
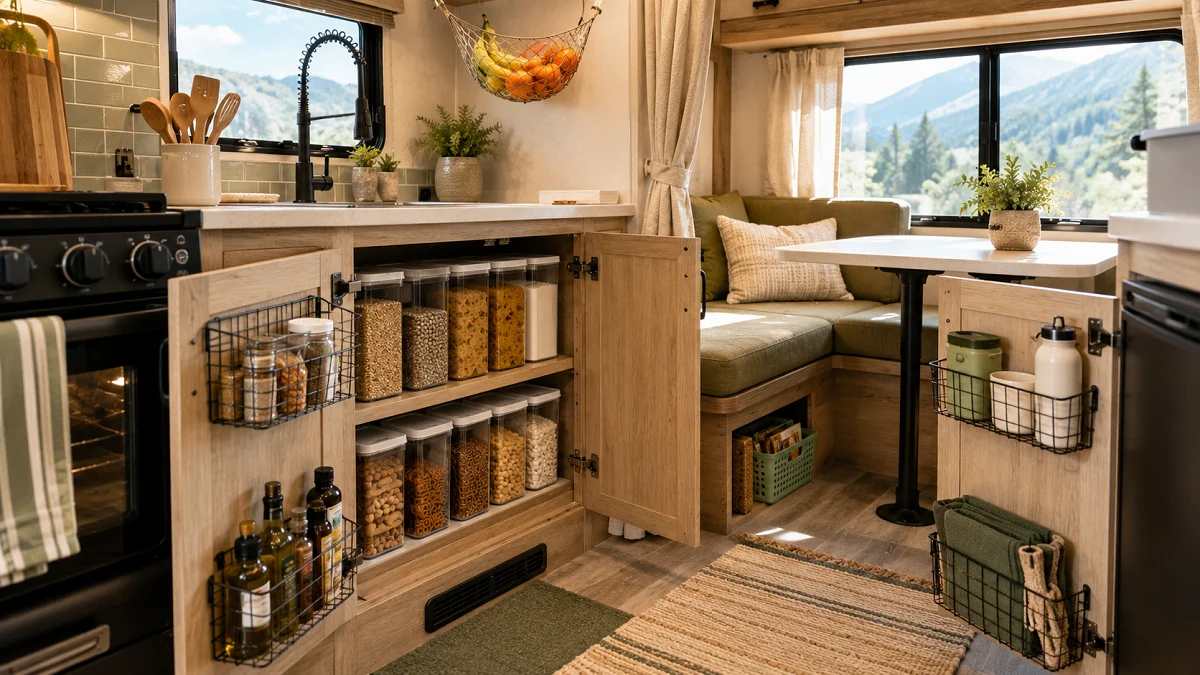
Living in a camper forces you to look at square footage in a completely different way. When floor space is limited, everyday items start piling up on the dinette, kitchen counters, and bedside ledges within a single afternoon. Most factory rigs come with awkward, open cavities that look spacious on the showroom floor but quickly become black holes for gear once you hit the road.
Finding practical small rv storage ideas is not about buying every plastic organizer on the shelf. It comes down to claiming overlooked vertical surfaces, securing loose items so they survive bumpy highway miles, and making sure everything has a dedicated home you can reach without unpacking an entire cupboard.
These 18 setup ideas tackle real-world camper clutter using functional hardware, lightweight organizers, and simple layout adjustments that make your rig feel open, organized, and ready for travel.
1. Mount Wire Baskets Inside Lower Cabinet Doors
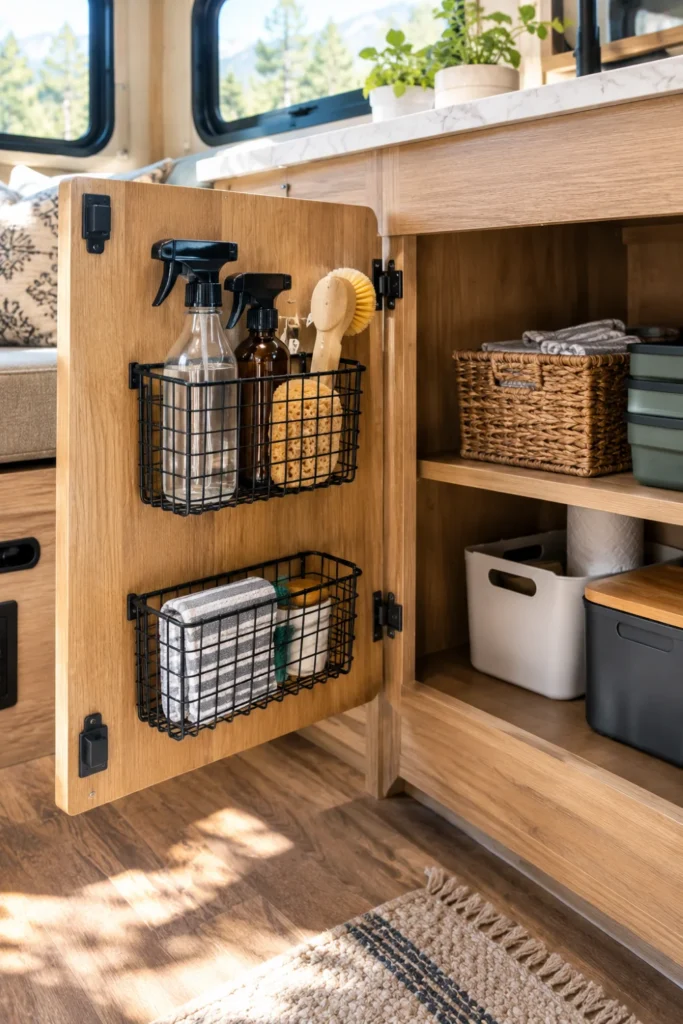
The dead air between your cabinet doors and interior shelves is prime real estate. Screwing or taping lightweight wire organizers directly to the inside panel creates instant drop zones for items that normally get lost in deep base cabinets.
Sponges, dish soap bottles, and trash bags pile up on the cabinet floor around plumbing pipes.
Cleaning essentials sit upright in door caddies, freeing the bottom shelf for bulky cookware.
Short wood screws work well on solid wood doors, but hollow RV cabinet panels hold better with heavy-duty mounting tape. Check your internal shelf clearance before mounting so the basket does not prevent the door from latching shut.
- Top door: Store foil, parchment paper rolls, and sandwich bag boxes.
- Bottom door: Hold dish soap bottles, scrubbing pads, and surface spray.
2. Install Heavy Duty Tension Rods Across Open Shelves
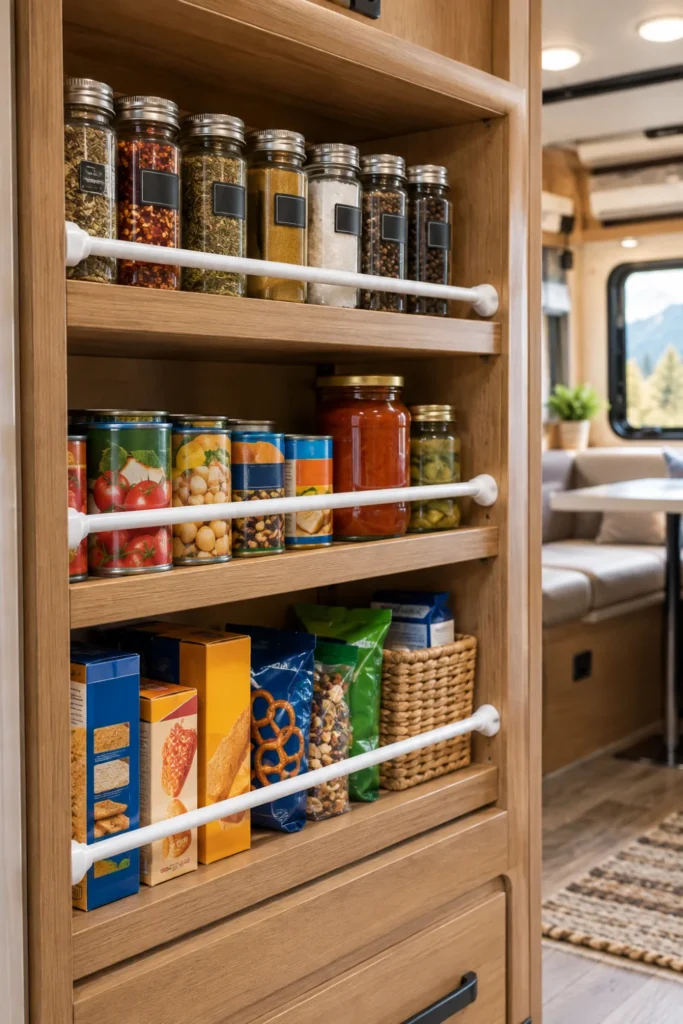
Open cubbies and shallow pantry ledges look great until you take your first sharp turn. Spring-loaded tension rods act as secure travel barriers that keep lightweight pantry items and books from sliding onto the floor in transit.
💡 Quick Tip
Pick tension rods with flat rubber end caps rather than hard plastic ones. The rubber grips slick laminate walls tightly and prevents vibration slip while driving.
Set the rod roughly two inches above the shelf surface to catch small spice jars and food packages. When you arrive at camp, you can leave them in place or remove them in seconds for easier reach.
- Measure the interior opening width between cabinet side walls.
- Twist the rod until it extends a half-inch wider than the opening.
- Compress the internal spring and seat both rubber feet firmly against the walls.
3. Hang Canvas Organizers in the Wardrobe Cavity
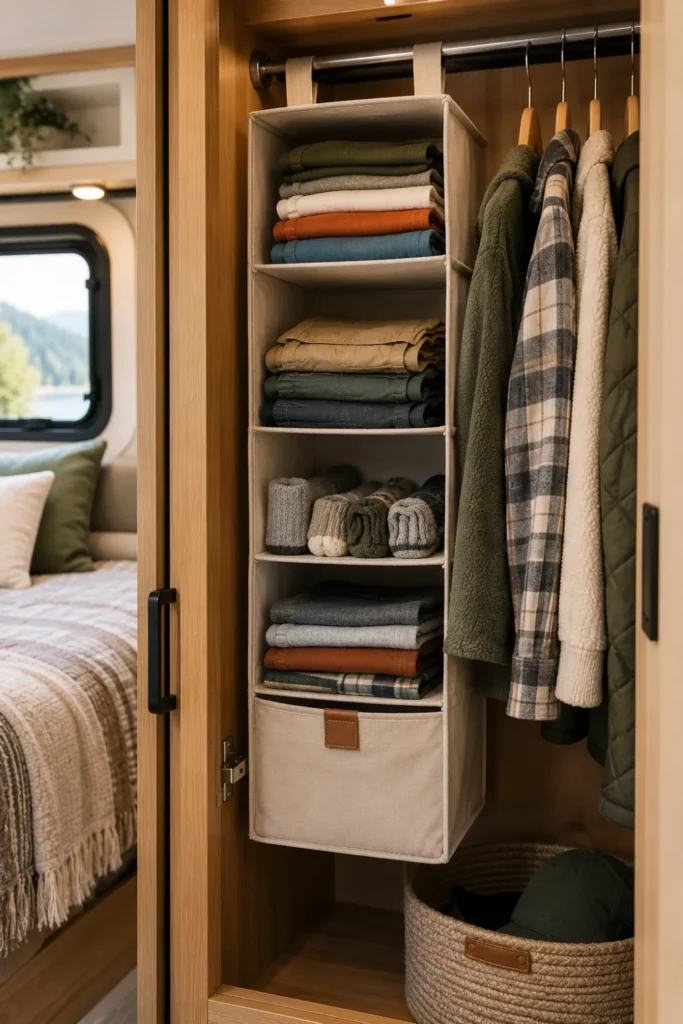
Tall, narrow camper wardrobes rarely have enough drawer space for folded clothing. A hanging fabric organizer turns a single clothes rod into multiple accessible cubbies without adding heavy wooden shelving.
Rolling garments rather than folding them flat prevents fabric wrinkles and lets you see every shirt at a glance. Secure the bottom tier with a velcro strap to stop the unit from swinging during travel days.
4. Use Magnetic Strips Along the Kitchen Backsplash
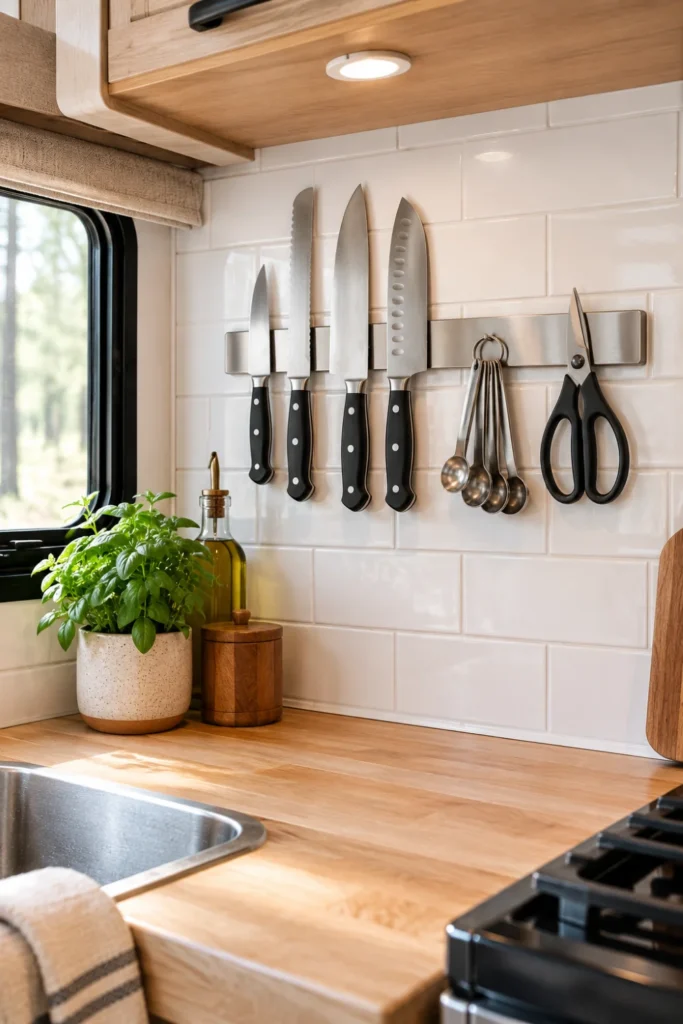
Camper drawers are notoriously shallow, making bulky cutlery blocks impractical. A wall-mounted magnetic strip holds stainless steel knives, metal measuring spoons, and scissors securely against the backsplash wall.
What to mount on the strip
Select a strip with a silicone or rubberized coating to prevent metal blades from scratching the bar while moving. Heavy items like cast iron tools should stay in lower cupboards to avoid dislodging on rough backroads.
- Clean the wall surface thoroughly with rubbing alcohol before mounting.
- Press adhesive backing firmly for sixty seconds to ensure a secure bond.
- Space heavy kitchen tools at least two inches apart along the magnet.
5. Add Shallow Undermount Sliding Drawers Under the Dinette
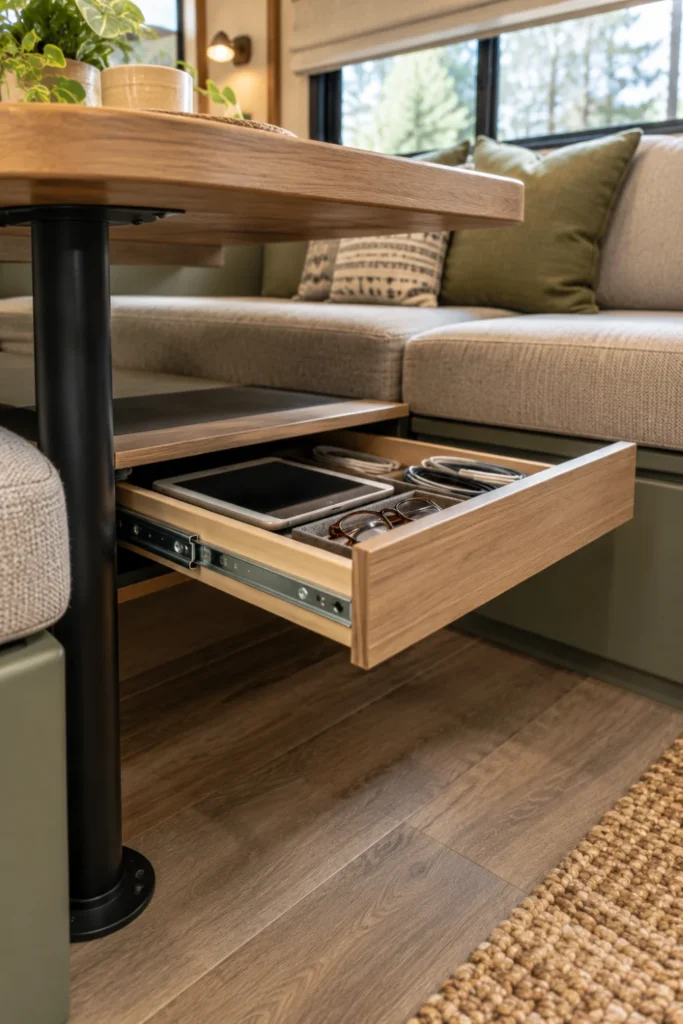
The underside of an RV dinette table is broad, flat, and usually unused. Adding low-profile adhesive pull-out drawers gives you a discreet spot for laptops, remotes, and pens without taking away legroom.
Position these sliding trays toward the center underside of the table rather than the edges. This keeps your knees from bumping into the hardware when sliding into booth seating.
| Stored Item | Benefit |
| Work tablets and e-readers | Protected from liquid spills on the tabletop |
| Board games and cards | Easy to grab on family movie nights |
| Charging cords and pens | Keeps daily surface clutter hidden |
6. Set Up Stackable Clear Bins with Latching Lids in the Pantry
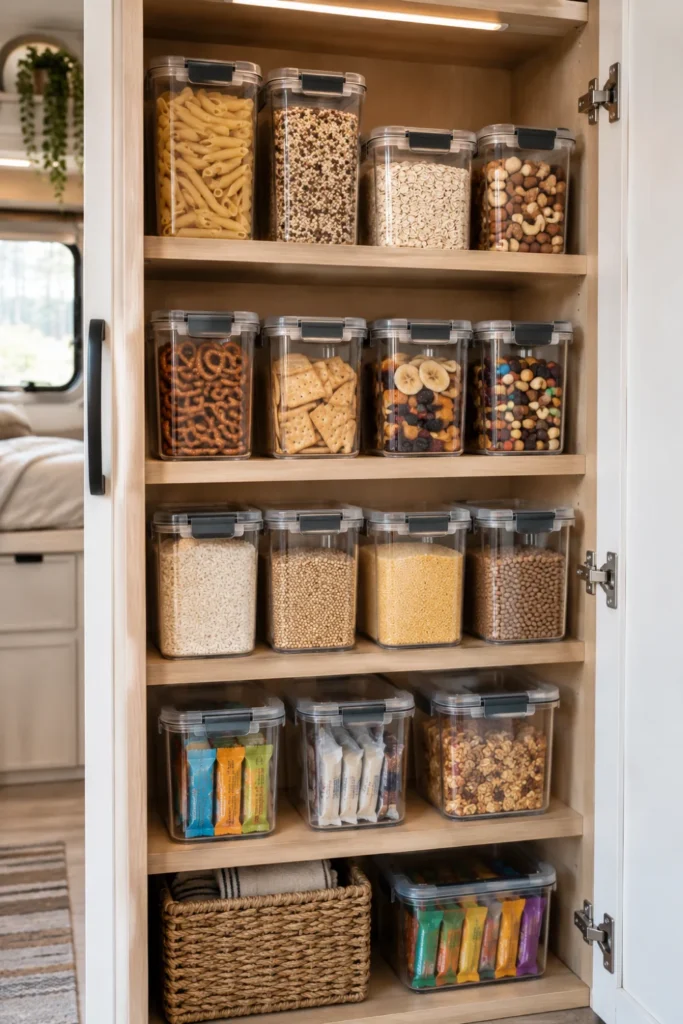
Deep camper cabinets make it easy for canned goods and pasta boxes to migrate to the back where you cannot see them. Clear stackable plastic totes keep food groups organized and prevent loose goods from shifting around inside dark pantries.
| Standard Open Bins | Latching Clear Bins |
|---|---|
| Items tip out when cornering hard. | Lids lock food items securely inside. |
| Hard to stack safely without buckling. | Rigid recessed tops allow sturdy stacking. |
Group pantry items by meal routine so you only pull one container at a time. A dedicated breakfast tote or taco night bin makes campground cooking much smoother.
- Choose clear plastic so you can see ingredients without opening the lid.
- Line shelf bases with non-adhesive grip mat to stop totes from sliding.
- Label the front faces with dry-erase markers for fast identification.
7. Fix Adhesive Hat and Coat Hooks on Blank Bedroom Walls
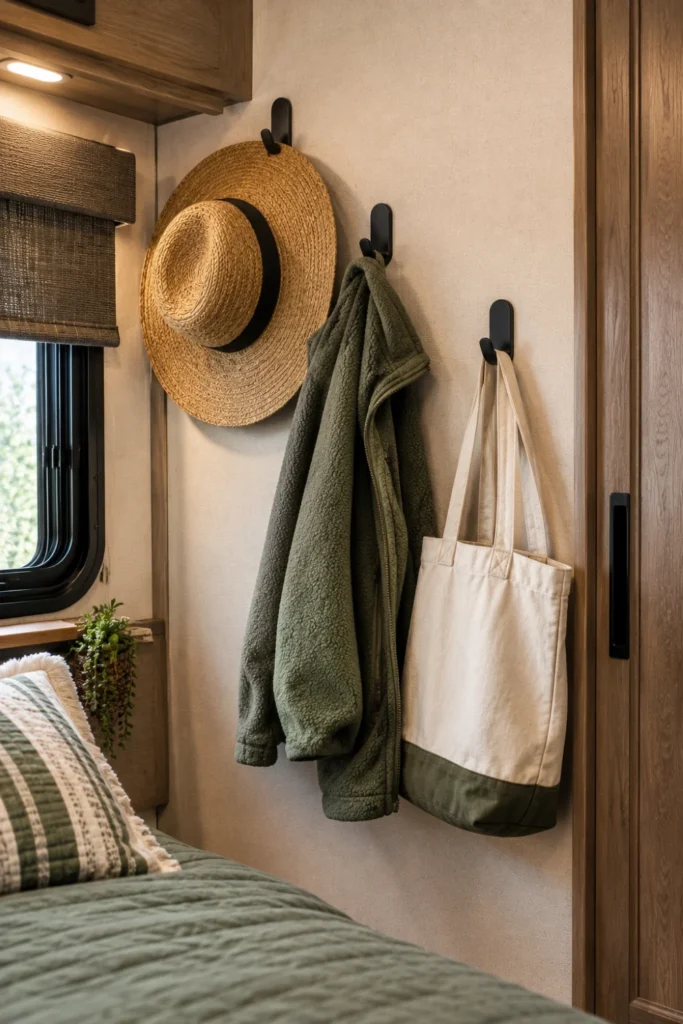
Camper bedrooms often lack closet depth for bulky jackets, bags, and sun hats. Sticking durable damage-free hooks to empty wall sections keeps your everyday outerwear up off the bed and sofa.
Clean wallpaper panels with rubbing alcohol first.
Wait an hour before hanging heavy hoodies or robes.
Do not drill screws into thin interior hollow walls.
Avoid hanging overfilled heavy backpacks on adhesive.
Stagger hooks at varying heights so jackets do not bunch into a bulky mound. Lower hooks work well for dog leashes and flashlights near the doorway.
- Wipe down the chosen wall surface to clear away dust and road film.
- Peel the adhesive liner and press the base firmly against the panel.
- Allow the strip to bond fully before loading it with heavy garments.
8. Slide Flat Wheeled Storage Totes Under the Master Bed
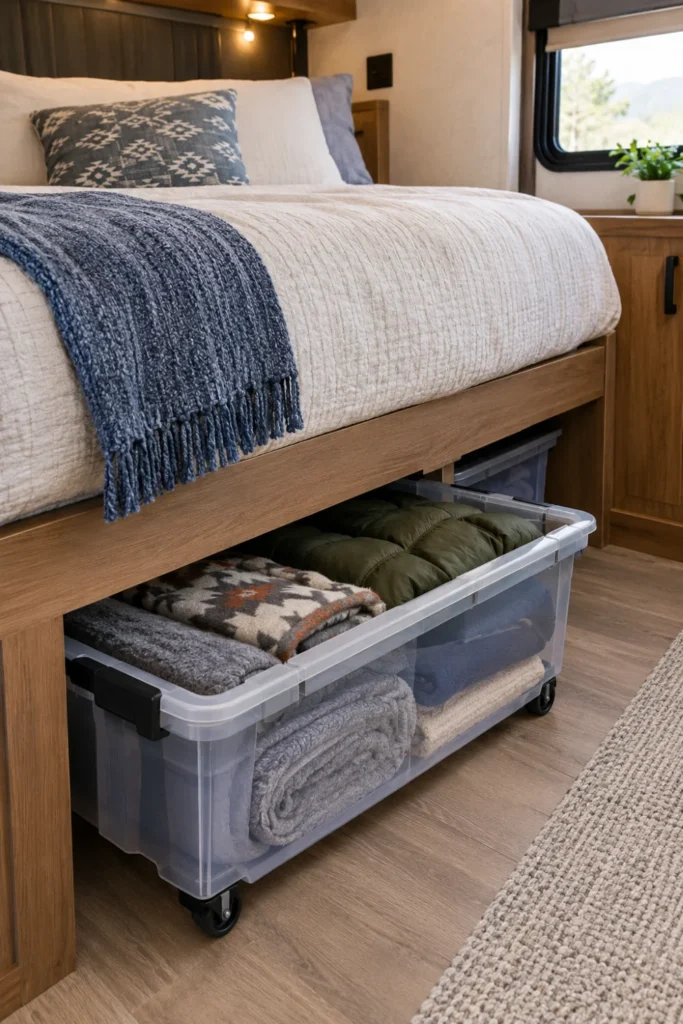
Most RV beds lift on gas struts to reveal a large storage bay, but lifting a heavy mattress daily is awkward. Placing low-profile wheeled totes beneath the outer bed overhang gives you immediate access to extra linens and gear.
Measure vertical clearance between your floor and the bed frame lip.
Pack off-season clothes or guest bedding in shallow wheeled bins.
Slide bins underneath and secure the outer latch before driving.
Look for split-lid storage containers so you can slide the tote out halfway and grab what you need. This keeps you from dragging the entire container out into narrow bedroom walkways.
- Bedding tote: Spare fleece throws, pillowcases, and fitted sheets.
- Seasonal bin: Extra winter coats, rain ponchos, and hiking boots.
9. Suspend Mesh Fruit Hammocks Below Overhead Cabinets
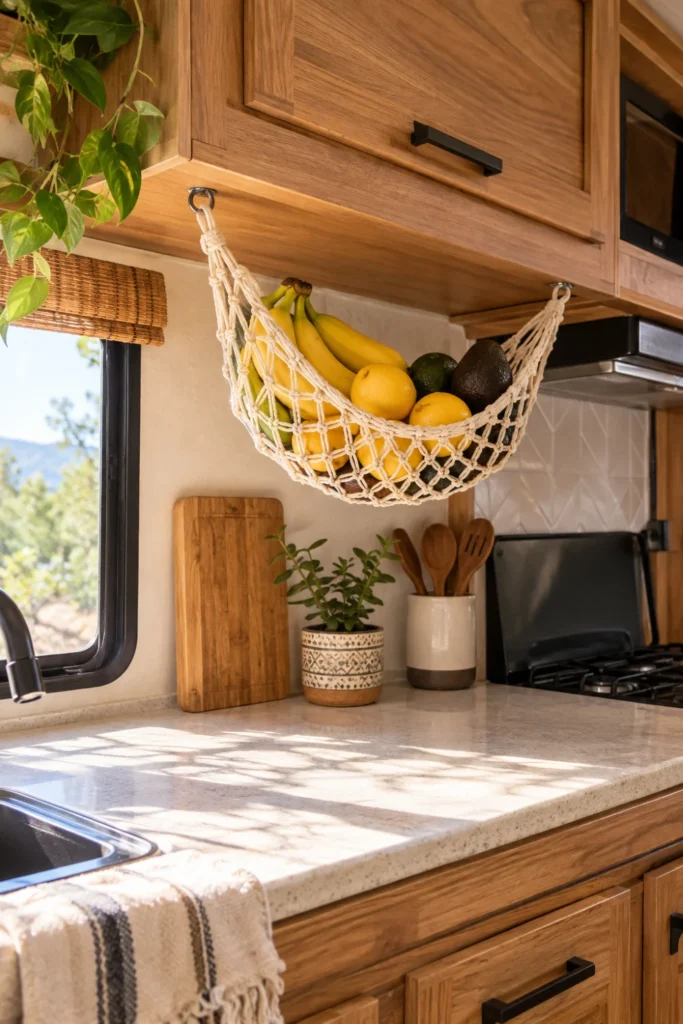
Countertops in travel trailers are small, and fruit bowls eat up valuable meal prep space. A woven macrame or mesh hammock mounted under an upper cabinet holds produce safely while allowing air circulation.
Airflow prevents soft fruits from bruising and spoiling quickly during hot summer trips.
Ensure the hammock hangs with enough tension that it clears the countertop by at least three inches when loaded. This prevents bouncing produce from bruising on kitchen counters during turns.
- Keeps bananas, avocados, and oranges up off prep cutting boards.
- Promotes 360-degree ventilation to reduce mold and humidity buildup.
- Folds flat against the cabinet underside when not in use.
10. Tuck Slim Rolling Utility Carts Between Furniture Gaps
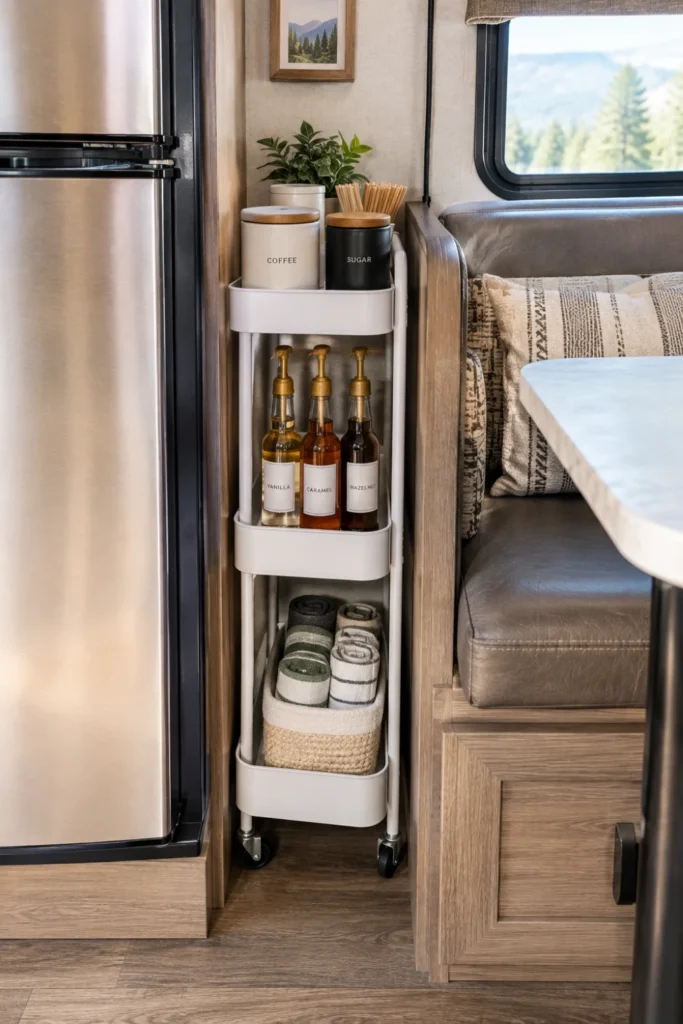
Narrow gaps between the dinette booth, refrigerator, or sofa often sit empty. A four-to-six-inch wide rolling cart slides into these slender alcoves to store pantry goods, laundry supplies, or pet food.
📌 Good To Know
Fasten a small bungee cord or eye-hook strap across the open gap on travel days so the cart cannot roll forward during heavy braking.
Three-tier plastic or metal carts with locking caster wheels are easy to move when cleaning camper floors. Measure the gap with the RV slide-outs fully retracted to ensure proper fit on the road.
| Tier Location | Suggested Items | Benefit |
| Top Tier | Coffee beans, filters, sweeteners | Morning coffee station at arm’s reach |
| Middle Tier | Olive oil, vinegar, spice grinders | Keeps glass jars away from open counters |
| Bottom Tier | Heavy canned goods, dog food bags | Low center of gravity prevents tipping |
11. Mount Overhead Ceiling Nets for Lightweight Bedding
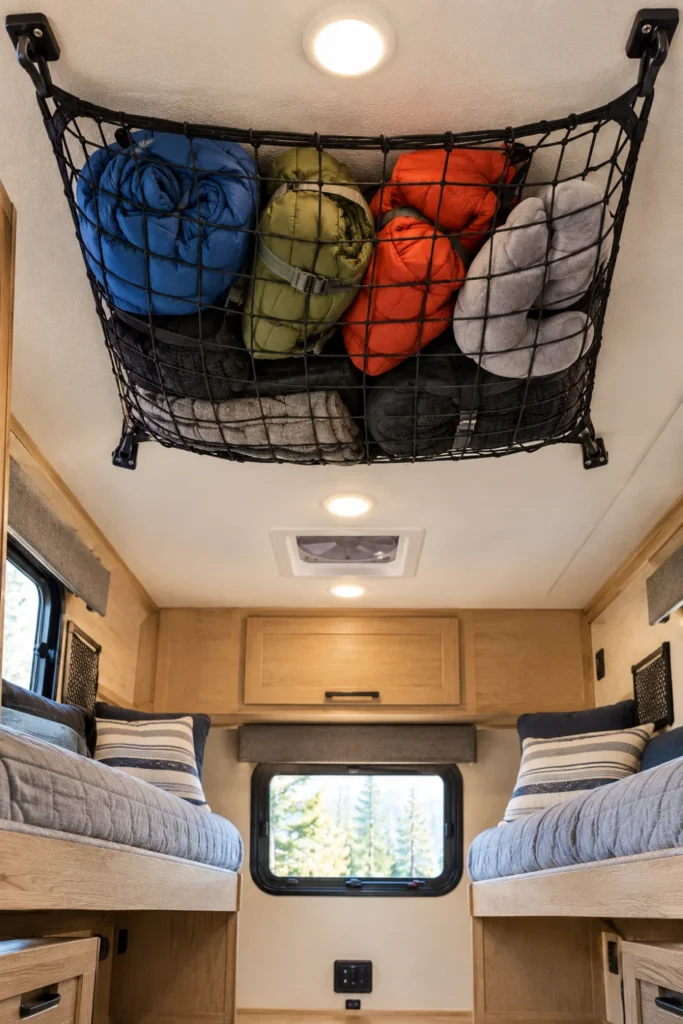
The space along the ceiling above master beds or rear bunkhouses is rarely used. Installing cargo net mesh securely across ceiling anchor points creates an overhead hammock for lightweight, bulky textiles.
Make sure to mount netting into structural framing members or ceiling rafters rather than thin interior ceiling panels. Never place heavy, sharp, or hard gear in ceiling nets where it could fall during transit.
- Only store soft, lightweight textiles that compress easily.
- Keep mesh pulled taut so it does not sag into headroom space.
- Use quick-release carabiners for easy detachment when washing the net.
12. Install a Wall-Mounted Fold-Down Dish Drying Rack
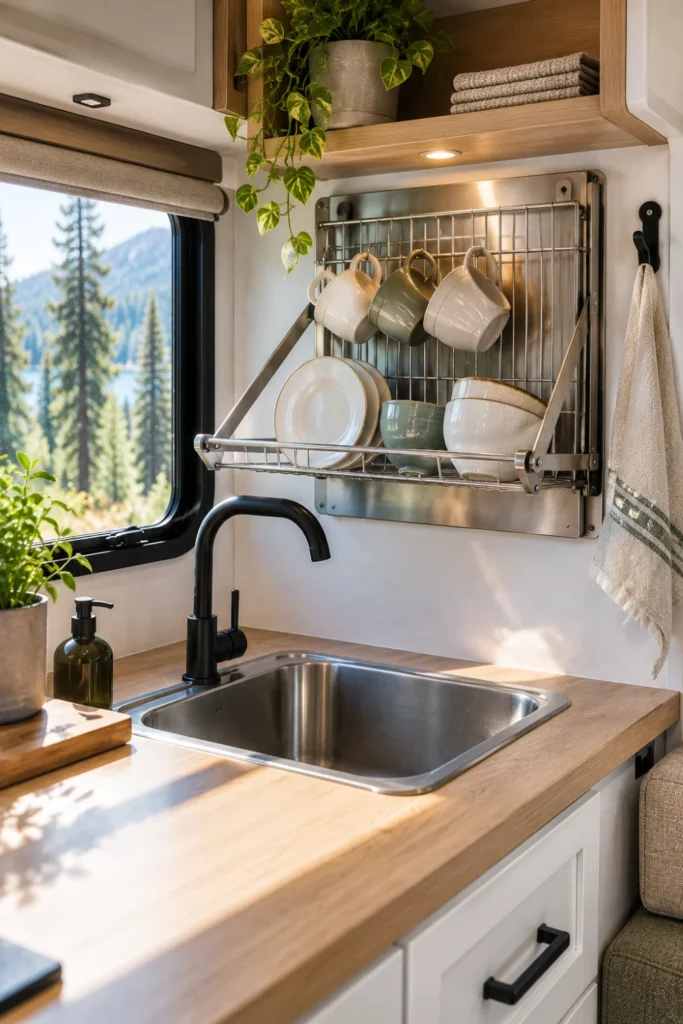
Traditional plastic dish drying racks take up half of your available kitchen counter space. A stainless steel fold-down rack mounted over the sink lets washed dishes drip directly into the basin, folding flat against the wall when dry.
Installation Checklist
Look for a model with removable utensil cups and cup hooks. When meal prep starts, fold the unit upright to clear your sink area for chopping and cooking.
- Hold the rack above the sink basin to check faucet clearance.
- Mark and level the mounting holes along the backsplash studs.
- Fasten the rack securely and test the fold-down hinge tension.
13. Add Stackable Non-Slip Shelf Risers Inside Tall Cupboards
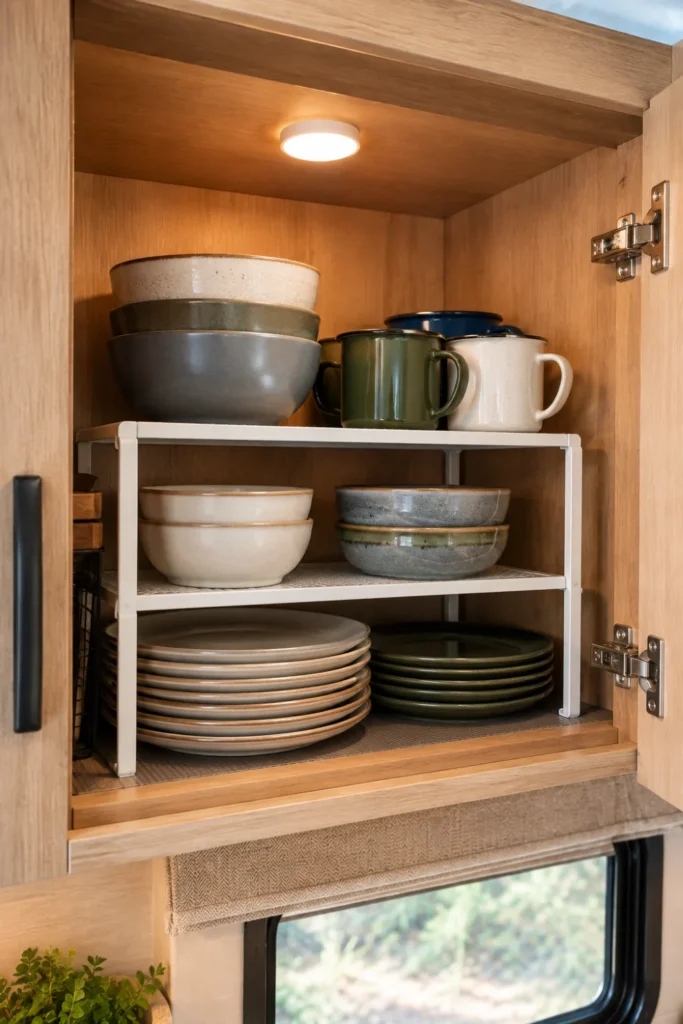
RV upper cabinets are often tall with only a single fixed shelf, wasting the top half of the cupboard. Adding sturdy wire or coated metal shelf risers doubles your flat storage surface for dishes and mugs.
Plates, bowls, and mugs are stacked together in unstable piles that shift around in transit.
Plates slide underneath while coffee mugs sit securely on top for easy, single-layer access.
Place non-adhesive silicone liner under the riser feet to stop the metal stand from shifting across smooth cabinet laminates.
- Separates dinner plates from delicate glassware.
- Eliminates the need to unstack heavy bowls to grab a single plate.
- Fits inside upper cupboards and lower pantry cabinets alike.
14. Use Pocket Organizers on the RV Bathroom Shower Rod
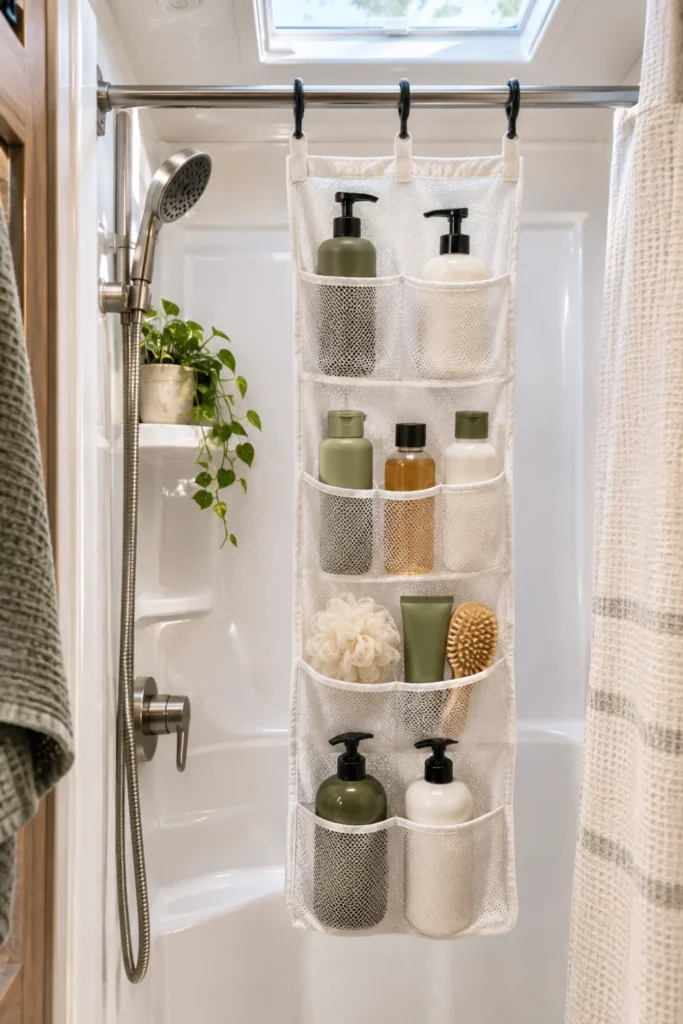
Small wet baths and camper showers rarely feature built-in shampoo shelves. A mesh multi-pocket organizer hung alongside the shower curtain keeps soaps and hygiene bottles contained without crowding the basin.
- ▸Quick-drying mesh fabric resists mold and dries quickly after showers.
- ▸Individual pockets keep bottles upright so lids never leak while driving.
- ▸Hang with standard curtain rings directly on the existing shower rod.
Select mesh fabrics instead of solid vinyl so water drains straight through into the shower pan. This stops standing moisture from causing soap scum and mildew build up.
- Top pockets: Bar soap, facial cleanser, razors.
- Middle pockets: Full size shampoo, conditioner, and body wash bottles.
- Bottom pockets: Pumice stones, loofahs, and scrub sponges.
15. Secure Pegboards to Pass-Through Storage Bay Walls
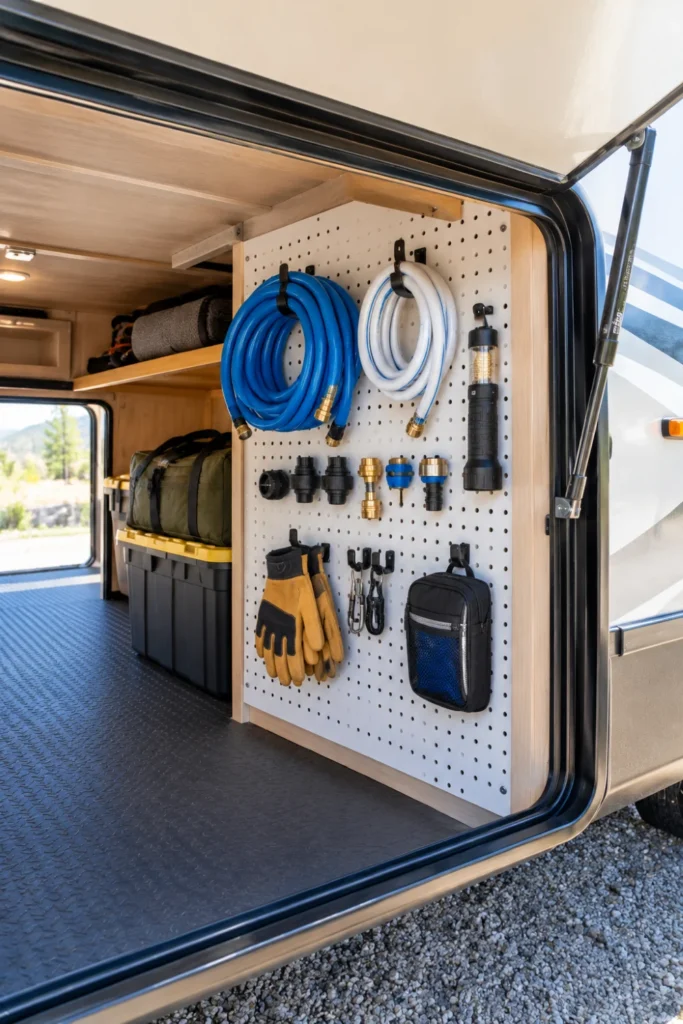
Pass-through basement storage bays often become messy piles of hoses, extension cords, and leveling blocks. Mounting a lightweight plastic pegboard onto the interior dividing wall gets utility tools organized and easy to spot.
Use locking pegboard hooks or zip ties so tools cannot unhook and rattle loose over highway bumps.
- Measure the interior bay wall clearance around electrical and water bypass lines.
- Fasten a lightweight composite pegboard panel using short wood screws.
- Arrange hooks to secure sewer hose wrenches, fresh water adapters, and tire pressure gauges.
16. Attach Over-the-Tank Flush Valve Baskets in Tiny Bathrooms
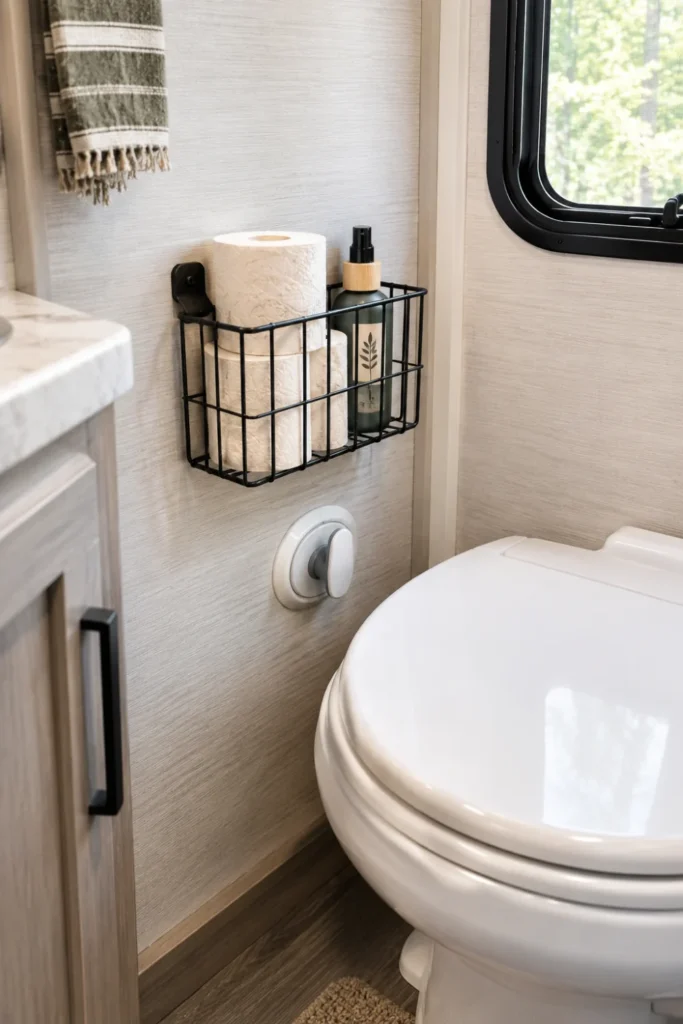
Camper bathrooms have very little floor area around the toilet. An over-the-tank steel wire basket clips over the edge of the flush cabinet or side ledge to hold extra toilet tissue, wet wipes, and deodorizer packs.
⚠️ Watch Out
Always verify toilet seat clearance when the lid is lifted upright. Ensure the basket does not press against the seat or hinder the flush pedal mechanism.
Since RV toilets lack traditional residential water tanks, mount the basket directly to the adjoining wall panel using heavy-duty adhesive strips or hang it over an adjacent vanity door.
- Keeps spare RV-safe toilet paper rolls dry and accessible.
- Holds black tank treatment drop-ins right where you need them.
- Frees up lower vanity cabinet space for towels and first aid kits.
17. Fit Tiered Corner Shelves in Bedroom and Lounge Corners
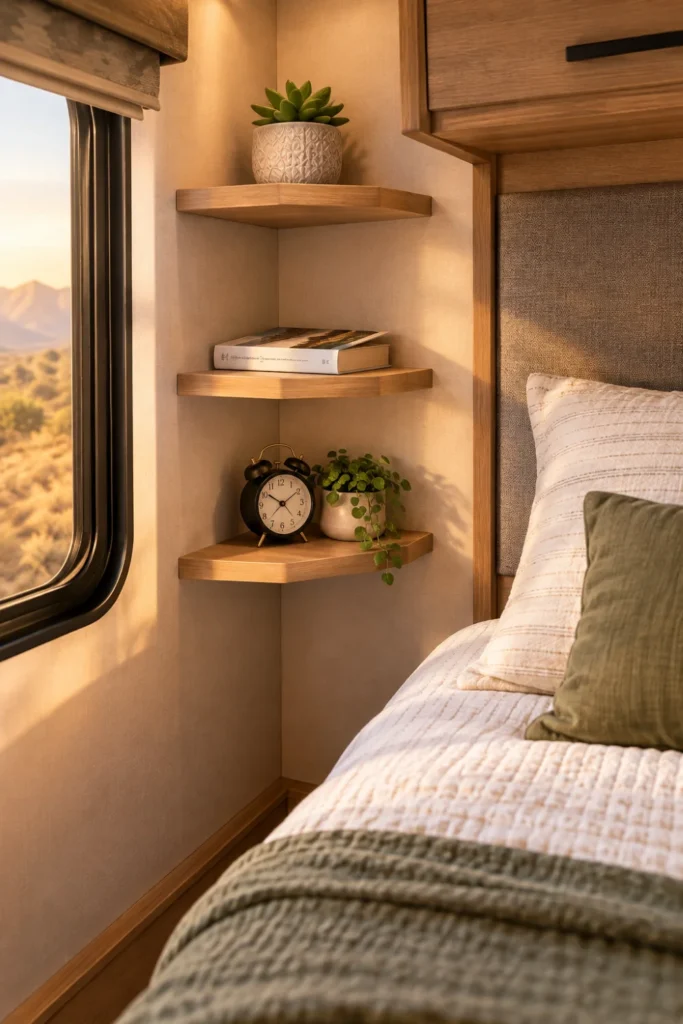
Room corners in camper bedrooms and living areas are often neglected. Installing lightweight triangular corner shelves creates functional perches for nightstand items, books, and alarm clocks without blocking walkways.
Use lightweight acrylic or hollow wood corner shelves.
Add a low front lip or elastic band to keep items contained.
Do not install heavy stone or cast iron brackets.
Avoid placing loose ceramic mugs or heavy glass on top.
Place corner shelves beside the bed to act as a floating nightstand for glasses and phones.
| Location | Recommended Use |
| Beside bed frame | Holds phone, water tumbler, and eyeglasses |
| Above dinette booth | Holds small table speaker and card games |
| Bathroom corner | Holds lotion bottles and hand towels |
18. Install Pop-Up Collapsible Wall Hooks Along the Entryway
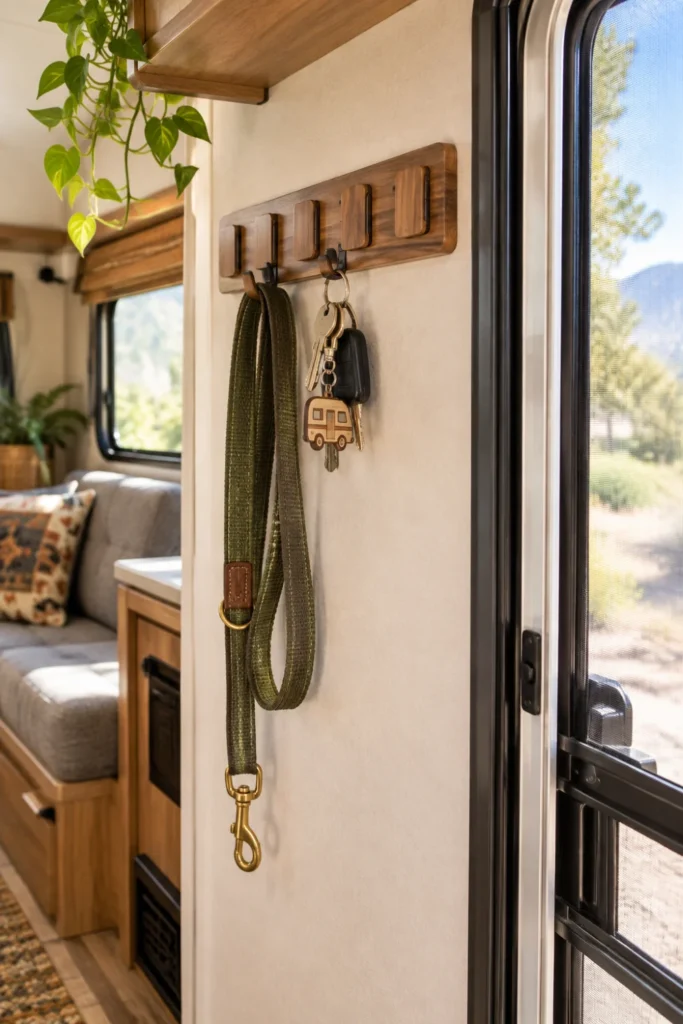
Entryways in travel trailers and motorhomes get crowded quickly with jackets, dog leashes, and keys. Retractable wall hooks fold flat when empty, preventing snagged clothes as you walk through narrow doorways.
Flush-folding hardware prevents clothing snags and avoids clearance collisions when extending your slide-outs.
Mount a multi-hook strip near the main door jamb at chest height. When you pack up camp, flip each hook up flush into its housing to maintain a clean wall profile.
- Flips open smoothly to hold hats, wet raincoats, and campsite keys.
- Folds flat against the wall when gear is removed to keep entryways clear.
- Prevents snagging shoulders or gear bags while moving through tight halls.
Maximizing tight spaces in a camper is all about small, intentional upgrades that keep surfaces clean and items secure on travel days. Implementing just a handful of these small rv storage ideas will make your daily routine smoother and your rig noticeably more comfortable.
Save this list to your RV boards for the next time you set out to refresh your camper storage layout.

