
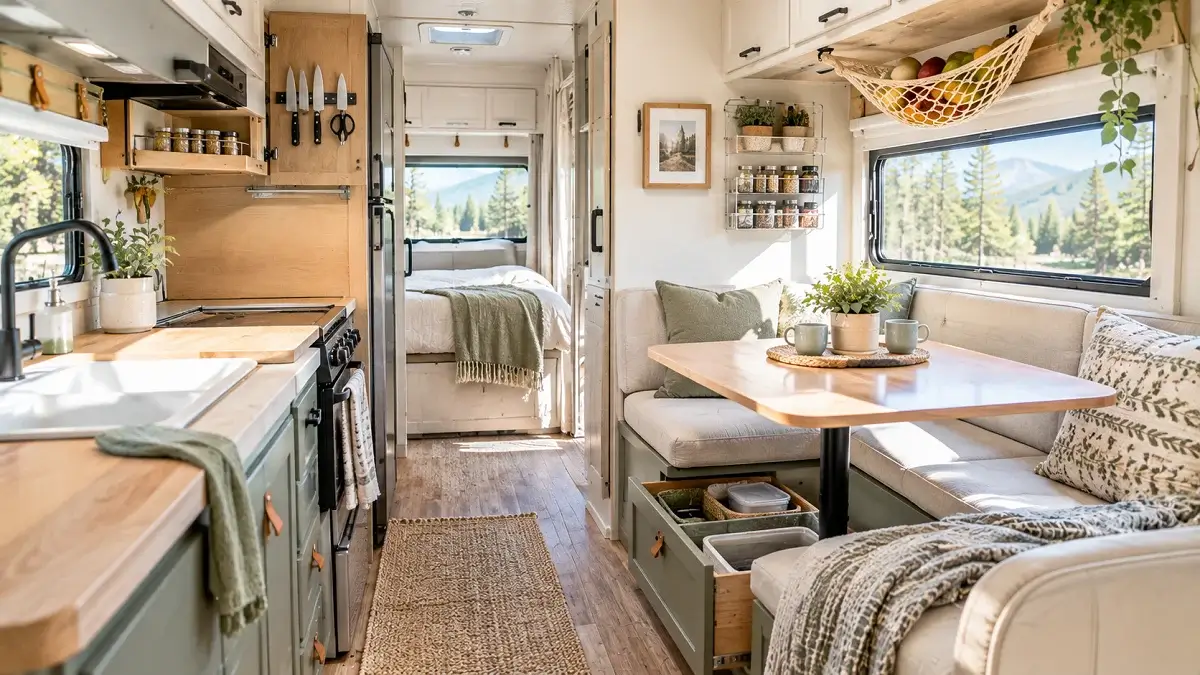
Living in a small camper forces you to look at every square inch differently. Most factory RV layouts come with awkward dead zones, shallow cupboards, and empty wall spans that do not pull their weight. When everything you own lives inside a hundred square feet, even a dropped coffee mug or a stray jacket creates instant chaos.
The good news is that you do not need a complete teardown or an expensive renovation to gain room. Practical campers know that smart, everyday modifications create breathing space where you least expect it. Focusing on vertical verticality, under-utilized doors, and dual-purpose furniture keeps your rig feeling open.
These tried-and-true space saving rv ideas tackle real travel frustrations without adding unnecessary weight. From quick pantry setups to clever under-bed storage, each adjustment helps your camper run smoother so you can spend less time moving clutter and more time enjoying the road.
1. Mount Heavy-Duty Magnetic Knife Strips Inside Pantry Doors
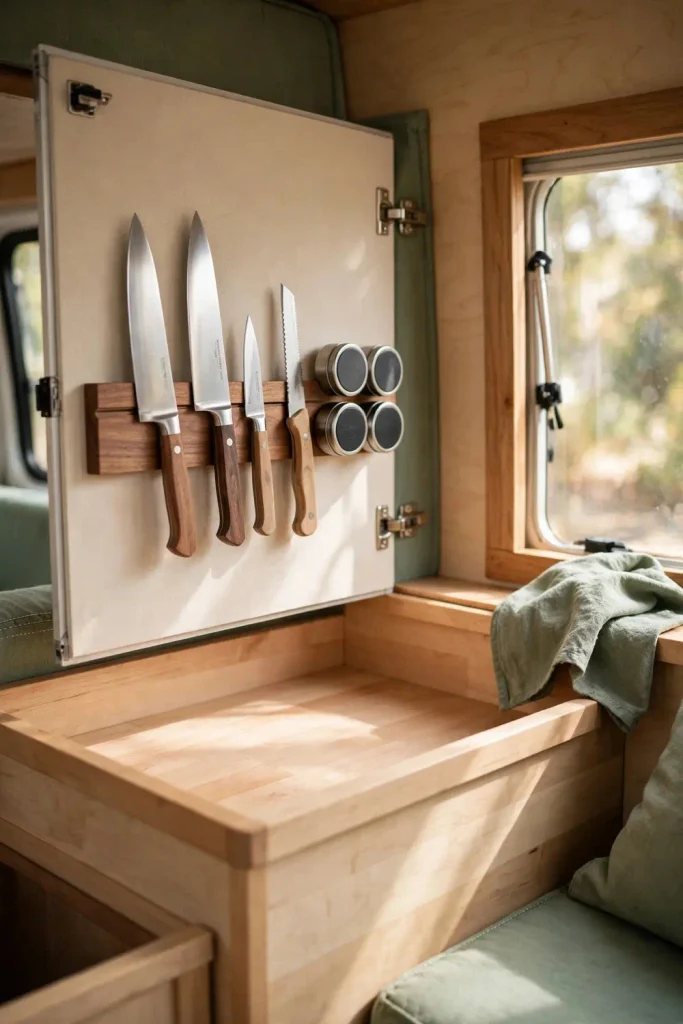
Bulky wooden knife blocks eat up valuable galley counter space, and tossing sharp blades into a drawer creates a dulling safety hazard on travel days. Mounting a magnetic bar behind a cabinet door secures your prep tools cleanly out of the way.
Look for a strip with continuous rare-earth magnets encased in wood or silicone to protect blade edges from vibration. Use short wood screws paired with heavy-duty mounting tape to anchor the strip into the door frame rather than the thin center panel.
- Choose carbon steel or stainless steel knives that hold a firm magnetic bond.
- Add flat magnetic tins to the remaining span for daily spices, paperclips, or tea bags.
- Check clearance with interior shelves before tightening the final screws.
Heavy wood block sliding on the counter, dulling blades in loose drawers, and zero prep room left beside the sink.
Knives locked firmly against the hidden door panel, free countertops, and tools ready to grab in one second.
2. Hang Wire Produce Hammocks Under Upper Cabinets
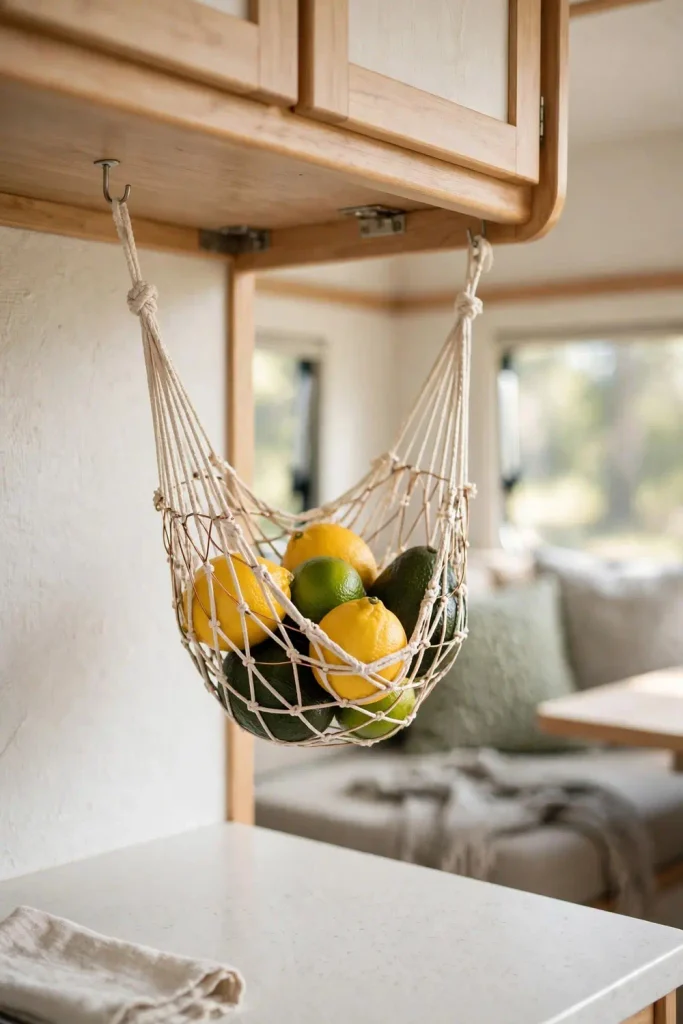
Round fruit rolling across the table on curvy mountain passes is an everyday annoyance. Stashing firm produce in your compact refrigerator robs you of space for perishables that actually require cooling.
A woven or wire mesh hammock suspends below upper kitchen cabinets, utilizing airspace that normally goes unused. The constant airflow keeps onions, citrus, and avocados dry and fresh without bruising during travel.
- Screw brass cup hooks directly into the cabinet face frame overhang.
- Clip the hammock loops to the hooks with small carabiners for quick removal on wash days.
- Load heavier items like potatoes in the center and soft stone fruits toward the edges.
💡 Quick Tip
Pick an elastic net with small weave gaps so smaller limes and garlic bulbs do not slip through when braking.
3. Install Full-Extension Drawer Slides Under the Dinette Benches
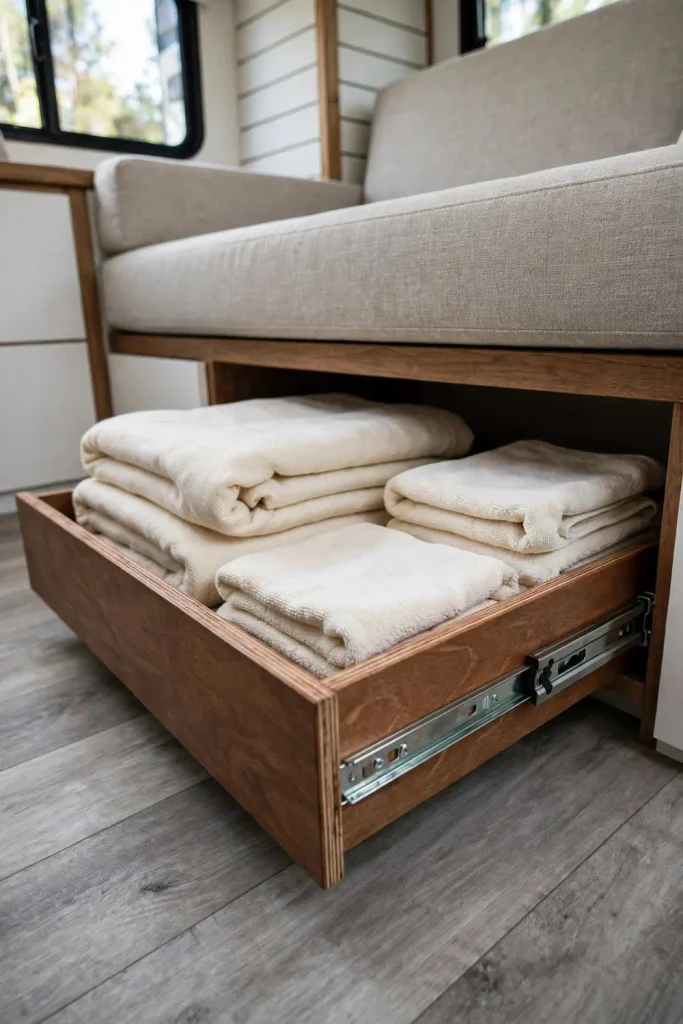
Standard RV dinette seats have removable top plywood lids that require removing every cushion and disturbing anyone sitting down just to grab a spare towel. Building front-pulling drawers fixes this permanently.
Install heavy-duty ball bearing slides that pull out completely past the table edge. This lets you access your gear from the center aisle in seconds.
| Feature | Standard Plywood Hatch | Full Extension Drawer |
| Access Speed | Slow, cushions must move | Instant pull from the main aisle |
| Gear Visibility | Deep bottom items get lost | Complete top-down view of contents |
| Effort to Install | Factory standard (zero work) | Weekend project with basic wood tools |
4. Suspend Collapsible Hanging Canvas Shelves in the Wardrobe
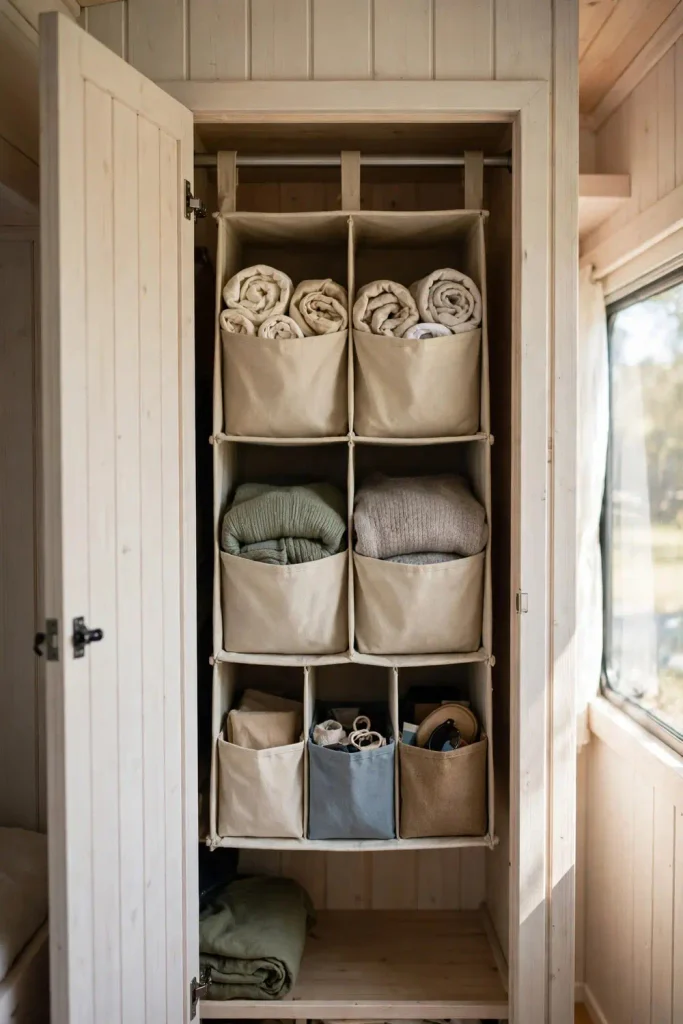
Most camper hanging closets are too tall for short jackets, leaving half the vertical space completely vacant below the hangers. Tucking a collapsible multi-tier fabric organizer over the clothes rod creates instant shelving.
This setup gives you dedicated cubbies for folded tees, denim, and fleece wear without building permanent wooden dividers. Secure the top straps with hook-and-loop wraps around the main bar so it cannot slide back and forth while driving.
- Measure your closet depth before buying to ensure the door closes flush.
- Slide lightweight fabric bins into individual cubbies to stop rolled clothes from spilling out.
- Place heavier jeans on bottom tiers to keep the center of gravity stable.
What to store in canvas cubbies
5. Secure Floating Acrylic Ledges Along the Bedroom Wall
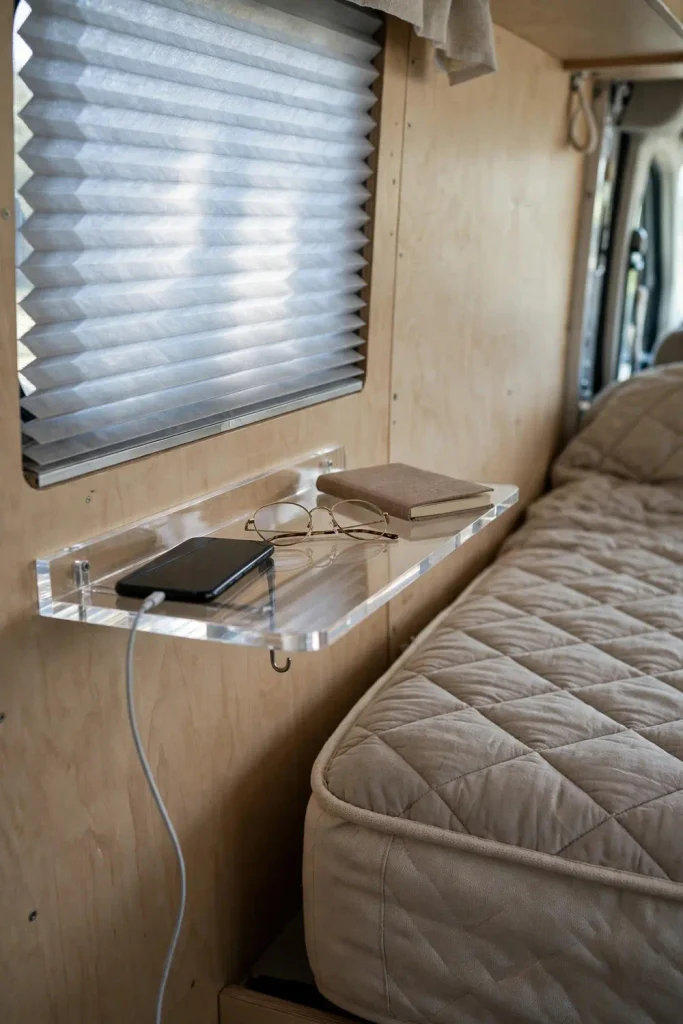
RV bedroom side tables are notoriously narrow or nonexistent, leaving you with no safe spot to charge a phone or rest a water bottle overnight. Clear acrylic display ledges mounted directly to the wall solve this without stealing precious walking room.
Because acrylic is thin and transparent, it maintains a clean visual look in tight quarters. Use heavy-duty double-sided acrylic foam tape if you prefer not to pierce thin luan wall paneling with screws.
- Wipe the wall panel thoroughly with isopropyl alcohol to remove factory dust.
- Press the acrylic shelf firmly for sixty seconds to activate the pressure-sensitive adhesive.
- Route a charging cord with a small adhesive silicone clip right next to the edge.
6. Add Spring Tension Rods Inside Every Deep Cupboard
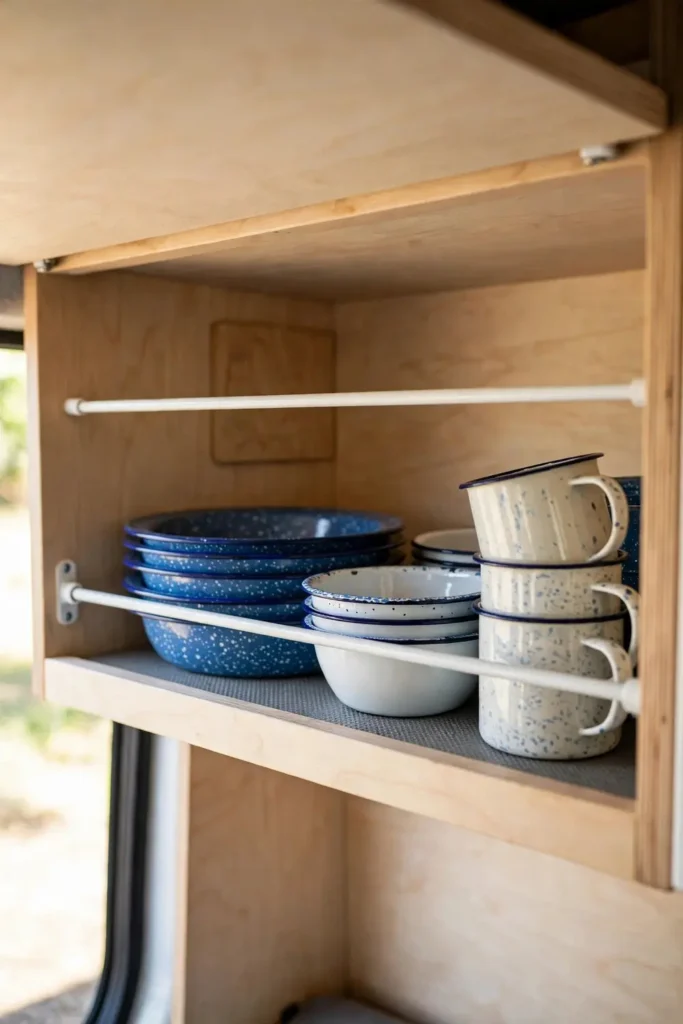
Opening an upper camper cabinet after driving fifty miles over rough highway seams can lead to broken bowls tumbling onto the floor. Spring tension bars act as practical mini guardrails across every shelf opening.
Position the rods approximately two inches above the shelf surface, just inside the door frame. When you open the cabinet door, plates and food packages rest firmly behind the bar instead of sliding outward.
- Twist the rod until it presses with strong outward tension against the side stiles.
- Add rubber tips to both ends to prevent scuffing the finished cabinet wood.
- Double them up vertically for tall cereal boxes or stacked insulated drink tumblers.
Measure the interior width of your shelf opening between the solid face frame stiles.
Adjust the tension rod three-quarters of an inch wider than the interior opening width.
Compress the spring and seat it firmly against the inside lip two inches above the shelf deck.
7. Swap Hard Dining Chairs for Storage Cube Footstools
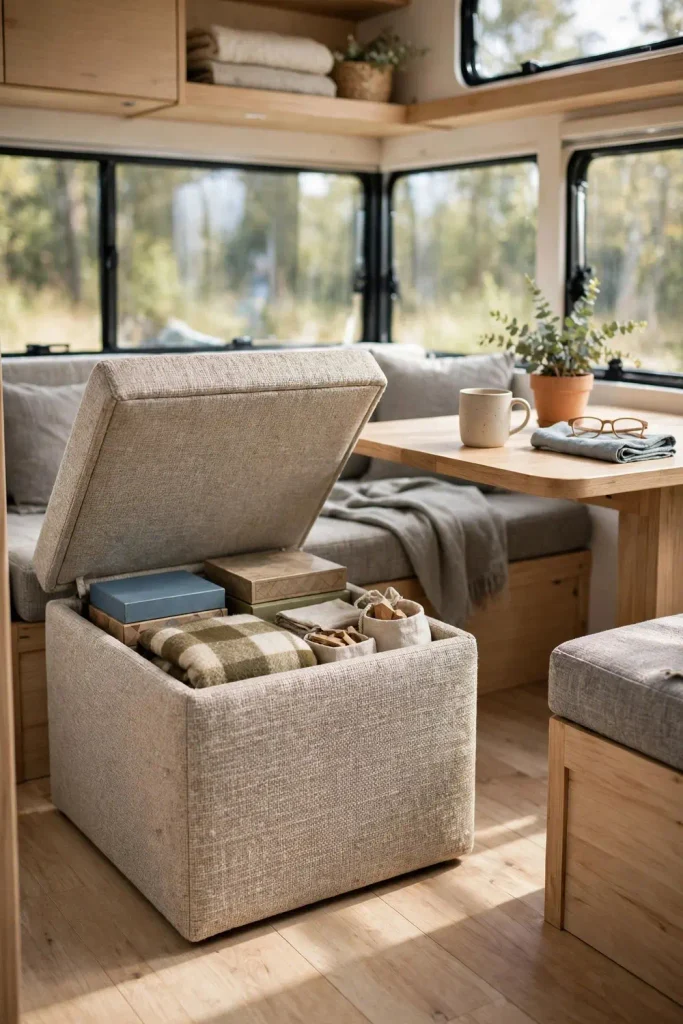
Bulky freestanding camper chairs take up an enormous amount of floor real estate and serve only one purpose. Swapping them for lidded storage ottomans gives you comfortable seating, a footrest, and hidden volume all at once.
Choose models wrapped in durable faux leather or heavy linen that clean up easily after outdoor excursions. When guests leave, tuck them cleanly underneath the dining table to open up the central walking path.
| Feature | Standard RV Wood Chair | Folding Storage Ottoman |
| Internal Storage | None (zero volume) | 35 to 45 liters of enclosed gear space |
| Flexibility | Rigid, stays at table | Moves to sofa as footrest or side table |
| Stowability | High profile, trips feet | Collapses flat or slides beneath table edge |
| Storage Cube Match | Ideal Item To Hide |
|---|---|
| Living Area Ottoman | Board games, extra throw blankets, dog toys |
| Dining Table Cube | Heavy pantry overstock, bulk paper towels, appliances |
8. Fit Telescoping Tension Poles in the Shower Corner
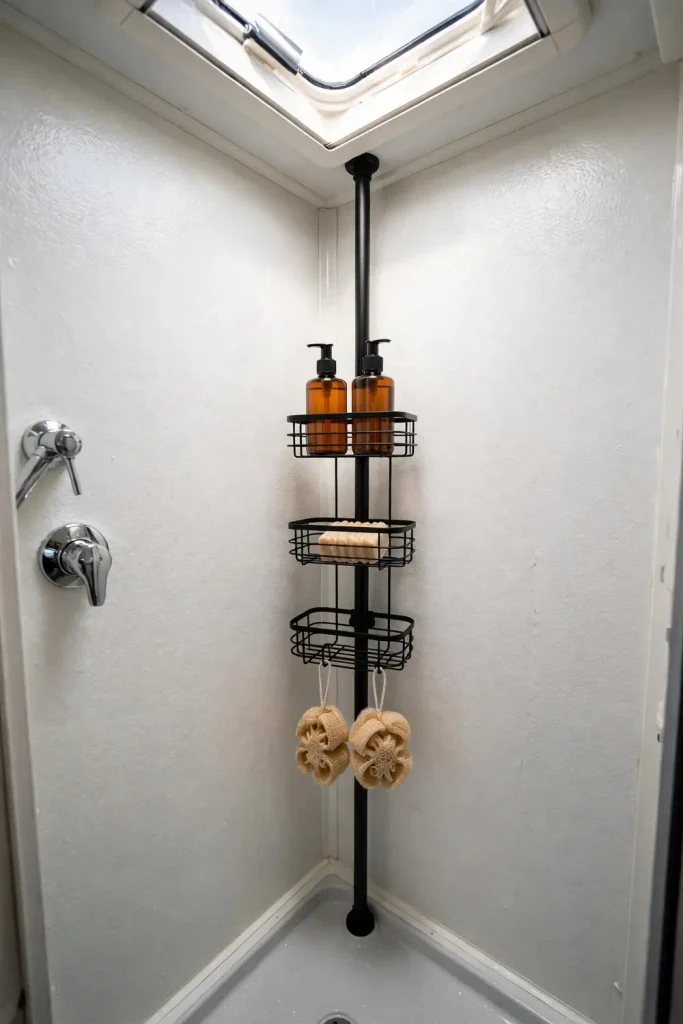
Camper shower enclosures are compact, and their tiny molded ledges cannot hold family-sized shampoo bottles without them crashing down mid-turn. A floor-to-ceiling corner tension pole creates four levels of rust-proof storage right in the corner seam.
The spring mechanism keeps the pole wedged tight between the fiberglass pan and ceiling without requiring glue or wall anchors. Make sure you select a pole with deep wire baskets that allow water to drain instantly.
- Position the bottom rubber foot firmly against the outer corner of the shower tub pan.
- Compress the internal spring against the solid ceiling framing for a secure hold.
- Adjust the individual basket heights to fit tall pump bottles and hanging loofahs.
Choose rust-proof anodized aluminum or coated stainless steel.
Place the pole in the inner corner where the roof is strongest.
Suction cup caddies that pop off plastic walls during transit.
Leaving heavy bottles on high baskets while driving down dirt roads.
9. Mount Pegboards Inside the Passthrough Storage Bay
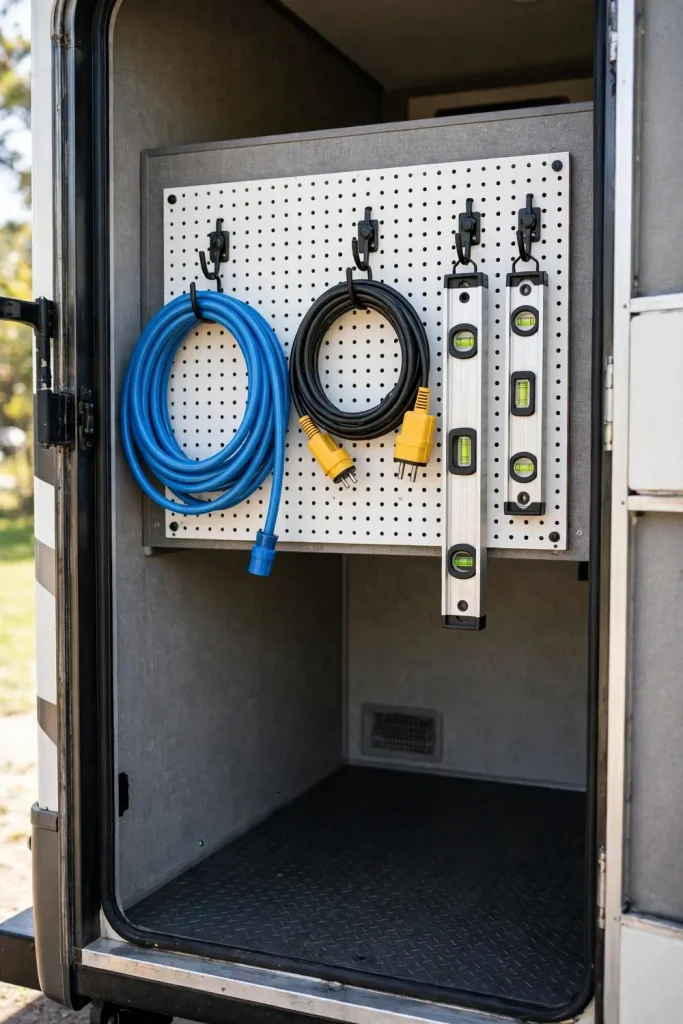
The large exterior basement bay often becomes a tangled heap of freshwater hoses, power cords, leveling blocks, and wheel chocks. Mounting a sturdy composite pegboard to the interior bulkhead turns this chaotic cavity into an orderly tool wall.
Use locking metal peg clips or custom 3D-printed brackets to hold heavy tools firmly in place against road shocks. This leaves the entire bay floor clear for large coolers, portable grills, and camp chairs.
- Hang sewer fittings and hose wrenches right near the access hatch for fast setups.
- Coil your heavy 30-amp or 50-amp power cord onto heavy-duty utility hooks.
- Trace tool outlines with a silver marker so you immediately spot missing gear at camp breakdown.
⚠️ Watch Out
Check screw length carefully on partition walls so you do not puncture water lines or electrical harnesses running behind the bay panels.
10. Install Drop-Leaf Wall Hinges for an Instant Folding Workstation
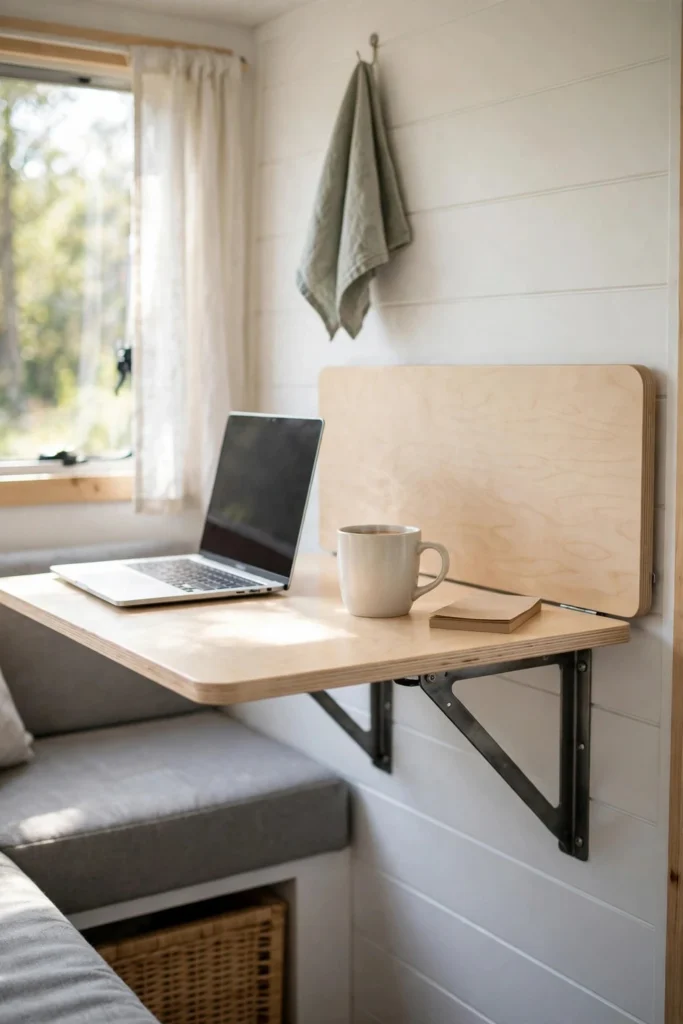
When working remotely from a travel trailer, setting up a laptop on the main dining table blocks the kitchen and prep areas. Installing a folding drop-leaf shelf against an open interior wall panel creates a dedicated desk that disappears in seconds.
Heavy-duty locking triangular brackets support over fifty pounds when locked open. When the workday wraps up, pressing two quick-release levers lets the wooden board fold down flat against the wall with barely an inch of profile.
- Locate the internal aluminum or wood wall studs using a sensitive magnetic stud sensor.
- Anchor the folding brackets into the solid framing using self-tapping wood screws.
- Fasten a lightweight finished pine or butcher-block board to the horizontal bracket arms.
Always verify the downward folding clearance to ensure the collapsed shelf clears low baseboard heaters and electrical outlets.
11. Tuck Under-Shelf Sliding Wire Baskets into Tall Cabinets
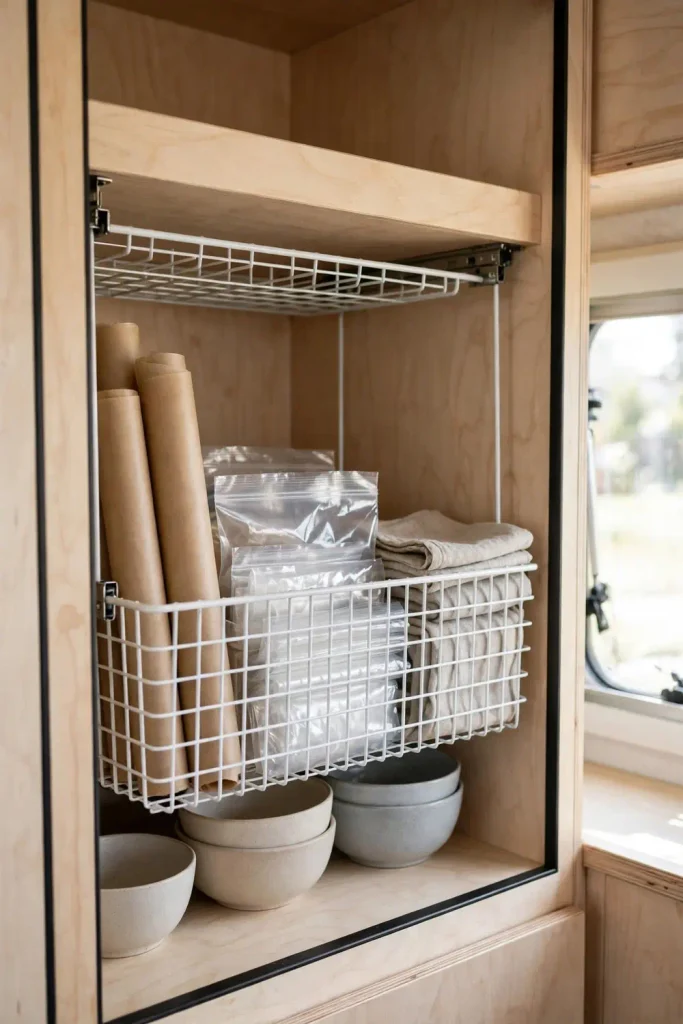
RV builders frequently create deep overhead kitchen cabinets with massive gaps of empty vertical air space above the dishes. Sliding wire baskets slide straight onto existing shelf decks without using a single tool or screw.
These wire cradles hold lightweight pantry goods in that forgotten upper half of the compartment. Because they hang directly below the shelf, you double your usable surface area in under thirty seconds.
- Measure shelf thickness to make sure the bracket arms slide on snug without bending.
- Store flat items like foil boxes, silicone baking mats, and tea towel bundles inside.
- Stick a small strip of felt under the metal arms to protect the cabinet’s wood finish.
Quick items that fit best in hanging wire baskets
12. Use Elastic Cargo Netting Across Open Bunkhouse Cubbies
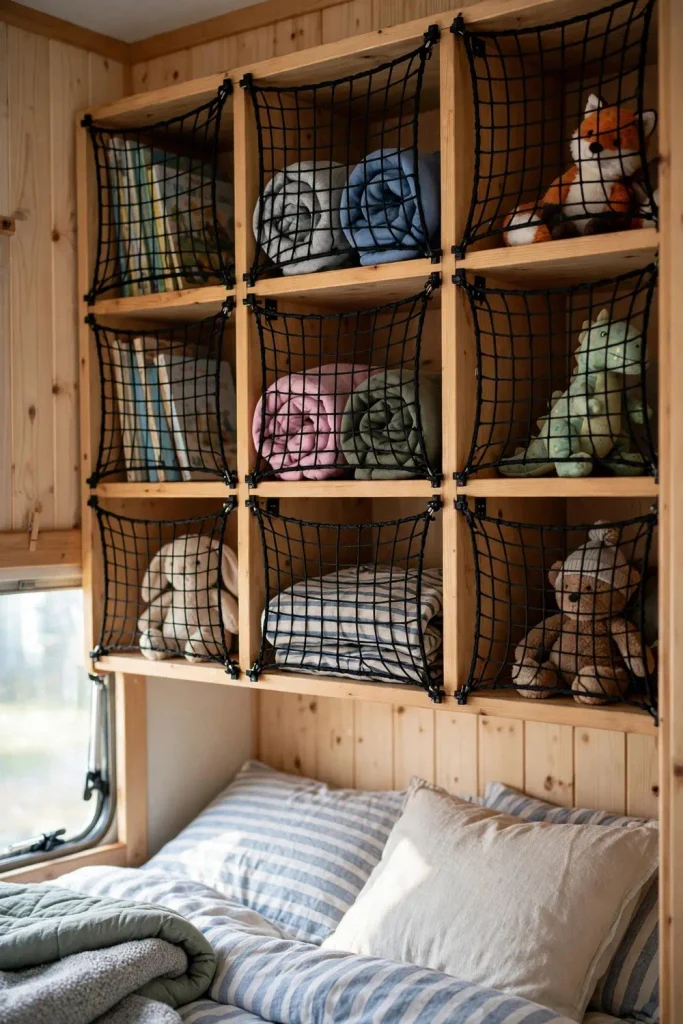
Open shelving in camper bunkhouses looks cute at the RV dealership, but the moment you hit highway speed, toys, books, and shoes bounce directly onto the hallway carpet. Installing elastic envelope cargo netting keeps everything in place.
Use simple screw-in anchor eyelets along the shelf perimeter to secure the net corners. The elastic web stretches easily when children need to pull out a sweatshirt or book, then snaps tight again to guard the opening.
| Storage Style | Open Factory Cubbies | Elastic Cargo Netting |
| Braking Security | Zero, contents slide out easily | Firm elastic keeps items contained |
| Weight Added | None | Under eight ounces per shelf span |
| Visual Access | Clear | Transparent mesh allows quick identification |
Piles of shoes and stuffed animals falling out of open cubbies after every highway transition or sudden stop.
Tidy, visible bunks with flexible net barriers that flex when reached into and snap securely shut while rolling.
13. Stick Clear Adhesive Pockets to the Bathroom Medicine Cabinet Door
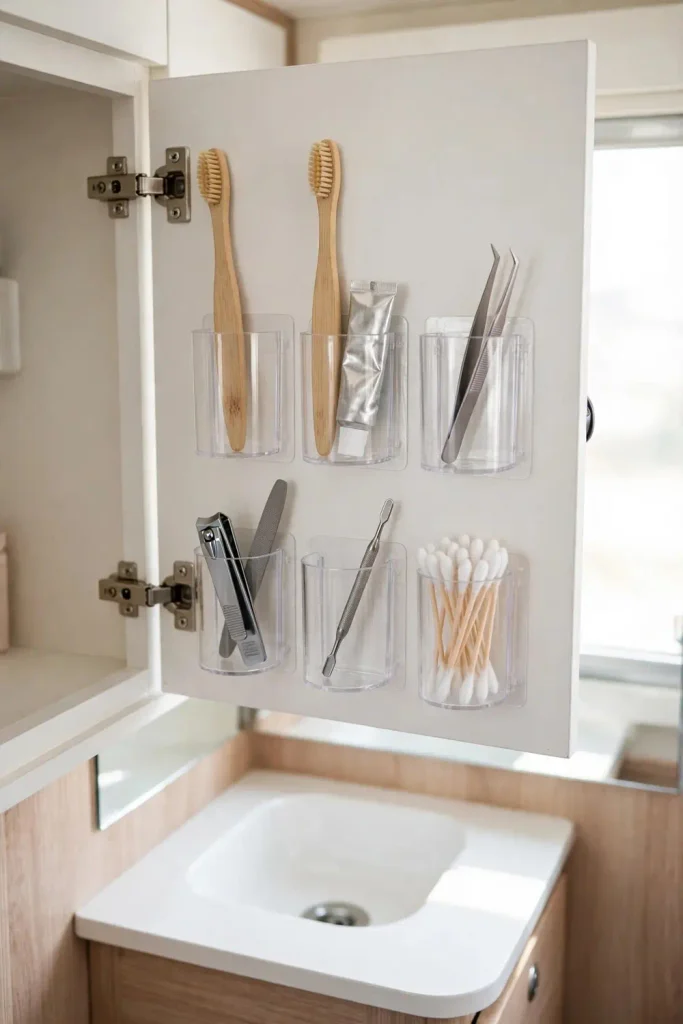
Camper bathroom sinks have almost zero counter surrounding the bowl, meaning your toothbrush, razor, and face wash fight for the same two-inch ledge. The back of the medicine cabinet door offers premium vertical real estate.
Stick slim, shatter-proof acrylic cups or stick-on organizer bins directly to the interior mirror or door wood. This lifts wet grooming essentials up off the sink deck where they can dry thoroughly.
- Wipe the interior door surface dry using an alcohol prep pad.
- Press self-adhesive organizer pockets against the surface, aligning them between internal shelf gaps.
- Let the adhesive cure for 24 hours before filling the holders with heavy creams or electric razors.
- ▸Electric toothbrushes and charging bases kept away from sink puddles.
- ▸Safety razors, tweezers, and nail clippers organized in individual slots.
- ▸Daily vitamin tubes and prescription bottles held upright without rattling.
14. Add Heavy-Duty Gas Struts Under the Queen Bed Frame
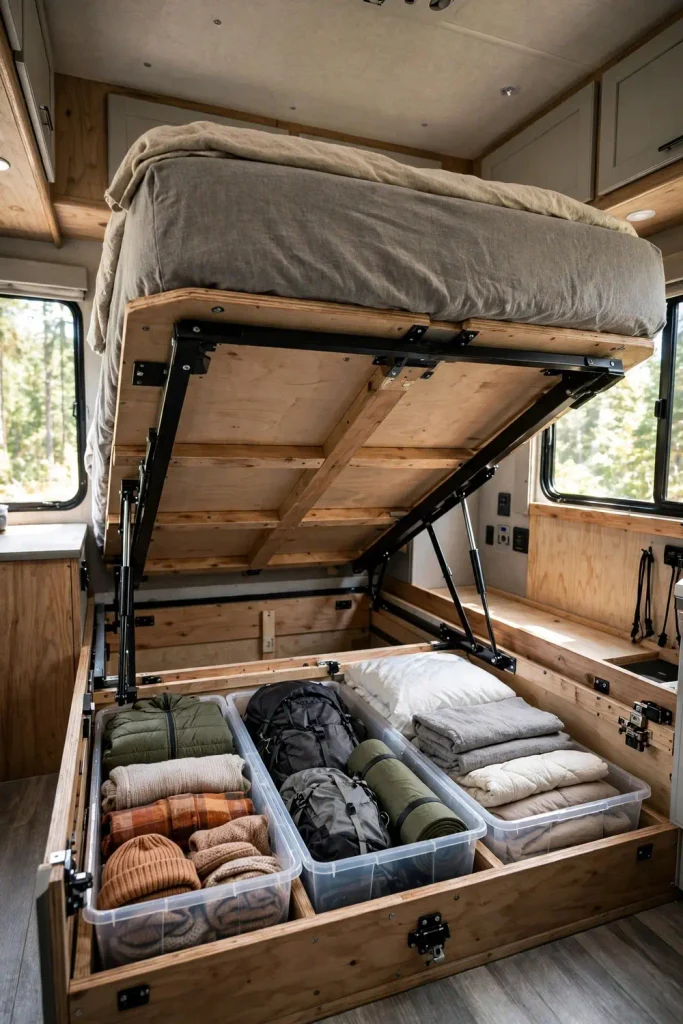
Most camper beds lift up to reveal a massive storage cavern beneath the mattress, but factory setups often lack lift struts or use weak ones that drop on your head. Heavy-duty gas struts turn this space into effortless everyday storage.
Choose struts rated between 80 to 120 pounds of lift pressure depending on the weight of your mattress and bedding. Once installed, the bed lifts smoothly with one hand and stays suspended safely while you sort through winter coats or extra pantry goods.
- Measure the bed platform side frame to select the correct strut length.
- Reinforce the thin plywood deck attachment points with backing blocks of hardwood.
- Mount the lower ball socket securely to the solid floor framing runner.
15. Hang a Pocket Shoe Organizer Across the Back of the Entry Door
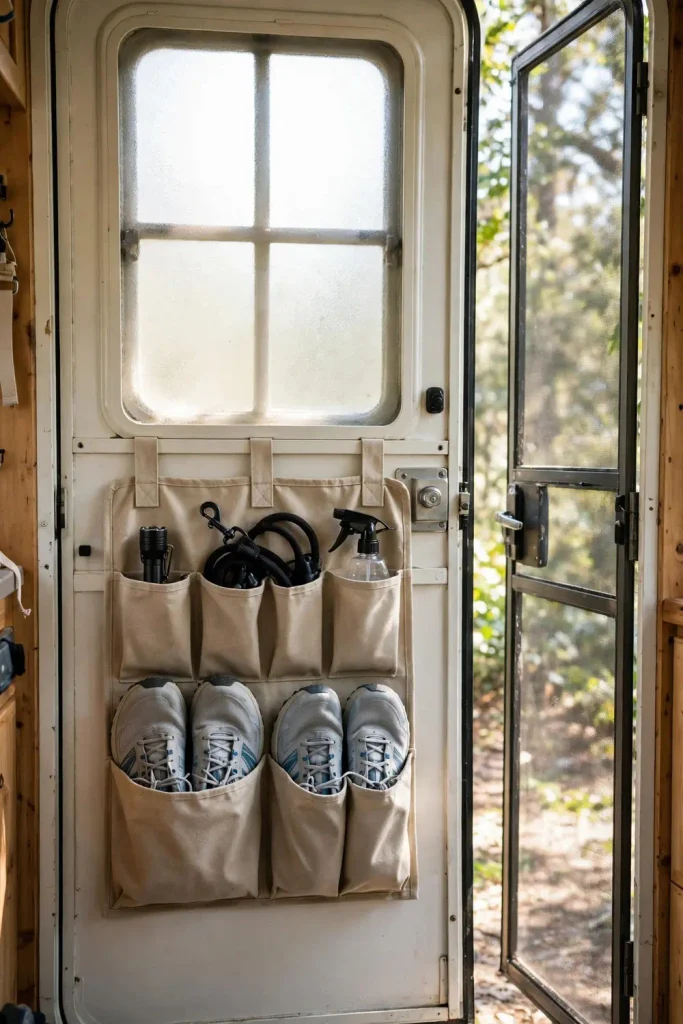
Shoes piled up at the camper doorway create an immediate tripping hazard in a narrow aisle. A clear mesh or canvas shoe organizer hung flat across the inside of the main entrance door clears the threshold immediately.
Trim excess pockets off the bottom so the fabric clears the screen door latch smoothly. Mesh pockets allow air to circulate around damp hiking shoes while letting you see every pair instantly as you step inside.
- Secure low-profile over-door metal hooks across the top edge of the entry door frame.
- Hang the organizer and anchor the bottom two eyelets with removable adhesive strips to stop swinging.
- Use the top pouches for dog leashes, flashlights, insect spray, and sunscreen bottles.
📌 Good To Know
If your camper door weatherstripping is extra tight, attach the organizer grommets directly to the door panel using short truss-head screws and washers instead of over-door brackets.
16. Mount Inverted Stemware Racks Underneath Kitchen Shelving
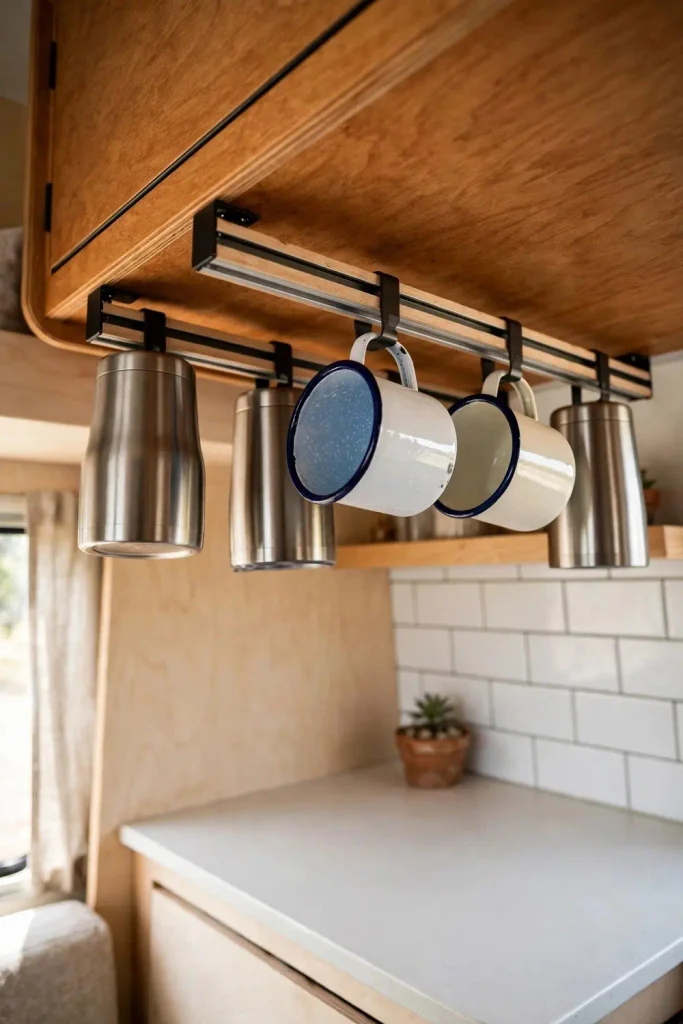
Insulated stainless steel tumblers and camp coffee mugs take up huge cupboard footprint because their broad handles stop them from nesting together closely. Hanging them by their bases under cabinets reclaims that shelf space.
Install lightweight wood or metal sliding rails beneath your overhead cabinetry. Tumbler bases slide right into the parallel grooves, suspending them securely upside down where dust cannot collect inside.
- Measure tumbler base diameters to ensure the channel width gives enough side clearance.
- Angle the rails slightly backward toward the wall to prevent slide-outs during heavy braking.
- Wipe down the underside of the cabinet with alcohol before installing adhesive rail strips.
17. Attach Flat Cord Wraps Behind the Media Console
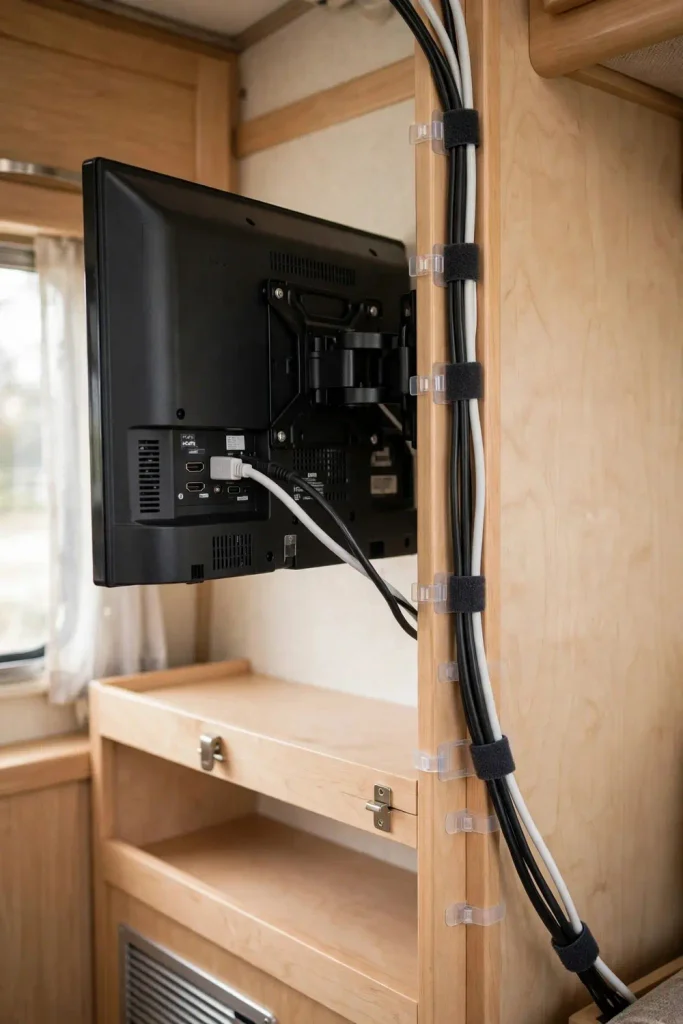
Tangled charging cords, television HDMI leads, and inverter cables easily create an unsightly rat’s nest in tight RV entertainment cubbies. Worse yet, dangling cables can get caught in moving slide-out mechanisms during setup.
Stick adhesive silicone cable docks or low-profile wrap spindles directly to the rear surfaces of your television mount and console stiles. Keeping electronics cables bundled flat against the wall prevents snags and frees the surface below for remotes and books.
- Bundle long excess cords together using reusable fabric hook-and-loop ties.
- Press flat adhesive cable clips every eight inches along the wall corner edge.
- Label each cord tail with white electrical tape so you know which plug runs the router or antenna booster.
Use soft hook-and-loop wraps so you can swap out charging cords easily.
Route cables snugly along interior cabinet stiles and wall trims.
Plastic zip ties that require clippers to remove when reconfiguring gear.
Leaving slack cables hanging near sliding slide-out wall seals.
Making the most of a compact mobile home is all about working with the physical space you already have. When each tool, mug, and blanket has an anchored spot that stays put while traveling, your entire camper feels twice as big. Try tackling two or three of these practical upgrades before your next weekend trip, and enjoy a clutter-free, functional cabin wherever you park.
Save this list to your RV Pinterest boards so you have these easy DIY space-savers ready for your next weekend project.