
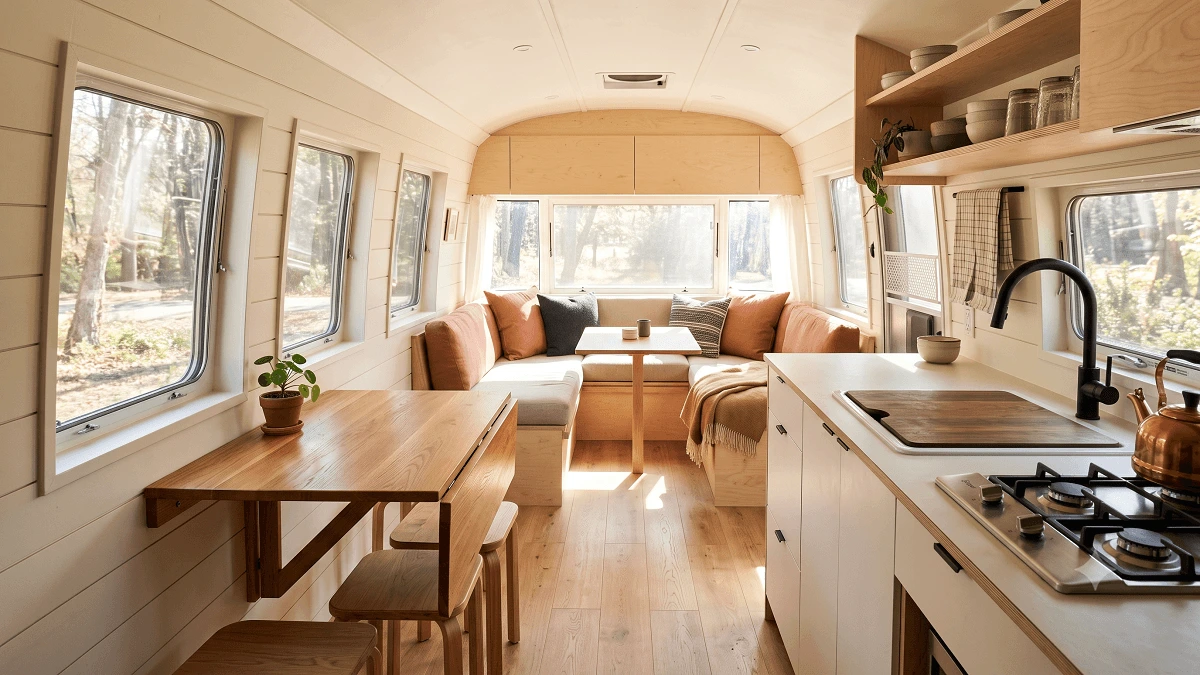
Living in a travel trailer or motorhome brings unmatched freedom, but the reality of small spaces hits hard when you cannot find a place for your morning coffee mug. Most factory RV layouts waste massive amounts of valuable room with chunky furniture and hollow, unbacked walls. You are told to just pack less stuff, but that advice falls flat when you are trying to live comfortably on the road.
True comfort comes down to changing how your environment functions. By tackling smart interior modifications, you can reclaim hidden storage areas and open up narrow walkways. These practical small rv renovation ideas focus on clever DIY alterations that require simple tools and basic hardware.
You do not need an engineering degree to make your rig feel twice as wide. Making small, intentional changes to your layout will completely transform how your daily routine flows. Let us look at the best ways to open up your living quarters.
1. Replace the Bulky Factory Dinette with a Wall-Mounted Drop-Leaf Table
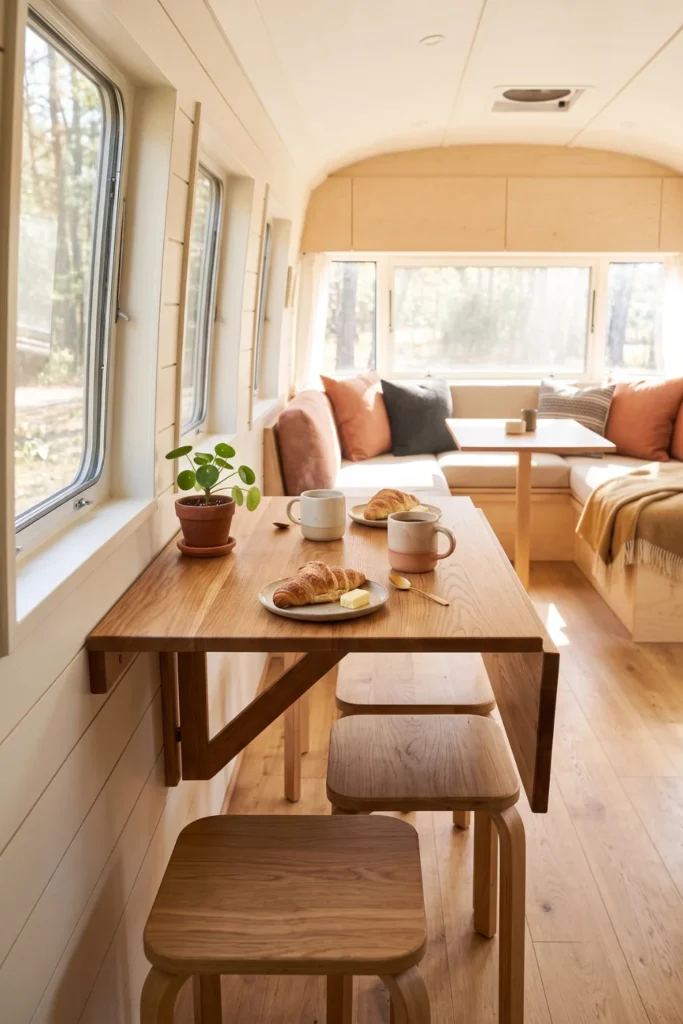
That oversized wrap-around booth looks comfortable at the dealership, but it acts like a massive roadblock in a narrow hallway. Ripping it out creates an open area you can actually walk through. A wooden drop-leaf table mounts flat against the wall and swings up only when you need to eat dinner or type on a laptop.
| Table Setup | Floor Space Used | Daily Flexibility |
|---|---|---|
| Factory Booth | 16 square feet | Fixed position, blocks walking path |
| Drop-Leaf Design | 2 square feet | Folds completely flat when lowered |
2. Install Heavy-Duty Full-Extension Slides in Deep Lower Cabinets
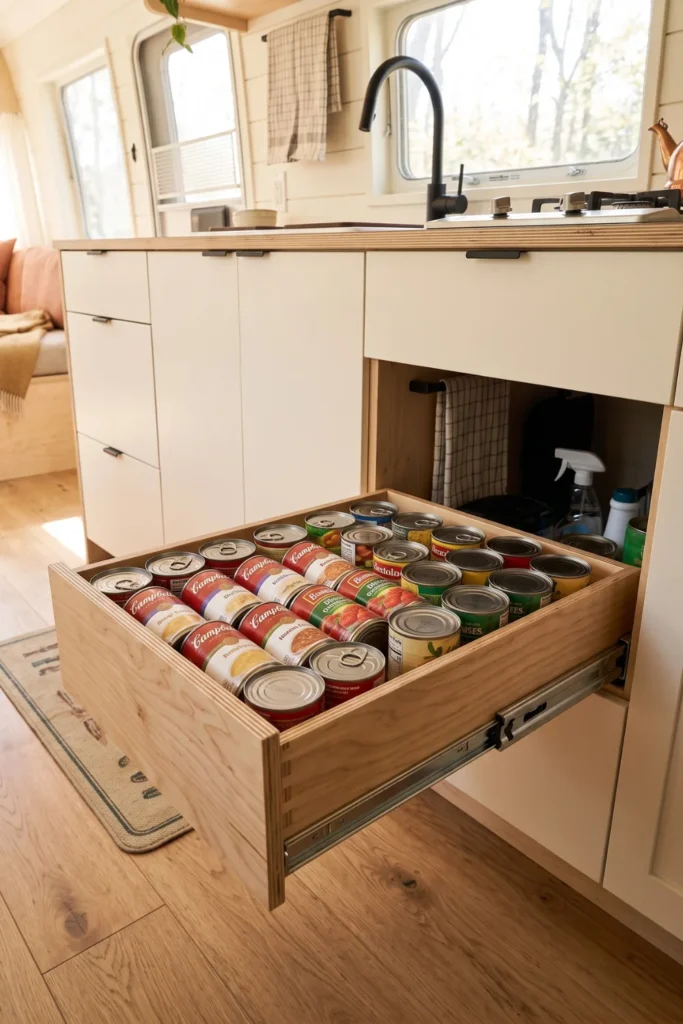
Deep kitchen cabinets quickly become dark tunnels where canned goods and frying pans disappear forever. If you must get on your hands and knees with a flashlight to find dinner, you are wasting usable space. Adding pull-out drawers changes the entire layout.
- Slide choice: Select heavy-duty drawer runners rated for 100 pounds.
- Box build: Construct shallow plywood drawer boxes built to fit your opening.
- Transit safety: Use front locking brackets to prevent sliding during bumpy travel days.
Installing full-extension tracks allows the entire drawer to pull completely out into the open hallway, giving you instant access to the very back corners without rummaging.
💡 Quick Tip
Always measure the inner cabinet opening width near the door hinges. RV cabinet frames are often narrower than the internal cavity, which can block a wide drawer box from sliding out.
3. Swap the Standard Microwave for a Flush-Mounted Convection Air Fryer
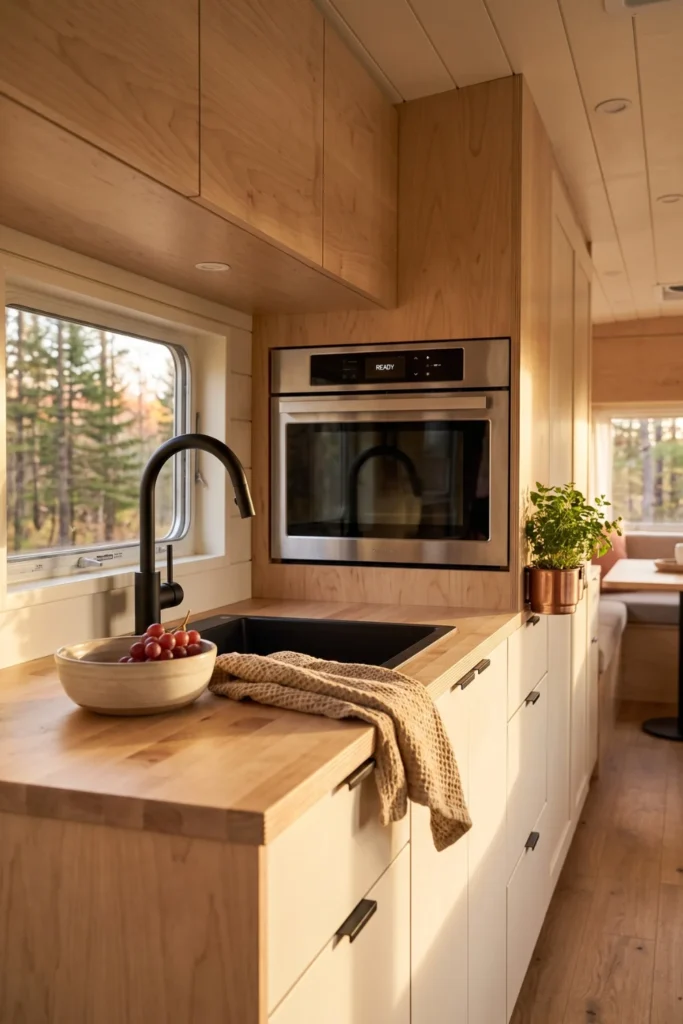
The typical factory microwave only handles one specific task, which wastes valuable kitchen real estate. Upgrading to a multi-purpose appliance opens up options without adding bulk.
- Unplug and unscrew the old factory microwave unit from its metal casing.
- Measure the existing cutout to ensure adequate rear ventilation clearance.
- Slide the convection unit into place and secure it with heavy-duty metal trim kits.
This switch allows you to bake fresh bread, roast vegetables, and reheat leftovers using a single appliance footprint.
A bulky microwave that only warms up liquids, combined with a separate toaster sitting out on the kitchen counter.
One multi-functional built-in oven that bakes, toasts, and air fries, leaving the kitchen counter entirely open for meal prep.
4. Add Gas Struts to Elevate the Main Bed Frame Safely
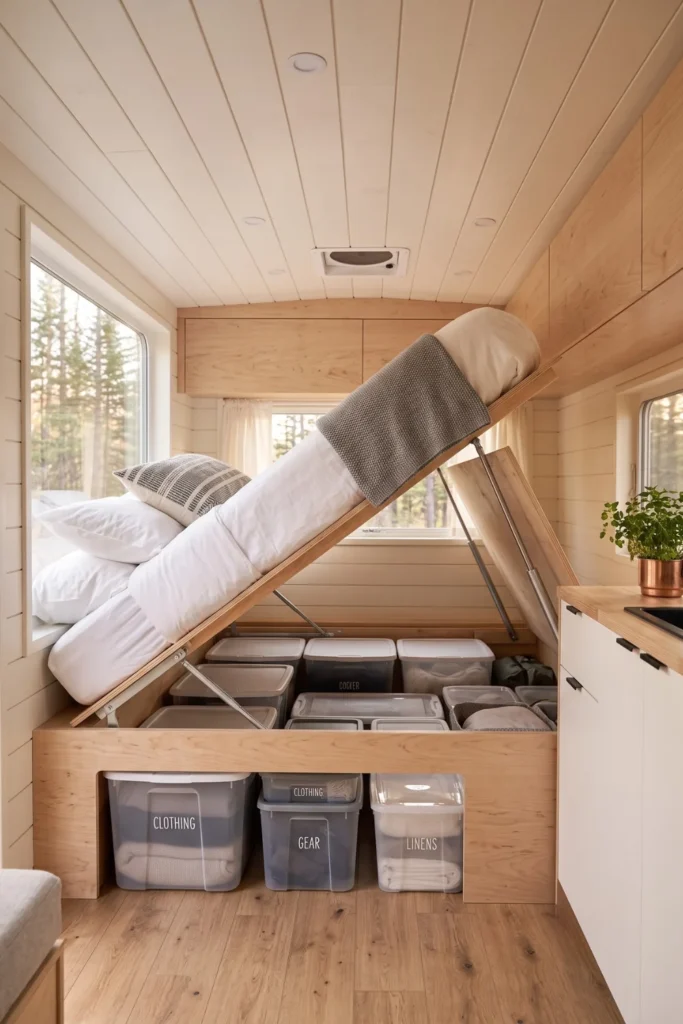
The massive void under your mattress is the largest storage area in your rig, but lifting a heavy plywood board by hand means you will avoid using it. Installing automatic lift support rods solves this problem instantly.
| Strut Rating | Best Mattress Type | Practical Benefit |
|---|---|---|
| 80-Pound Struts | Standard factory RV mattress | Smooth lifting assistance |
| 120-Pound Struts | Heavy aftermarket memory foam | Holds the frame open hands-free |
Mounting a pair of gas pressure shocks takes the strain off your lower back and keeps the platform propped up completely safely while you grab seasonal gear.
What to grab first
5. Mount a Heavy-Duty Pegboard Panel Inside the Rig’s Tallest Closet
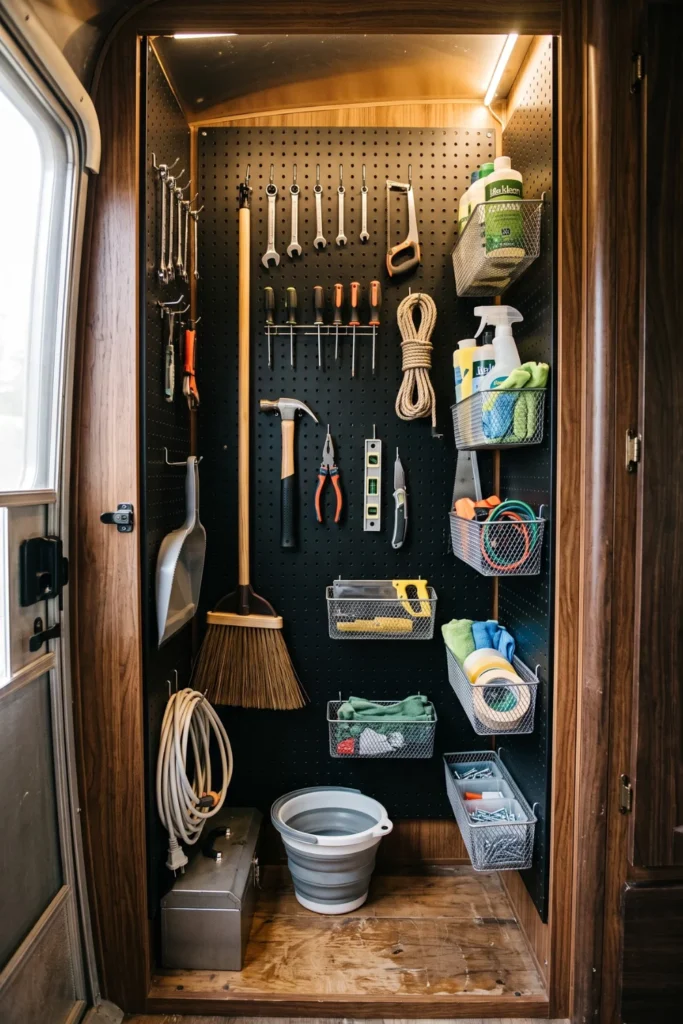
Deep closets without shelving turn into messy piles of jackets and rogue flashlights. You can fix this vertical waste by lining the back wall with a durable utility board.
- Use sturdy metal pegboard panels that will not crack over rough roads.
- Attach rubber-coated hooks to damp rattling noise when driving down the highway.
- Hang small plastic storage bins for loose charging cables and batteries.
Hanging your tools, brooms, and frequently used gear frees up the bottom closet floor space for heavy storage boxes.
6. Trade the Fixed Sofa Seating for Modular Storage Ottomans
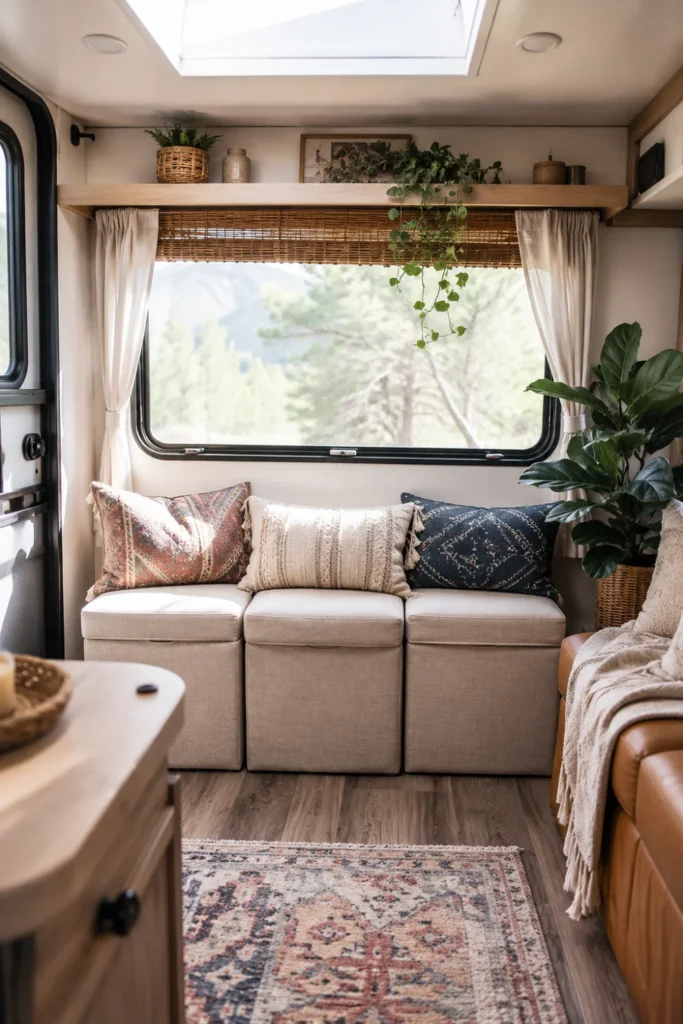
Unbolting the heavy factory jackknife sofa opens up structural floor space. Replacing it with individual, moveable storage seats lets you rearrange the living layout dynamically.
- Store extra blankets, winter coats, or heavy tools inside the hollow bases.
- Move the seating units around to create a chaise lounge or separate chairs.
- Clear floor paths quickly when pulling in deep slide-outs for travel days.
Empty the interior storage cavities completely to keep individual units lightweight.
Push the ottomans tight against each other under the main window framework.
Secure the base frames with a heavy ratchet strap anchored to the floor brackets.
7. Suspend a Three-Tier Wire Basket System in the Kitchen Ceiling Corner
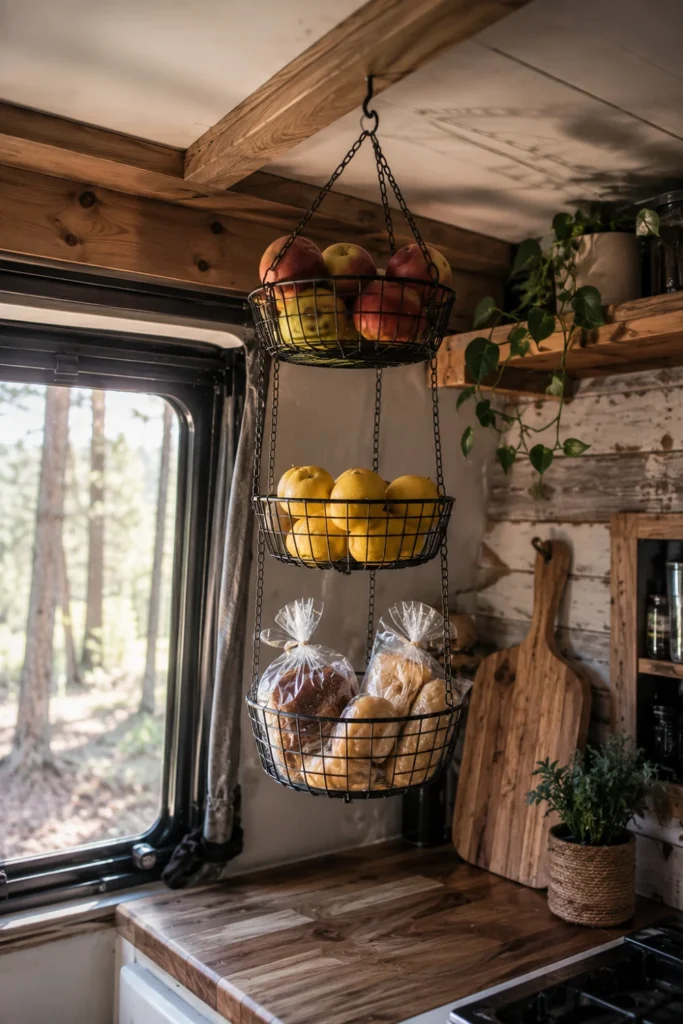
Upper corners in the galley area usually sit completely empty because items slide around during transit. Hanging a multi-tier basket system captures this wasted overhead space.
| Item Type | Storage Safety | Space Benefit |
|---|---|---|
| Fresh Produce | Keeps apples off counter surfaces | Prevents bruising |
| Bread Bags | Avoids crushing in deep drawers | Keeps counters clear |
Anchor the top hook directly into a structural ceiling rafter for stability.
Use lightweight, shatterproof items like mesh produce bags inside the tiers.
Do not screw the mount into thin interior paneling without a backing anchor.
Avoid leaving heavy glass jars loose inside the baskets while driving.
8. Excavate Dead Space Behind the Bathroom Drywall for Recessed Shelving
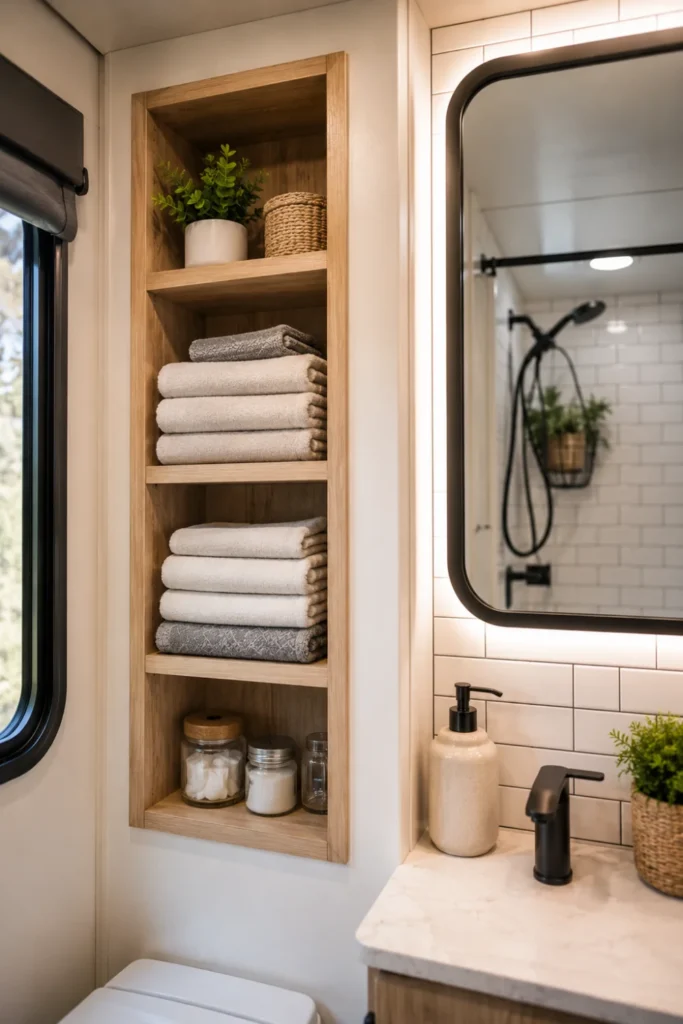
Many RV bathroom walls are built hollow to cover plumbing lines that only take up a tiny fraction of the wall cavity. Cutting into the thin paneling reveals hidden depth.
- Tap the paneling gently with a stud finder to locate the internal wall framework.
- Cut a small test opening to check for hidden wires or water pipes.
- Frame out a shallow wooden box and insert built-in shelves flush with the wall.
| Wall Cavity Depth | Best Shelving Option |
|---|---|
| 2 to 3 Inches Deep | Built-in spice racks for toiletries and medicine containers |
| 4 Plus Inches Deep | Deep recessed boxes for folded hand towels and extra toilet paper rails |
9. Run Low-Profile Acrylic Ledges Down Narrow Bedroom Walls
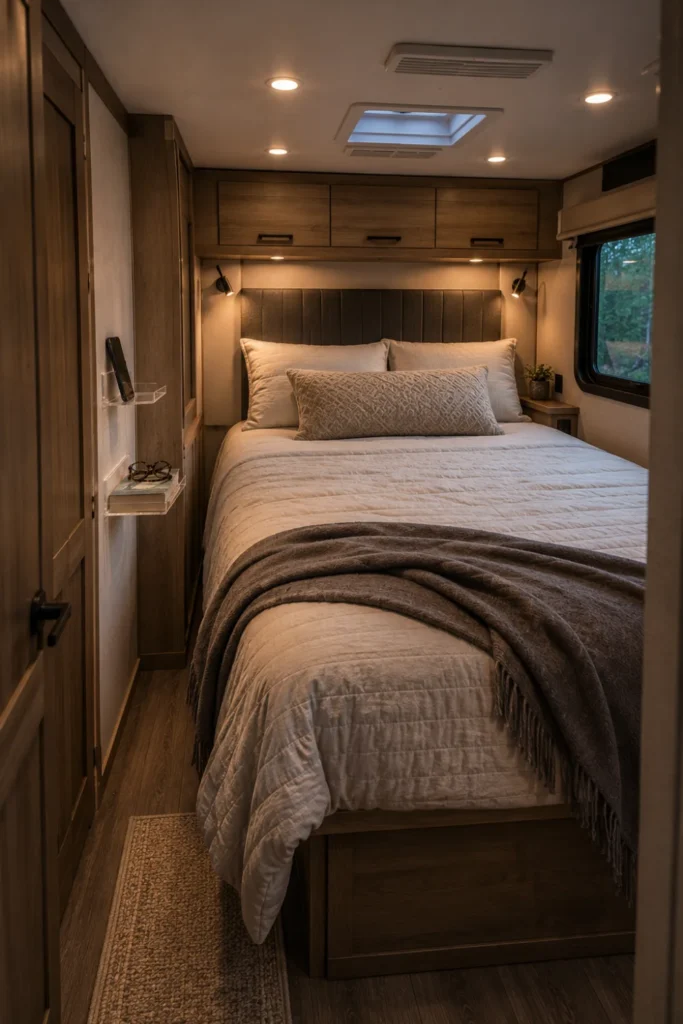
Standard nightstands crowd the narrow walking space alongside an RV bed frame, making it tough to move around. Clear plastic wall ledges provide a slim storage alternative without sticking out.
- Hold smartphones, eyeglasses, and water bottles securely overnight.
- Utilize just two inches of wall depth instead of taking up valuable floor space.
- Maintain open sightlines to make the small bedroom feel significantly wider.
Clear acrylic allows the wall color to show through, which tricks the eye into seeing an open, clutter-free bedroom walkway.
10. Build a Pull-Out Pantry Tower into the Dead Space Beside the Refrigerator
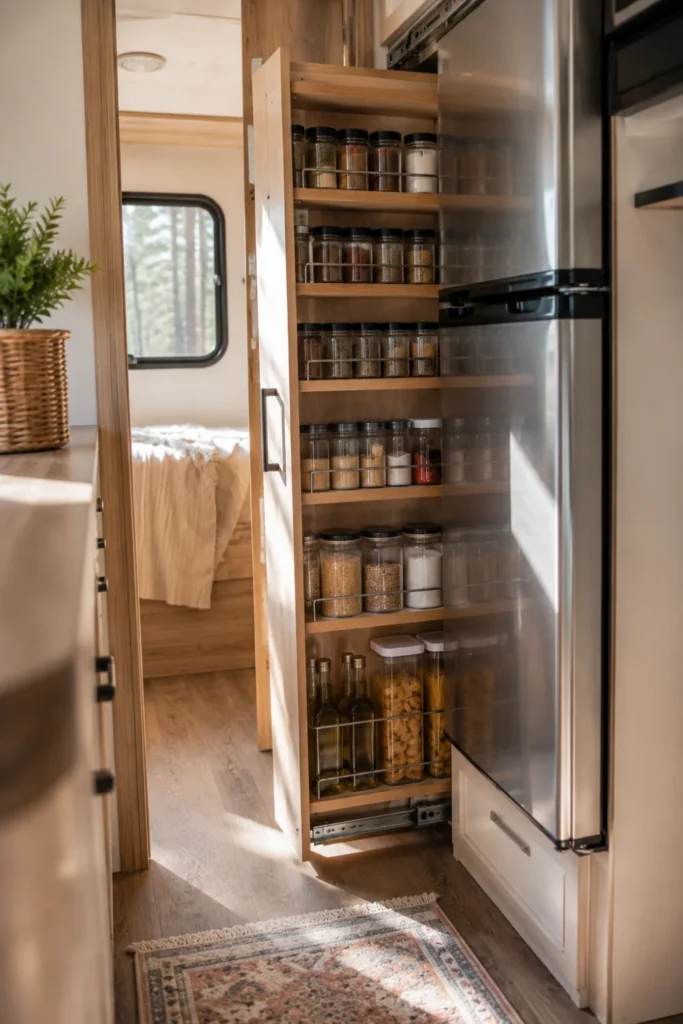
The vertical gap between the kitchen fridge and the structural wall is often covered with a simple blank trim piece from the factory. Turning this five-inch gap into a rolling storage tower maximizes grocery space.
| Tower Setup | Storage Capacity | Access Level |
|---|---|---|
| Factory Trim Panel | Zero storage space | Completely inaccessible |
| Rolling Pantry Tower | Up to 24 canned items | Pulls out fully into the hallway |
⚠️ Watch Out
Always install a heavy-duty mechanical barrel bolt latch at the top of the tower. Magnetic cabinet catches are rarely strong enough to keep a heavy pantry full of soup cans closed on sharp highway turns.
11. Add a Hinged Countertop Extension to the End of the Kitchen Island
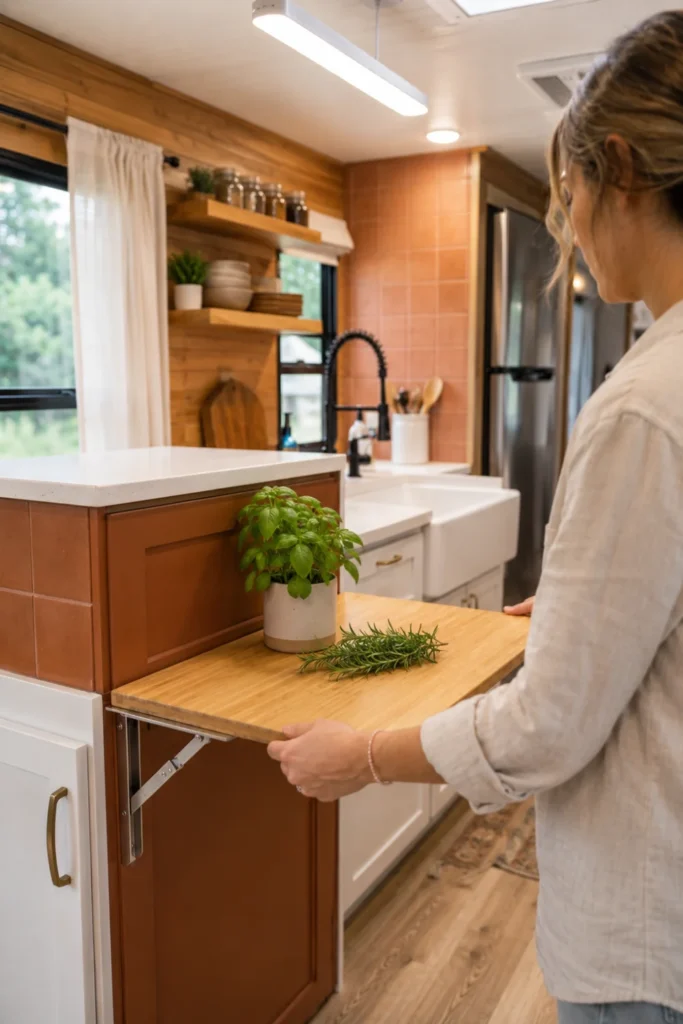
Kitchen counters in motorhomes are notoriously small, often barely leaving enough room for a standard cutting board. Fixing a flip-up wood extension to the outer side panel creates instant workspace without permanently blocking the entry door path.
- Mount heavy-duty spring brackets that snap lock into position automatically.
- Select a lightweight bamboo surface to reduce strain on the cabinet sidewall.
- Drop the shelf completely flat against the island base when dinner prep is finished.
This simple layout tweak provides that vital extra foot of counter space exactly when you are chopping vegetables or plating meals.
12. Swap Curved Glass Shower Doors for a Retractable Self-Cleaning Screen
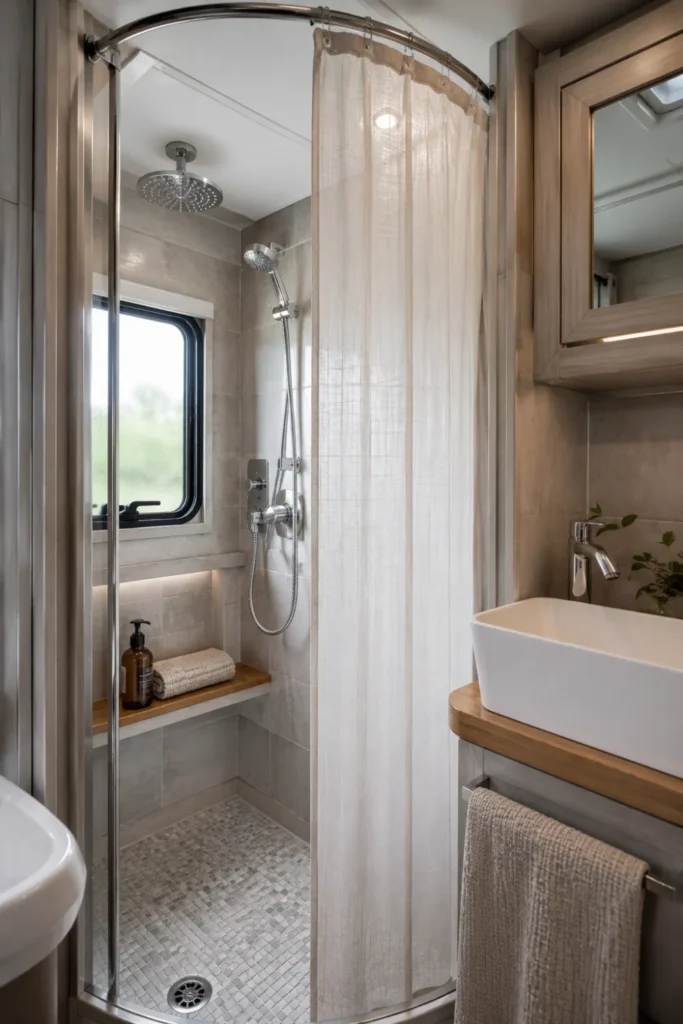
Heavy glass shower doors are noisy during transit, difficult to clean, and require structural space to swing open. Replacing the factory glass with a rolling screen saves serious weight and prevents water leaks.
- Remove the old metal track frame from the shower enclosure walls using a square driver bit.
- Clean the fiberglass surround completely to remove old silicone adhesive residue.
- Bolt the new spring-loaded track into place with waterproof marine sealant.
The soft screen rolls entirely into a slim wall casing, keeping the tiny bathroom aisle completely unobstructed when you step out of the shower.
What to grab first
13. Install Under-Cabinet Magnetic Strips for Frequently Used Kitchen Knives
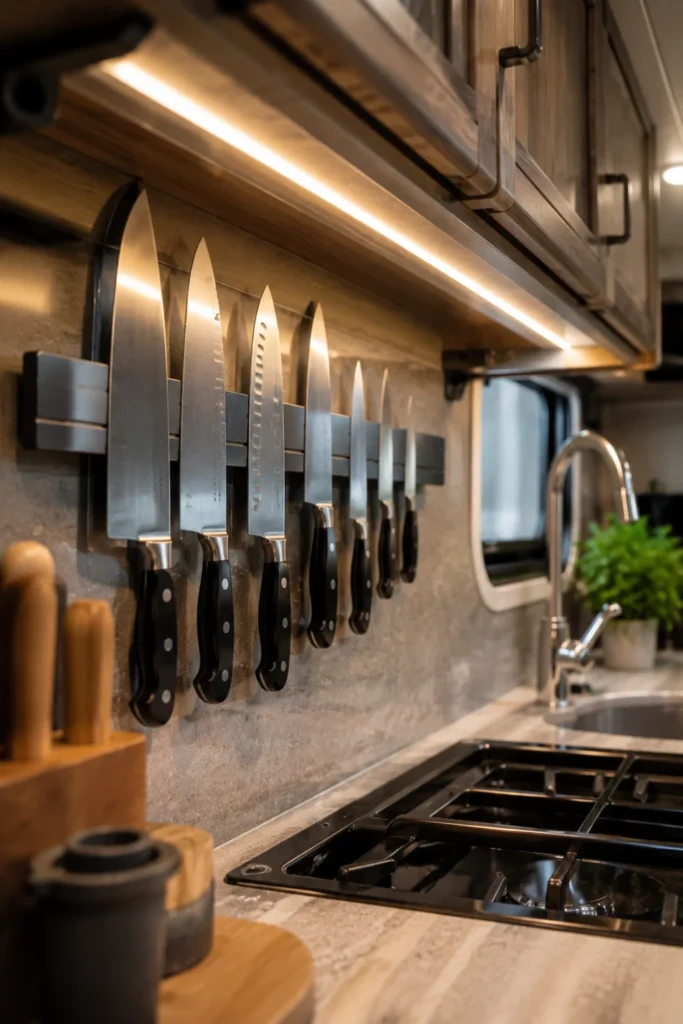
Traditional knife blocks take up massive amounts of kitchen counter surface area and slide around wildly while you drive. A heavy-duty magnetic strip mounted underneath upper cabinets keeps your cutlery secure and out of sight.
| Storage Method | Counter Space Used | Safety on Rough Roads |
|---|---|---|
| Wooden Knife Block | 45 square inches | High risk of tipping over |
| Under-Cabinet Magnet | 0 square inches | Fully locked by magnetic pull |
This simple modification keeps sharp blades firmly locked in place through bumpy road conditions while saving your main drawer space for larger cooking tools.
Knives rattling loosely inside a crowded utility drawer, dulling the blades and creating a safety hazard.
Cutlery gripped safely against the wall, out of reach of children and leaving drawers free for food storage containers.
14. Mount Slim Fabric Shoe Pockets Along the Base of the Entryway Wall
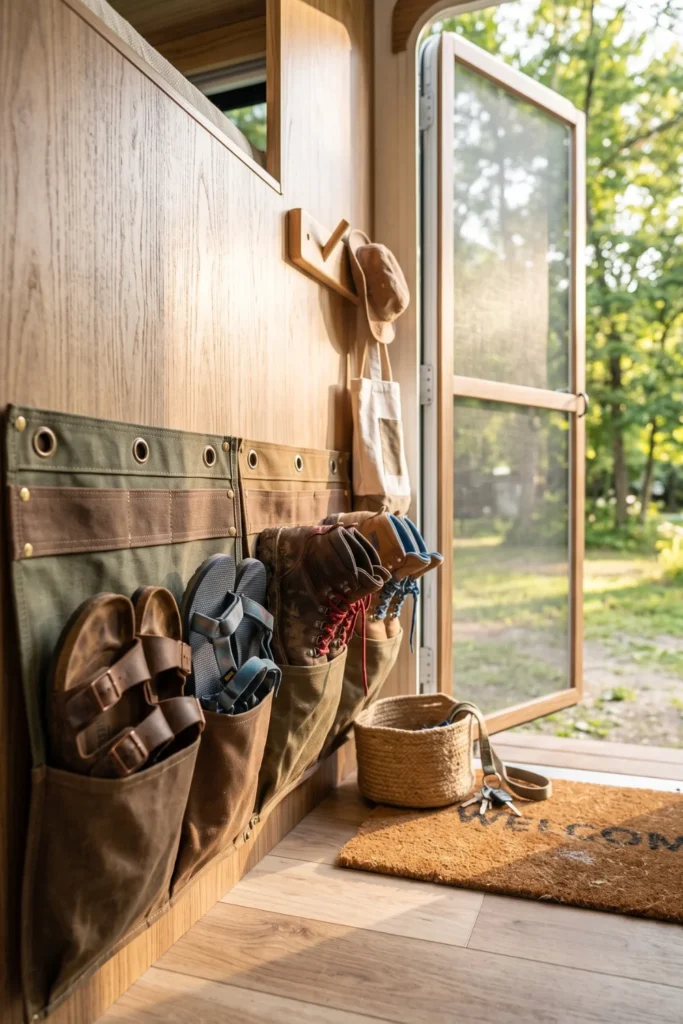
Rogue boots left by the doorway create an immediate tripping hazard in a narrow living zone. Using the blank space at the bottom of your master bed frame or entrance wall keeps footwear organized and off the floor walking path.
- Lay out the pocket strip along the lower panel to check slide-out clearances.
- Fasten the top corners with short wood screws and wide washers to prevent tearing.
- Insert heavy shoes into the outer slots and flat sandals into the center dividers.
Pick heavy canvas shoe organizers with reinforced plastic backing panels.
Use short half-inch wood screws to avoid piercing hidden utility lines inside the partition walls.
Load the heaviest sneakers into the lowest slots to minimize pulling force on the fabric mounts.
15. Split the Main Under-Bed Platform into Individually Accessible Hatches
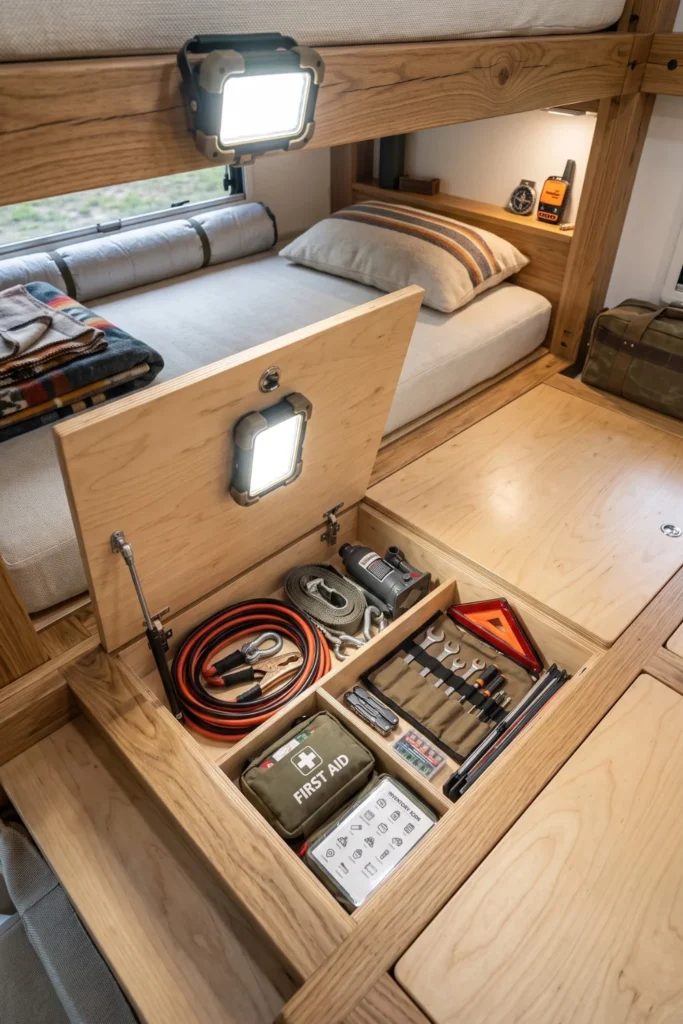
Standard RV beds hide a giant storage cavity under one single, heavy sheet of plywood. Cutting that platform into three independent panels changes how you access your gear.
- Left Section: Access plumbing valves and winter gear without lifting the entire bed.
- Center Section: Store heavy toolboxes directly over the trailer axles.
- Right Section: Keep extra linens and seasonal clothing organized and dry.
You can access specific items tucked away in the back corner without disturbing the blankets, pillows, and sleeping partner on the other side of the mattress.
16. Slide Spring-Loaded Tension Rods Vertically Inside Overhead Cabinets
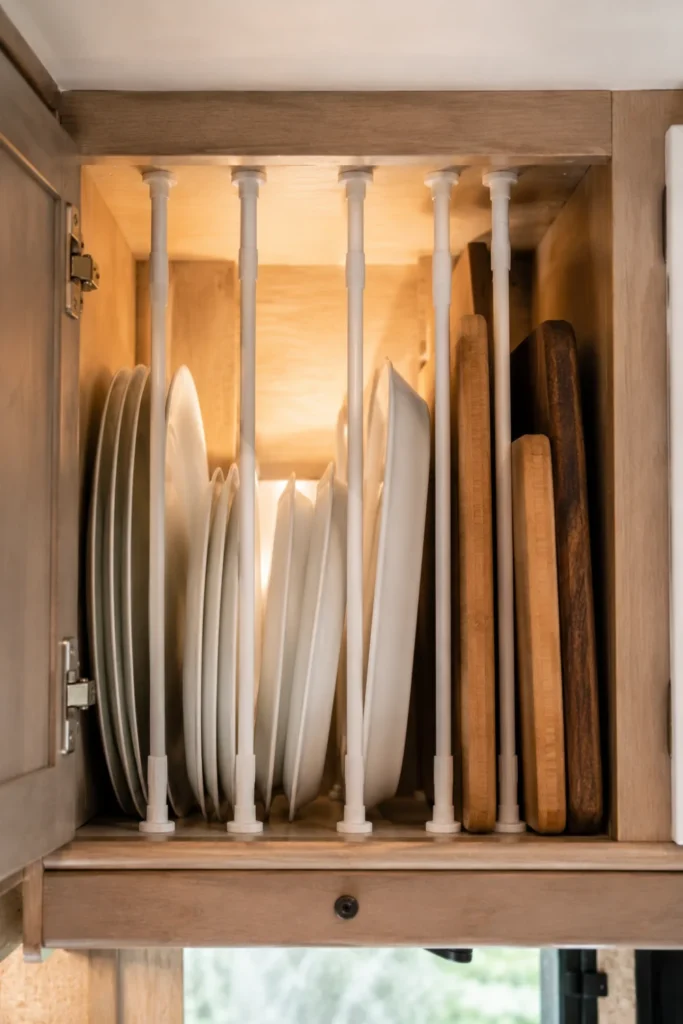
Stacking lightweight plastic plates or baking sheets horizontally creates a cluttered pile that rattles constantly on the road. Turning these items sideways by placing short tension bars vertically locks them in place.
- Organize plates, cutting boards, and pan lids like a vertical file cabinet.
- Adjust the width between bars instantly when you buy new kitchenware.
- Prevent items from shifting forward against the cabinet door during travel.
| Storage Method | Rattle Control |
|---|---|
| Horizontal Stack | High noise, plates slide around easily |
| Vertical Tension Rows | Zero noise, every dish stays perfectly pinned |
17. Secure Woven Mesh Hammocks Across Wasted Upper Wall Corners
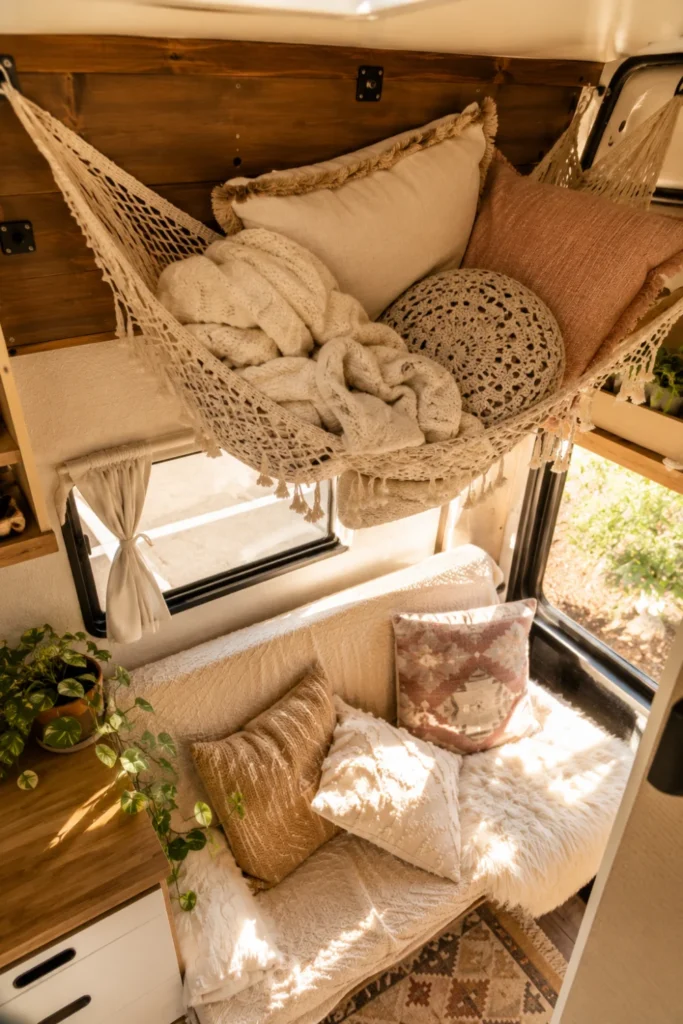
The open ceiling space above your dinette or bed often goes unused because standard shelves add too much heavy woodwork. Netting hammocks provide a soft, featherweight solution for awkward angles.
- Screw small metal eye hooks directly into the solid corner molding studs.
- Clip the carabiners of the mesh net onto the anchors firmly.
- Load soft items like winter hats, sweatshirts, or extra yarn balls.
Fill nets with lightweight linens, towels, and winter clothing items.
Check anchor tightness before heading out on long highway trips.
Avoid storing heavy canned food items or sharp metal kitchen tools.
Do not overload the fabric mesh beyond its rated weight limits.
18. Trade the Solid Bathroom Swing Door for a Lightweight Sliding Canvas Screen
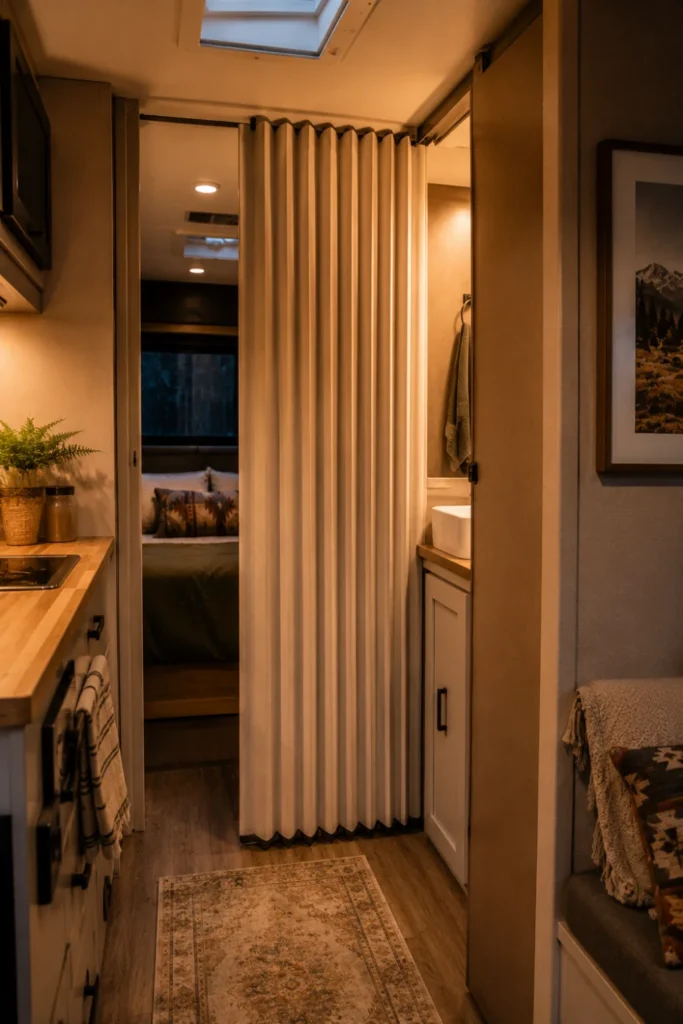
A standard heavy wood bathroom door requires a large radius to swing open, completely blocking the central walking lane when someone exits. Swapping it for a thick accordion fabric curtain keeps the walkway open.
| Door Style | Aisle Obstruction | Weight Impact |
| Factory Wood | Blocks hall completely | Heavy composite wood |
| Canvas Screen | Zero floor space used | Under 3 pounds total |
This layout adjustment keeps the main pathway clear even if someone is using the bathroom area while another person cooks.
- ▸Saves up to 4 square feet of active walking clearance.
- ▸Eliminates door slams and rattling wall noises while driving.
- ▸Installs easily using a basic top-mounted aluminum track rail.
19. Attach Grippy Silicone Dash Organizers in the Driver Cockpit Overhang
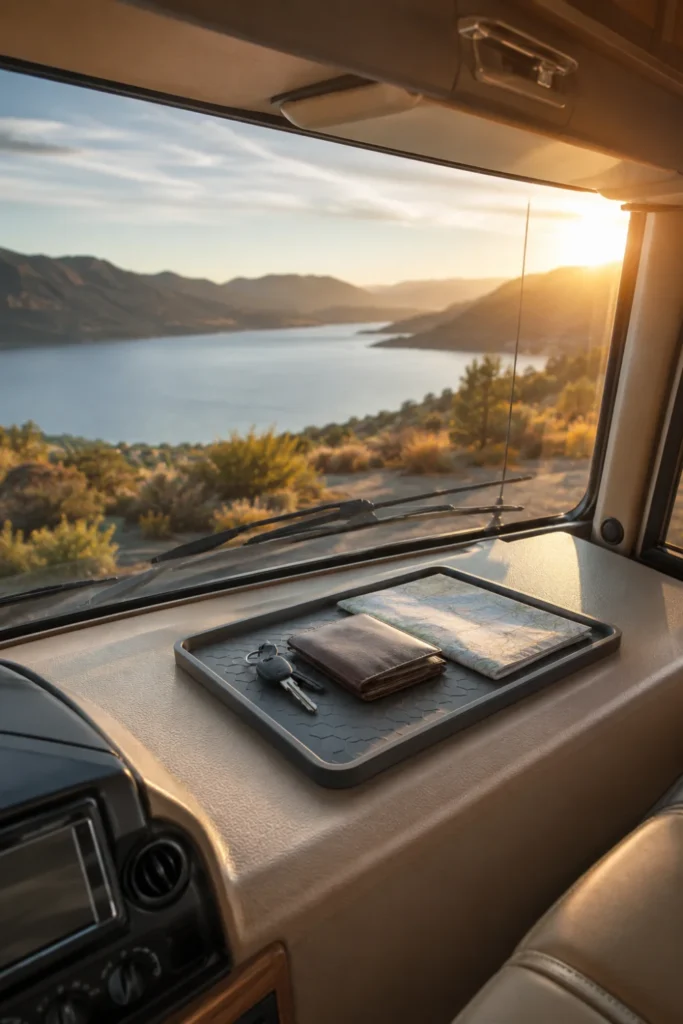
The massive flat dashboard area in a motorhome usually sits idle once you park at a campsite for the week. Placing sticky silicone trays across this vinyl surface creates a stable zone for daily gear.
- Keep sunglasses, state park passes, and map booklets within arm’s reach.
- Prevent plastic items from sliding around due to the non-slip textured base.
- Wash the trays with warm water to restore the stickiness instantly.
Utilizing the cockpit dashboard during extended camp stays keeps your main living room tables clear of daily pocket clutter.
20. Fasten Threaded Bungee Cord Barriers Across Open Bookshelves
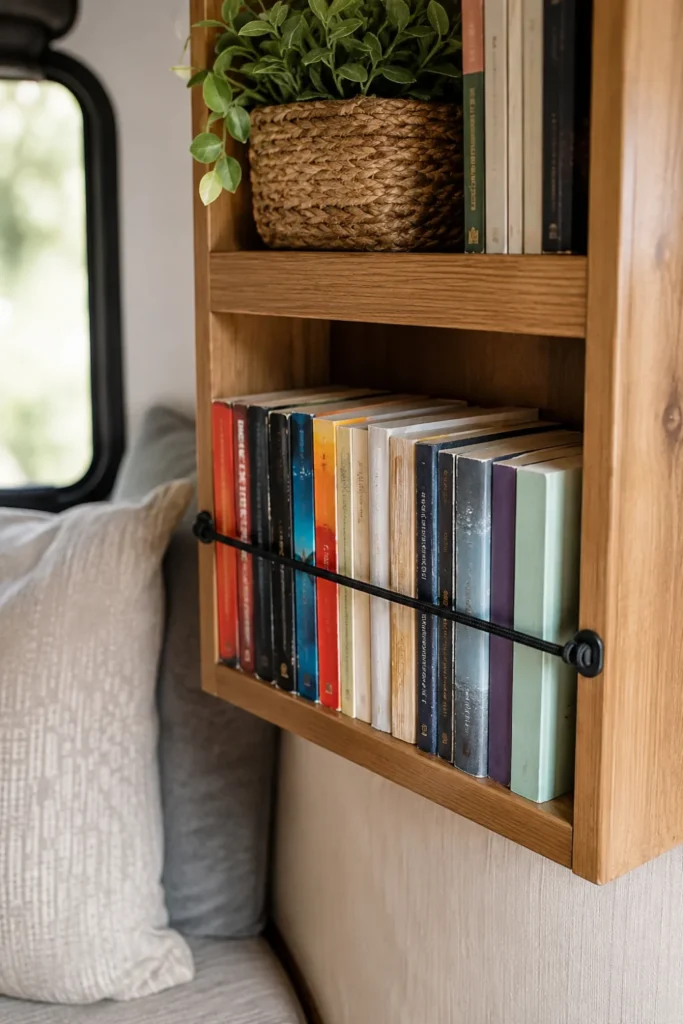
Open storage ledges look bright and airy when parked, but turning a corner on a mountain highway will launch your books straight onto the floor. You can secure these items without hiding them behind solid wooden doors.
- Drill small pilot holes on the outer edge of the shelf frame.
- Thread a thick elastic shock cord through the openings horizontally.
- Tie double knots at the ends to maintain high tension.
This flexible barrier keeps your novels and decorative items safely pinned to the wall while allowing you to pull them out with one hand when relaxing.
📌 Good To Know
Pull the bungee cord taut before knotting it. Over time, heavy books leaning against the elastic line will stretch it out, so starting with high tension prevents future sag.
21. Replace the Deep Dual Sink Basins with a Single Shallow Basin and Matching Cutting Board Cover
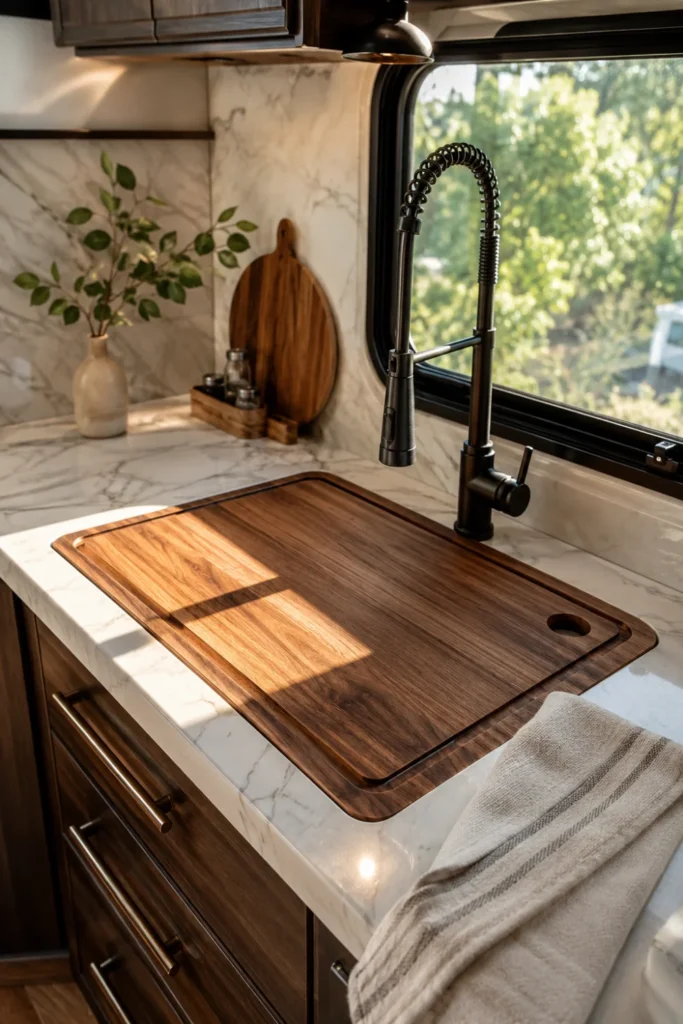
Factory double sinks split your kitchen wash area into two cramped spaces where a standard frying pan cannot lay flat. Swapping that unit for a wide, single basin instantly improves kitchen function.
- Gain room to wash large pots and bowls easily.
- Create extra workspace by placing a fitted wooden cover over the opening.
- Hide dirty dishes quickly from view before travel days.
This adjustment gives you maximum workspace in a tiny galley kitchen layout.
22. Slide Low-Profile Wire Baskets Beneath the Main Living Area Sofa Base
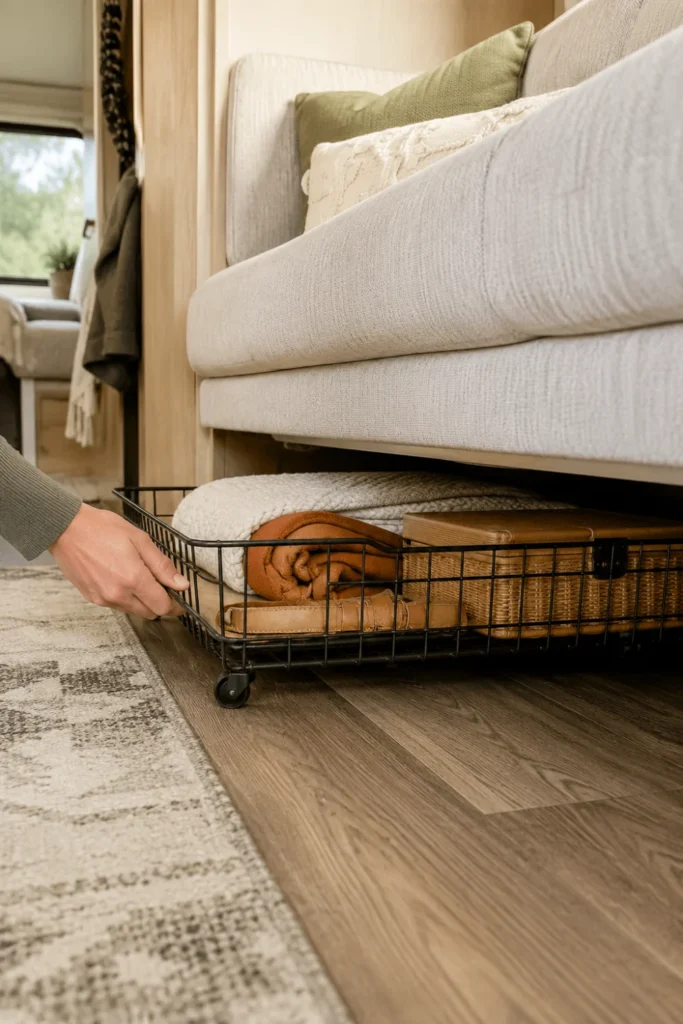
The dark void under a jackknife sofa frame or stationary dinette seat bench is a classic target for wasted space. Sliding shallow wire containers into this bottom gap keeps things organized.
- Measure the height from the floor carpet to the lowest metal support rail.
- Choose bins with smooth plastic glides to protect your flooring.
This layout keeps extra footwear and heavy dog food bags completely out of sight but within easy reach.
What to grab first
23. Fasten Aluminum T-Tracks Under Upper Cabinets to Slide Hanging Storage Jars
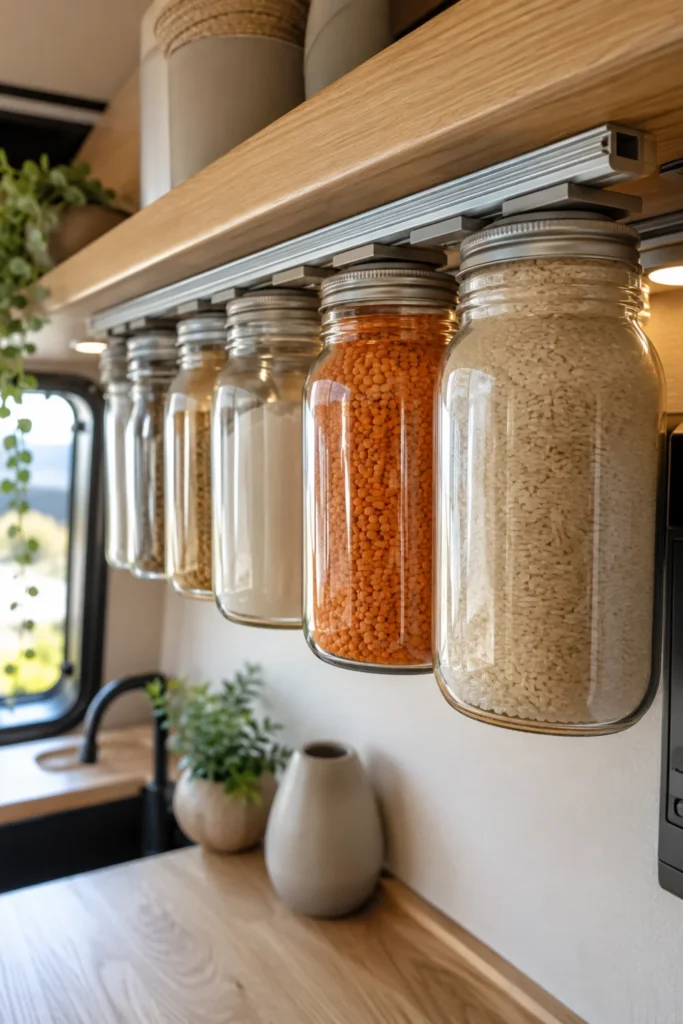
The underside of your upper kitchen cabinets offers a great opportunity to free up crowded spice drawers. Adding lightweight metal rails lets you slide storage containers right beneath the cabinets.
| Jar Material | Weight | Visual Clarity |
| Plastic Jars | Ultra-lightweight | High transparency |
| Glass Jars | Heavy downforce | Risk of breaking |
This simple modification leaves your lower drawer space free for heavy pots and cooking utensils.
Spices clattering loosely inside dark plastic bins, making it tough to read the labels while cooking dinner.
Jars hanging neatly in rows under the upper cabinets, easily sliding out along aluminum track channels.
24. Convert an Unused Top Bunk Frame into a Dedicated Walk-In Closet Organizer Hub
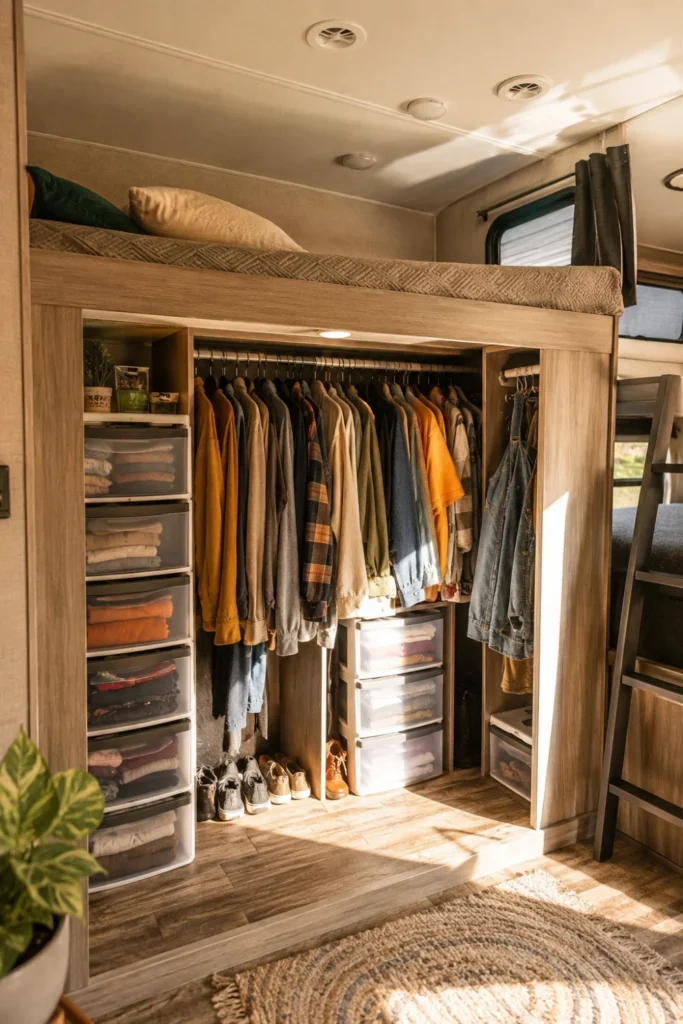
If you travel as a couple without kids, that upper bunk mattress space becomes a messy catchall for empty bags. Removing the cushion lets you build a highly functional wardrobe area.
- Hang a lightweight clothes rail across the upper ceiling rafters.
- Place clear plastic storage bins side by side on the solid wood deck.
- Secure the containers with quick-release cargo nets for safe driving.
This renovation provides massive storage space without changing the structural layout of the rig.
Unscrew the factory mattress safety rails and lift out the soft cushion pad.
Secure plastic multi-drawer towers directly to the plywood base platform using small brackets.
Mount a slim tension rod across the front edge to hold hanging coats in place.
25. Screw Sturdy Canvas Pocket Organizers Directly to the Exposed Bed Box Frame
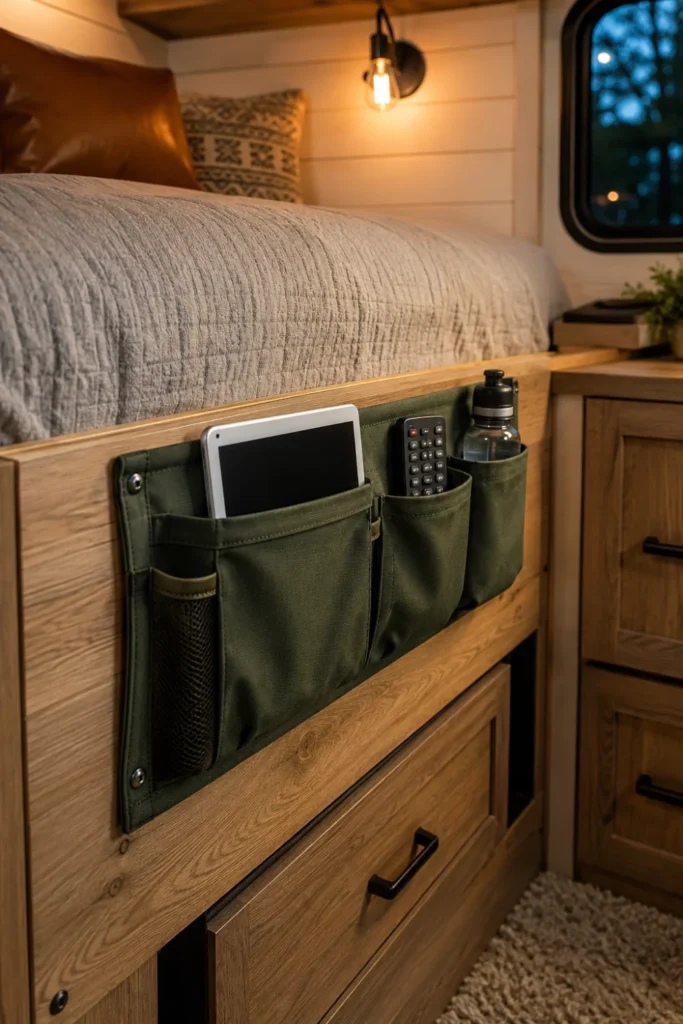
The vertical wooden sides of your master bed platform are perfect spots for adding zero footprint storage containers. Fastening heavy fabric pocket grids right to this plywood face organizes daily essentials.
- Hold items like remote controls, tablets, and flashlights securely.
- Keep the main floor pathway entirely clear of clutter.
This trick places your nightly necessities right at your fingertips without the need for bulky wooden tables.
26. Replace Heavy Box Springs with Low-Profile Wooden Ventilation Slats
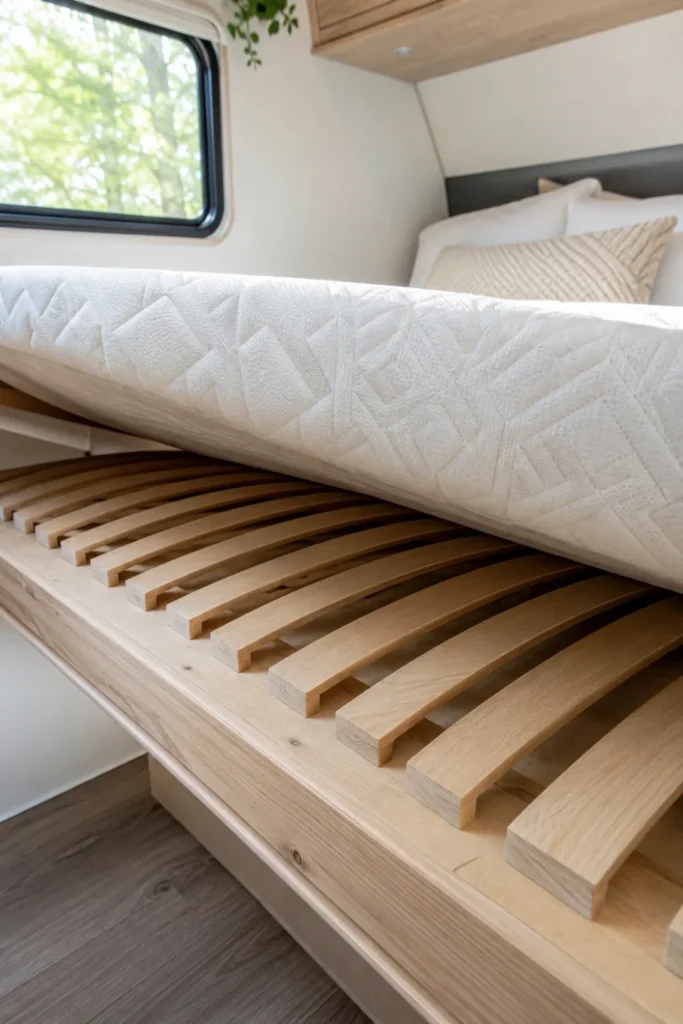
Factory mattress foundations take up massive amounts of height and limit your overhead space. Switching to arched wooden bed slats offers a smarter solution.
- Reduces overall bed platform weight by up to forty pounds.
- Creates a continuous path for air to flow under the mattress.
- Prevents harmful moisture buildup and mold growth in humid climates.
This change yields more headroom while keeping your sleeping area completely dry and comfortable.
| Foundation Type | Airflow Performance |
|---|---|
| Solid Factory Box | Zero airflow, traps mattress moisture underneath |
| Flexible Wooden Slats | Continuous ventilation, keeps fabric dry |
27. Nest Stackable Acrylic Drawers Inside the Deep Cavity Under the Bathroom Sink
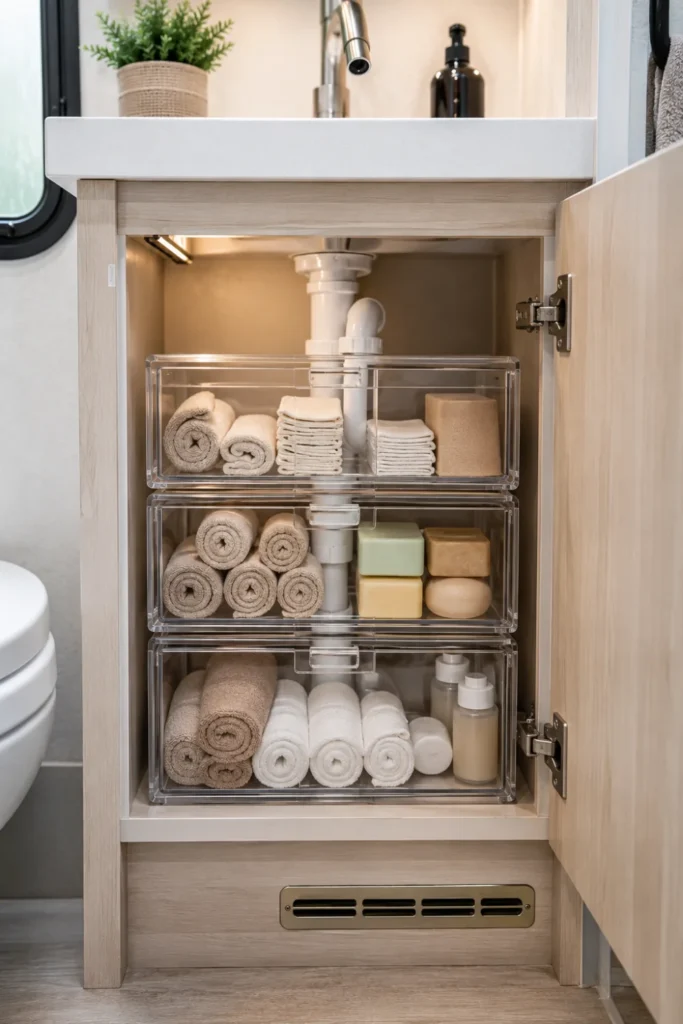
The plumbing layout under a tiny camper bathroom sink is often an unorganized mess of plastic pipes and loose bottles. Dropping clear plastic drawer units into this area brings instant structure.
- Slide clear storage towers around the existing drain pipes carefully.
- Label every individual drawer for items like first aid supplies and soap.
This quick update ensures your daily essentials are always easy to find during busy morning routines.
Measure clear spaces carefully around the main P-trap pipe setup.
Use transparent plastic drawers so you can identify contents instantly.
Do not force drawer towers tightly against flexible hot water lines.
Avoid leaving the storage drawers unlocked before driving down the road.
Please let me know when you are ready to proceed with Stage 5 for the final article conclusion and the soft Pinterest save call to action.

