
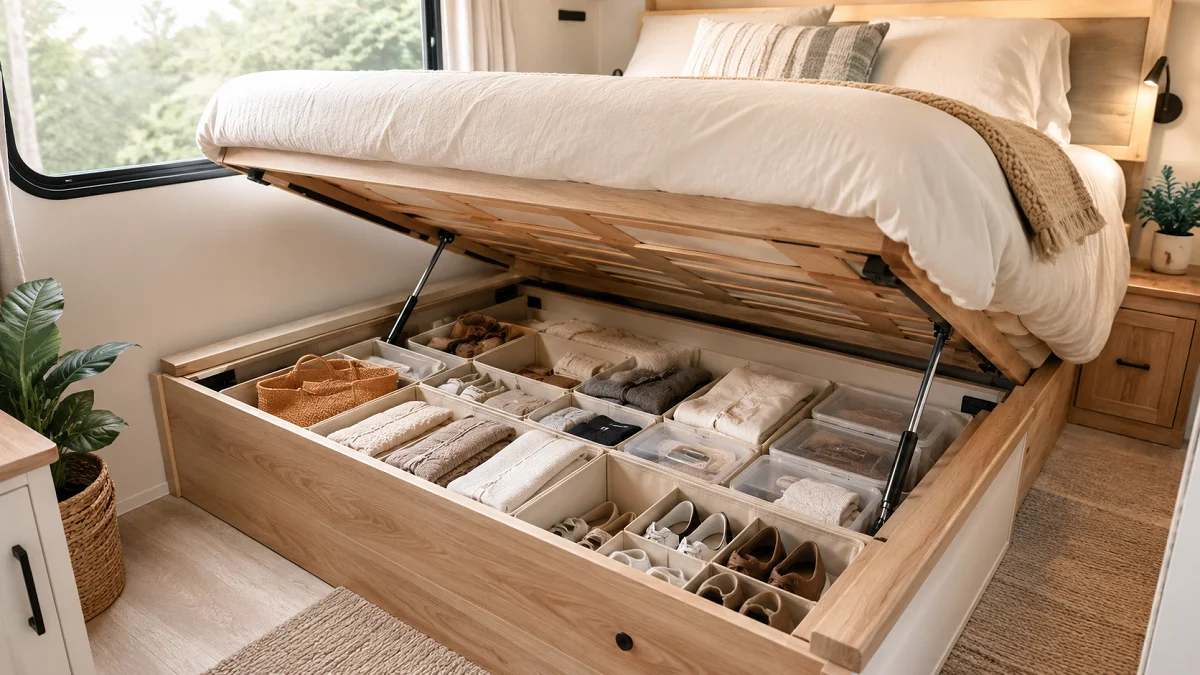
Every RV owner knows the frustration of lifting up a heavy mattress only to find a dark, chaotic pit of loose gear. When floor space is at a premium, the area underneath your bed is prime real estate, but without a clear system, it quickly turns into an unreachable junk drawer.
Most stock rigs leave this cavity as one wide-open box. That seems great until your extra blankets, spare tools, and shoes shift into a tangled mess every time you drive down a bumpy road.
Finding smart RV under bed storage ideas isn’t about buying dozens of plastic tubs and hoping for the best. It comes down to creating quick-access zones, securing your gear against road movement, and protecting your rig from moisture built-up in dark corners.
Here are 19 practical, space-tested solutions to transform that awkward under-bed void into a clean, organized layout you can actually use.
1. Swap Bulk for Vacuum Bags (With a Breathable Buffer)
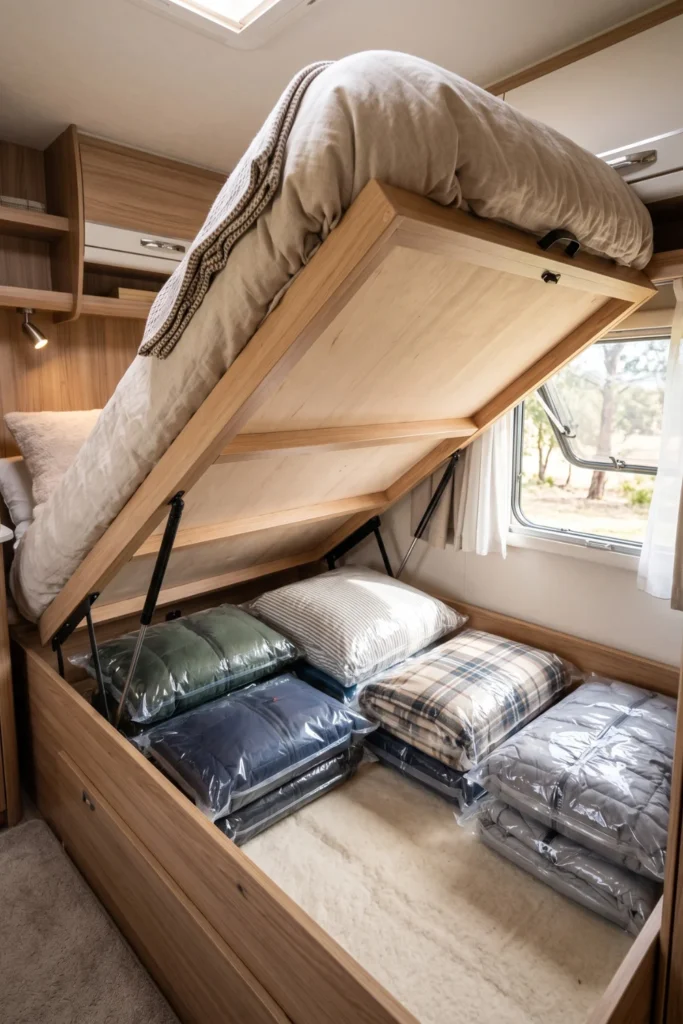
Storing bulky winter coats, extra pillows, or seasonal duvets under the bed usually swallows up half your total storage capacity in one move. Vacuum-seal compression bags pull out the trapped air, shrinking fluffy items down to flat, stackable tiles.
Instead of stacking sealed bags directly onto the cold plywood base, place a thin cotton sheet or felt layer underneath them. Cold camper floors combined with trapped air inside plastic bags can create hidden condensation spots during winter travels.
- Best items to seal: Down jackets, guest pillows, thick winter blankets, extra sheets.
- Packing rule: Group items by season so you only unseal one bag at a time.
- Space payoff: Reduces soft-goods volume by up to 70 percent.
💡 Quick Tip
Keep a compact 12V hand pump or low-draw vacuum in your utility kit so you can re-compress your storage bags while dry camping off-grid.
2. Install Hydraulic Gas Struts Before You Buy Bins
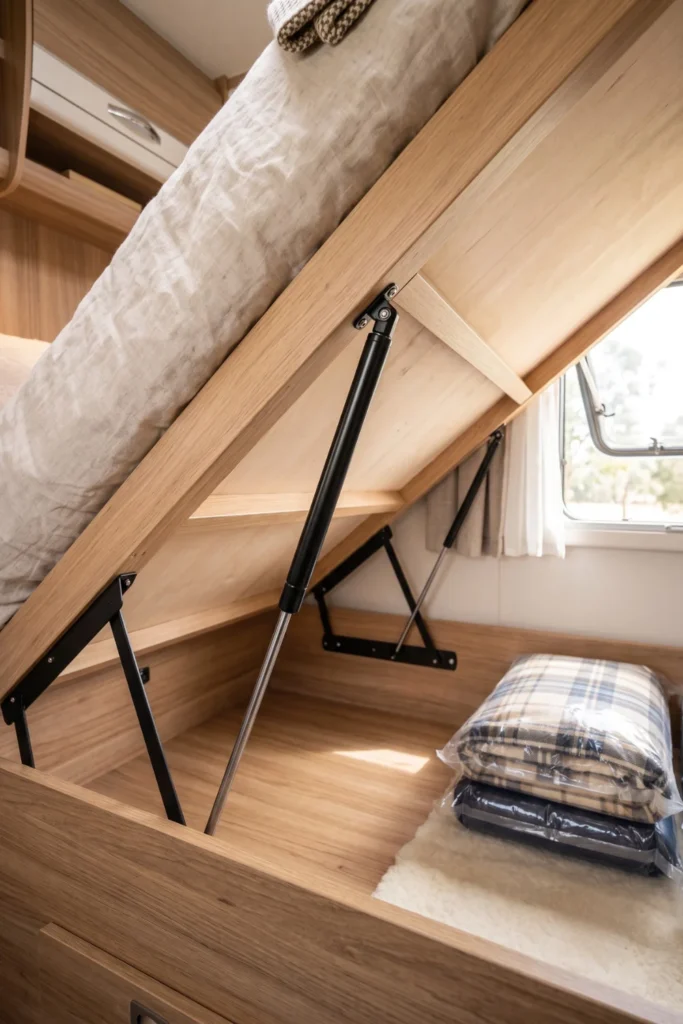
Trying to hold up a heavy RV mattress with your head while digging for a spare pair of shoes is a recipe for a sore neck. Upgrading to heavy-duty hydraulic gas struts turns a two-person lift into a smooth, one-handed motion.
Before ordering hardware, weigh your mattress, especially if you replaced the thin factory pad with a heavy memory foam topper. Struts are rated by force pounds, so selecting the correct strength keeps the platform stable whether open or closed.
| Mattress Type | Recommended Strut Force (Per Pair) | Best Mounting Position |
| Stock Factory Foam | 80 lbs – 100 lbs | Mid-frame pivot point |
| Heavy Memory Foam | 120 lbs – 150 lbs | Upper third of platform |
| Residential Hybrid | 150 lbs + (with reinforced frame) | Dual side-mount anchors |
3. Build Canvas Soft-Box Cubbies for Daily Clothes
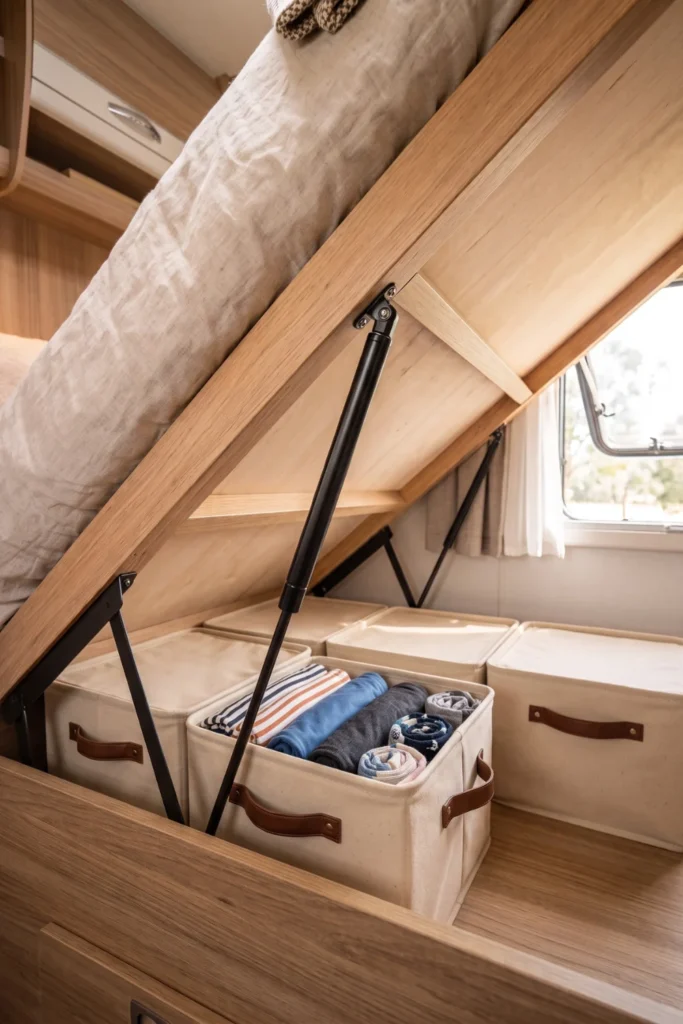
Hard plastic bins are durable, but their rigid edges waste valuable inches along curved RV walls or near internal wiring harnesses. Fabric soft-sided bins bend slightly around odd obstacles without cracking or scuffing the interior finish.
Label the outside handles of each canvas box so you can pull out folded shirts or extra socks without lifting the main bed platform every single morning.
- Measure the exact height clearance between the floor and the bed frame ribs.
- Select canvas bins with reinforced front handles for quick pulls.
- Group everyday items by category rather than owner for faster sorting.
Loose clothes piled into dark corners, sliding around during turns and trapping dust under the bed frame.
Neatly categorized soft cubbies that glide smoothly, keeping outfits organized and instantly accessible.
4. Add Heavy-Duty Full-Extension Drawer Slides
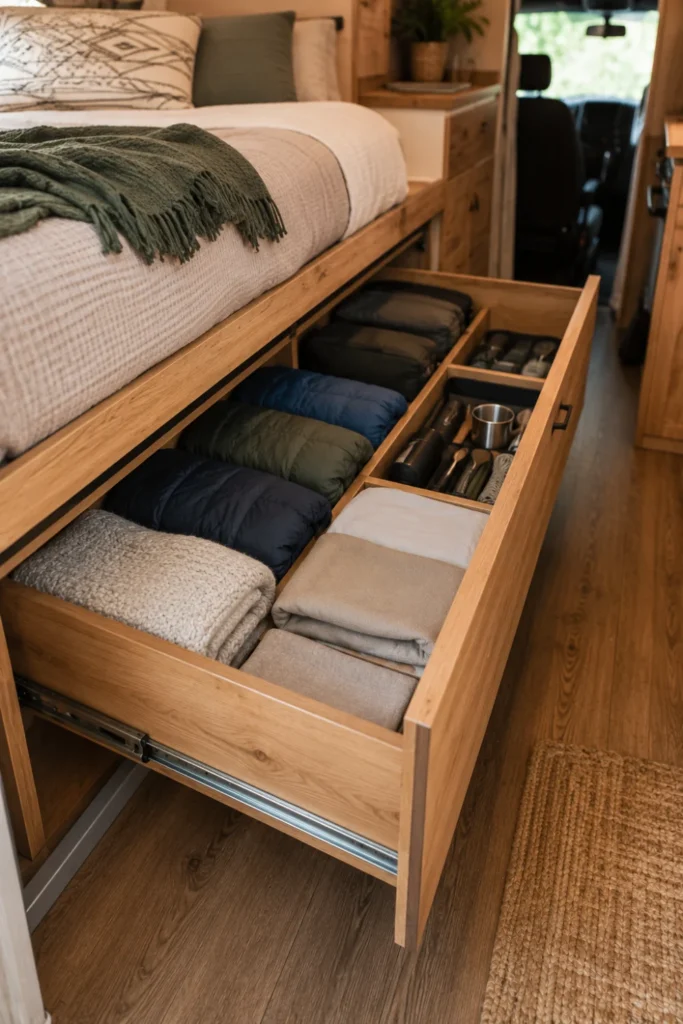
Reaching into the back section of an under-bed cavity requires deep leaning and awkward bending. Installing full-extension drawer slides allows you to pull the entire storage tray out into the aisle.
Mount the slide rails directly into the bed frame studs or base framing. Heavy-duty ball-bearing slides ensure the drawer opens smoothly even when loaded with heavy gear or pantry overstock.
- Slide Rating: Choose runners rated for at least 100 lbs.
- Latch Lock: Add a simple push-latch to keep drawers closed while driving.
- Floor Guard: Keep half an inch of clearance underneath the tray so it glides over rug edges easily.
5. Create a Low-Profile Shoe Matrix with Plywood Dividers
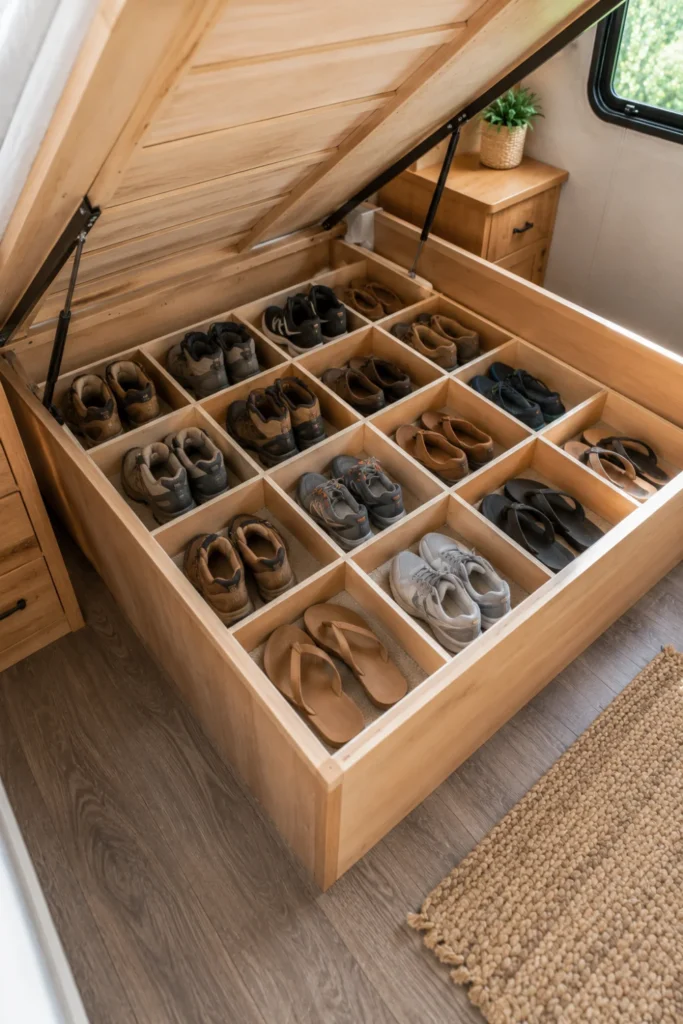
Shoes are notorious for turning into a chaotic pile at the bottom of an RV closet or under the bed. Building a custom grid matrix using thin quarter-inch plywood keeps every pair paired up and visible.
Measure your footwear height to set your grid spacing correctly. Hiking boots need wider slots, while sandals and flip-flops can double up inside narrow channels.
- Slot Size: 8 inches wide for boots, 5 inches for sneakers.
- Divider Material: Lightweight birch plywood keeps total rig weight low.
- Finishing: Sand edges smooth to prevent snagging socks or fabric liners.
6. Anchor Tension Rods to Keep Plastic Bins from Sliding
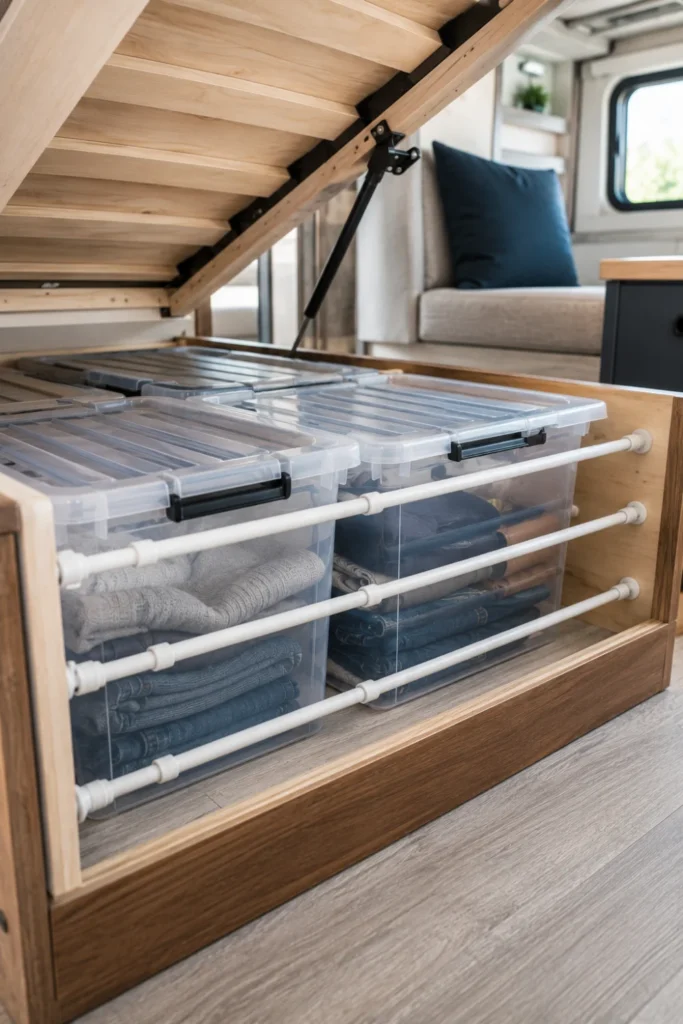
Plastic totes glided easily across smooth plywood when parked, but sharp highway turns send them crashing into your internal bed frame walls. Securing them doesn’t require complex carpentry—a few spring-loaded tension rods create custom bumper rails to hold everything in place.
Position the rods horizontally along the base of your bed cavity. They act as light structural retainers that lock bins in their assigned slots while remaining easy to snap out when you want to reconfigure your storage layout.
What to grab first
7. Mount Under-Platform Cargo Nets for Light Gear
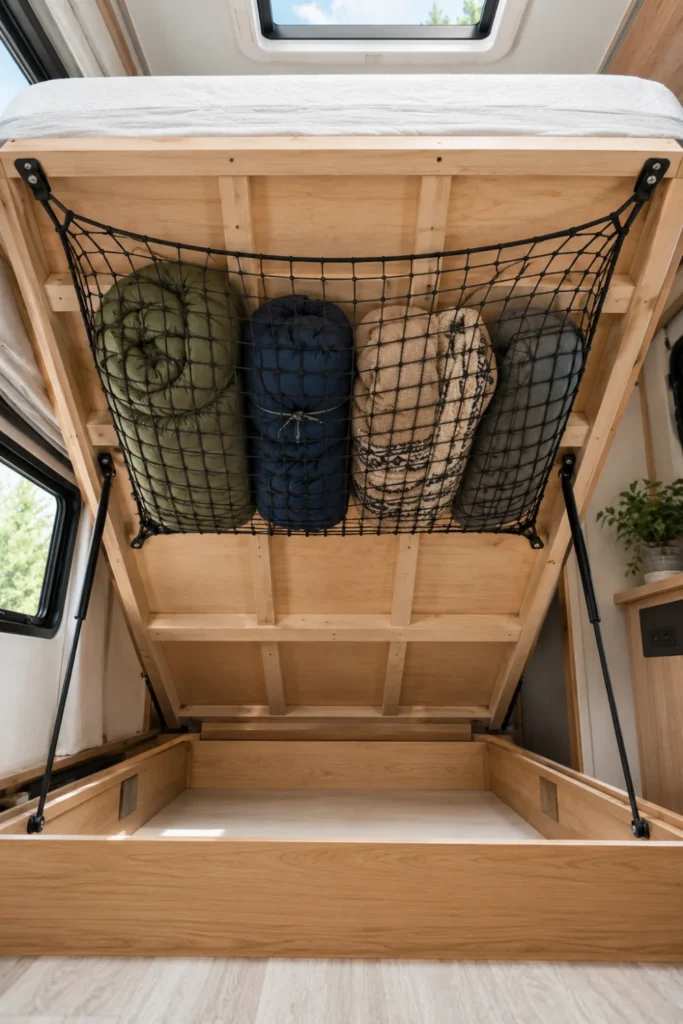
The underside of the liftable bed platform is often overlooked. Attaching elastic cargo netting directly to the plywood underside creates a hammock-style zone for storing flat, lightweight soft goods.
This keeps bulky but featherlight items—like sleeping bags, extra towels, or rain jackets—completely off the main under-bed floor, leaving the floor open for heavy boxes and hardware.
- Best Items: Extra pillows, winter jackets, light blankets, foam pads.
- Fastening Strategy: Use wide-head pan screws with washers so the netting clips don’t pull through the plywood under weight.
- Clearance Rule: Make sure cargo items sit flat against the platform so they clear your floor bins when the bed closes.
Cargo netting doubles your storage area by turning dead overhead space into a secure hammock for lightweight items.
8. Split the Bed Base into Dual-Access Zones
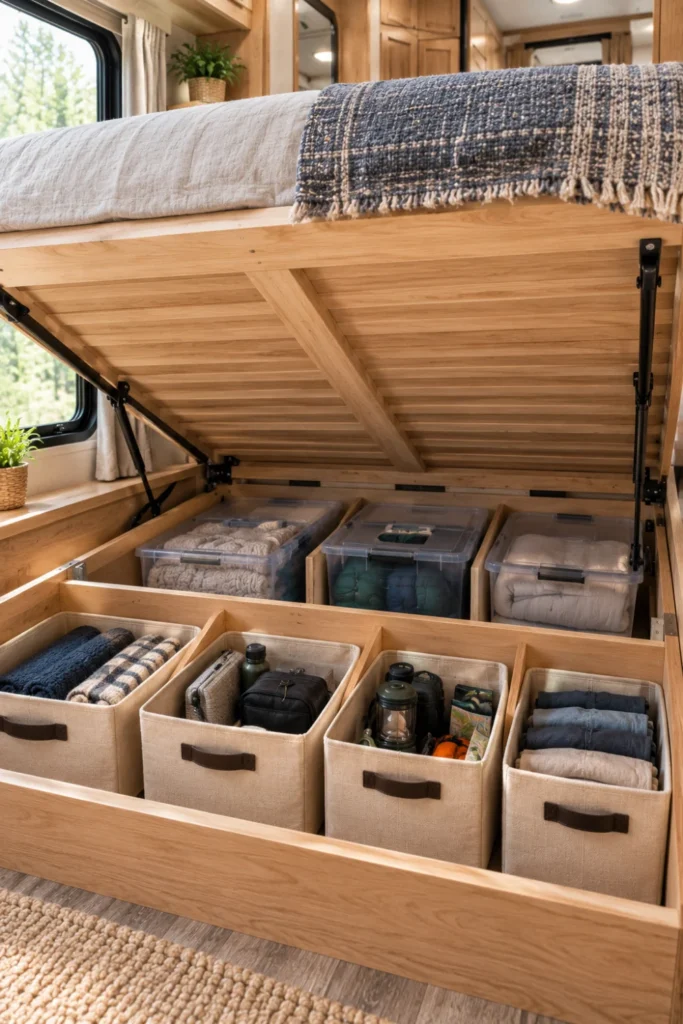
Lifting the mattress every single time you need a small item gets tiring fast. Splitting your under-bed cavern into two distinct access zones makes your layout much more practical for daily living.
Place infrequently used items—like off-season clothes or surge protectors—toward the deep back center. Position daily necessities along the front perimeter where you can reach them through small hatch doors or slide-out drawers without lifting the mattress.
- Zone 1 (Outer Perimeter): High-frequency items accessed via outer side flaps or drawers.
- Zone 2 (Mid-Cavity): Weekly gear reached by lifting the main platform halfway.
- Zone 3 (Deep Wall): Seasonal equipment and long-term spares placed along the back wall.
Map your gear by frequency: daily, weekly, or seasonal access.
Install vertical plywood dividers to separate access zones cleanly.
Load deep-zone seasonal gear first before packing daily items in front.
9. Use Clear Drop-Front Boxes for Off-Season Wear
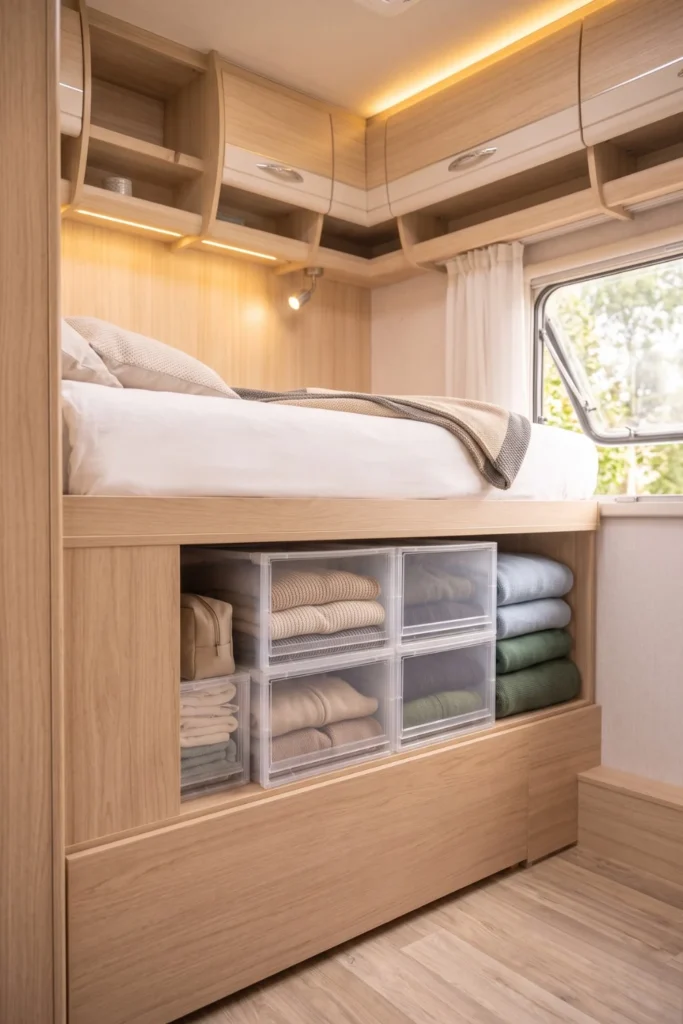
Standard plastic tubs force you to unstack every box on top just to grab one sweater from the bottom tub. Stackable drop-front shoe or sweater boxes fix this issue completely.
The front door swings open on a hinge, giving you direct access to stacked contents. Made from rigid clear plastic, they let you check what’s inside at a glance while keeping clothes safe from road dust.
Use rigid drop-front boxes with magnetic latches.
Stack units vertically to utilize total cavity height.
Standard snap-top tubs that lock from the top rim.
Soft bags that collapse and block access when stacked.
10. Line the Floor Base with Anti-Slip Rug Underlay
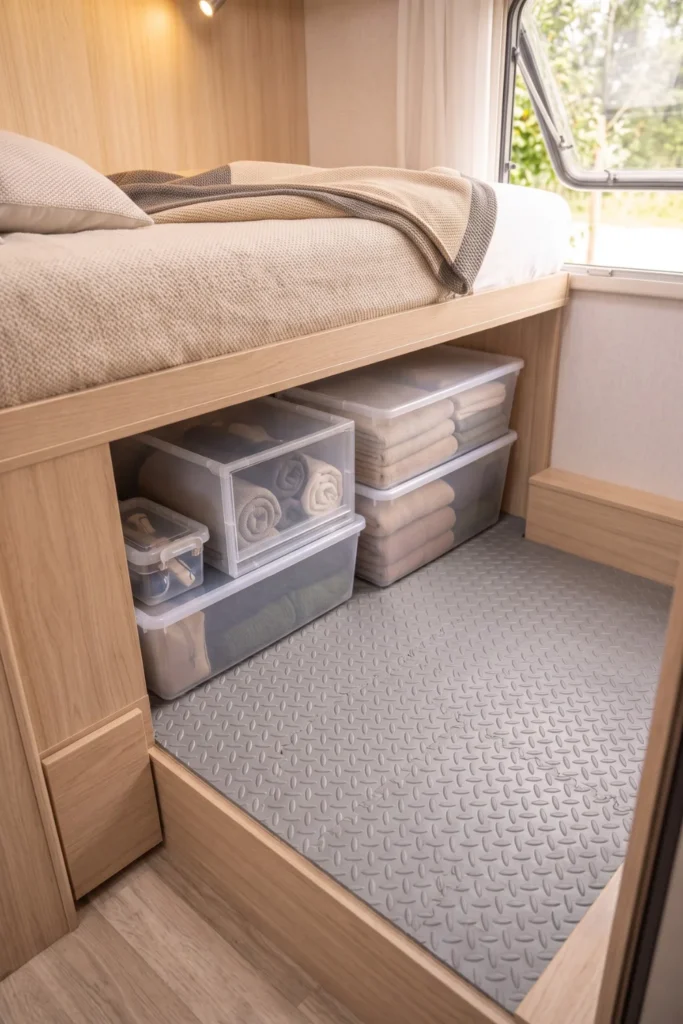
Hard plastic boxes sliding across raw plywood while driving make an annoying rattling noise. Over time, that constant rubbing scuffs up the wood and creates fine sawdust inside your storage space.
Lining the bed cavity floor with a cheap grip liner or rubberized rug underlay instantly stops shifting. It cushions your gear and dampens road vibration while traveling.
- Material: Non-adhesive rubberized foam mesh or thin marine carpet.
- Maintenance: Easy to pull out and shake clean during seasonal deep cleans.
- Bonus Benefit: Provides a mild thermal layer over metal wheel wells or uninsulated floors.
⚠️ Watch Out
Avoid adhesive-backed liners on raw plywood. RV interior temperatures can soar in summer storage, melting the glue into a sticky residue that ruins wood surfaces.
11. Mount Flat Rolling Under-Bed Carts with Rubber Wheels
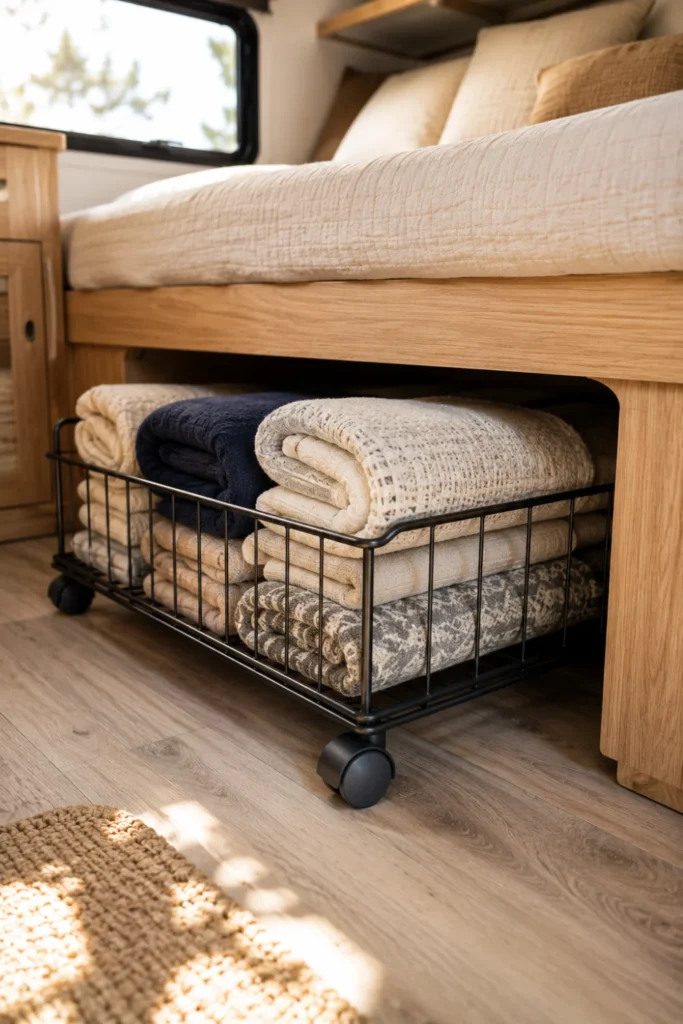
Rolling storage carts sound convenient, but rigid plastic wheels often drag and scratch up finished RV vinyl or laminate flooring. Swapping to wide-track rubber casters ensures smooth movement without leaving scuff marks behind.
Choose ultra-low-profile carts that hover just half an inch above the floor. Rubber wheels grip the surface gently, keeping the cart from rattling or sliding around while driving down bumpy highways.
| Wheel Feature | Rigid Plastic Casters | Soft Rubber Roller Wheels |
| Floor Impact | Scratches and indents soft vinyl | Glides smoothly without leaving marks |
| Road Noise | Rattles constantly over road bumps | Cushions vibration and reduces travel noise |
| Movement Control | Tends to drift sideways on turns | Tracks straight into its under-bed slot |
| Feature | Standard Plastic Wheels | Soft Rubber Casters |
|---|---|---|
| Floor Protection | Scratches interior vinyl floor finish | Glides safely over vinyl, laminate, or wood |
| Rattle Dampening | Noisy over bumps and gravel roads | Absorbs shock and stays quiet while towing |
12. Install Hinged Hatch Panels for Quick Side Access
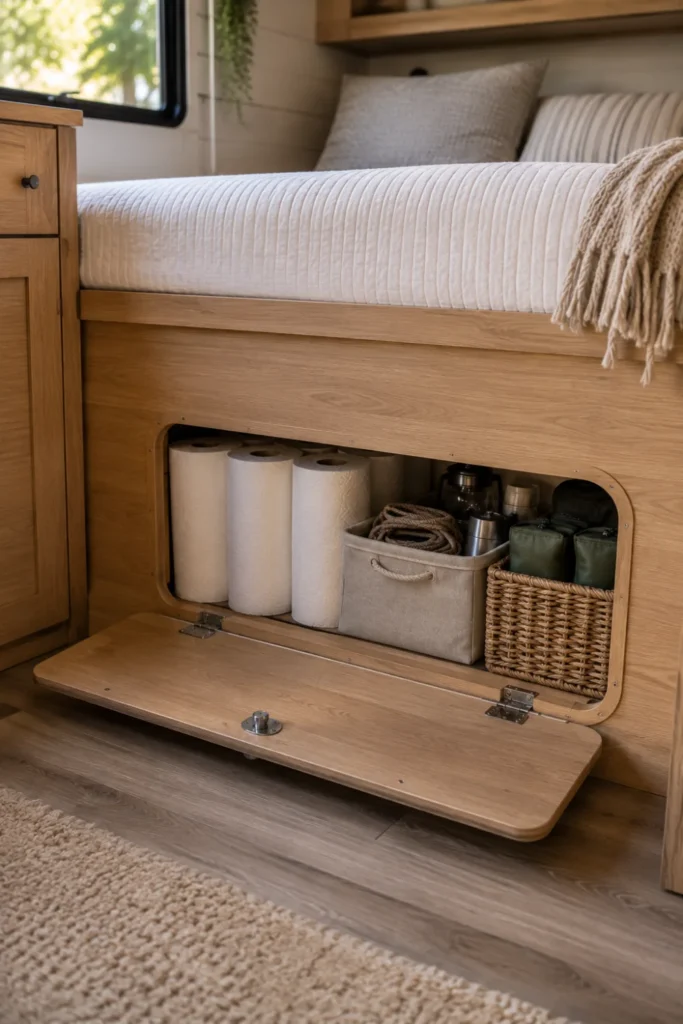
Lifting a heavy mattress and mattress topper just to grab a small item quickly becomes annoying. Installing side hatch panels on the front face of your bed frame gives you instant access to daily gear from the main walkway.
Cut out a section of the bed box face, trim the edges with vinyl moulding, and reattach the panel with concealed cabinet hinges. Secure the door with a magnetic touch latch for a clean finish.
- Mark Opening: Leave at least two inches of structural frame support around the border.
- Cut Panel: Use a jigsaw with a fine-toothed blade to prevent wood splintering.
- Attach Hardware: Mount soft-close hinges and a magnetic push-latch for easy opening.
Lifting the entire mattress platform every time you need extra toilet paper or a fresh towel.
Opening a discrete front hatch door to grab everyday essentials in seconds without touching the bedding.
13. Store Heavy RV Tools in Shallow Pegboard Trays
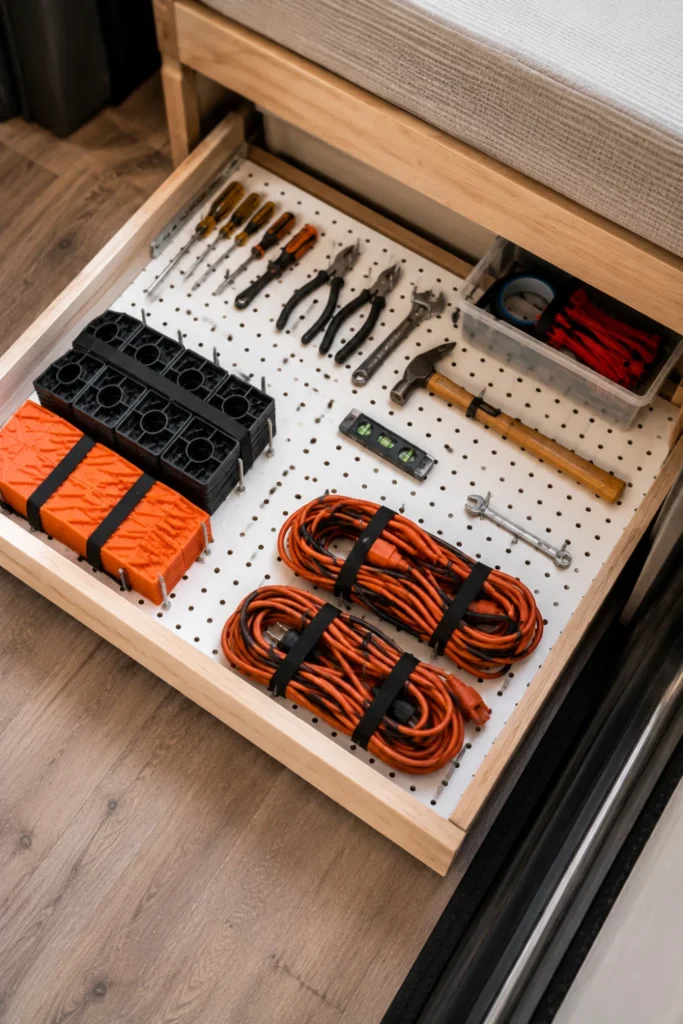
Keeping bulky toolboxes loose in your bed cavity creates heavy weight points that can slide around and damage fragile wood framing. Shallow wooden trays fitted with metal pegboards keep tools flat, organized, and anchored.
Lay hand tools, spare sewer hose adapters, and tire gauges horizontally in custom cutouts or secured with elastic bands. This keeps heavy metal items from rolling around while keeping your kit organized.
- Best Items: Leveling block pads, torque wrenches, spare water fittings, extension cords.
- Weight Rule: Place heavy tool trays directly over or near the RV floor framing joists.
- Protection Tip: Line the tray with foam rubber to keep metal tools from clinking.
14. Set Up a Sliding Laundry Hamper Frame
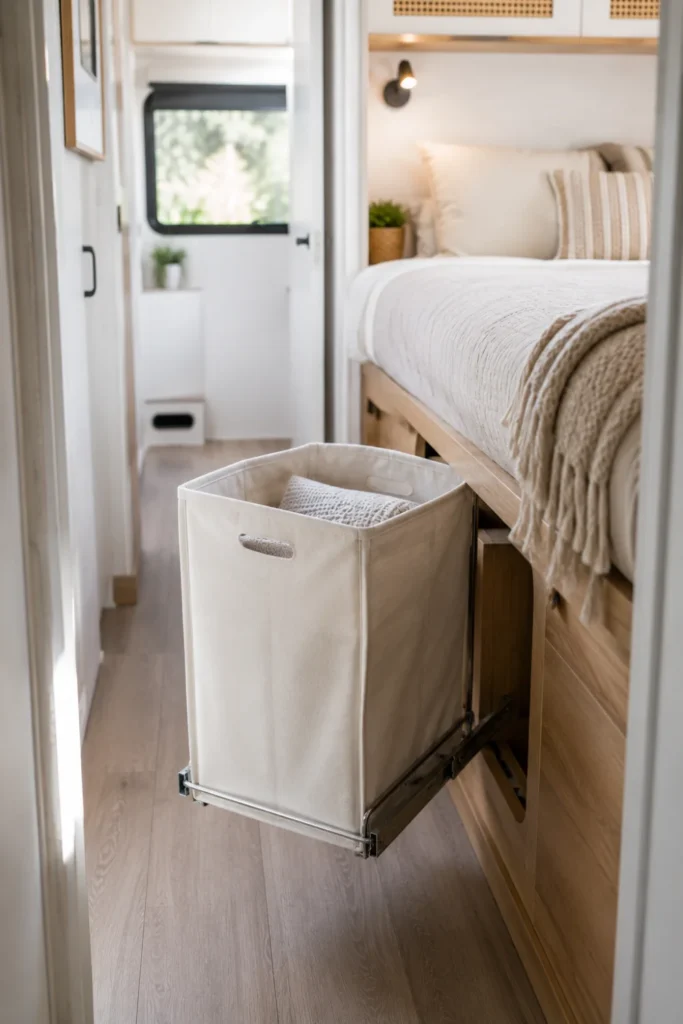
Dirty clothes quickly take over small RV spaces, clogging up hallway walkways or bedroom floor space. Mounting a sliding laundry basket system under your bed keeps hamper bags hidden away out of sight.
Build a simple wooden track frame using lightweight aluminum angle channels or wooden slide rails. A removable canvas hamper bag drops straight into the frame, allowing you to slide it out effortlessly on laundry day.
- Step 1: Measure the clearance height under your bed frame opening to pick a matching hamper size.
- Step 2: Mount two parallel aluminum channels to the bed frame ceiling or floor base.
- Step 3: Insert a canvas tote with a rigid wire top rim that glides cleanly along the tracks.
Measure under-bed cavity height to ensure your hamper leaves two inches of top clearance.
Attach two low-profile wooden guide rails to the floor using heavy-duty mounting tape or short wood screws.
Drop in a lightweight, collapsible canvas hamper bag fitted with an easy-grip pull handle.
15. Hang Elastic Cord Mesh to Tame Spare Bedding
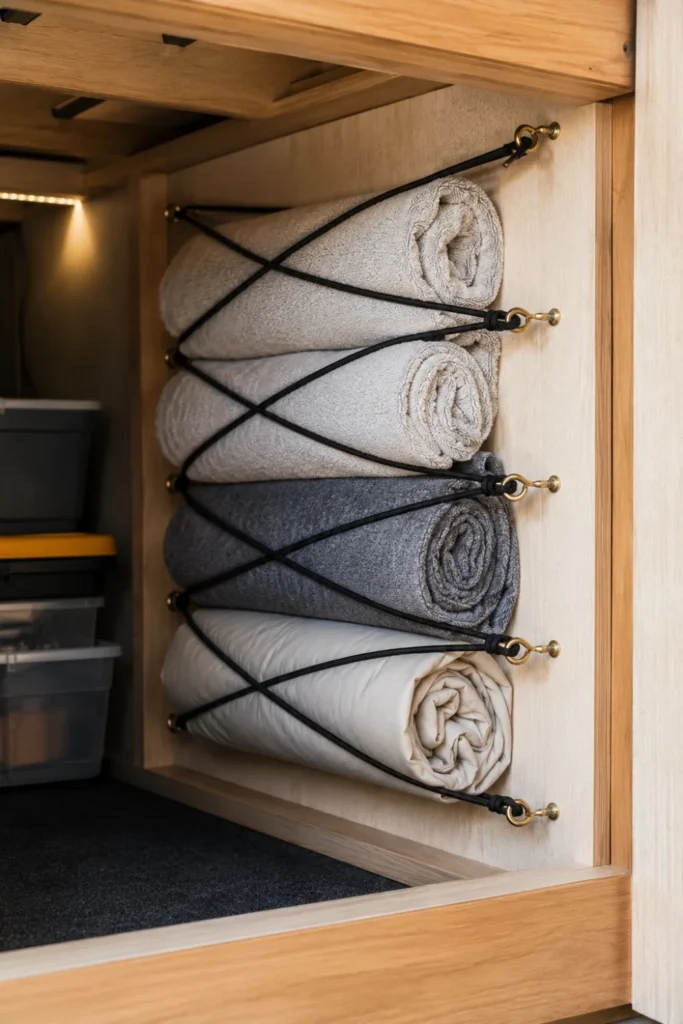
Extra bed sheets, pillowcases, and lightweight summer blankets don’t always need bulky plastic storage bins. Criss-crossing elastic shock cords across internal frame walls creates flexible web storage pockets.
These elastic mesh walls utilize vertical side spaces that usually sit empty. You can slide rolled-up sheets or spare blankets behind the cords, keeping soft items organized without taking up main floor space.
What to grab for this setup
16. Add Wooden Label Tags to Blind Storage Bins
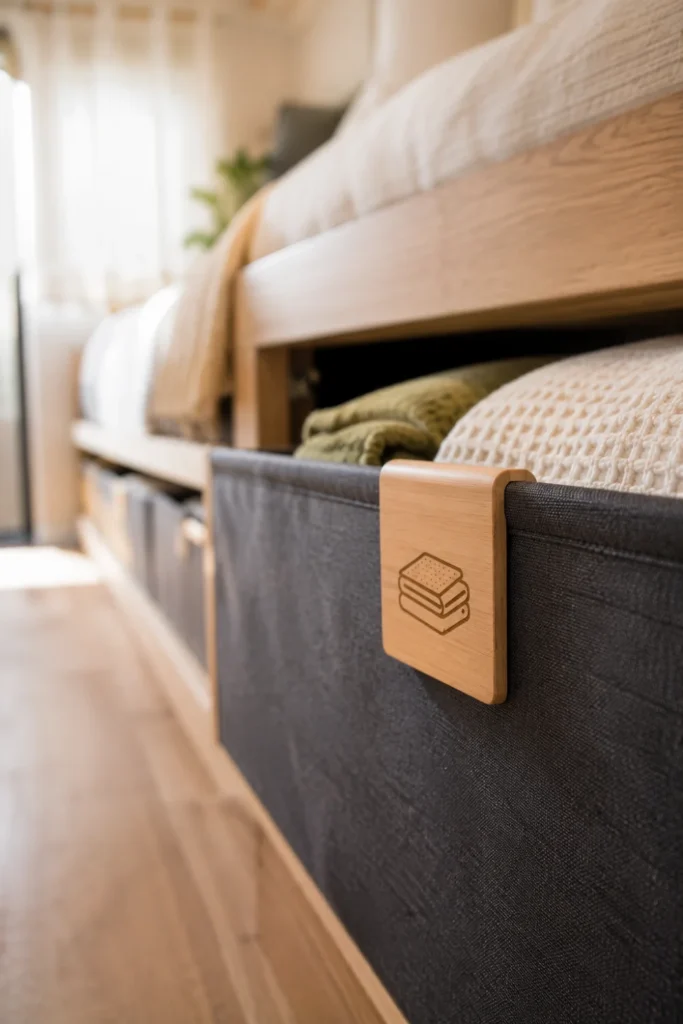
Opaque plastic bins keep your space looking clean, but they also mean you end up guessing what’s inside every single box. Adding simple wooden or chalkboard clip-on tags saves you from digging through multiple tubs just to find a spare heating pad or surge protector.
Clip the labels to the outer edge of each bin facing the main hatch door. That way, as soon as you lift the bed platform or open the side hatch, you can read your storage index at a glance.
Labeling the outer facing edge of every bin eliminates wasteful digging and keeps your under-bed layout organized long-term.
- Best Label Types: Clip-on wooden tags, chalkboard stickers, or plastic card sleeves.
- Indexing Tip: Group items by category (e.g., “First Aid & Medical,” “Extra Linens,” “Camp Gear”).
- Maintenance: Use removable chalk markers so you can update bin descriptions when seasonal gear changes.
17. Partition the Central Cavity for Seasonal Sports Gear
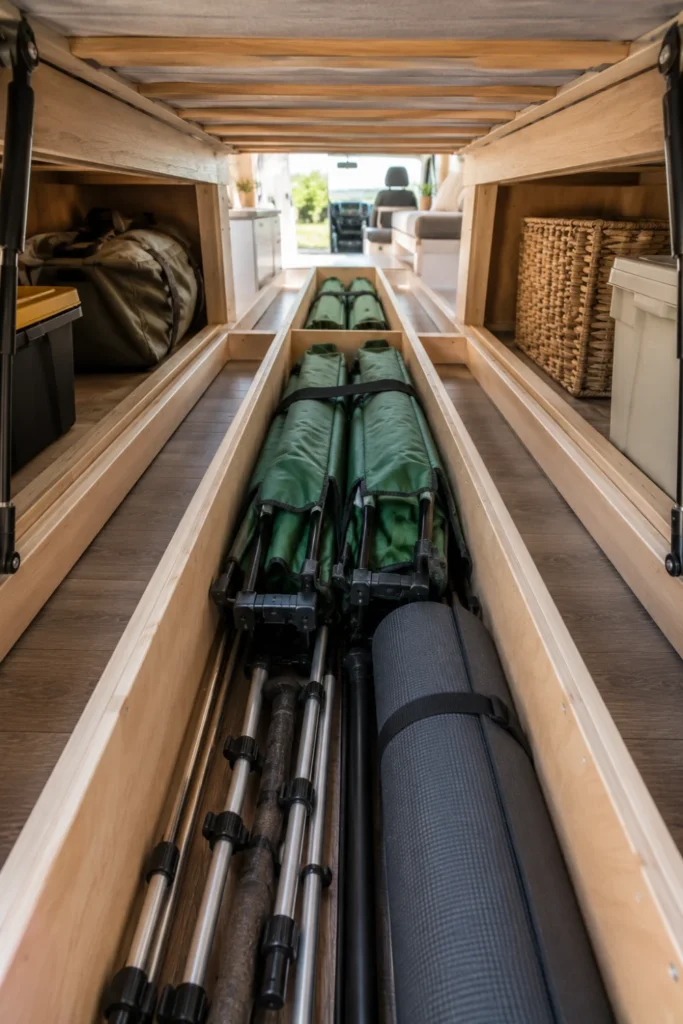
Long, awkward equipment like folding camp chairs, fishing rods, and hiking poles often ends up thrown haphazardly across the under-bed space. Installing simple vertical plywood dividers creates narrow, dedicated slots to slide these long items straight in.
This prevents long gear from lying across your smaller storage bins. It holds bulky recreational items securely in their own channels so they stay put during travel.
- Divider Spec: Use 1/2-inch lightweight plywood screwed into floor cleats.
- Protection Note: Line the rod channel with felt to protect delicate fishing reels and tackle.
- Access: Place long channels right down the center where the bed platform lifts highest.
18. Place Charcoal Moisture Absorbers in Every Corner
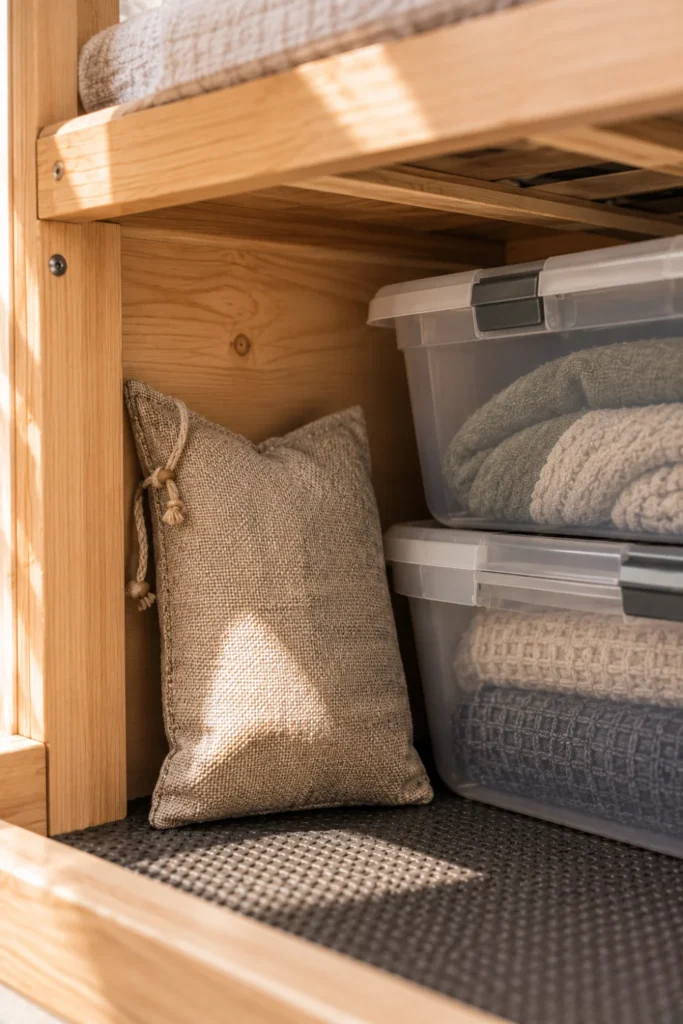
Under-bed cavities in RVs are prone to humidity buildup. Because these spaces lack active airflow and sit right above uninsulated storage bays, damp air can get trapped and lead to musty odors on bedding or clothes.
Tossing a couple of activated charcoal moisture-absorbing bags into the back corners solves this problem naturally. They trap ambient humidity without using electricity or harsh chemicals.
📌 Good To Know
Recharge your bamboo charcoal bags once a month by placing them outside in direct sunlight for two hours. This releases trapped moisture so they remain effective all season.
- Placement: Put one bag in each back corner, plus one inside large fabric storage tubs.
- Safety Advantage: Unlike liquid desiccant tubs, charcoal bags won’t spill or leak chemical fluid over your floor while towing.
- Odor Control: Continuously neutralizes damp, musty smells in enclosed wooden bed frames.
19. Convert the Headboard Dead Space into a Hidden Shelf
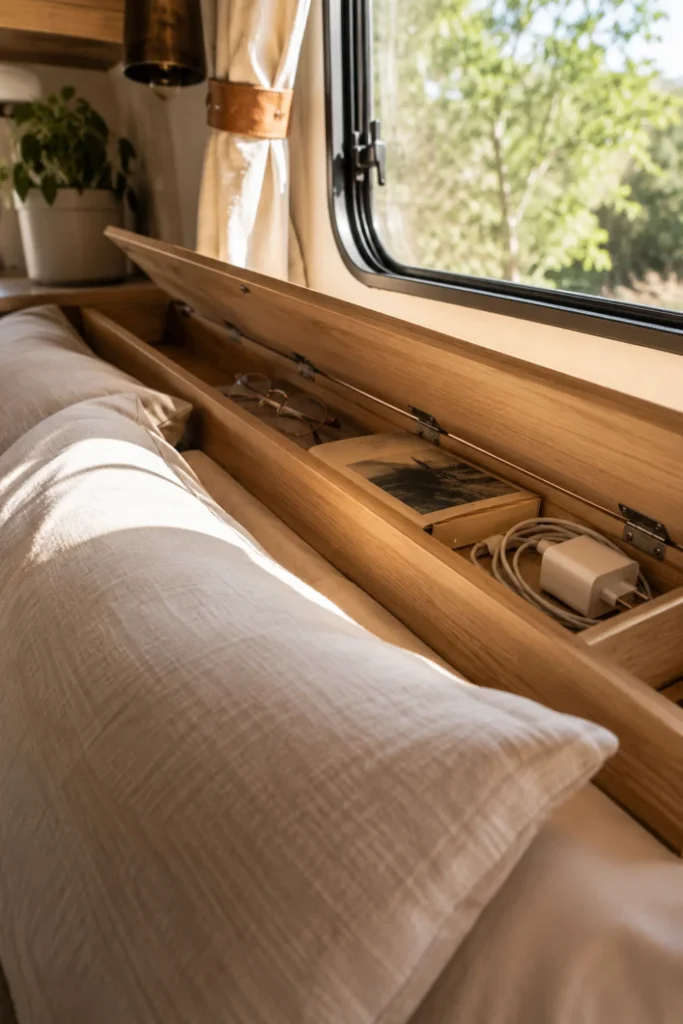
The gap between your mattress top and the back RV wall is often filled with empty framing or dead air space. Mounting a slim, top-loading storage shelf along the interior headboard wall captures extra room for small nightstand items.
This gives you a dedicated spot for reading glasses, charging cords, and books without cluttering your main under-bed cavity or tiny bedside ledges.
Build a slim 4-inch deep top-hinged box behind the mattress.
Include built-in pass-through holes for phone charging cables.
Deep shelves that block the main bed platform from lifting freely.
Unsecured open trays that spill items behind the bed while driving.
- Measure Clearance: Ensure your mattress can shift forward slightly without hitting your bedroom door frame.
- Mount Support: Fasten light pine cleats directly into wall studs using heavy-duty pocket screws.
- Finish Top: Add a flip-top lid on piano hinges to keep dust out while keeping items easily accessible.
Maximizing Your Camper Floor Plan
Organizing the space under your bed completely changes how your RV functions on the road. When every item has a dedicated spot, setting up camp becomes faster and daily routines feel far less stressful. By choosing a mix of quick-access drawers, vertical dividers, and moisture protection, you turn an awkward storage cavern into a practical, highly efficient layout.
Save this list to your RV organization board on Pinterest so you can reference these practical storage updates before your next big trip!

