
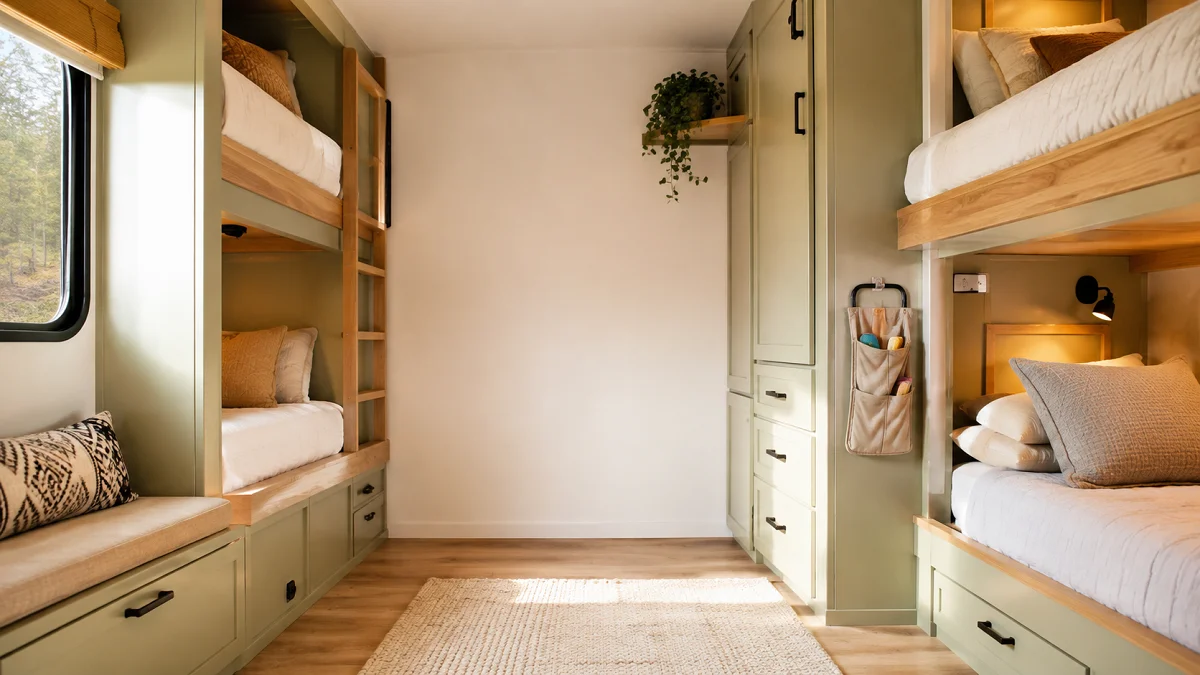
Factory RV bunkhouse layouts are built for generic mass appeal, which usually means dark paneling, flimsy mattresses, and zero personal space for growing kids. When you live or travel in a tight footprint, a cramped back room quickly turns into a cluttered chaos zone where nobody wants to hang out.
Giving this space a dedicated makeover does not require custom cabinet skills or thousands of dollars in construction. With a few smart storage tweaks, light-reflecting finishes, and custom touches, you can turn a dark sleeper area into a cozy haven your children actually look forward to keeping clean.
Here are practical, real-world rv bunkhouse remodel ideas designed to maximize every square inch of your camper while keeping your rig’s weight down.
1. Build Built-in Reading Nooks with Clip-On Gooseneck Lights
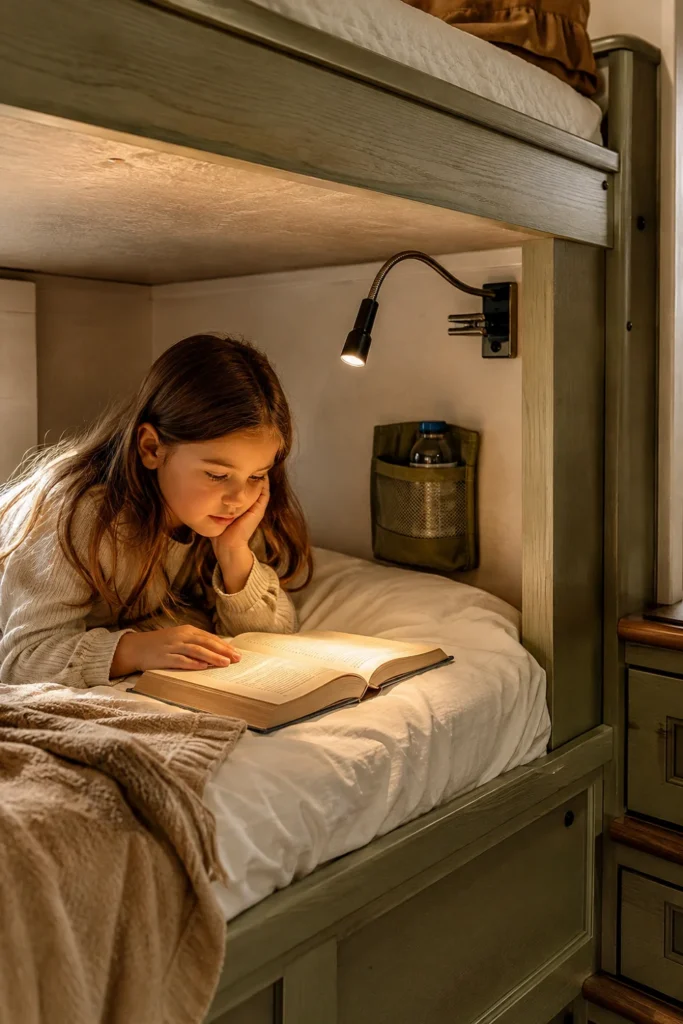
Main overhead camper lights are usually way too harsh for nighttime wind-downs, yet kids still need dedicated lighting for reading or drawing in bed.
Installing low-wattage, clip-on gooseneck lamps on the frame of each bed gives every child control over their own light source without keeping the whole room awake. Look for dimmable LED options with padded clamps so you don’t scratch the wood paneling during travel days.
💡 Quick Tip
Opt for USB-rechargeable lights over hardwired models. You won’t have to pull wire behind factory walls, and kids can detach them to use as flashlights during midnight bathroom trips.
- Mounting Height: Clamp at least 12 inches above mattress height to prevent heads from bumping it.
- Power Source: Pick 2000mAh+ rechargeable batteries to get 10+ hours of light per charge.
- Color Temp: Stick to 2700K warm white LEDs to avoid blue-light disruption before sleep.
2. Swap Factory Mattresses for Custom Cut Foam Blocks
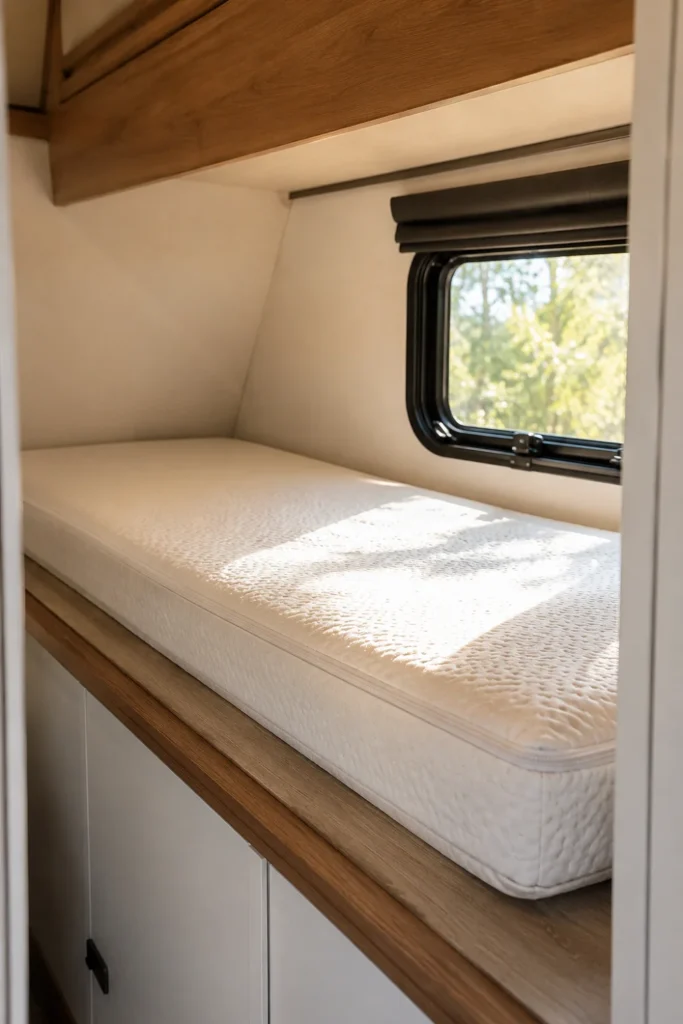
Stock RV bunk mattresses are notoriously thin, stiff, and covered in slippery vinyl or cheap poly-blend fabric that makes sheets slide off constantly.
Replacing them with high-density foam cushions wrapped in washable covers makes an instant difference in sleep quality. You can buy high-density foam blocks online and easily trim them to match odd RV bunk corners using a standard electric kitchen knife.
Thin 2-inch factory pad resting on hollow plywood. Sheets bunch up, and springs kick through after a few trips.
4-inch gel memory foam core wrapped in a zippered, machine-washable bamboo cover. Cushioned, contoured, and dead quiet.
- Measure twice: Track total length, width, and angled corner cuts precisely.
- Cut clean: Mark your lines with permanent marker and glide an electric knife along the edge.
- Protect: Wrap the raw foam in a waterproof mattress encasement before putting on cotton sheets.
3. Install Individual Curtains with Heavy-Duty Magnetic Closures
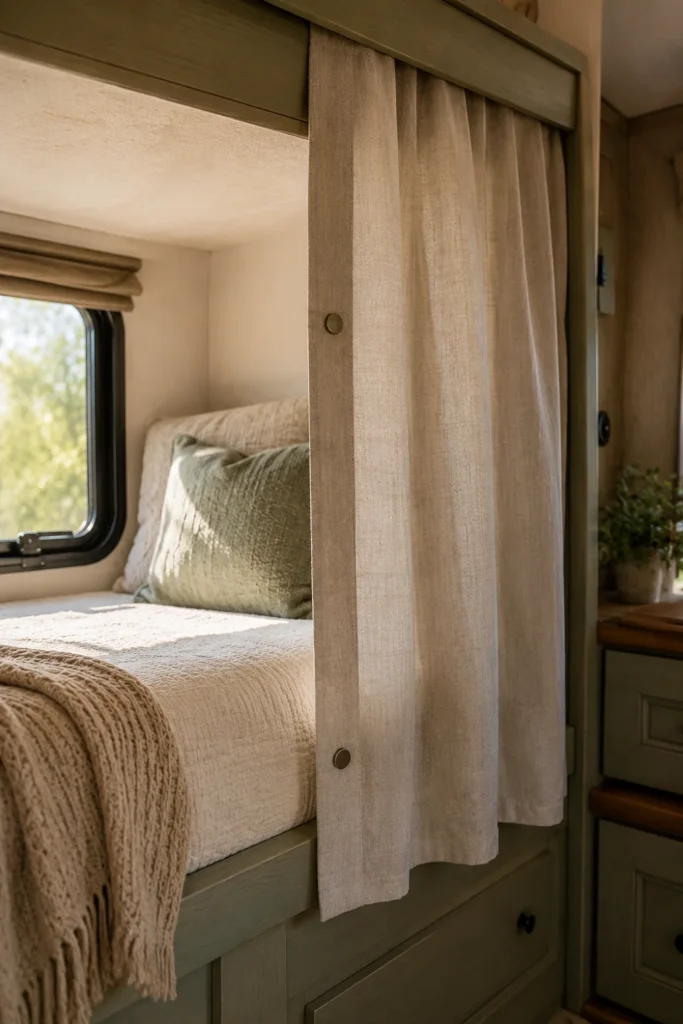
Privacy is hard to come by in a travel trailer, especially when multiple kids share a single bunkhouse room.
Hanging custom bunk curtains gives each child their own personal sanctuary for quiet time. Use tension rods or ceiling-mounted curtain tracks paired with magnetic seam closures to keep curtains tightly shut while driving or sleeping.
What to grab first
- Fabric Choice: Choose lightweight blackout cloth so it doesn’t drag down the ceiling track.
- Safety Tip: Cut curtain lengths so they clear the floor by 1 inch to avoid tripping hazards.
- Tie-Backs: Install soft fabric snap ties to keep panels open during daylight hours.
4. Convert the Bottom Bunk into a Fold-Down Homework Desk
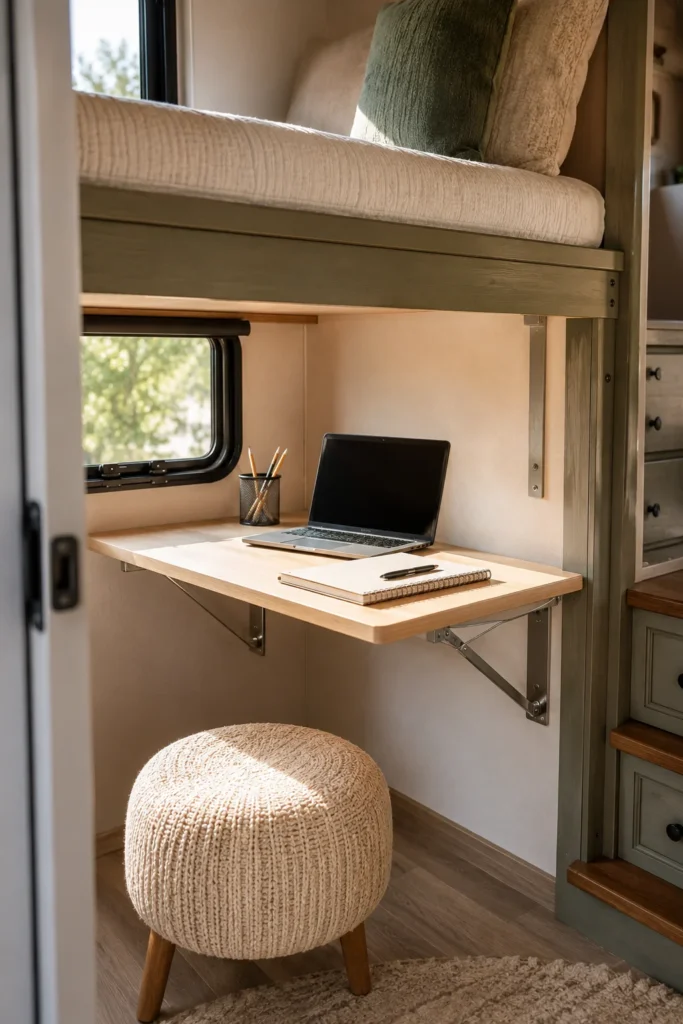
If your bottom bunk isn’t used for sleeping every single night, turn it into a multi-functional activity space for schoolwork, crafting, or board games.
By installing a wall-mounted fold-down desk hardware system, you can lift the desk surface out of the way when it’s time to pull out extra bedding for sleepovers or travel days.
- Plywood Base: Use 3/4-inch sanded birch plywood for a sturdy desktop surface.
- Bracket Choice: Pick stainless steel folding brackets with soft-close locking levers.
- Edge Finishing: Sand corners round to prevent scrapes inside narrow bunk aisles.
5. Mount Elastic Mesh Pockets Directly to the Wall
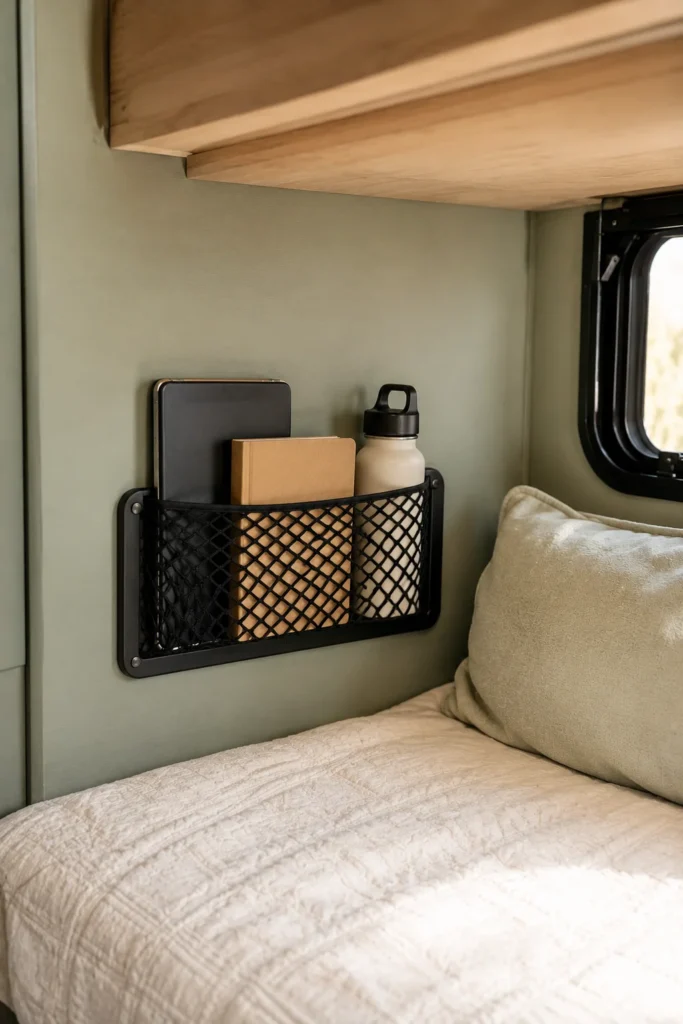
Nightstands don’t exist in camper bunks, leaving kids with nowhere to stash water bottles, books, or action figures at night.
Attaching stretchable mesh cargo nets directly onto wall studs gives kids easy-to-reach storage that automatically holds items snug, even when you’re towing down bumpy back roads.
Locate internal wall studs or hollow wall anchors rated for thin paneling.
Position mesh frame at bed height where kids won’t roll into it during sleep.
Fasten corner grommets using short 1/2-inch panhead screws and washer caps.
- Pockets per Bunk: Install two mesh pockets per bed for water bottles and tech gadgets.
- Weight Limit: Keep individual items under 3 lbs to avoid pulling on thin walls.
6. Add Peel-and-Stick Accent Wallpaper to Rear Bunk Walls
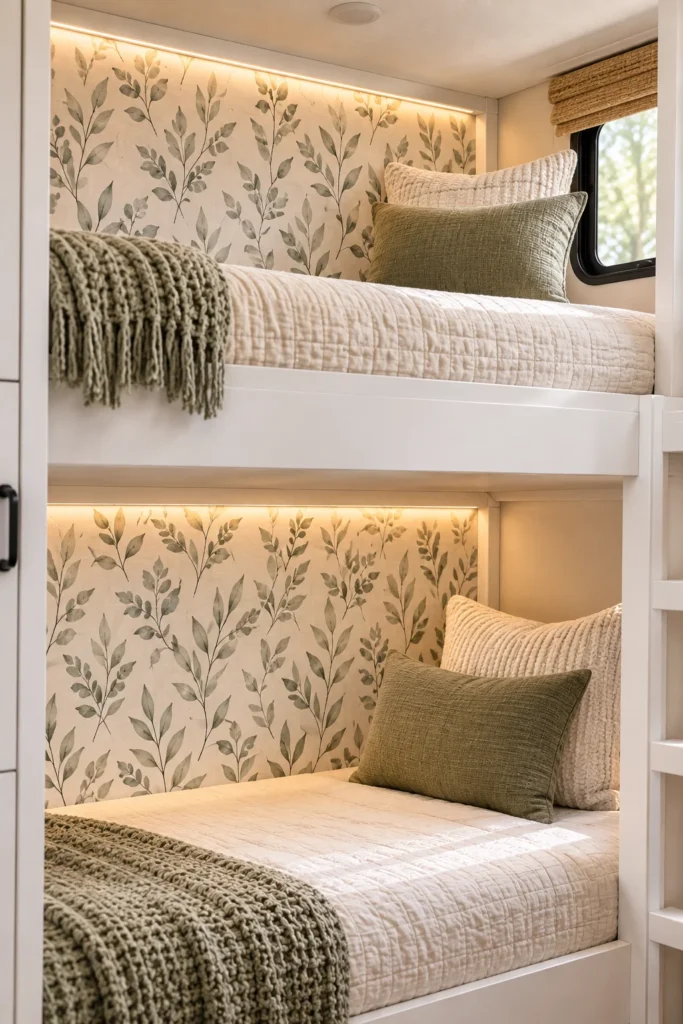
Factory wallboard in camper bunks is usually a drab brown or beige wallpaper pattern that makes small rooms feel dark and boxy.
Applying removable peel-and-stick accent wallpaper to the back wall adds instant personality and brightness. It lets kids pick out fun patterns without causing permanent damage to the rig’s original walls.
Clean walls with rubbing alcohol before applying to remove factory oils.
Use a felt-edged squeegee to push out air bubbles as you roll top-to-bottom.
Don’t use unpeelable vinyl wallpaper that rips off thin wood veneer upon removal.
Avoid installing on freezing days; adhesive needs warm temps to bond properly.
- Prep Work: Wipe down every panel with isopropyl alcohol to clear dust and grime.
- Pattern Choice: Stick to vertical stripes or botanical patterns to visually lift low ceilings.
- Trimming Tool: Keep fresh utility blades on hand for crisp cuts along aluminum trim.
7. Mount Flat Metal Strips for Magnetic Board Game Storage
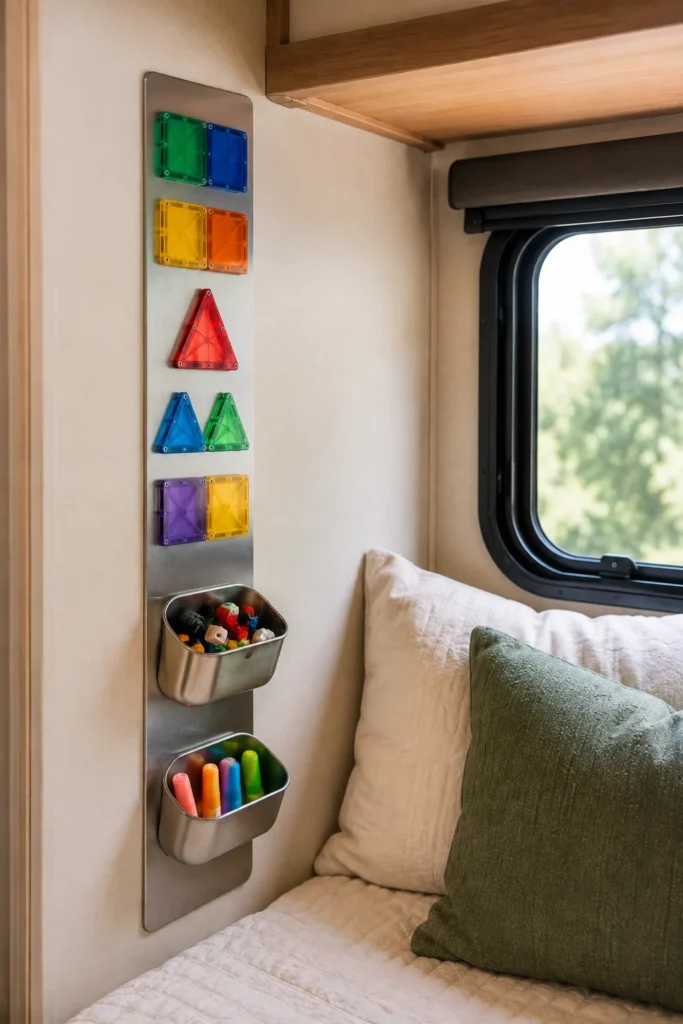
Loose game pieces, magnetic tiles, and small toys love to roll off bunk edges and disappear under floor slides.
Mounting flat stainless steel magnet strips along the bunk wall turns dead space into an interactive game board and display area. Kids can play games right in bed without losing pieces on travel days.
| Storage Style | Magnetic Wall Strips |
|---|---|
| Traditional Plastic Bins | Vertical Wall Mounted Strips |
| Takes up floor/shelf space, rattles on road | Zero floor footprint, keeps pieces secure while moving |
- Metal Type: Use 430-grade magnetic stainless steel strips for maximum hold strength.
- Mounting: Secure with heavy-duty mounting tape reinforced with flathead wood screws.
- Storage Tins: Glue small neodymium magnets to clear plastic tins to store crayons or cards.
8. Recess USB Charging Stations into Bunk Side Walls
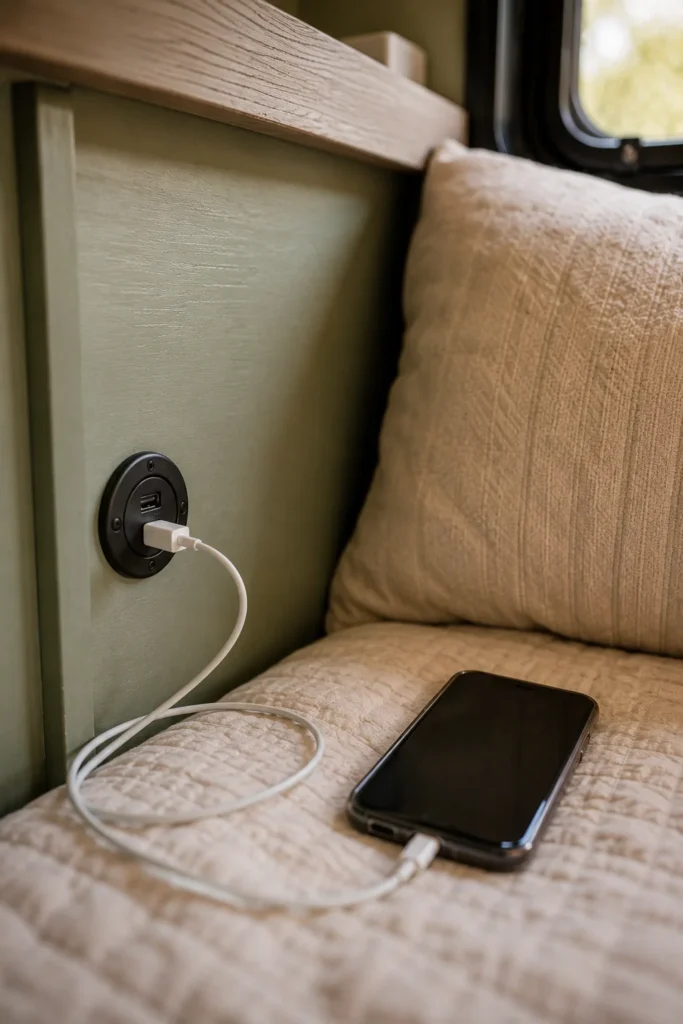
With tablets, handheld games, and small fans constantly needing power, open outlets get cluttered in a hurry.
Installing flush-mount 12V dual USB outlets right into each bunk frame gives every child safe, dedicated access to charging power without dangling messy cords across the room.
- Wiring Source: Tap into existing 12V lighting circuits nearby using inline fuses.
- Cut Tool: Use a standard 1-1/8 inch hole saw bit for clean, flush round cutouts.
- Switch Feature: Pick USB sockets with built-in power switches to stop phantom battery drain.
9. Swap Overhead Cabinets for Soft Fabric Hanging Bins
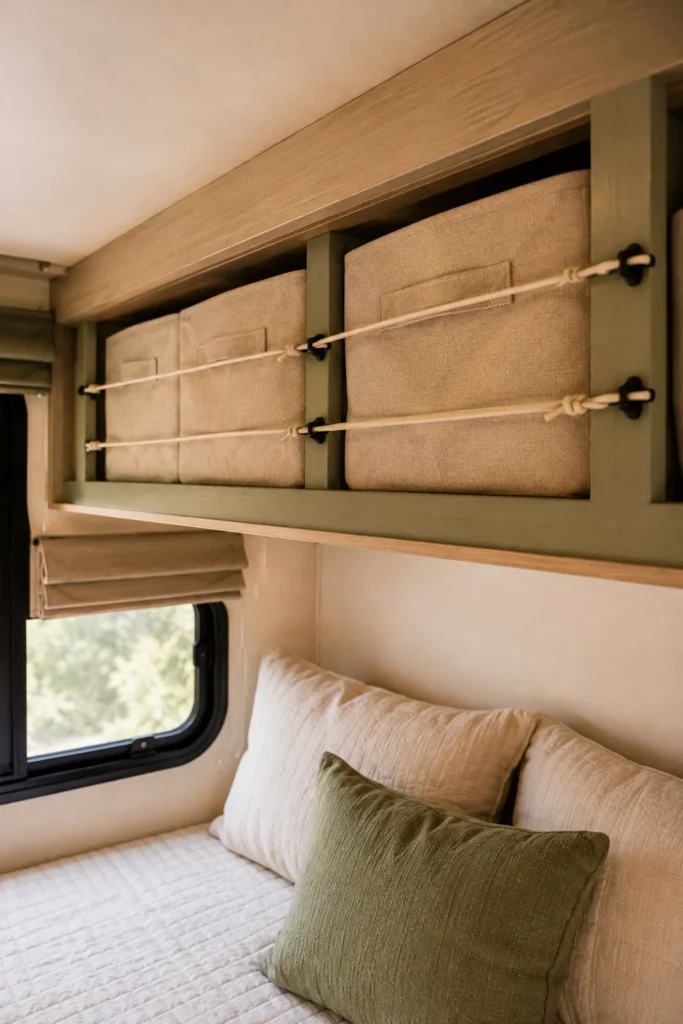
Hard wooden overhead cabinets inside upper bunks can cause painful head bumps when kids sit up fast in the morning.
Removing heavy wooden doors and replacing interior shelf spaces with soft collapsible fabric bins keeps things safe, slashes rig weight, and makes it way easier for younger kids to put away their own clothes.
⚠️ Watch Out
Always secure canvas bins with stretch cords or elastic straps across open cabinet fronts so clothes don’t slide out on sharp highway turns.
- Weight Saved: Removing heavy wood cabinet doors cuts 10 to 20 lbs of overhead weight.
- Bin Sizes: Measure cabinet depth carefully; 10×10-inch collapsible cubes fit most rigs.
- Labels: Add iron-on fabric labels so kids know where socks, shirts, and pajamas belong.
10. Install Under-Bunk Rolling Storage Drawers on Carpet Casters
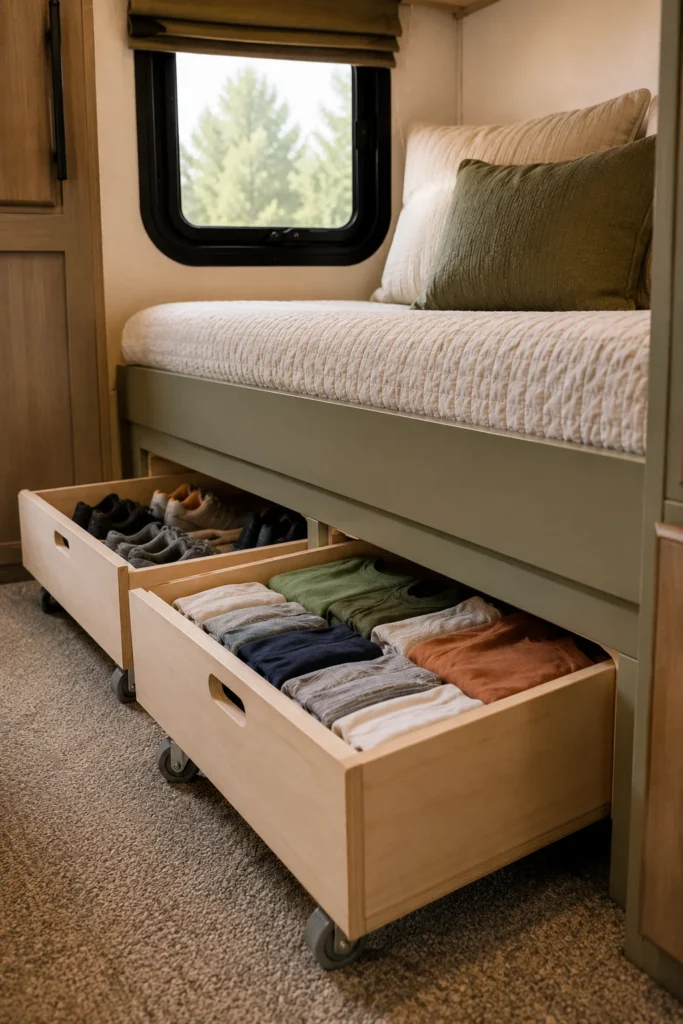
The open space beneath a bottom bunk usually turns into a messy pile of loose shoes, extra blankets, and bulky gear.
Building low-profile wooden drawer boxes fitted with smooth-rolling inline casters lets you slide storage out effortlessly. It maximizes under-bed space while keeping floor clutter hidden from view.
Use wide 2-inch rubber wheel casters instead of plastic wheels so your drawers roll smoothly across both RV carpet and vinyl planking without scratching.
- Drawer Height: Keep overall drawer box height 1 inch shorter than under-bunk clearance.
- Handle Choice: Recessed flush pull handles keep kids from stubbing toes when walking past.
- Divider Inserts: Add adjustable plywood dividers inside to separate shoes from toys.
11. Paint Bunk Frames in Light Tones with Washable Satin Sheen
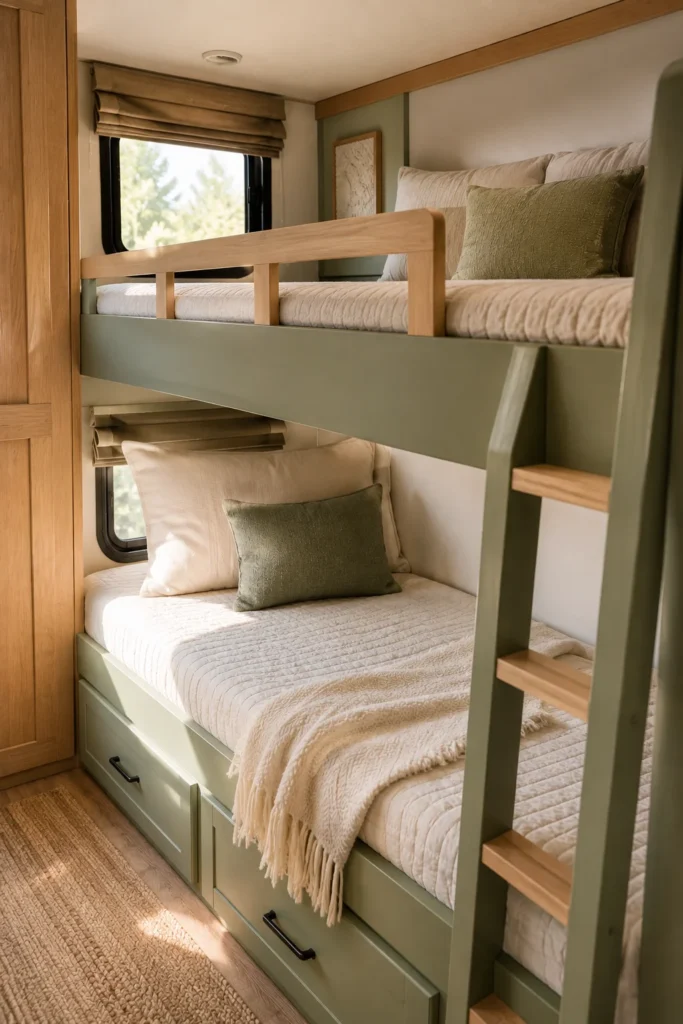
Dark wood veneers can make a small RV bunkhouse feel like a cramped windowless box.
Applying a fresh coat of bright, warm paint instantly opens up the room. Using a durable satin or semi-gloss finish ensures dirty handprints, scuffs, and mud wipe off quickly with a damp microfiber cloth.
- ▸De-gloss First: Lightly sand laminate surfaces with 220-grit sandpaper so primer bonds tightly.
- ▸Shellac Primer: Apply one coat of shellac-based primer to seal in wood oils and prevent bleed.
- ▸Acrylic Paint: Finish with two coats of cabinet-grade acrylic satin paint for maximum durability.
- Color Pick: Crisp warm whites, soft sage greens, or pale blue tones reflect natural light best.
- Drying Time: Allow 24 hours of drying time between coats to cure fully before kids use beds.
12. Hang Canvas Wall Organizer Over the Bunkhouse Door
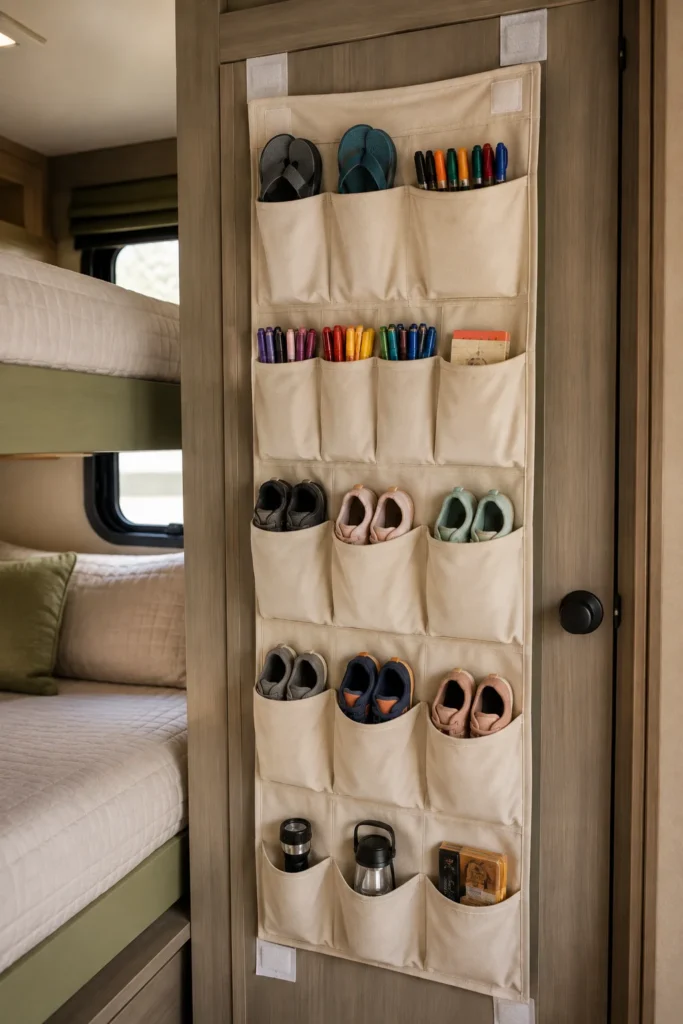
The back of the bunkhouse interior door is prime real estate that often goes completely unused.
Hanging a heavy-duty canvas pocket organizer over the top of the door gives you dedicated vertical storage for shoes, art supplies, flashlights, and small toys without taking up an inch of floor space.
- Over-Door Hooks: Use slim metal hooks so the interior door still closes fully against the frame.
- Bottom Anchor: Attach adhesive hook-and-loop strips at the bottom corners so it doesn’t swing.
13. Add Sturdy Ladder Rung Grip Tape for Small Feet
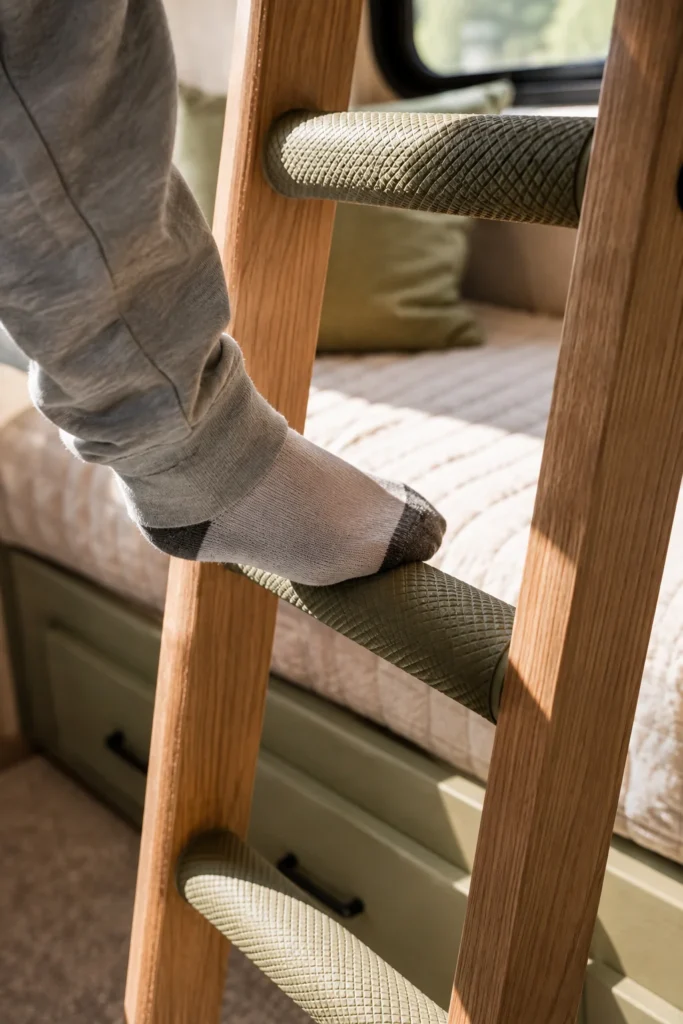
Slippery, thin factory bunk ladder rungs can make climbing up and down in socked feet uncomfortable and hazardous for young kids.
Wrapping rungs in padded textured ladder tape or adding soft silicone tread strips gives small feet extra traction and cushioning, making nighttime climbs much safer.
📌 Safety Note
Skip rough sandpaper skateboard grip tape. Choose waterproof, soft rubberized anti-slip tape designed specifically for bare or socked feet.
- Tread Width: Cut tape pieces to cover the center 8 inches of every rung for solid foot placement.
- Cleaning: Wipe down wooden or metal rungs with rubbing alcohol before applying tape.
14. Install Low-Voltage LED Strip Lights with Color Remote Controls
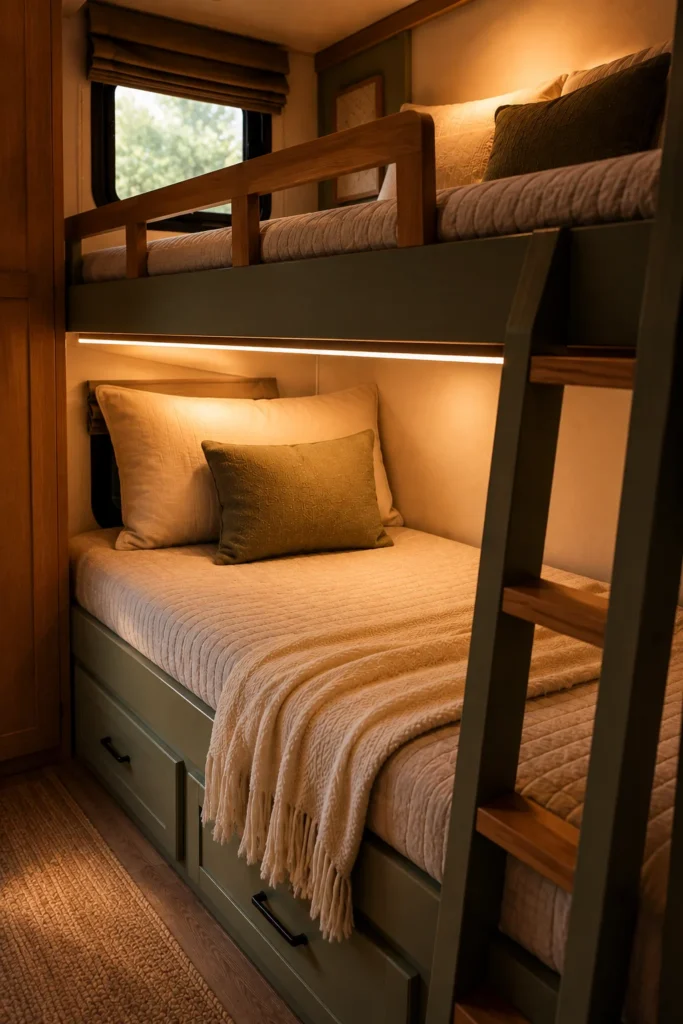
Standard bulb fixtures heat up small spaces and lack ambient light options for cozy evening bedtime routines.
Tucking remote-controlled RGB LED light strips along the underside of upper bunk frames adds fun custom color options for kids while doubling as low-draw nightlights for dark travel nights.
Single hot ceiling bulb casting harsh shadows across beds and wasting 12V power.
Concealed perimeter LED strips with dimmable warm tones and customizable bedtime colors.
- Diffuser Track: Install strips inside aluminum diffuser channels to soften harsh LED dots.
- Voltage: Pick 12V-native strips to wire directly into your camper’s house battery system.
15. Secure Lightweight Pillow Stops Along Bunk Wall Edges
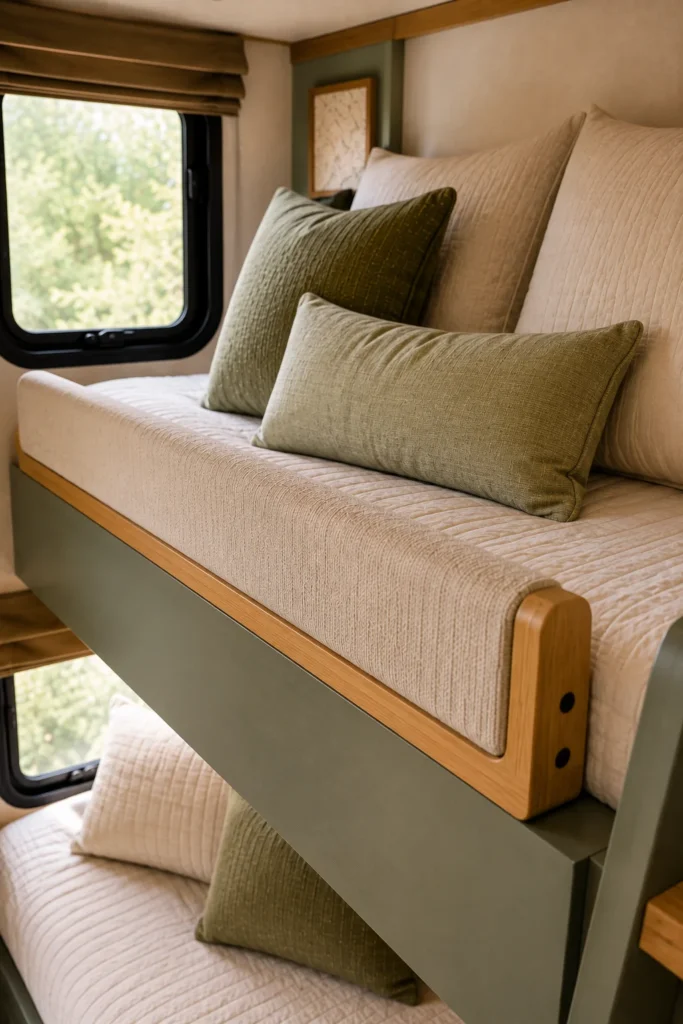
Camper bunks are often open on one or two sides, causing pillows and stuffed animals to slip down between the mattress and wall during sleep.
Adding padded fabric-covered wooden rails or foam bolster wedges along open mattress gaps keeps bedding securely on the mattress all night long.
Measure length of gap between mattress edge and exterior wall frame.
Cut a 1×3-inch pine board to length and wrap with batting and heavy canvas.
Screw board flush to bed platform using L-brackets underneath mattress line.
- Padding Material: Wrap boards with 1/2-inch upholstery foam before stretching fabric over edges.
- Height Above Bed: Rail should extend 3 to 4 inches higher than the top of the mattress pad.
16. Create Modular Floor Cushion Seating on Bunkhouse Carpeting
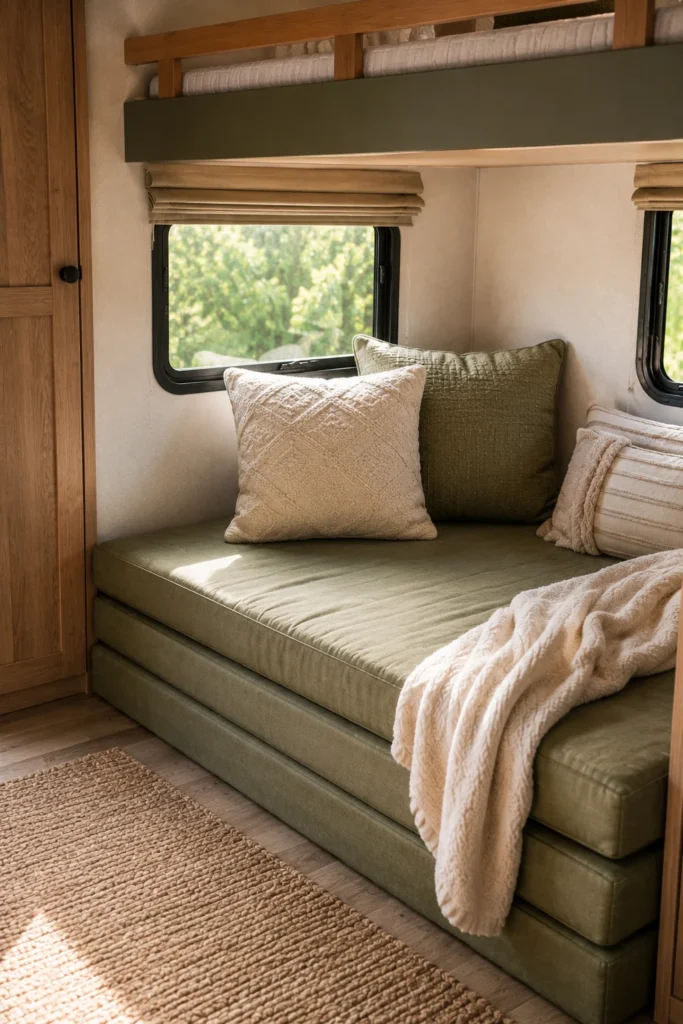
When kids aren’t sleeping, they want spaces to play games, lounge with books, or hang out on rainy campsite days.
Replacing bulky built-in furniture with stackable, high-density floor cushions creates flexible seating that adapts to whatever activities your kids have planned for the day.
Choose stain-resistant outdoor performance fabrics like Sunbrella for covers.
Use folding tri-fold mattress cushions that stack vertically into corners when needed.
Don’t pick heavy bean bags that absorb humidity and take up permanent floor space.
Avoid unzippered covers that can’t be tossed straight into a campsite washing machine.
- Storage Setup: Stack cushions under the bottom bunk during driving hours to clear walkway space.
- Foam Density: Choose 1.8 lb/cu.ft. foam or higher to ensure seating holds shape over time.
17. Mount Hook-and-Loop Cable Organizers Along Mattress Frames
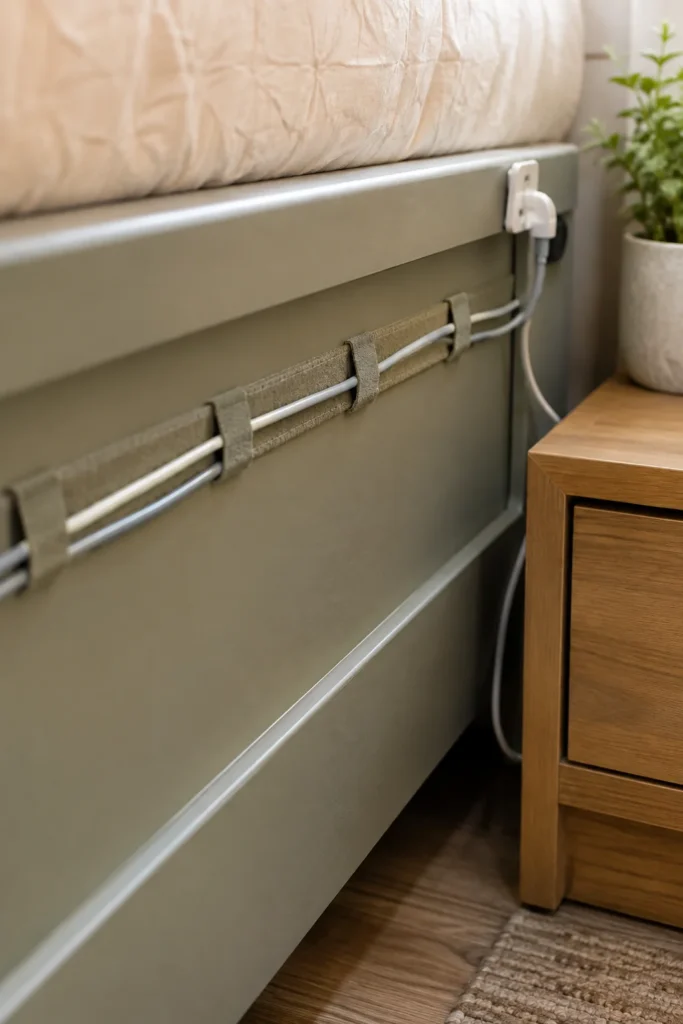
Loose phone cables, fan cords, and nightlight wires tangle fast in tiny quarters, making bunk spaces look cluttered and chaotic.
Running self-adhesive fabric hook-and-loop cable tracks along rear frame edges keeps charging cords neatly pinned against walls so they’re always right where kids need them.
Quick Prep Checklist
- Clip Placement: Anchor silicone cable clips within 6 inches of mattress headboards.
- Cable Length: Use 3-foot braided nylon charging cords to avoid long, hazardous dangling wire loops.
18. Custom Cut Pegboards to Turn Dead Bunk Wall Space into Hanging Storage
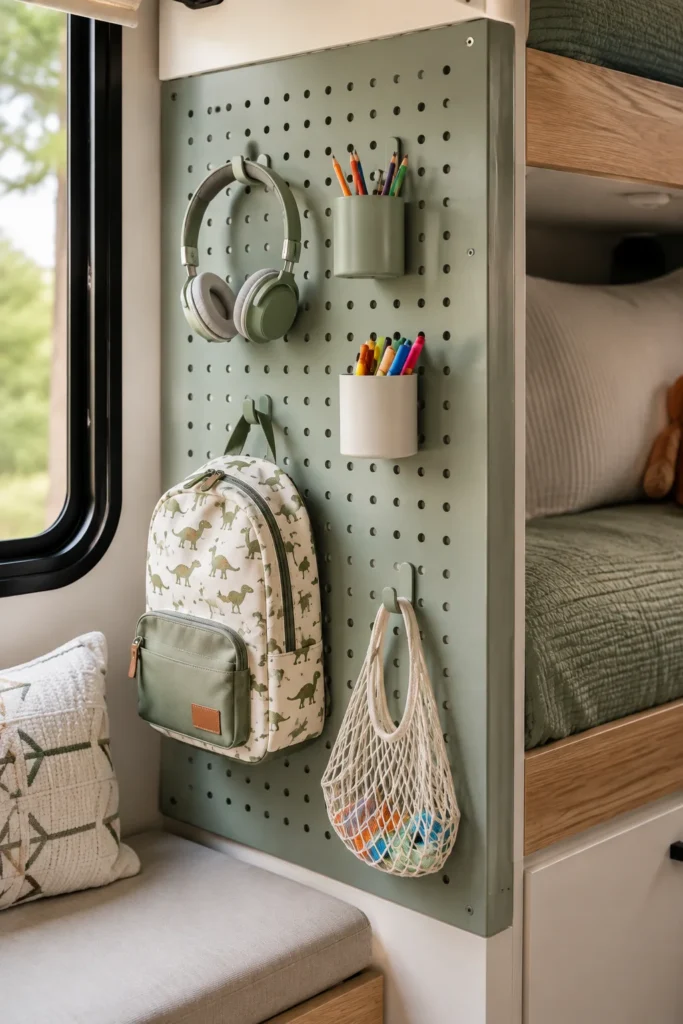
The flat end-walls of RV bunk units are often blank panels that offer plenty of unused vertical real estate.
Installing lightweight metal or acrylic pegboard panels turns empty wall surfaces into fully customizable storage hubs for headphones, hats, gear bags, and art supplies.
Always choose metal or heavy-duty plastic pegboard panels instead of standard pressed masonite. Masonite absorbs moisture in RVs and warps over time.
- Spacer Furring: Mount 1/2-inch furring strips behind panels so peg hooks slide in easily.
- Hook Locks: Use plastic peg locks so metal hooks don’t pop off when pulling items loose on the road.
- Custom Paint: Spray-paint pegboards in bright accent colors to match room decor.
Conclusion
Remodeling your travel trailer bunkhouse doesn’t require massive structural teardowns or expensive custom cabinetry work. By picking light paint colors, organizing vertical wall space, and adding custom touches for each kid, you can turn a cramped back room into a functional, comfortable bedroom everyone loves spending time in.
Focus on lightweight materials, secure mounting hardware, and multi-functional designs to get the absolute most out of every square inch. Save this list of rv bunkhouse remodel ideas for the next time you’re ready to give your camper’s kids room a smart functional upgrade!

