
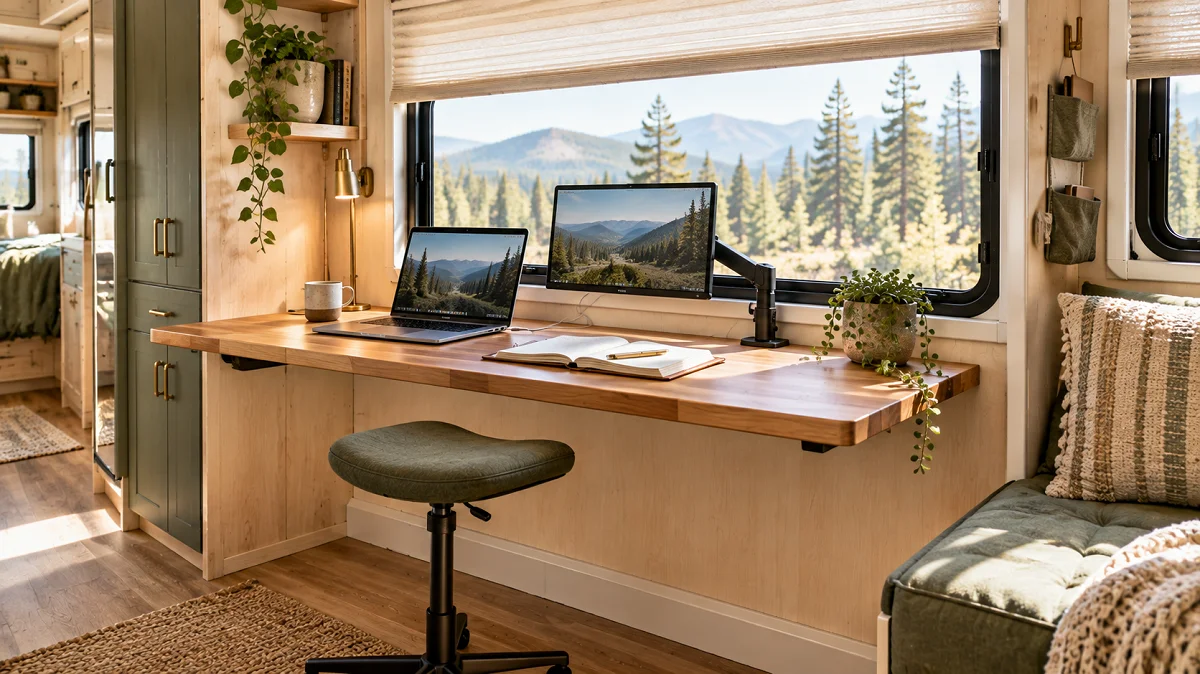
Working remotely from a camper sounds like pure freedom until you spend your third consecutive Tuesday hunched over a wobbly dinette table. Most factory RV setups simply were not designed for an eight-hour workday. Your lower back screams after an hour, cords tangle around your feet, and the constant midday sun glare turns your laptop display into a black mirror.
The reality is that balancing a laptop on your knees or clearing away breakfast dishes just to open an email spreadsheet gets exhausting fast. You need a dedicated, ergonomic space with proper back support, rock-solid internet routing, and stable power that keeps your workflow going uninterrupted.
Making a remote workspace function inside a compact motorhome or travel trailer comes down to smart hardware choices and modular builds. These functional rv office ideas will help you convert dead wall space, build true ergonomic comfort, and stay productive whether you are parked at a full-hookup resort or dry camping off the grid.
1. Replace the Factory Booth Dinette with a Wall-Mounted Floating Worktop
Factory booth benches lock your legs at an unnatural angle and offer zero lower-back support during marathon typing sessions. Tearing out the bulky booth foam and pedestal table opens up prime floor real estate inside your main slide-out.
A thick butcher block or lightweight birch plywood slab secured with heavy-duty folding wall brackets creates a rigid desk that never shakes when you type.
- Use heavy-duty steel locking brackets rated for at least 150 pounds.
- Anchor the rear ledger board directly into the aluminum wall studs of your slide-out.
- Keep the desk depth between 20 and 24 inches to maintain open interior walking clearance.
Thin foam cushions that bottom out, a wobbly single-pole center post, and zero legroom for tall workers.
Solid wood work surface, room for a real ergonomic desk chair, and unobstructed leg room underneath.
Drop the surface flat against the wall on travel days. When you reach your campsite, swing the brackets up until they click into place for an instant, wobble-free workstation.
2. Install a Lagun Swivel Table Base on the Passenger Captain’s Chair
Front cab seats are frequently the most comfortable, well-cushioned chairs in your entire rig, yet they sit completely unused while parked.
Mounting a heavy-duty anodized aluminum Lagun bracket to the seat pedestal or seat base turns the front passenger zone into an instant executive work hub.
- Bolt the mounting plate to a reinforced section of the steel seat base.
- Cut a finished tabletop piece measuring roughly 16 by 28 inches.
- Loosen the arm handles to swing the desk directly over your lap.
The primary benefit is 360-degree adjustability. You can fine-tune the height, slide the arm closer to your chest, or swing the entire table away when you need to walk back into the cabin.
💡 Quick Tip
Always back the mounting plate with a half-inch steel backing plate rather than screwing into thin exterior sheet metal. Road vibration will tear loose screws straight out of thin RV trim.
3. Convert the Rear Bunkhouse into a Dedicated Two-Desk Hub
If you travel without children or guests, the standard rear bunk room is wasted storage space. Removing the twin mattresses and bunks gives you an entire enclosed private room for dual remote work stations.
Use the bottom bunk framing as your structural bench foundation. You can build two 40-inch desk spaces side by side, or face them toward opposite walls to prevent video meeting mic bleed.
| Component | Standard Mod Spec | Alternative Option |
|---|---|---|
| Work Surface | 3/4-inch Baltic Birch | Butcher block laminate |
| Storage | Center drawer divider | Heavy-duty fabric wall pockets |
| Seating | Low-profile task stools | Swiveling compact office chairs |
The rear room provides genuine acoustic separation from your partner making lunch in the kitchen, giving you professional silence for clients and Zoom presentations.
4. Mount an Ultralight Dual-Arm Monitor Bracket into Solid Backing
Working strictly on a tiny 13-inch laptop display burns out your eyes and forces bad neck posture. Setting up secondary desktop monitors makes a massive difference in daily productivity.
Standard desk-clamp monitor mounts vibrate loose over rough dirt roads and can easily bend hollow RV desktop edges. A through-bolted, locking wall mount plate is significantly safer for mobile transit.
| Mount Style | Vibration Resistance | Travel Security | Ideal Rig Location |
|---|---|---|---|
| Wall-Bolt Locking Arm | High | Excellent (locks rigid) | Solid interior partition wall |
| Desk Clamp Pole Mount | Low | Poor (must dismount screens) | Solid wood desks only |
| Quick-Release VESA Plate | Moderate | Great (instant unhook) | Bedroom vanity walls |
Always locate the internal aluminum or wood frame studs using an electronic stud finder before drilling. If the wall is hollow luan plywood, span two wall studs with an external stained 1×4 pine board and mount the bracket to that backer.
| Locking Wall Bracket | Desktop Desk Clamp |
|---|---|
| Stays mounted on driving days with safety strap. | Must be detached and packed onto bed before moving. |
| Eliminates desktop clutter completely. | Consumes valuable surface area on small desks. |
5. Build a Fold-Down Murphy Desk Against an Unused Hallway Wall
Hallway walls in travel trailers are often left empty because they must remain clear while walking to the bathroom or bedroom. That makes them ideal for ultra-slim drop-down surfaces.
A slim 4-inch deep wooden box mounted to the wall can house notebooks, pens, and your laptop charger. When opened, the front lid lowers to form an instant standing or bar-height desk.
- The fold-down panel should be suspended by marine-grade brass support hinges or vinyl-coated cables.
- Install magnetic touch latches or spring roller catches to keep the door firmly closed on transit days.
- Mount the desk surface at 40 to 42 inches from the floor if you prefer a standing workstation.
This layout gives you a practical workstation during work hours without consuming a single square foot of permanent floor area.
6. Wire a Dedicated 12V USB-C Fast-Charging Station Directly to the Battery Bank
Inverters waste substantial battery capacity transforming 12-volt direct current power up to 120-volt alternating current simply to plug in a standard laptop brick.
Installing high-output 12V Type-C Power Delivery ports on your desk bypasses the inverter entirely, drastically lowering electrical losses when boondocking off grid.
- Run an inline-fused 10-gauge marine wire pair directly from your 12V distribution panel or battery busbar.
- Cut a small recess hole into your office side panel using a 1-1/8 inch hole saw.
- Install a certified 65W or 100W USB-C PD flush-mount socket.
- Test the voltage output using a basic digital multimeter before connecting your high-end devices.
Locate an open fused slot on your rig’s 12-volt DC fuse panel.
Route heavy copper marine-grade wire to minimize line voltage drop.
Install a PD 3.0 outlet compatible with modern high-draw laptops.
This simple electrical upgrade cuts power waste and lets your laptops charge quietly without the loud hum of an inverter fan running beneath your chair.
7. Turn a Bedroom Wardrobe Slide-Out into a Hidden Work Closet
Most RV bedrooms include a wall of deep wardrobe cabinets that end up packed with extra clothing you rarely wear on the road.
Removing the hanging garment bar and lower shelves lets you slip a compact, custom-fit desktop slab inside the enclosure. When the working day wraps up, close the wardrobe doors to conceal the entire office.
- Measure the interior cabinet depth to ensure your screen clears the closed doors.
- Add an ultra-slim LED light bar inside the top header to eliminate shadows.
- Route your power cords through a clean 2-inch desk grommet cut into the floorboard.
Use a swivel stool that stows completely inside the closed cabinet.
Line the cabinet interior with warm peel-and-stick acoustic wallpaper.
Do not leave power bricks loose on the floor where slide mechanisms travel.
Avoid bulky high-back armchairs that block the bedroom walkway.
This setup separates your work from your downtime, letting you visually disconnect from your job the moment your workday ends.
8. Swap Standard Window Shades for Snap-On Anti-Glare Cellular Blinds
Daylight pouring in from low-slung camper windows is fantastic for campsite views, but it ruins contrast on computer screens during daytime calls.
Basic pleated camper blinds let light leak past the side cords. Replacing them with tight-fitting double-cell shades or tailored magnetic blackout inserts gives you instant lighting control.
- Choose insulating honeycomb shades to reduce radiant heat against your computer monitors.
- Use side-tracking channels to lock out perimeter light leaks.
- Keep lightweight magnetic privacy panels handy for harsh direct sunlight.
What to grab first
Better glare control means you can work outdoors on bright sunny afternoons without turning your screen brightness up to maximum and depleting your batteries.
9. Secure Your Office Gear with Heavy-Duty Marine Slam Latches and Bungees
Leaving fragile computer hardware, monitor docks, and coffee mugs unsecured inside an RV leads to expensive accidents on bumpy back roads.
Outfit your workspace drawers, storage caddies, and monitor arms with positive-locking hardware designed for marine conditions.
- Replace decorative cabinet pulls with push-to-close marine slam latches.
- Anchor monitor arms to rear security eyelets with quick-cinch nylon cam straps.
- Place silicone adhesive mats under hard drive enclosures and dock hubs.
If it is not physically bolted, latched, or strapped down, treat it like it has already fallen onto the floor.
A two-minute pack-down routine before pulling out of your campsite protects your expensive electronics through unexpected potholes and emergency stops.
10. Add a Slide-Out Keyboard Tray Under the Rig’s Main Solid Surface Counter
Most RV kitchen counters and dinette ledges are set at standing or counter height (36 inches), which is several inches too tall for neutral, pain-free wrist ergonomics.
Installing heavy-duty ball-bearing keyboard slides underneath your solid surface countertop drops your keyboard and mouse down to the recommended 28-inch typing height.
- Select 14-inch to 16-inch locking drawer slides that hold the tray firmly in place while in use.
- Choose a tray wide enough for both an ergonomic keyboard and your mouse.
- Check the structural thickness of your countertop substrate before driving screws upward.
⚠️ Watch Out
Never drive mounting screws straight into solid surface corian or thin fiberglass surfaces without pre-drilling pilot holes. Use epoxy-set threaded brass inserts to prevent cracking the countertop.
Lowering your typing surface immediately eliminates shoulder shrugging and prevents repetitive strain injuries during long writing and coding shifts.
11. Dedicate an Overhead Cabinet to a Shock-Mounted Network and Starlink Router Bay
Spotty internet drops are the quickest way to derail remote work. Leaving loose modems and routers sitting on your desktop leaves them vulnerable to spills, clutter, and overheating.
Mount your cellular modem, mobile router, and Starlink power supply inside an overhead cabinet positioned near the rig’s exterior cable entry point.
| Gear Setup Element | Recommended Spec | Benefit |
|---|---|---|
| Cabinet Ventilation | 12V low-RPM exhaust fan | Prevents thermal throttling in hot weather |
| Power Supply | Direct 12V DC-DC converter | Runs internet uninterrupted when off grid |
| Router Placement | High ceiling shelf | Maximizes internal Wi-Fi signal coverage |
Tucking your network components up high keeps the equipment cool, safely stowed, and clear of everyday kitchen and living room counter space.
12. Use an Ergonomic Saddle Stool That Tucks Flush Under Shallow Surfaces
Full-sized office desk chairs with five-point caster wheels take up far too much floor space inside a narrow camper aisle and constantly roll around while driving.
A backless, height-adjustable saddle stool encourages healthy, active spinal alignment while taking up less than half the floor footprint of a traditional executive chair.
- The saddle seat tilts your pelvis slightly forward, taking painful pressure off your lumbar spine.
- The smaller footprint allows the stool to slide completely under your desk on travel days.
- Replace standard rolling casters with rubber bell-style glides to keep the stool planted on slick vinyl floors.
| Ergonomic Saddle Stool | Traditional Office Chair |
|---|---|
| Slides completely under shallow 20-inch desks. | Armrests block the chair from sliding all the way in. |
| Weighs under 12 pounds for simple lifting. | Heavy and awkward to stow on travel mornings. |
13. Install a Vertical Cork-and-Felt Acoustic Panel Behind Your Laptop Screen
Thin hollow fiberglass walls inside campers create high audio reverberation, which makes your voice sound hollow and echoey on speakerphone and video calls.
Sticking dense felt-faced acoustic tiles or natural cork sheets on the wall right behind your desk absorbs harsh high-frequency room reflections.
Hollow echoes, bare vinyl walls that pick up room bounce, and an unprofessional video background.
Clean vocal resonance on conference calls, plus a handy pinboard for sticky notes and road maps.
- Use non-damaging interlocking adhesive strips so panels hold firmly through extreme camper summer heat.
- Select neutral gray or charcoal tones that present a clean, distraction-free backdrop on camera.
- Pin daily work agendas and emergency phone numbers within easy eye line.
This inexpensive wall treatment upgrades your call audio quality while giving your desk nook a clean, intentional look.
14. Set Up a Portable Foldaway Desk in the Toy Hauler Garage Space
Toy hauler floor plans are uniquely suited for mobile professionals because the rear ramp door drops down into an open-air elevated patio.
Setting up a rugged, stowable aluminum camping desk in the garage area lets you work right in the breeze with unobstructed landscape views.
- Use an adjustable-height folding work table with independent locking leg extensions to balance uneven ground.
- Add magnetic bug screens across the ramp opening to keep flies and mosquitoes off your monitor.
- Run an outdoor-rated surge strip from the garage’s auxiliary outlet bank directly to your table.
This outdoor-facing setup brings in fresh air and beautiful views, giving you the true work-from-anywhere experience you hit the road for.
15. Run a Low-Profile Cable Raceway Channel Along the RV Baseboards
Messy power cords and USB leads sprawled across the floor become dangerous tripping hazards inside the tight confines of a mobile living area.
Enclosed adhesive-backed PVC surface raceways let you route thick monitor cords, HDMI lines, and ethernet connections cleanly around floor trim and door frames.
- Clean the baseboard with isopropyl alcohol to ensure the adhesive backing sticks firmly.
- Route high-draw power cables and low-voltage data cables through separate tracks to avoid electrical interference.
- Snap the decorative channel covers closed to protect wiring from pet paws and shoe scuffs.
Concealing your cord bundles keeps walkways tidy and prevents accidentally kicking your computer off the desk during a sudden move.
16. Add a Footrest Riser Box That Doubles as Document and Hard Drive Storage
Sitting for hours without proper foot support puts unnecessary strain on your lower back and thighs, especially if your seat is slightly raised.
A solid wood footrest box with a hinged, foam-padded lid lifts your feet to a healthy ninety-degree angle while giving you a secure, discreet storage stash.
- Position the footrest surface 4 to 6 inches off the floor to support healthy posture.
- Add dense foam padding and durable vinyl to the lid so it doubles as a comfortable foot cushion.
- Line the interior with padded storage dividers to protect external hard drives and sensitive paperwork.
What to grab first
This simple dual-purpose upgrade improves daily typing ergonomics and gives you a protected spot to store gear in an otherwise unused corner.
17. Hang a Magnetic Pegboard Strip on the Kitchen-Office Transition Wall
The narrow wall return between an RV galley kitchen and the living slide-out is frequently left blank. Turning it into vertical organization keeps daily desk supplies from cluttering your counter space.
Mounting a powder-coated steel pegboard strip lets you snap magnetic bins, charging cable anchors, and headphone hooks directly to the wall.
| Mount Setup | Weight Limit | Ideal Stowed Items |
|---|---|---|
| Wall Stud Bolts | 35 lbs | Heavy tablet hubs, tool kits, full file boxes |
| Industrial VHB Tape | 12 lbs | Pencils, charging cables, light headphones |
| Removable Adhesive Strips | 4 lbs | Small note pads, keys, glasses |
Use strong magnetic cups to hold pens and small styluses while in transit.
Hang heavy over-ear headsets on rubber-coated utility hooks.
Never rely on standard plastic household pegs, which rattle loose on bumpy roads.
Do not overload shallow slide-out partition walls with heavy gear.
Taking supplies off the desktop keeps your working area clean, helping you feel organized even inside a tiny living footprint.
18. Rig a Swivel Standing-Desk Converter to the Existing Kitchen Island
Modern fifth wheels and travel trailers often feature large center kitchen islands with solid countertops that sit at an ideal natural standing elbow height.
Adding a lightweight, gas-strut adjustable scissor riser lets you switch between sitting and standing throughout the day without replacing any permanent factory cabinetry.
- Center the converter on the kitchen island, ensuring at least four inches of clearance from the sink edge.
- Adjust the gas strut counterbalance so you can lift your laptop and secondary screen with minimal effort.
- Slide the collapsed converter flat under your bed or couch before travel days.
Place an anti-fatigue gel mat in the kitchen aisle to relieve pressure on your heels.
Raise the desktop riser so your forearms rest parallel to the floor at 90 degrees.
Drop the riser completely flat after calls to return the island to dinner prep duties.
Alternating between sitting and standing throughout the day keeps your energy up, promotes better circulation, and keeps you feeling alert during afternoon meetings.
Designing an RV Workspace That Truly Lasts
Building a reliable workspace on the road is all about making thoughtful, small adjustments rather than taking on an expensive full-rig remodel. When you prioritize solid ergonomics, stable 12V direct charging, and firm travel latches, you eliminate the daily hassles that make remote mobile work feel stressful.
Try starting with just one high-impact change this weekend, like swapping out wobbly table hardware or setting up dedicated glare control. Save this list to your RV renovation Pinterest board so you have these practical rv office ideas ready for your next campsite upgrade.

