
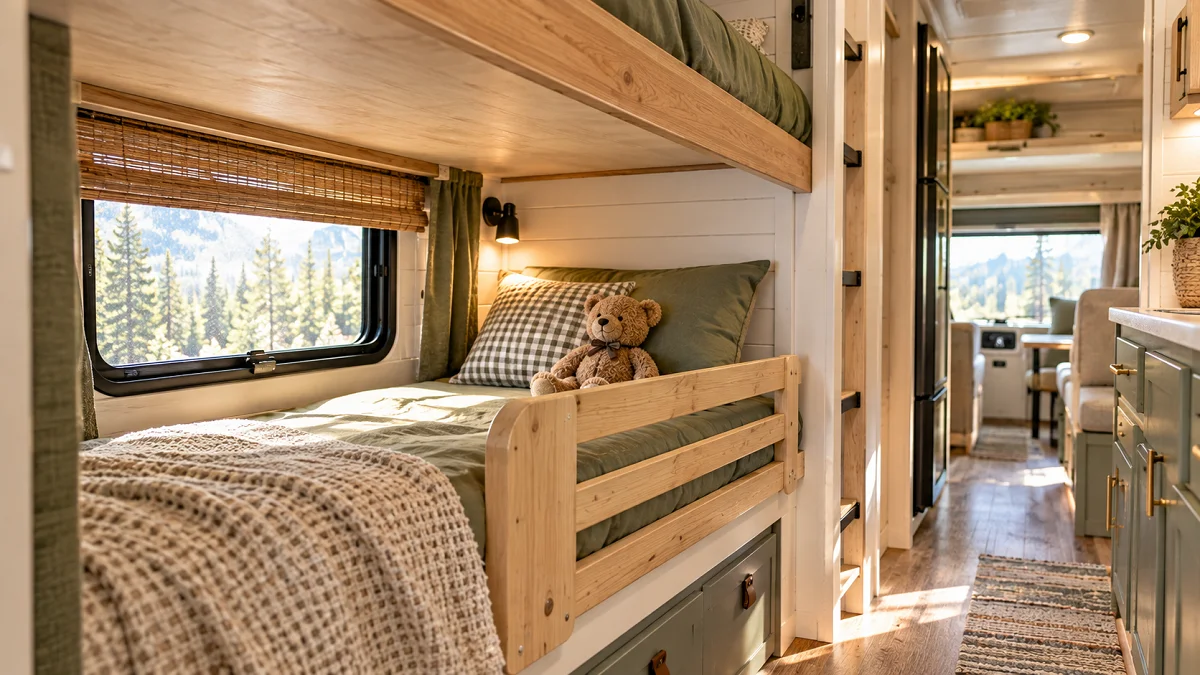
Standard camper bunks simply are not built for rolling, restless toddlers. Most factory setups come with thin vinyl mattresses, narrow ladders, and steep drop-offs that leave parents checking the bunk every twenty minutes. Trying to wedge a bulky domestic pack-and-play into a 30-inch camper hallway usually blocks the bathroom door and tests everyone’s patience by night two.
Getting sound sleep on the road requires a dedicated sleep space that keeps little bodies secure without turning your living area into an obstacle course. You need simple setups that handle road vibration, work with thin RV walls, and pack down quickly when travel days arrive.
These practical rv toddler bed ideas show you how to modify factory bunks, convert daytime furniture, and create snug nooks so your whole family can rest easy at the campground.
1. Build a Slide-In Wood Bunk Rail for Factory RV Bunks
Factory camper bunks often feature an open drop to a hard vinyl floor. You can build a lightweight barrier using smooth pine boards without driving permanent screws into your camper walls.
Slot the base of the frame under the mattress weight, letting the child’s body anchor the barrier firmly in place. Sand every edge down with fine-grit sandpaper so there are no rough corners near bedding.
- Measure the vertical gap between the mattress top and the ceiling to allow easy parent access.
- Cut vertical slats spaced no wider than two and three-eighths inches apart to prevent wedging.
- Apply a clear, non-toxic water-based seal to handle humid mornings.
Open drop-off ledge, slippery mattress edge, and constant worries about night rolling.
Sturdy, removable timber barrier held down by mattress weight without putting holes in camper walls.
2. Convert the Lower Dinette into a Dedicated Toddler Daybed
Dropping the dinette table down creates a low-profile sleep space right near the master bed. The issue is that smooth camper cushions love to slide apart under moving sleepers.
Tuck a fitted crib sheet across two adjacent cushions to bind them into a single sleeping pad. This creates a dedicated floor-level rest zone that keeps your toddler from falling from high bunks.
💡 Cushion Grip Trick
Cut a roll of rubberized kitchen cabinet liner and lay it directly on the wooden table base before arranging dinette cushions. It stops individual pieces from creeping out during restless sleep.
- Lower your dinette tabletop onto the factory bench cleats.
- Lay down non-slip silicone shelf liner across the bare wood base.
- Fit a breathable cotton mattress pad across the seam layout to prevent small limbs from slipping between sections.
3. Drop an Inflatable Toddler Travel Bed into the Slide-Out Floor
When your layout lacks dedicated bunks, the open floor space inside a main slide-out offers prime real estate. Toddler travel beds feature raised outer bumpers that prevent midnight rollouts onto cold floors.
These beds inflate with a compact pump in two minutes and deflate flat into a standard tote bin. During the day, flip the bed upright against the sofa to keep your central walkway completely clear.
- Standard mini crib sheets slip over the central removable mattress block.
- Place a thin fleece blanket under the PVC base to stop squeaking noises against vinyl camper floors.
- Push the bumper edge snug against the sofa baseboard to create a cozy nook.
4. Install Heavy-Duty Cargo Netting Across the Overhead Bunk
Cab-over and elevated bunks offer great vertical space, but high drops make them nerve-wracking for young kids. A commercial-grade cargo net provides a flexible wall that holds firm without adding heavy lumber weight.
Mount quick-release carabiner clips along the ceiling trim and bed platform frame. This allows you to unclip the entire barrier in five seconds for daytime bed-making and book reading.
Locate solid framing members in the ceiling or bunk surround using a stud finder.
Mount heavy eyelet plates with self-tapping wood screws into solid framing.
Clip marine carabiners from the cargo net edges directly into the eyelets, pulling the weave taut.
- Choose two-inch polyester webbing with tight square openings to prevent hands from catching.
- Keep tension tight across the bottom edge so toys cannot tumble down the gap.
- Use screw-lock carabiners that little fingers cannot twist open at night.
5. Turn the Master Bedroom Closet Floor into a Cozy Nook
Large travel trailers and fifth wheels often come with wardrobe closets that have deep floor pans. Removing lower shelving yields a private sleeping corner right beside the parent bed.
Line the base with high-density foam wrapped in moisture-resistant fabric. This provides a dark, den-like atmosphere that helps overstimulated toddlers fall asleep while ambient campsite activity continues outside.
Remove the closet door completely or tie it open securely for continuous airflow.
Use a USB-powered fan mounted high to keep air circulating throughout the cubby.
Leaving heavy hanging garments above the child’s sleep space.
Letting sliding doors swing loose while the rig is parked on an uneven slant.
- Take sliding wooden closet doors off their tracks and store them beneath the main bed during camping season.
- Position a portable white noise machine on the upper shelf to block out campground chatter.
- Check that furnace heater registers do not blow hot air straight into this enclosed nook.
6. Anchor a Foam Incline Wedge Under the Fitted Sheet
Bumpy, off-camber campsites can leave your camper slightly out of level despite your best leveling block efforts. Toddlers tend to slide toward the foot of the bed or roll into the camper wall when their bunk has even a slight tilt.
Tucking a firm high-density foam wedge directly under the mattress topper stops that midnight roll cold. It creates a subtle ramp that keeps your child centered in their sleeping zone all night long without rigid plastic hardware.
Wedge Setup Essentials
- Slide the thick end of the wedge against the outer wall if your camper tends to settle toward the driver-side slide-out.
- Use bed sheet clips underneath the plywood bunk board to keep the fitted sheet stretched tight over the foam profile.
- Select a breathable bamboo cover so heat does not build up behind your child’s shoulders on warm summer nights.
7. Fit a Custom Foam Mattress Over the Fold-Down Jackknife Sofa
Factory jackknife sofas make quick sleeping platforms, but that deep middle crease is notorious for swallowing toddlers mid-sleep. The uneven split between the two vinyl cushions creates an awkward slope that disturbs light sleepers.
Ordering a custom-cut three-inch piece of medium-firm foam turns that bumpy fold-out into a flat, comfortable toddler bed. When morning comes, simply roll the foam pad up with two velcro cinching straps and tuck it behind the sofa backrest.
- Unfold your jackknife sofa flat and press firmly down on the center hinge until it clicks into locked position.
- Roll out your continuous three-inch foam pad directly across the seam.
- Stretch a twin-size mattress protector over both the foam and sofa edges to hold everything as one stable unit.
8. Swap Factory Bunk Curtains for Breathable Mesh Blackout Panels
Standard RV bunk curtains are typically heavy synthetic drapes that trap stale air and heat inside small bunks. Toddlers kick them open instantly, letting morning campground light wake them up at dawn.
Replacing them with custom-cut breathable mesh panels gives you full light control without suffocating the bunk opening. Install heavy hook-and-loop strips along the exterior edge so the panels stay closed even when little feet kick against the fabric.
| Factory RV Drapes | Breathable Mesh Panels |
|---|---|
| Traps muggy summer heat inside the bunk | Maintains active cross-ventilation with AC airflow |
| Swings open easily when tossed or kicked | Fastens snug along borders with quiet velcro closures |
| Gathers dust and moisture along camper window tracks | Wipes clean with a damp microfiber cloth in seconds |
- Mount the upper track using aluminum command strips rather than putting screws into delicate ceiling paneling.
- Leave a two-inch gap at the bunk ceiling line to let ceiling AC vents push cool air downward through the space.
- Add magnetic hem weights along the bottom seam to keep the curtain hanging straight against the bunk rail.
9. Build a Hinged Plywood Drop-Gate for the Bottom Bunk
A bottom bunk offers the safest foundation for a curious toddler who loves to climb out of bed before sunrise. Building a half-height wooden drop-gate turns that low cubby into a safe sleeping den with zero falling risk.
Use lightweight half-inch birch plywood cut to match the lower opening frame. Attach two brass barrel latches on the outside face of the gate where small hands cannot reach over to unlock them.
Always mount locking hardware on the exterior camper hallway side. Kids figure out interior latches quickly, but an exterior slide bolt keeps the gate securely closed until morning.
- Sand all cut edges down using 220-grit sandpaper and round off every sharp corner.
- Mount piano hinges along the bottom frame so the gate folds flat against the baseboard during daytime play.
- Drill decorative two-inch circular portholes across the board to promote fresh airflow and let your child see into the living area.
10. Wedge a Foldable SlumberPod Over a Mini Travel Cot
If your camper has an open floor plan without separate bunk walls, creating darkness for early bedtimes is a challenge. Pairing an ultra-compact folding cot with a breathable blackout canopy gives you an instant private bedroom anywhere inside your rig.
The flexible poles tension outward to create an enclosed dome that blocks over ninety percent of ambient camper lights. You can keep your kitchen lights on and prepare dinner while your toddler sleeps soundly just a few feet away.
💡 Airflow Management Tip
Always unzip the integrated fan pouch and insert a USB-powered desk fan aimed across the top mesh vents. Camper corners can get muggy quickly, and active airflow prevents stuffiness inside enclosed sleep canopies.
- Tuck the cot legs into rubber furniture cups so metal feet never scratch delicate camper vinyl flooring.
- Check the ceiling height under lower overhead cabinets before setting the canopy poles in place.
- Fold the frame down flat against the master bed each morning to open up your walking path.
11. Cut High-Density Foam to Fill the Dinette Bed Seam Gap
When you collapse a camper dinette table to make a bed, the vinyl cushions rarely meet without leaving wide dips. Toddlers shift around at night and often end up wedged right in those stiff, awkward grooves.
Cutting a narrow wedge of high-density upholstery foam fills the seam line so the bed surface behaves like one single mattress. It costs very little, packs into a standard storage bin, and saves you from middle-of-the-night adjustments.
Two-inch gaps between hard vinyl benches that pinch arms and swallow pacifiers all night long.
A smooth, continuous sleeping pad secured beneath a tight mattress pad with zero pinching seams.
- Measure the exact width and depth of the gap using a standard cloth sewing tape.
- Use an electric carving knife to slice the foam insert with clean, straight edges.
- Wrap the foam piece in a zippered cotton sleeve so crumbs and dust stay off the bare cushion foam.
12. Rig a Removable Canvas Spall Board on Metal Eyelets
Traditional wooden rails can feel clunky in tight camper hallways where every inch of walkway counts. A heavy-duty duck canvas panel provides a strong, flexible barrier that cushions rolling toddlers without bruising shins.
Fasten stainless-steel eyelet turn-buttons straight into the solid wood bunk stiles. When your child wakes up, simply twist the fasteners a quarter turn and drop the canvas down flat against the baseboard.
Marine Fastener Checklist
- Pull the canvas taut during installation so the barrier stays stiff against leaning weight.
- Keep the top hem at least eight inches higher than the mattress crown.
- Roll the canvas roll upward and tie it off with twill tape loops during daytime playtime.
13. Stack a Floor Mattress with a Non-Slip Rug Pad Beneath
If your camper has an open bunkhouse floor or a wide hallway near the bathroom, a floor mattress is often the simplest setup. The challenge is that lightweight foam pads love to drift across slick camper vinyl floors every time a toddler moves.
Placing a rubberized rug pad directly against the subfloor keeps the mattress glued down in place. The extra rubber layer also stops chilly drafts from rising through thin slide-out floors on crisp mountain mornings.
- Sweep the floor clear of campground grit so dust does not ruin the rubber grip.
- Cut the rug gripper pad two inches shorter than your mattress footprint on all four sides.
- Drop a standard four-inch folding toddler cot mattress directly centered over the pad.
14. Fit an Expandable Tension Bed Rail Between Bunk Walls
Many camper bunks are recessed into alcoves with walls at both the head and foot ends. That alcove shape lets you run an adjustable tension barrier across the opening without drilling a single screw hole.
Select an expandable gate that uses broad, silicone-padded wall cups. The wide rubber surface distributes outward pressure over thin luan paneling without crushing hollow camper interior partitions.
Locate the solid framing edges near the bunk trim where wall paneling meets exterior studs.
Position the broad rubber wall protector cups over the framing points on both opposing walls.
Tighten the center tension spindles until the rail stays firm against firm adult hand pressure.
- Always place the tension pads over interior stud lines rather than open hollow sections.
- Check the tension spindle dials after bumpy highway driving days to ensure road vibration did not back them off.
- Pad the steel rail bars with split foam pipe insulation to keep chilly metal away from sleeping arms.
15. Repurpose a Modular Pop-Up Playpen Inside Toy Hauler Cargo Bays
Toy hauler garages provide expansive floor space, but the bare diamond-plate tie-downs and industrial walls are far from toddler friendly. Setting up a freestanding hexagonal pop-up play yard transforms that rugged space into an instant safe sleep zone.
The mesh walls keep your child away from metal latches, ramp door hardware, and gear storage areas. You get a completely enclosed perimeter that sets up with a single pull in less than thirty seconds.
- Lay an interlocking foam exercise mat across the garage floor first to cushion cold metal decking.
- Pick a play yard model with an integrated shade top to dim overhead LED garage lights.
- Clip the playpen frame to an adjacent floor D-ring using a hook strap to prevent the base from walking during active play.
16. Anchor Inflatable Bed Bumpers Beneath Deep-Pocket Sheets
Bulky wooden guardrails can crowd a narrow 28-inch camper bunk and make changing sheets a headache. Inflatable bumper tubes offer a low-profile alternative that packs down into a glove box when not in use.
Place the inflated tubes directly on the bare mattress vinyl along the open edge, then pull an elastic-heavy fitted sheet tightly over the entire setup. The sheet tension holds the bumper firmly in place, creating a natural roll barrier that lets your toddler lean back safely without hitting hard edges.
⚠️ Watch Out
Never rely on standard loose camper sheets with inflatable bumpers. If the sheet slips off the mattress corners, the tube will roll away with the child. Always use sheet suspender straps underneath to lock the fabric down.
- Choose bumpers made from puncture-resistant TPU rather than cheap PVC to handle temperature swings between hot days and chilly mountain nights.
- Inflate the tubes to about eighty-five percent capacity so they provide a soft, forgiving contour rather than an uncomfortable, rock-hard ridge.
- Pack a miniature manual bicycle pump in your camper utility drawer for lightning-fast inflations at setup.
17. Use a Hard-Bottom Travel Bassinet for Small Bunkhouse Cutouts
Small travel trailers often feature awkward L-shaped bunk cutouts or narrow under-bunk nooks that swallow standard bedding. A rigid, hard-bottom travel bassinet fits neatly into these compact footprints without bunching up or sagging.
The firm base plate keeps your toddler resting on a flat, level plane regardless of the soft, uneven camper cushion underneath. When morning comes, fold the side struts inward and slide the bassinet right under your master bed mattress.
Place the bassinet on solid plywood surfaces or well-supported bench seats.
Check with a small spirit level to ensure your camper pitch has not tipped the frame.
Setting the frame over loose, unzipped cushions that pitch sideways under toddler weight.
Allowing bed sheets to drape over the breathable mesh border panels.
- Clear out any stray clothing or loose bedding from the corner cutout area.
- Unfold the bassinet frame until each corner lock clicks into position.
- Slide the non-slip rubber feet against the bunk board border trim to stop movement during the night.
18. Fasten Heavy-Duty Webbing Straps Across Cab-Over Bunk Ceilings
Class C motorhomes have high, cavernous cab-over areas that feel like towering precipices for toddlers. Rigid metal hardware rarely fits the complex curved ceilings of modern motorhomes, making traditional swing gates impractical.
Heavy-duty nylon webbing straps run vertically and horizontally across the bunk mouth, connecting with quick-release automotive-grade side buckles. You get complete containment that absorbs heavy pushes without scratching the overhead ceiling liner.
| Rigid Metal Gates | Nylon Webbing Straps |
|---|---|
| Rattles and squeaks constantly against cabinet walls while driving down the highway | Completely silent on bumpy gravel washboards and smooth interstate miles |
| Heavy hardware that requires drilling large holes in delicate trim | Lightweight polyester webbing secured into structural corner plates |
| Fixed height that does not fit irregular, sloped camper ceiling profiles | Adjustable strap cam buckles that cinch taut to any ceiling contour |
- Use two-inch seatbelt-grade polyester webbing that will not stretch over time.
- Fasten the bottom anchor straps into the structural wooden front fascia board beneath the mattress.
- Unclip the top buckles and roll the strap bundle to the corner stile when making the bed.
19. Install an Under-Bed Pull-Out Trundle on Locking Casters
The empty void beneath a camper queen bed is often wasted on forgotten storage totes. Building a shallow plywood trundle box on smooth casters creates a slide-out sleeping bay that tucks away completely by daybreak.
Line the bottom with thin slats to keep the toddler mattress off cold camper flooring and encourage under-mattress airflow. At bedtime, simply roll the trundle out into the bedroom aisle and lock the wheel brakes with your foot.
Always equip your trundle with multi-directional locking rubber casters. Without wheel locks, the frame will shift every time your child turns or moves, waking up light sleepers and scuffing your flooring.
- Keep the overall frame depth under seven inches so it clears the camper under-bed framing support struts.
- Attach a wide leather drawer pull to the front board to make pulling it out smooth and effortless.
- Use lightweight half-inch poplar boards to keep your overall rig payload impact to a minimum.
20. Layer a Water-Resistant Breathable Mattress Protector Over Factory Vinyl
Camper bunks come wrapped in cheap industrial vinyl that traps body sweat, squeaks whenever a child shifts, and makes toddlers wake up clammy. A proper layered mattress cover transforms that stiff board into a quiet, breathable bed that feels just like home.
Layering a soft cotton terry cover over a waterproof breathable membrane protects the factory bunk pad from accidental diaper leaks and spilled sippy cups. The soft fabric eliminates plastic rustling sounds and keeps your little one comfortable all night.
Nighttime Comfort Layers
- Air out factory foam pads in the sunshine for a day before adding your protective layers to clear any trapped camper odors.
- Keep an identical spare mattress pad and fitted sheet set folded together in a zip-top bag for quick 2 AM bed changes.
- Tuck an absorbent waterproof pet training pad beneath the fitted sheet for an extra sacrificial barrier on tough nights.
Wrapping Up Your Camper Bed Setup
Finding the right camper sleep setup takes a little trial and error, especially when balancing tight floor space with wiggly toddlers. The secret is finding a solution that keeps your little one safe and contained without turning your living area into a permanent obstacle course. Once your sleeping zones are dialed in, everyone wakes up rested and ready to explore the trails together.
Save this list to your RV board for the next time you plan a family camping trip or want to refresh your camper layout.

