
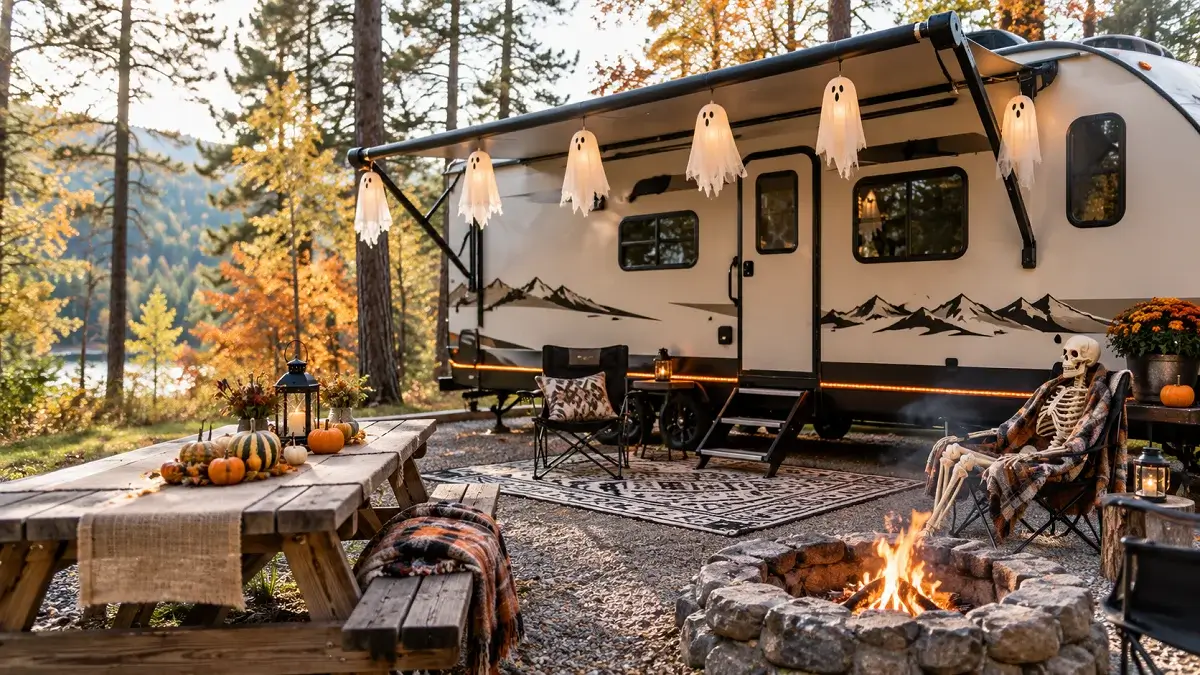
Setting up camp during October brings crisp evening air, woodsmoke, and a fun community feel that you simply do not get during summer. Walk through almost any state park or private resort on an autumn weekend, and you will see rigs dressed up with cobwebs, skeletons, and glowing lanterns. Getting involved makes the stay memorable, especially for families and trick or treaters wandering the loops.
The trouble starts when you try bringing sticks-and-bricks holiday decor into a camper. Bulky plastic yard inflatables swallow half your underbed storage. Fragile ceramic tabletop pieces bounce around inside travel trailer cabinets on bumpy mountain roads. High winds can rip cheap party store banners right off your awning rails before dusk even hits.
Smart campers decorate differently. The best halloween campground decorations fold down flat, tolerate rain, and hold up against unexpected wind gusts without scratching automotive paint or leaving glue marks. With a few practical materials and clever placement tricks, you can create a standout campsite that packs away into one slim storage tote on Sunday morning.
1. Hang Weatherproof Ghost Lanterns From Your Awning Roller Tube
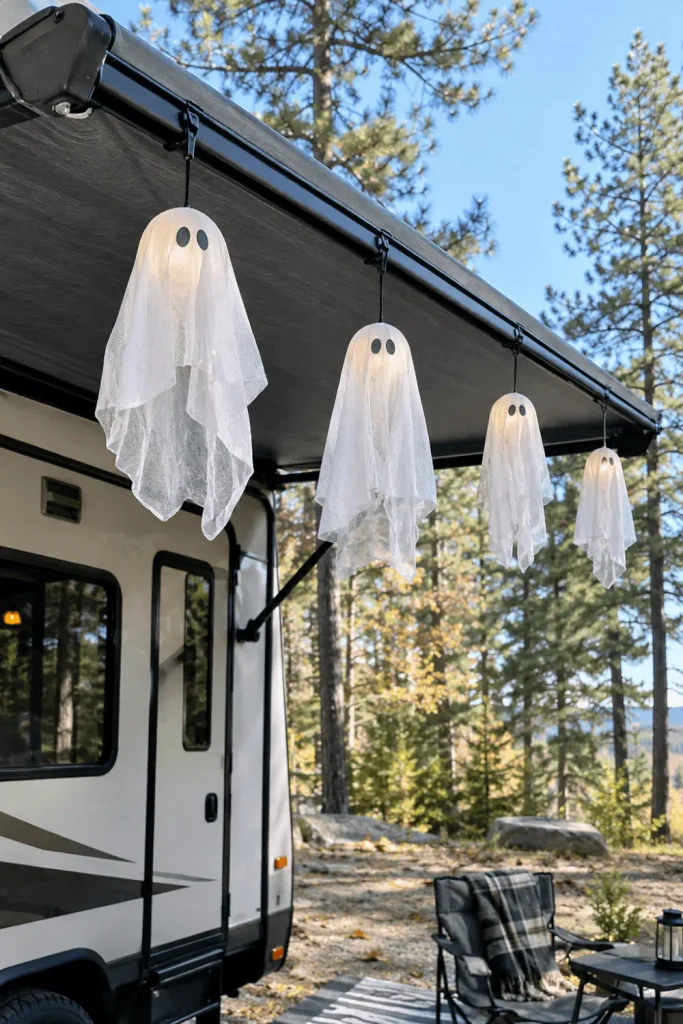
Your patio awning offers the most visible overhead real estate on your entire campsite. Instead of basic globe lights, hang lightweight fabric ghost lanterns directly along the roller tube track. Fabric allows autumn mountain breezes to blow right through without pulling hard on your awning fabric.
When you pack these at the end of the trip, you want zero hassle. Foldable paper lantern wire frames flatten down to the thickness of a notebook.
- Slide standard plastic camper awning clips into the utility channel.
- Thread battery-powered warm white puck lights into the wire frames.
- Drop sheer white outdoor mesh over each lantern and knot it at the bottom.
Tuck a small piece of foam tape around each clip hook so metal does not rub against the aluminum track on gusty nights.
2. Line Campfire Boundary Stones With Solar Powered Carved Jack-O-Lanterns
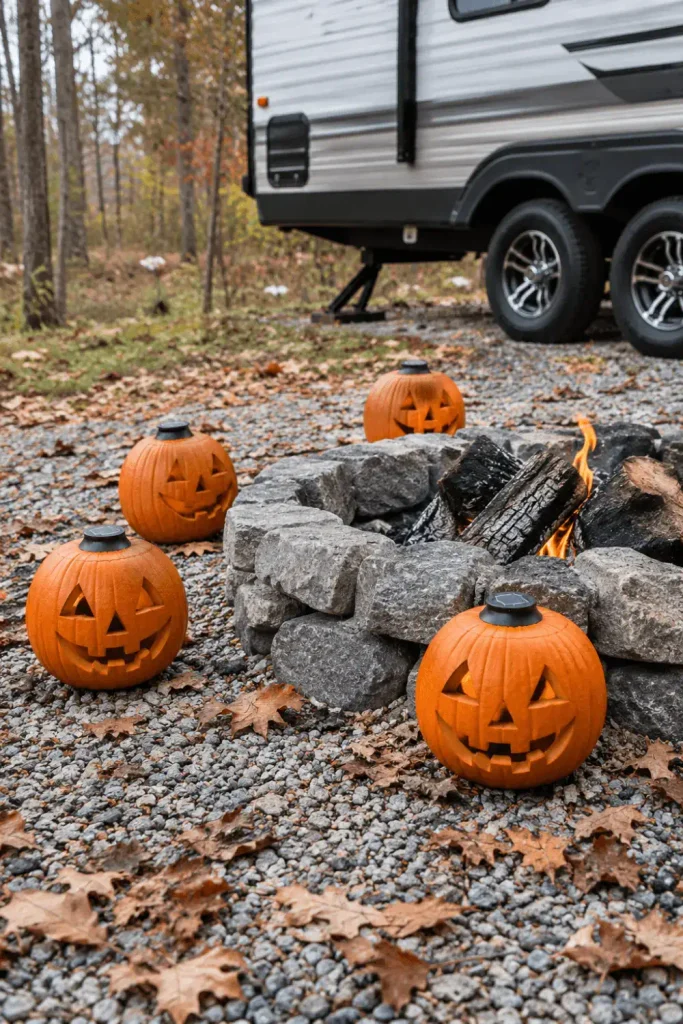
Real carved pumpkins rot quickly inside storage compartments and attract curious raccoons or bears to your outdoor seating area. Molded plastic or resin pumpkins look just as cheerful without leaving sticky pulp on your campsite mat.
Position them on the flat outer stones encircling your designated fire pit ring.
- Weight the base of each hollow pumpkin with three cups of clean playground sand.
- Replace flickering tea light candles with solar garden stake lights pushed through the bottom drainage hole.
- Angle the small solar top panels toward the afternoon sun.
💡 Quick Tip
Maintain at least four feet of clearance between plastic pumpkins and active open flames. Sparks drift easily on windy evenings.
The solar sensors kick on automatically as twilight fades, giving your campfire ring a warm orange perimeter without running long extension cords across the path.
3. Turn Your Stabilizer Jacks Into Witch Brooms Using Natural Twigs and Burlap
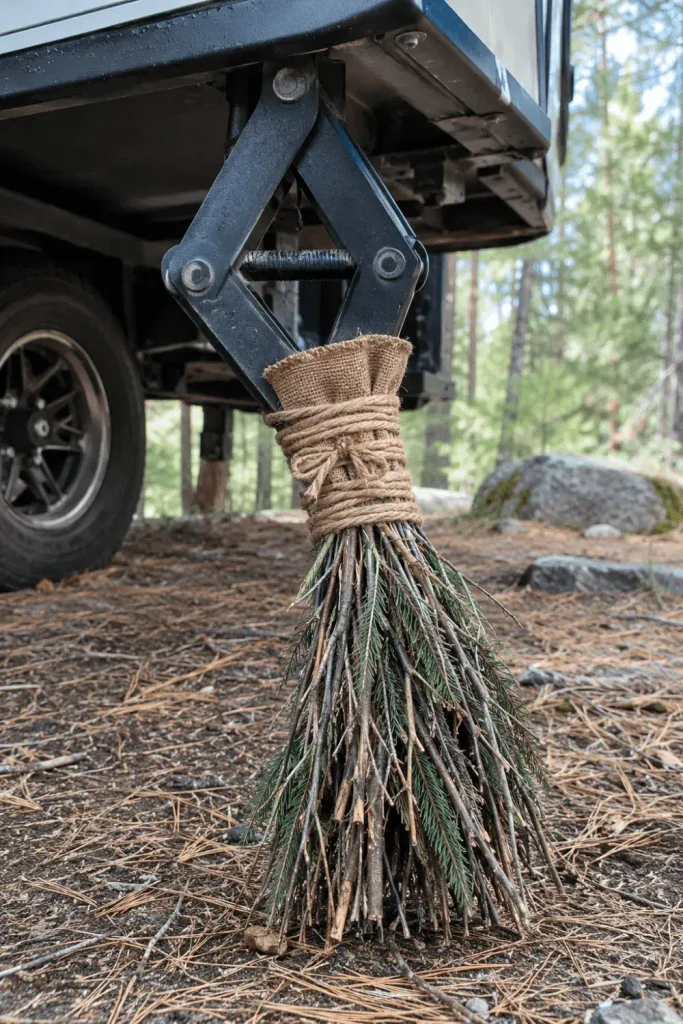
Scissor jacks and electric leveling legs look utilitarian and modern. You can disguise them into rustic witch broom bristles using dead brush gathered directly from your campsite clearing.
Tie a bundle of dried twigs around each steel jack leg with thick natural jute twine.
| Element | Material Used | Attachment Method |
| Broom Handle | Steel Jack Arm | Natural Rig Component |
| Bristles | Pine Sprigs or Twigs | Jute Twine Wrapping |
| Trim Collar | Weathered Burlap | Reusable Hook-and-Loop Strip |
Always untie your burlap and branch wraps before retracting your stabilizer jacks on departure day so nothing binds in the mechanical screw threads.
4. Secure A Cobweb Wrapped Glow Skeleton Into Your Spare Tire Carrier

The rear bumper spare tire offers a ready-made throne for a full-sized poseable plastic skeleton. Because spare tire carriers sit upright, you get great road visibility for cars and campers pulling in behind your site.
Wind outdoor polyester web netting through the tire spokes to create a weathered look.
Tire Mount Kit
- Thread your rubber gear ties behind the pelvic bone and through the spare wheel rim holes.
- Position the arms so the bony fingers grip the top edge of the tire tread.
- Wrap a small band of painter tape around the knees to keep the legs from knocking against your RV fiberglass cap.
Rubber-coated gear ties will not scratch your powder-coated wheel finishes or snap under morning frost like cheap plastic zip ties can.
5. Drape Orange Rope Lights Under The RV Underbelly Frame Rails

Low-profile lighting under the chassis does double duty at autumn campsites. It casts an eerie floor glow across your patio area and helps prevent family members from bumping their shins on trailer tongue frames.
Avoid regular indoor string lights with exposed bulbs, which trap dirt and get wet from grass dew.
Use magnetic hooks directly on the exposed I-beam chassis frame.
Choose IP65 waterproof rated silicone rope tubing.
Never staple or screw hangers into the chloroplast underbelly skin.
Avoid bright purple strobes that bother nearby tent campers.
Run the rope light along the inside lip of the frame. This keeps the light source hidden while projecting a clean, even wash of amber light across the crushed stone pad.
6. Hang Magnetic Bat Silhouettes Directly On Metal Entry Doors And Slide Sides
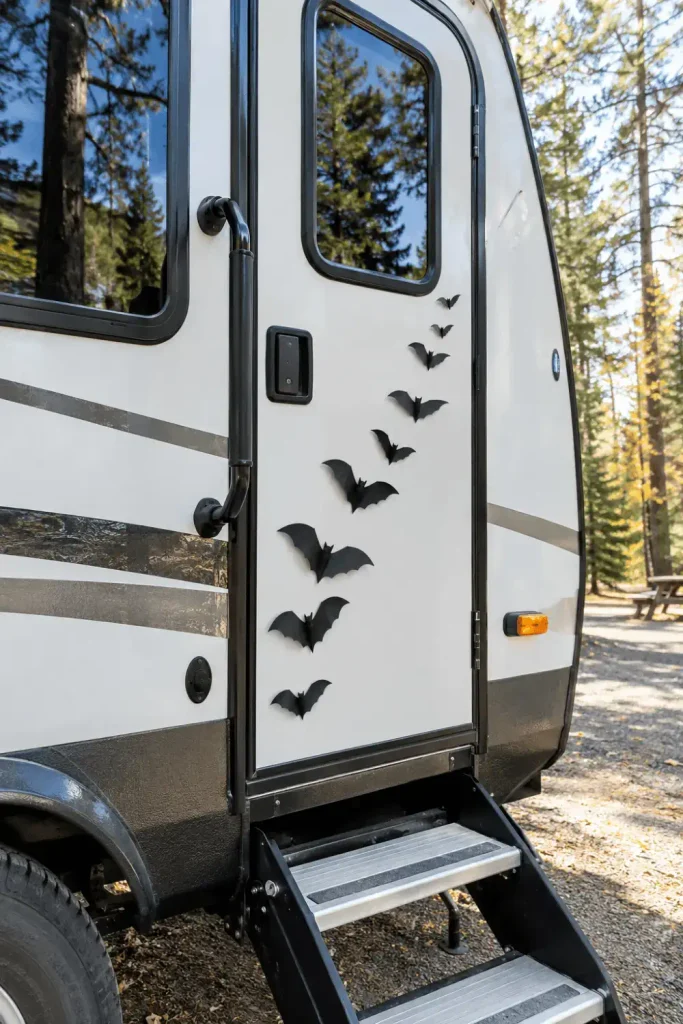
Stickers and gel window clings leave greasy outlines on RV decals when exposed to direct afternoon sun. Flat rubber-sheet magnets cut into bat profiles stick firmly to steel components and lift off without a trace.
You can display them in a rising swarm pattern across your camper entry door.
Trace bat templates onto thin sheets of flexible black craft magnet.
Crease the wings gently forward along the body edges for a 3D pop.
Press them against steel door skins or steel frame corners of your rig.
- Test your door panel with a small fridge magnet first to confirm it is steel, not aluminum or fiberglass.
- Store the bats flat between two sheets of parchment paper inside your RV drawer so the wings do not warp during travel.
7. Dress Up Your Picnic Table With A Weighted Burlap Runner And Mini Gourd Centerpieces
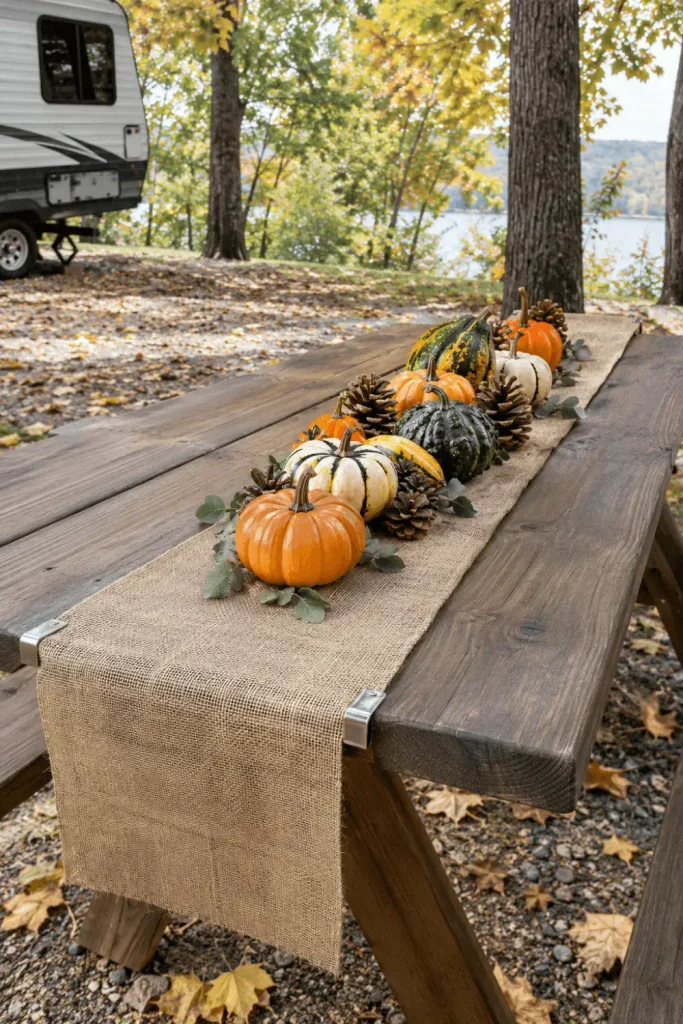
Park picnic tables take a beating from pine pitch, sap, and rain. A seasonal table setup gives your whole outdoor area a welcoming look while keeping eating surfaces clean.
Light plastic Halloween tablecloths flap violently in the wind. A natural woven runner weighed down with genuine gourds stays put without tape.
Thin plastic table covers tear easily, blow away in moderate wind, and require duct tape that leaves sticky gunk behind.
Heavy burlap breathes, stays planted under real mini gourds, and rolls up neatly into a tiny tube for your storage bay.
Use heavy-duty stainless steel picnic table clamps on both ends of the boards. Clamping the burlap runner keeps everything steady even when a gust rolls through the trees.
8. Wrap Slide-Out Support Arms In Gauze Mummy Bandages

The lower steel framework beneath extended camper slide-outs can create visual clutter. You can turn those exposed steel tubes into mummy arms using inexpensive rolls of rolled cotton gauze.
This softens harsh metal profiles and helps taller campers avoid head bumps when walking near the slide sides.
⚠️ Watch Out
Only wrap the static lower structural tubes. Keep all fabric clear of moving gear racks, slide seals, and hydraulic piston shafts.
- Unroll 4-inch wide medical cotton gauze or frayed muslin cloth strips.
- Wrap diagonally from the base up toward the slide-out wall corner.
- Tuck plastic monster eyes between the cloth wraps so they peek out toward the campsite pathway.
When packing up camp on Sunday, simply cut the gauze free with scissors and drop it straight into the site trash bin.
9. Stake Giant Spiders On The RV Roof Ladder Rungs
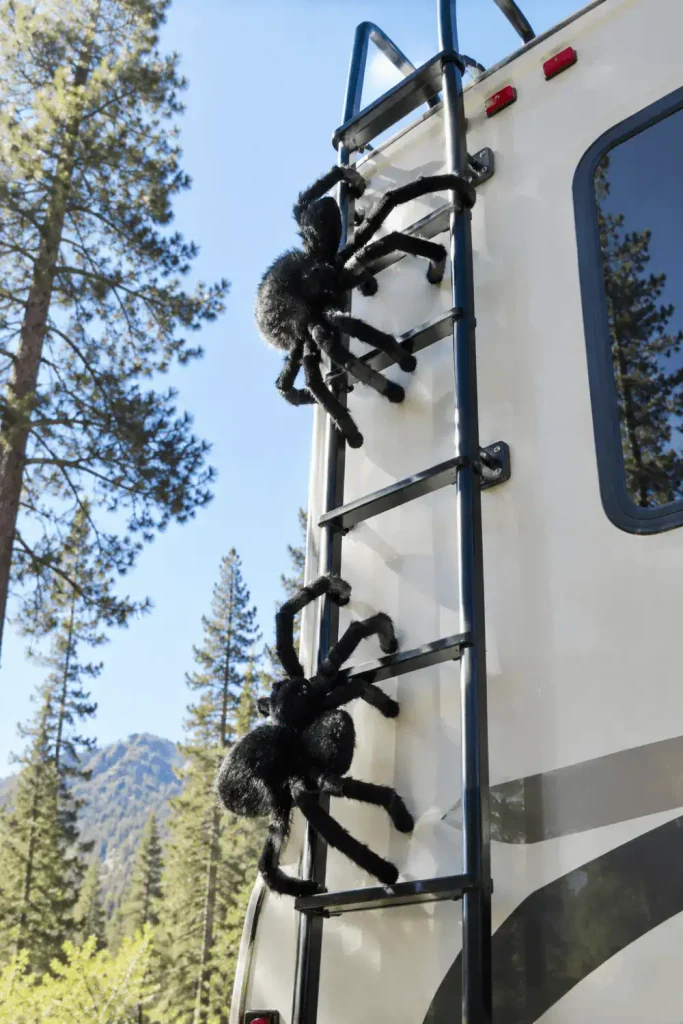
Camper ladders sit unused most of the weekend and offer great vertical support for oversize decorations. A giant furry spider clinging to the ladder rungs draws eyes up and gives your rig depth from the camp road.
Because flexible wire runs through the legs of large spider decorations, you can install them in less than three minutes.
Wrap spider legs completely around the ladder rungs rather than tying the belly with string. It prevents wind wobble and will not slide down.
Bend the front legs over the top rung and curl the rear legs beneath lower steps. If heavy rain rolls through, the synthetic plush fur dries quickly in the morning breeze without waterlogging your ladder hardware.
10. Border Your Patio Mat With Glowing Potion Bottles Filled With LED String Wire
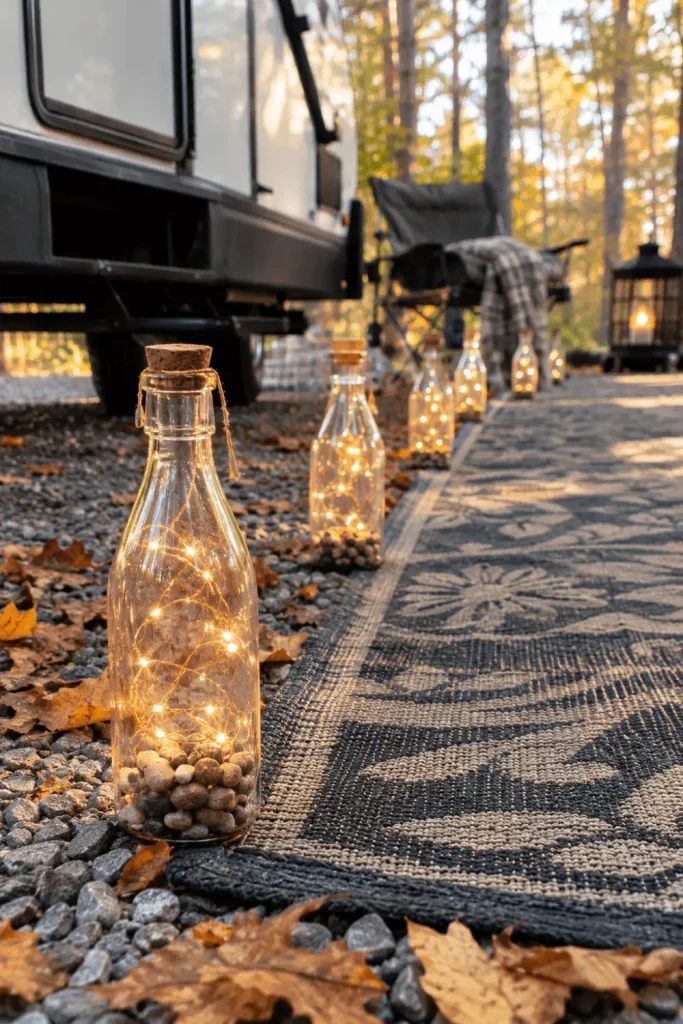
Campsite outdoor mats define your living zone and catch dirt before family members track it inside. Lining the mat edge with illuminated potion bottles creates a clear walkway border for evening camp strolls.
Choose durable plastic containers rather than fragile glass jars that could shatter on gravel pads.
| Container Material | Camp Performance | Storage Factor |
|---|---|---|
| Recycled Plastic Jugs | Shatterproof on gravel; safe for dogs and kids. | Nests inside totes easily. |
| Glass Mason Jars | Heavy and clear, but chips easily on rocks. | Requires bubble wrap in transit. |
Fill each plastic bottle with two handfuls of washed pea gravel to keep it upright. Feed a 10-bulb micro copper wire LED string inside and tuck the small battery box under the bottle neck.
11. Hang Floating Witch Hats From Low-Hanging Campsite Tree Branches
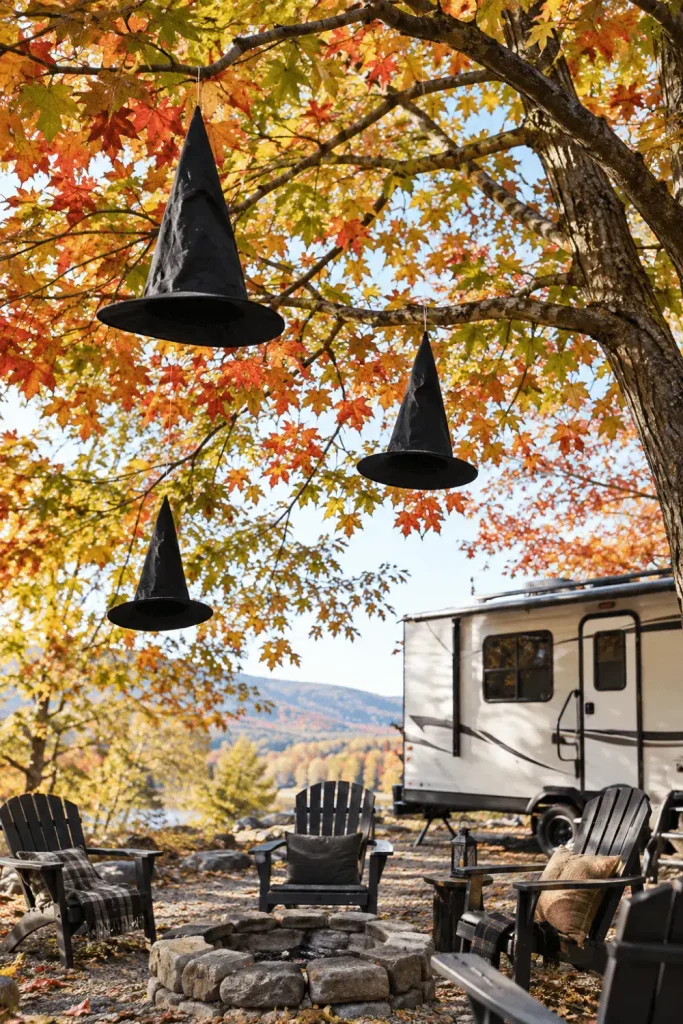
If your campsite includes mature shade trees over your fire ring or picnic table, take advantage of the canopy. Black fabric witch hats suspended by thin line look like they are floating in mid-air once night falls.
Standard pointed costume hats are made of light polyester, meaning they pack into less than an inch of vertical bin room.
- Use a sewing needle to thread clear monofilament line through the very tip of each hat.
- Tie the top of the line around a small dead twig to create an easy toss-anchor over tree limbs.
- Drop one cracked green or orange glow stick into the inside of each crown before dinner.
12. Stencil Chalkboard Signpost Arrows Pointing Toward Creepy Campsite Landmarks
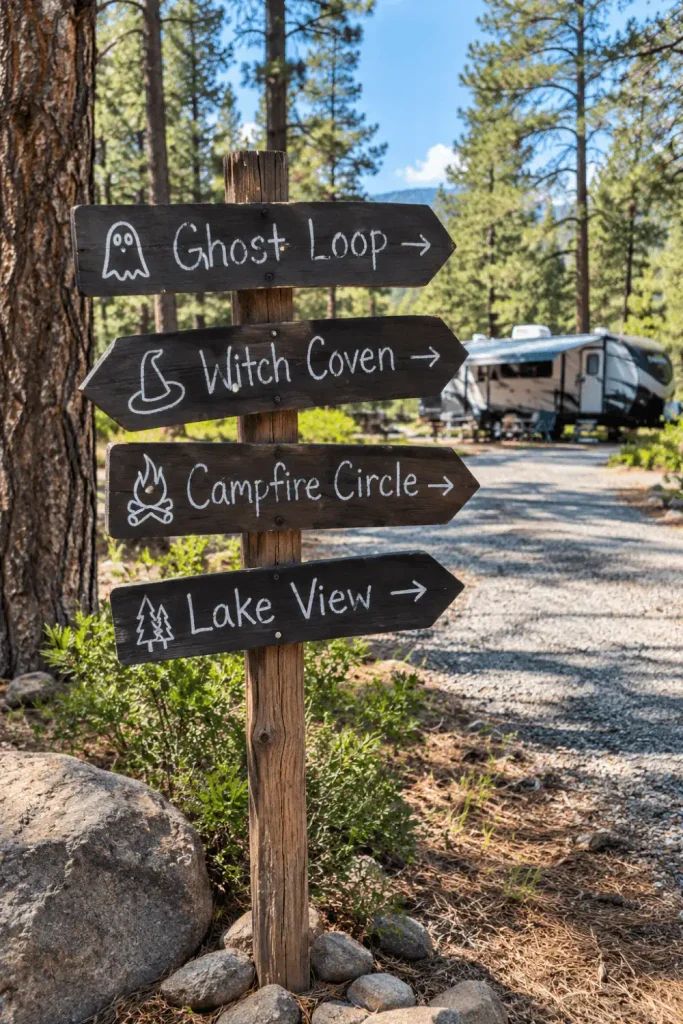
Campgrounds have distinct community spots like the bathhouse, dump station, camp store, and loop trail. You can create a quirky themed directional post using weathered scrap wood stakes and chalkboard paint.
Point arrows toward fun destinations like “Monster Swamp,” “Ghost Loop,” and “Witch Coven.”
- ▸Weatherproof Chalk Markers: Liquid chalk withstands damp night mist but washes away with a wet cloth when you are back home.
- ▸Rubber Mallet Installation: Tap the central garden stake gently into loose campfire dirt so you do not damage park ground turf.
- ▸Wing-Nut Screws: Attach wooden direction arrows with hand-tightened wing bolts so the sign packs apart flat in seconds.
Place the signpost right at the intersection where your campsite driveway meets the main loop road so passing campers can enjoy reading the funny direction markers.
13. Turn Your Outdoor Kitchen Or Griddle Station Into A Witch Cauldron Brew Bar

Most travel trailers and fifth wheels feature an outdoor pull-out kitchen drawer or an exterior Blackstone griddle prep area. Decorating this cooking zone turns evening snack prep into part of the campground entertainment.
Keep your cooking surfaces practical while adding fun accents to the surrounding shelving.
Display hot cider in a clean food-grade cast iron Dutch oven with an LED puck underneath.
Use printed kraft paper labels on stainless condiment squeeze bottles.
Never drape synthetic cobwebs near propane burner dials or stove windscreens.
Skip real dry ice chips inside drinking mugs where children might ingest them.
Set a bowl of miniature treat bags beside your coffee station so trick or treaters have a dedicated stopping point on Friday and Saturday evening.
14. Frame Your Main Rig Windows With Removable Vinyl Monster Eyes And Teeth
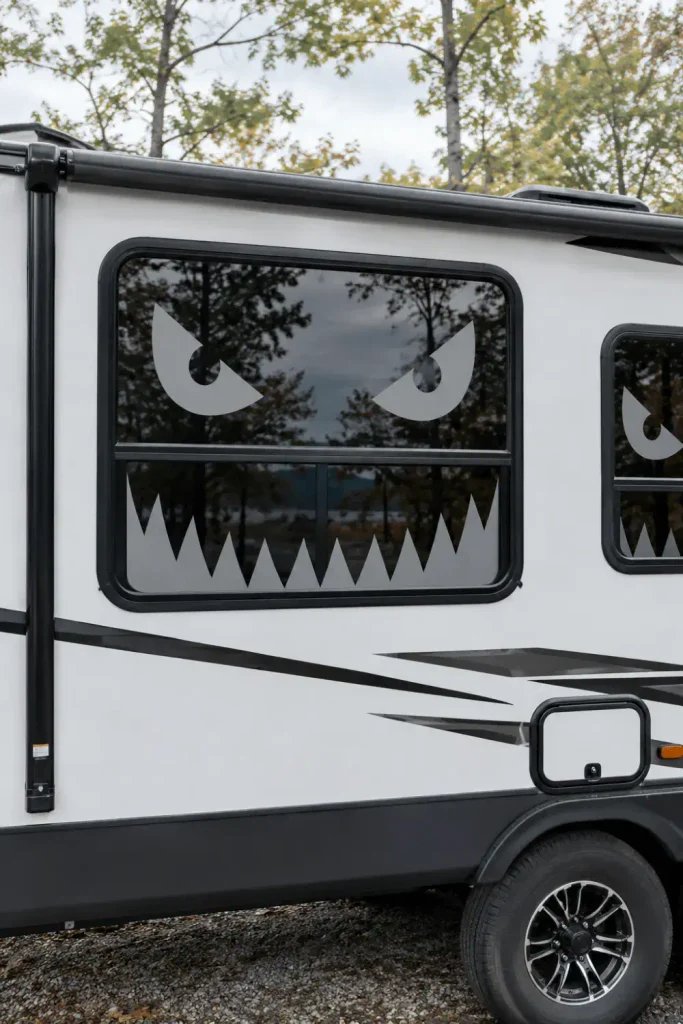
Your RV side windows make great illuminated display boxes. When your interior evening lights turn on inside the rig, dark silhouettes placed on the interior glass look sharp and clear from the outside.
Using thin static cling vinyl ensures your window tint remains scratch-free and leaves zero glue residue behind.
Window Cling Kit
- Cut big sharp monster teeth and angled glowing eye shapes out of black vinyl sheets.
- Spray the interior window glass with your soapy water mixture.
- Smooth the shapes into place and squeegee out the air pockets.
When your trip wraps up, peel them off the glass by the corner and roll them onto wax paper. They will be ready to stick right back up next fall.
Decorating your campsite for the fall season does not mean packing heavy crates or risking your RV finish. Focus on items that withstand damp nights, anchor against breezy afternoons, and roll or stack down flat into a single storage tote. These simple setups let you enjoy a festive holiday atmosphere around your campfire while keeping teardown day easy and stress-free.
Save this list to your RV lifestyle or autumn camping board on Pinterest so you have these practical ideas ready when planning your October campground reservations.