
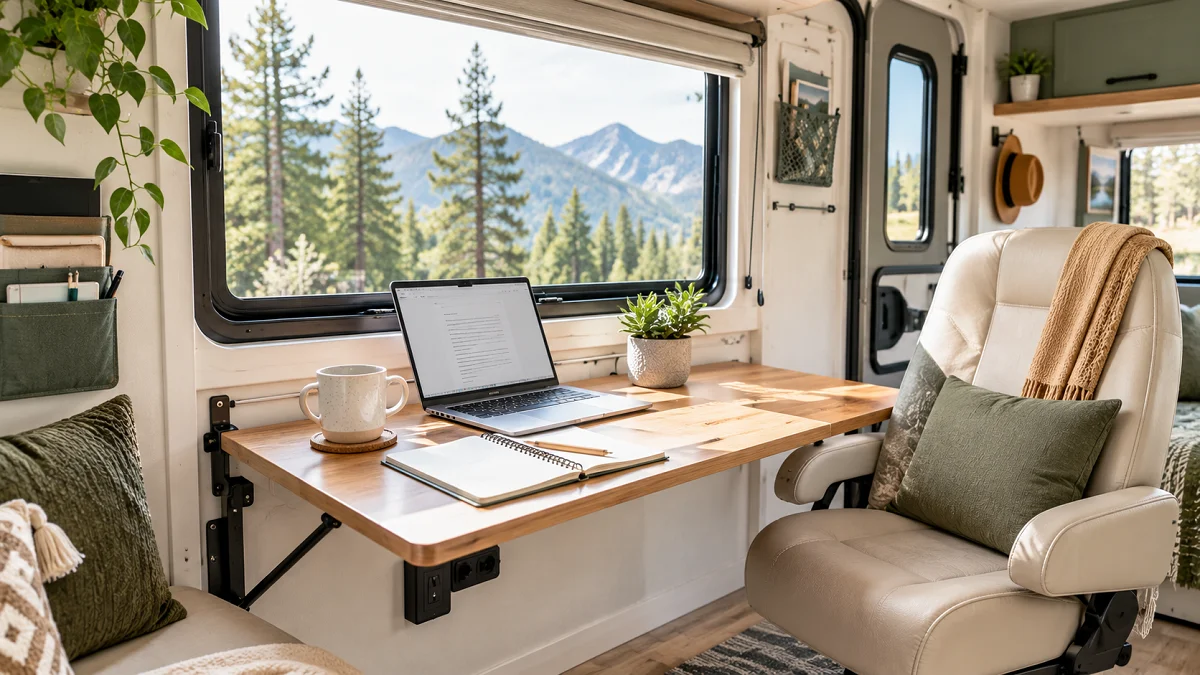
Working remotely from a camper sounds idyllic until you spend four hours hunched over a slick booth table that cuts straight into your thighs. Standard factory floor plans are built for quick weekend meals and card games, not back-to-back video calls or eight-hour typing marathons. Between the poor ergonomics, tangled power cables, and constant lack of elbow room, trying to stay productive on the road can feel like an uphill battle.
Most advice tells you to buy a larger rig or surrender your entire living area to a clunky office chair. You do not need to tear down your whole interior or tow an extra room behind you to get serious work done. The real fix comes down to using dead zones, mounting multipurpose surfaces, and picking hardware that stays rock solid when rolling down bumpy highways.
With a few thoughtful tweaks, your rig can support a steady workday without losing its relaxed camping feel. These practical rv workspace ideas show you how to carve out dedicated zones for your laptop, manage off-grid power, and keep your body comfortable wherever you set up camp.
1. Mount a Fold Down Teak Desk Under the Window

Dead wall space next to a large window offers some of the best natural lighting in any rig. A wall-mounted drop-leaf table lets you flip up a solid surface for your morning focus blocks, then fold it flat against the wall before dinner. Marine-grade teak or bamboo works best because both handle humidity swings without warping or peeling.
Finding solid backing behind camper paneling requires some patience. Locate the aluminum wall studs using a magnetic stud finder, or anchor a horizontal hardwood ledger board across two studs first. This gives your heavy-duty locking folding brackets a secure foundation that will not pull free on washboard roads.
- Bracket type: Heavy-duty spring-loaded locking hinges rated for at least 100 pounds.
- Surface depth: Keep the depth between 14 and 18 inches so it clears walking paths when down.
- Edge detail: Sand down the corners to avoid hip bruises when passing through narrow hallways.
2. Convert the Passenger Swivel Chair into an Executive Seat

Your front cab seats are often the most ergonomic chairs in your entire vehicle, yet they sit ignored whenever you put the engine in park. If your chassis allows for swivel bases, turning that seat 180 degrees creates an instant office setup with contoured lumbar support and adjustable armrests.
Pair the turned seat with an adjustable articulating laptop pole clamped to the seat base frame. This setup swings your computer directly over your lap for work and tucks against the cab wall when you need to walk back into the living quarters.
💡 Pedestal Stability Tip
If your swivel base rattles while typing, slide a cut section of dense rubber camper matting between the base plate and the floor mount before tightening the central locking pin.
- Engage the swivel release lever and clear both armrests past the steering column or door panel.
- Lock the base pin completely into the reverse detent to eliminate side-to-side play.
- Position an adjustable footrest underneath to keep your knees at an easy 90-degree angle.
3. Build a Slide Out Keyboard Tray Under the Dinette Table

Most factory dinette tables are mounted too high for comfortable typing, forcing your shoulders into your ears within twenty minutes. Mounting ball-bearing drawer slides underneath the tabletop drops your keyboard and trackpad down to elbow level without changing how you use the booth for meals.
Pick locking slides that click into place when fully extended and fully closed. This prevents the tray from shooting open around sharp mountain bends or vibrating loose while cruising down the interstate.
Ensure your mounting screws do not penetrate through the top surface of the main dinette. Using three-quarter-inch mounting cleats screwed and glued into the underside gives you a solid anchor without risking surface damage.
4. Swap the Factory Dinette for a Solid Butcher Block Bar
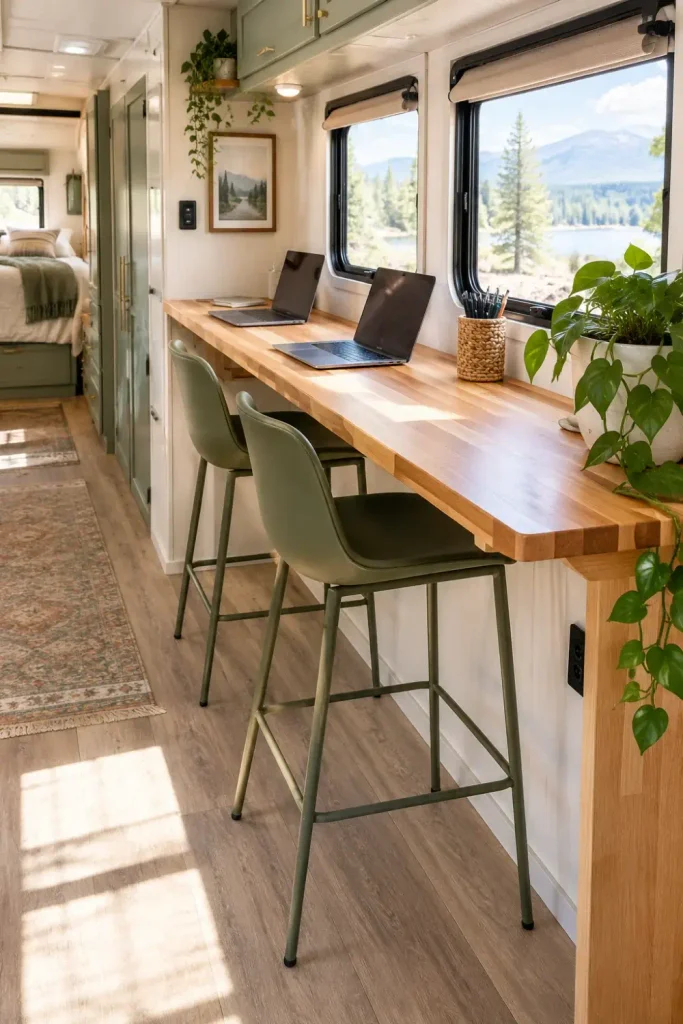
Bulky factory dinette booths consume enormous amounts of usable floor space while offering little back support. Replacing the booth with a narrow, wall-mounted butcher block bar opens up your hallway and gives you an expansive desk surface that easily fits two laptops.
Use residential barstools that tuck completely underneath the counter when not in use. You can strap them to the base frame using heavy-duty hook-and-loop straps on moving days to keep your living room open and quiet.
| Feature | Standard Dinette | Custom Work Bar |
|---|---|---|
| Aisle Clearance | Cramped walk path | Wide open walkway |
| Desk Depth | 36 to 40 inches deep | 18 to 22 inches deep |
| Seating Comfort | Rigid 90-degree back cushions | Swivel or ergonomic stools |
Seal your wood counter with a durable matte polyurethane instead of food-safe oil. Oil finishes need regular reapplications and can pick up dust from open camper windows during desert dry camping.
5. Install a Drop Leaf Counter Extender at the Kitchen Edge
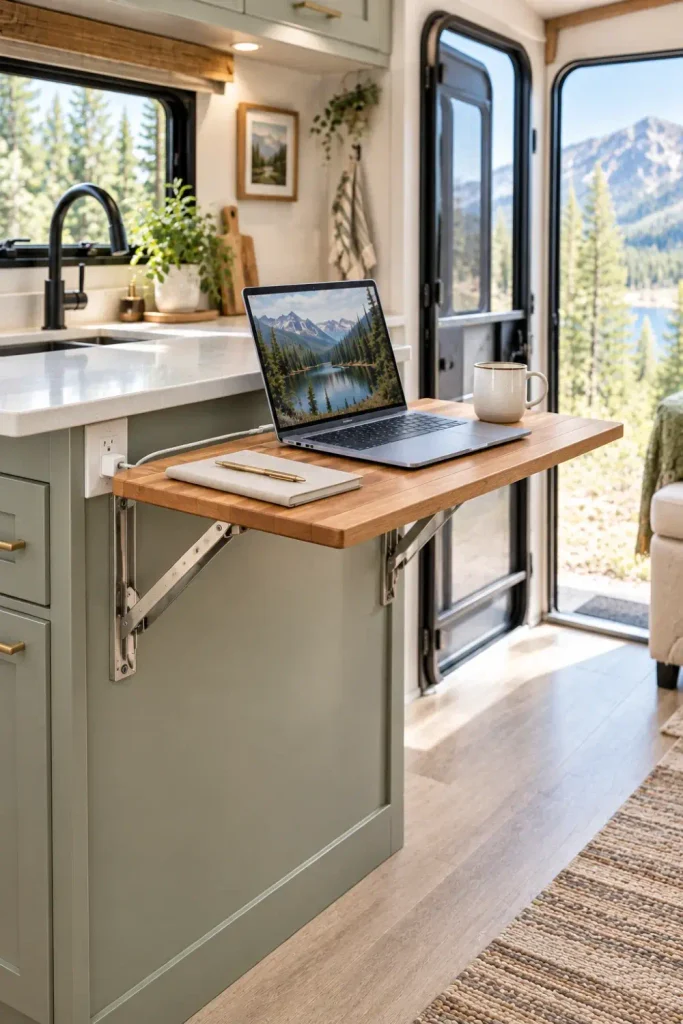
When floor space is at an absolute premium, the side panel of your kitchen galley can pull double duty. Mounting a matching flip-up cutting board extension creates a reliable standing desk right in the center of your camper.
This spot keeps you right next to electrical outlets, beverage storage, and the overhead vent fan for continuous fresh airflow during warm afternoons.
Laptops fight for room among cutting boards, coffee makers, and dishes on the main cooking counter.
A separate swing-up surface keeps electronics away from meal prep zones and drops down out of sight in seconds.
- Mount heavy-duty folding shelf brackets to the structural cabinet framing, not just the thin veneer skin.
- Match the wood tone to your existing cabinets to make the post look factory-built.
- Add a small brass latch to stop the leaf from tapping against the cabinet frame while driving down rough dirt roads.
6. Use Heavy Duty Articulating Monitor Arms on Structural Ribs
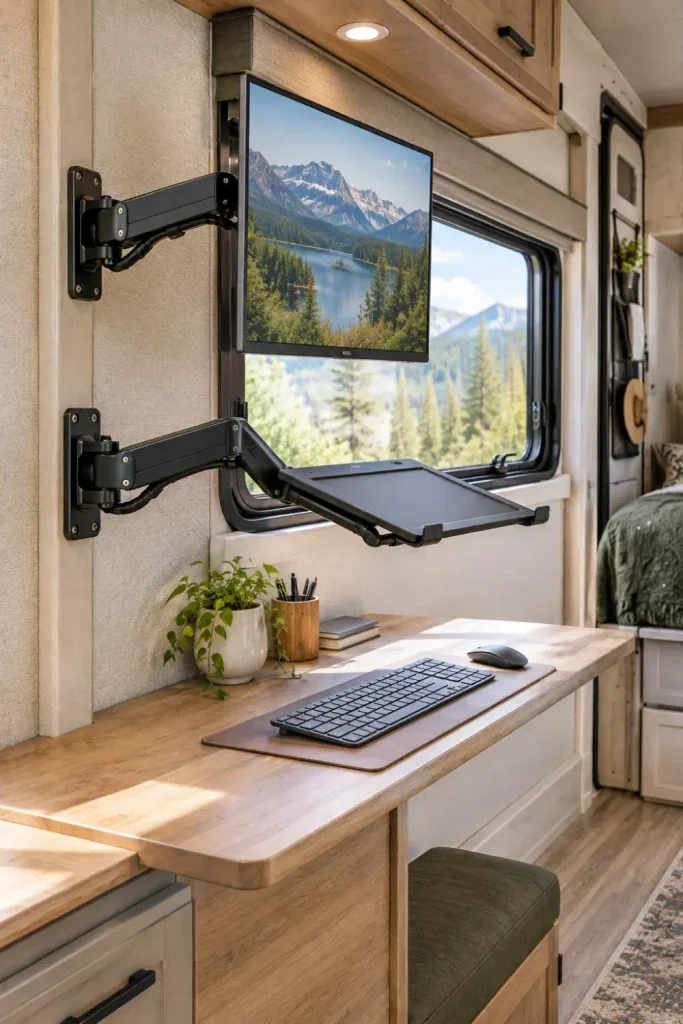
Setting a standard desktop screen loose on a table creates a constant hassle every time you pack up camp. Bolting a locking articulating monitor arm directly into the wall framework lets you position your display at eye level during calls, then pin it against the wall before driving.
Select an arm that features integrated mechanical pins rather than tension collars alone. Standard friction hinges eventually slip under continuous road vibration and let your expensive screen bang against cabinets.
Travel Day Monitor Checklist
Run your HDMI and USB cables through flexible split-wire loom along the arm body. Leaving enough slack at every pivot point avoids strained ports or sheared connectors when swinging the screen toward the bed for evening movie watching.
7. Create a Dedicated Laptop Nook in the Cabover Loft
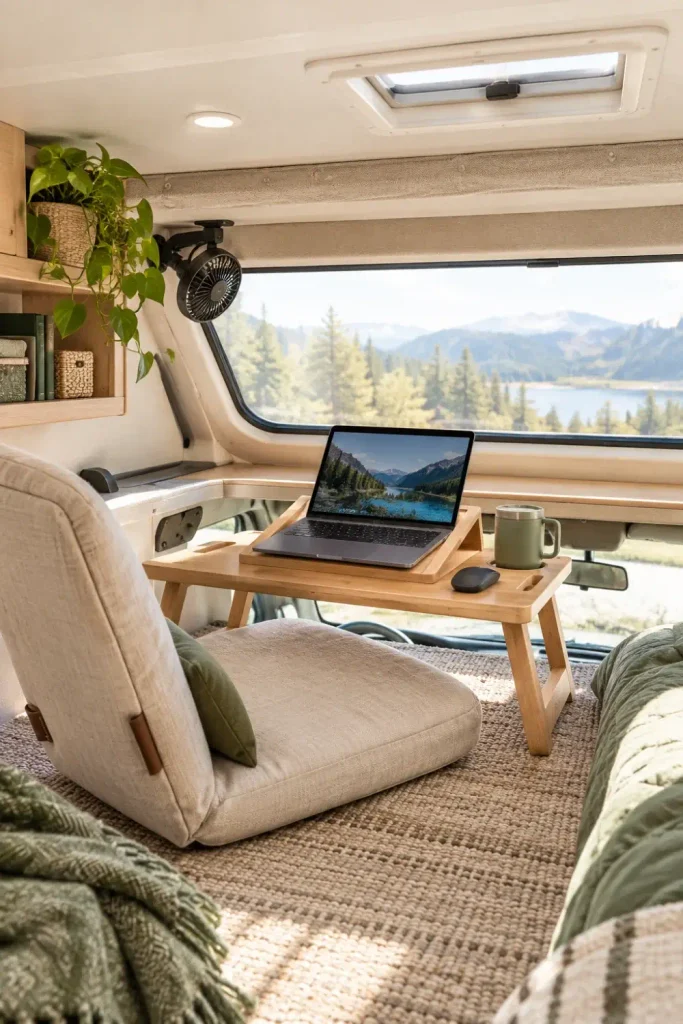
The front overhead bed area in a Class C or truck camper frequently turns into an unorganized storage pile. By placing a low floor desk or Japanese-style writing table against the front bulkhead, you get a cozy, distraction-free work capsule separated from the main living area.
Because overhead lofts trap rising heat quickly, pair this nook with a small 12-volt clip fan and keep the front roof vent cracked open. The quiet separation makes this space ideal for long recording sessions or deep focus periods.
Use a floor seat with adjustable back support to avoid hunching your neck under the low ceiling.
Place a breathable bamboo laptop riser under your machine to keep bed fabrics from blocking exhaust vents.
Never run heavy equipment directly on thick comforters where trapped heat shortens battery life.
Do not leave heavy monitors freestanding where a sudden bump could tip them over the loft lip.
8. Tuck a Standing Desk Converter Onto an Existing Counter
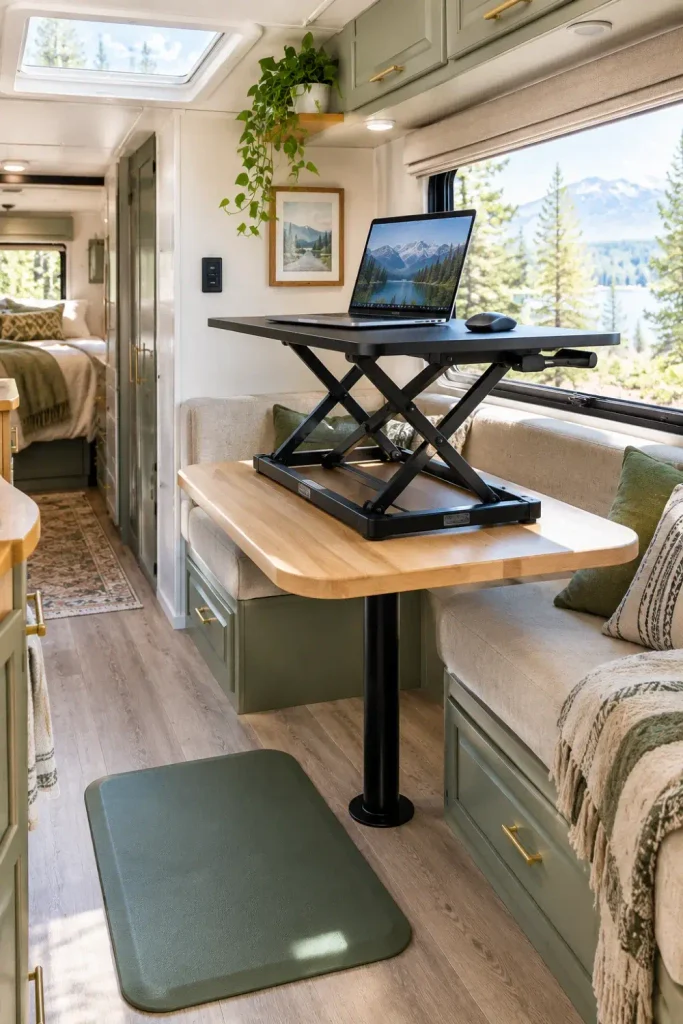
Sitting for eight straight hours inside a compact camper leaves anyone feeling sluggish. A lightweight, scissor-action standing desk converter transforms your kitchen counter or dinette into an ergonomic standing workstation in seconds.
Look for gas-strut models with a compact base footprint under 24 inches wide. When the workday wraps up, the entire assembly collapses down to a three-inch profile that slides neatly under your bed or behind a passenger chair.
Clear any loose countertop items and wipe the base surface dry to give the rubber feet a solid grip.
Squeeze the side tension release paddles and raise the top platform until your forearms sit level with the keys.
Place an anti-fatigue gel mat on the floor to reduce strain on your ankles and knees while standing.
9. Turn an Unused Bunk into a Split Office and Gear Locker
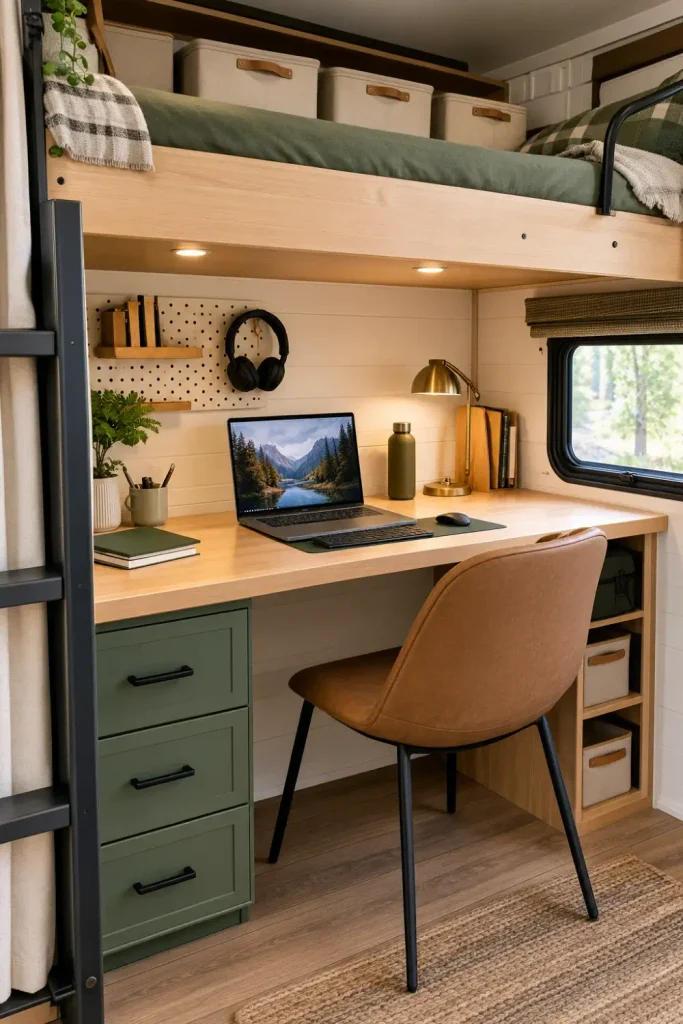
If you travel without kids or regular guests, the lower bunk in a bunkhouse floor plan is pure wasted potential. Removing the lower mattress lets you install a deep, residential-grade desktop while keeping the upper bunk intact for bulky tote storage or guest bedding.
Because bunks are framed directly into the rear exterior walls, they offer exceptional structural support for heavier monitor setups and shelving.
Keep the original bunk support framing intact so you can reinstall the factory mattress and preserve rig resale value whenever you decide to sell.
- Unscrew the plywood mattress deck and store it flat under your main bedroom bed.
- Cut a half-inch sheet of finished birch plywood to match the interior bunk frame dimensions.
- Install adhesive puck lights underneath the top bunk framing to illuminate your new desktop without glare.
10. Tether Dual Portable Monitors with Magnetic Folio Stands

Traditional computer screens take up too much vertical space and require dedicated storage boxes during travel. Ultra-thin portable USB-C monitors deliver full dual-display productivity while slipping cleanly into the same protective sleeve as your laptop.
These lightweight screens pull video signal and operational power through a single cable. That means fewer loose wires snaking across your kitchen counter and less clutter around your elbows.
💡 Battery Draw Warning
Running two extra screens powered straight from your laptop drains computer batteries twice as fast. Keep your laptop plugged into a dedicated 12V DC power brick rather than running your inverter all day.
- Display size: Stick to 15.6-inch screens to match standard laptop bags and desk depths.
- Mounting method: Use fold-over magnetic kickstands rather than loose plastic tripod mounts that tip over easily.
- Resolution: 1080p screens consume roughly 40% less wattage than 4K portable panels, keeping your solar reserves intact.
11. Mount Pegboard Organization on the Inside of Closet Doors
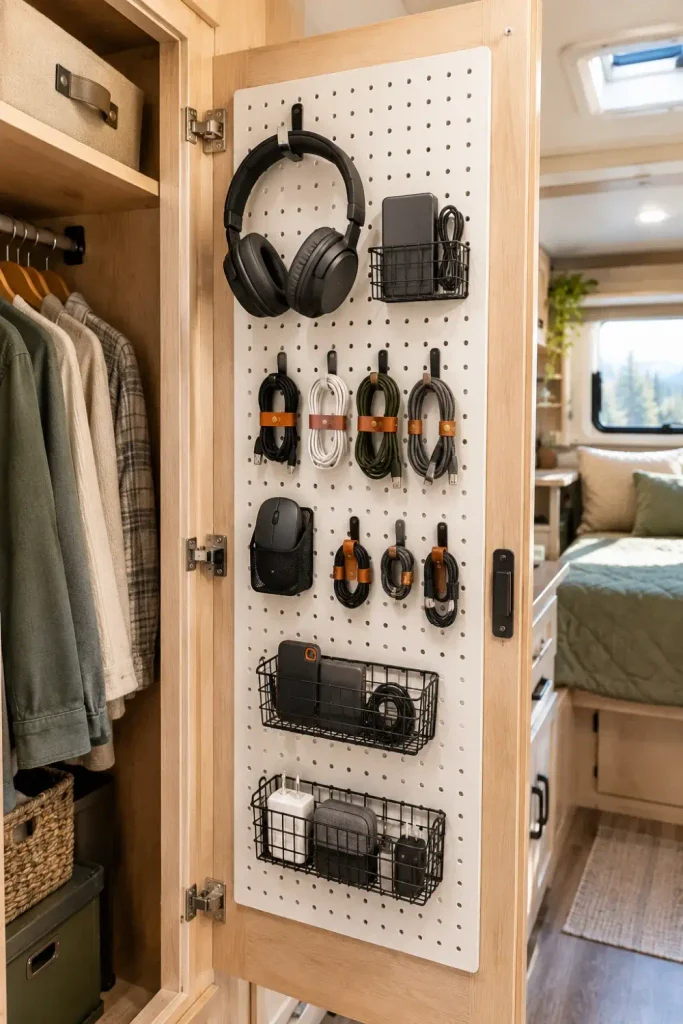
Small items like charging blocks, display dongles, and headset cases quickly scatter across counters and clutter your focus. The hollow interior face of your bedroom or hallway wardrobe door makes an ideal vertical storage grid when covered with lightweight composite pegboard.
Use elastic cord wraps and locking metal peg hooks to secure each tool in place. Because the door closes completely, your electronics stay dust-free and out of sight when coworkers or friends step inside your rig.
Fasten your pegboard using short wood screws and washers backed with construction adhesive. Always measure the thickness of the hollow door skin first so screw tips never break through the exterior finished side.
12. Install Recessed 12V USB-C Fast Chargers Directly at Your Workspace

Powering laptops through a big 120-volt inverter wastes considerable energy simply converting DC house power to AC and back to DC through your laptop brick. Hardwiring high-output, 100-watt USB-C Power Delivery ports into your workspace runs your electronics directly off your battery bank with almost zero idle loss.
Tap into an existing 12-volt ceiling light or water pump circuit using properly sized marine-grade duplex wiring. Be sure to match the fuse at your distribution panel to your wire gauge so you stay protected against overloads.
12V Charging Install Supplies
13. Add a Floor Mounted Post Table Between Front Captains Chairs

The empty flat floor between driver and passenger seats in motorhomes often sits empty while camping. Installing a removable marine pedestal base lets you drop in a small hardwood table that serves both front seats at once.
Lagun-style articulating table legs take this a step further by swiveling 360 degrees on two separate arms. You can slide the table right up to your chest while typing, then swing it aside to access the center console or walk to the galley.
- Bolt the mounting bracket through the floor using steel backing plates to spread the load across the undercarriage.
- Keep the tabletop dimensions under 20 by 30 inches so you can easily maneuver around it.
- Loosen the main collar handle to detach the leg from its mounting bracket before long drives.
14. Use Removable Wall Tracks for Adjustable Office Shelving
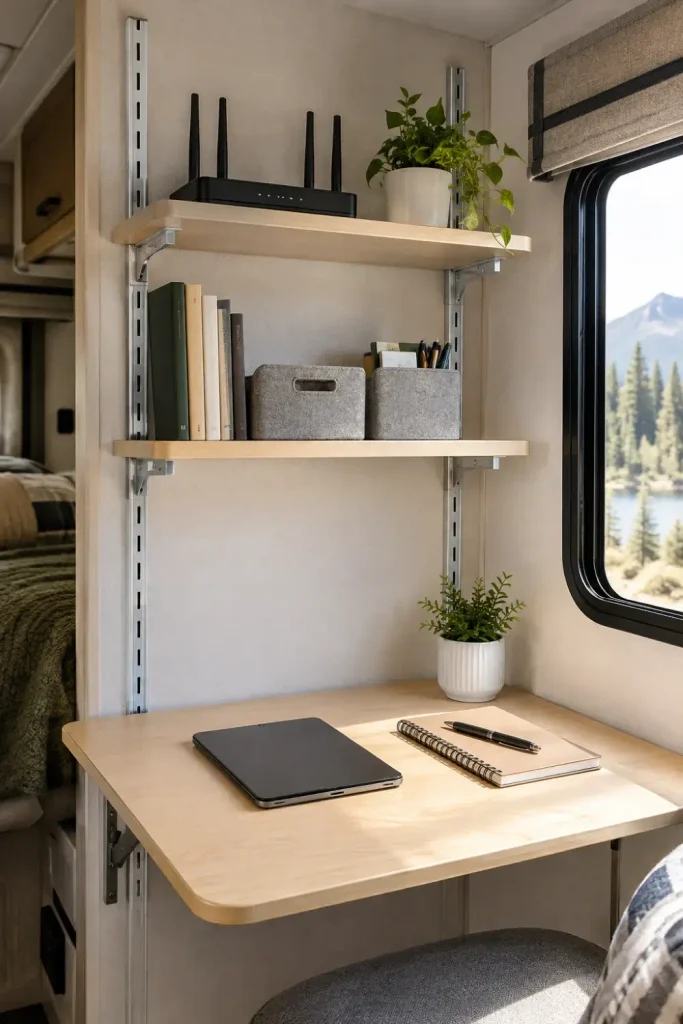
Rigid, permanent cabinets leave you stuck with fixed dimensions that may not fit your specific printers, routers, or document bins. Installing horizontal aluminum cargo tracks or adjustable wall standards lets you reconfigure shelves as your work gear evolves.
Secure your shelves with quick-release detent pins so you can raise, lower, or remove them without searching for a screwdriver.
| Method | Holding Power | Vibration Resistance |
|---|---|---|
| Adhesive Strips | Light duty (under 5 lbs) | Fails in extreme summer heat |
| Hollow Wall Anchors | Medium duty (10 to 20 lbs) | Loosens over washboard dirt roads |
| Rivet Nuts in Studs | Heavy duty (50+ lbs) | Completely immune to vibration |
15. Hang a Roll Up Ergonomic Back Rest Over Standard Camper Cushions

Factory dinette seat cushions are almost universally flat, firm, and set at a rigid right angle against the wall. That posture forces your lower spine to round forward, putting extra stress on your back during long spreadsheet reviews or writing sessions.
A contoured, roll-up lumbar support cushion suspended from the headrest or seat frame transforms that stiff vertical board into a supportive chair. Look for cushions made with high-density molded foam that will not pack down flat after an hour of sitting.
Place a wedge cushion under your thighs to tilt your pelvis forward and restore your natural lumbar curve.
Choose breathable mesh covers to stay cool during warm boondocking afternoons.
Do not rely on soft bed pillows, which compress completely and offer zero true spinal support.
Avoid slick faux-leather cushions that cause you to slide forward while typing.
16. Convert the Bedroom Wardrobe into a Closeable Murphy Desk
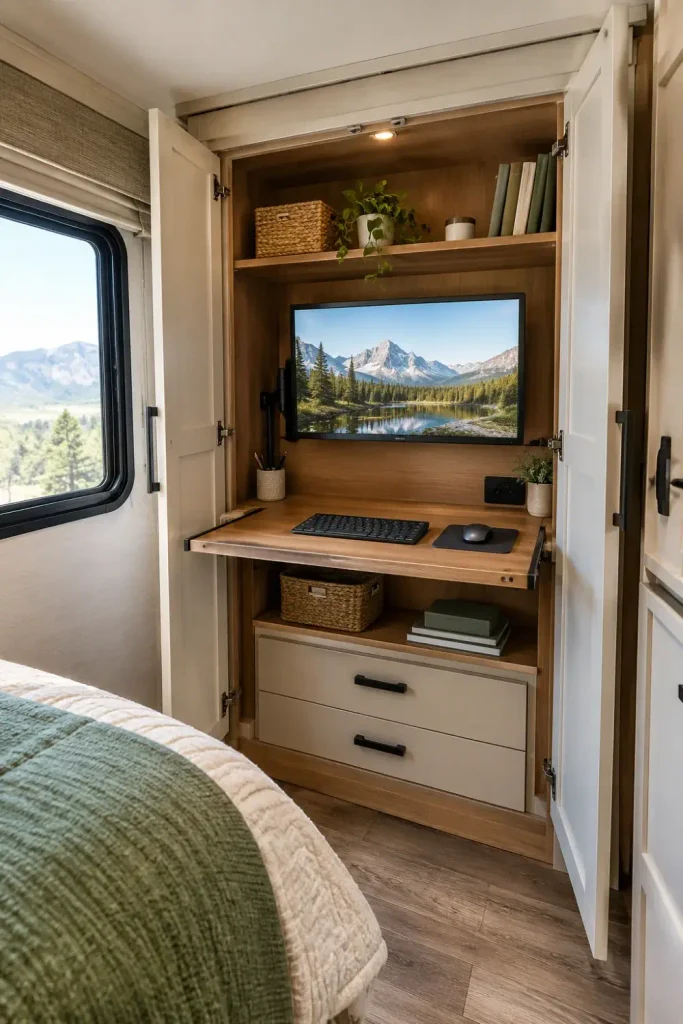
A messy workstation left out in full view makes it hard to unwind in a small rig. Converting a bedroom hanging wardrobe into a fold-out desk gives you a dedicated workspace that disappears behind closed doors the moment five o’clock arrives.
Remove the bottom wardrobe clothes rod, mount an interior desk shelf on heavy-duty drawer slides, and keep your displays plugged in inside the cabinet. When the workday ends, slide the tray back, close the wooden cabinet doors, and return your bedroom to a calm sleeping space.
Open the cabinet doors fully and secure them against the bedroom wall with magnetic door catches.
Pull the desk surface forward until the locking slide brackets click firmly into position.
Flip open your laptop and power up your hardwired monitor using the dedicated cabinet power strip.
17. Set Up a Quick Deploy Outdoor Standing Desk on the Rear Ladder
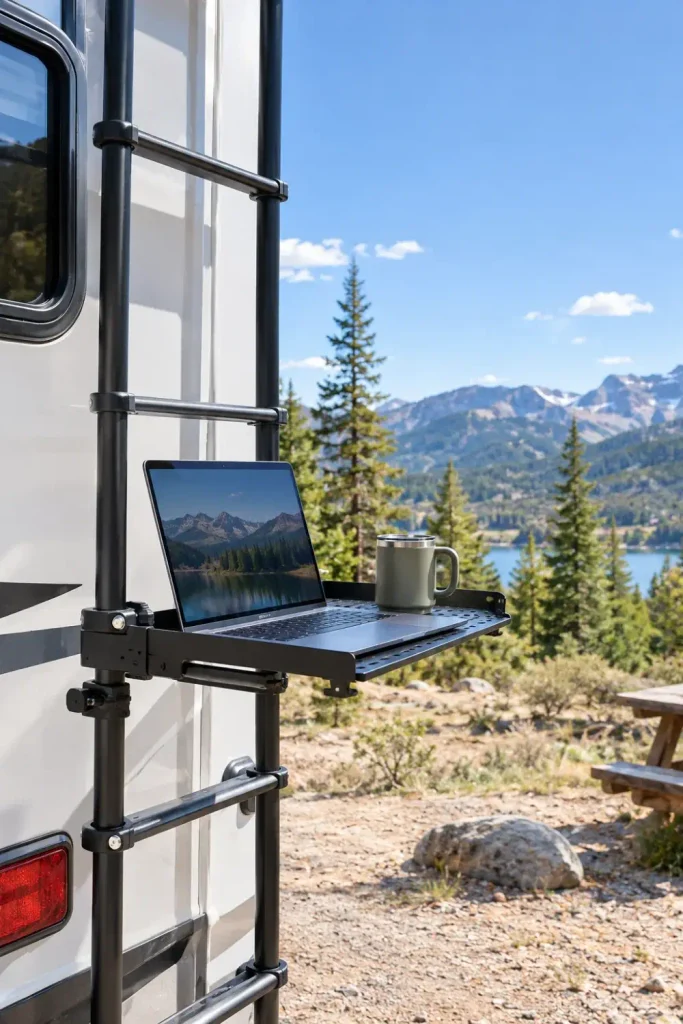
Sitting indoors on pleasant bluebird days can feel counterproductive when you camp in scenic places. Mounting an aluminum or composite utility tray to your rig’s exterior rear ladder gives you a solid standing desk with an unobstructed view of your campsite.
Use rubber-lined U-bolts to secure the mounting arms to the round ladder rungs. This prevents scratching the powder coating while keeping the desk stable enough for typing in light mountain breezes.
Working inside a dimly lit camper on sunny afternoons while missing out on fresh air and scenic views.
A solid standing perch right outside your back bumper, shaded by your rear awning and surrounded by nature.
- Pack a matte anti-glare screen protector for your laptop to cut down on harsh outdoor reflections.
- Pick up a clamp-on umbrella or canopy bracket to shield your computer from midday sun exposure.
- Unclamp and stow the tray inside your storage bay before turning in for the night to protect it from sudden rainstorms.
18. Add Neoprene Cable Sleeves and Surface Clamp Hubs for Travel Days
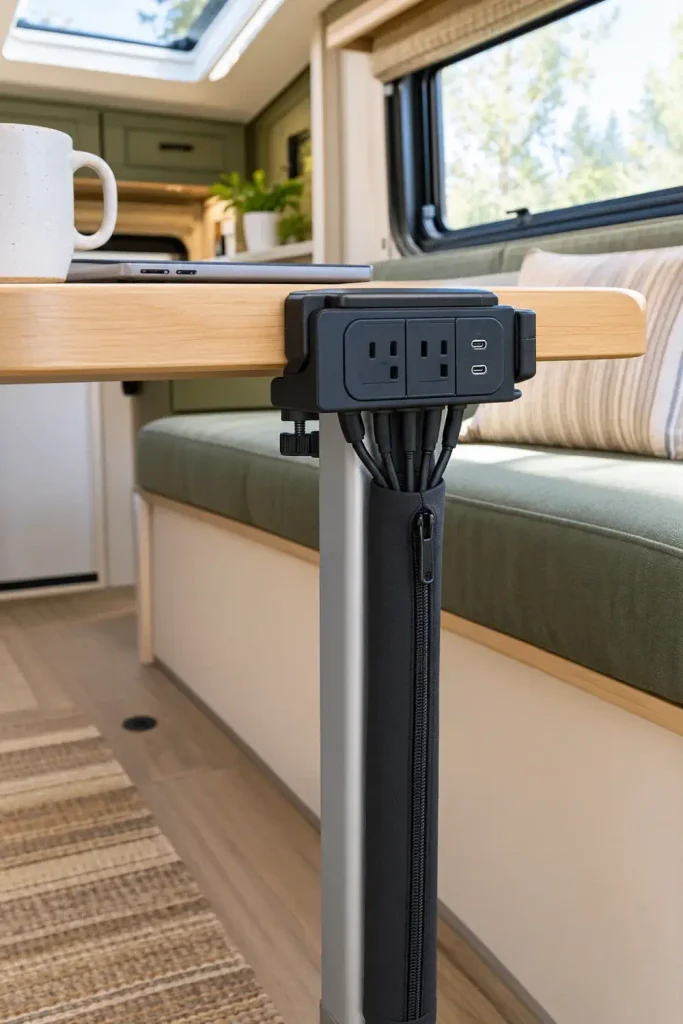
A rat’s nest of loose cables looks messy, catches on chair arms, and creates distracting tapping noises against interior camper walls while driving. Bundling your cords into zippered neoprene sleeves keeps everything organized, quiet, and protected from road vibration.
Pair those sleeves with an edge-clamp desk power hub that screws directly onto your desktop. This puts AC outlets and fast-charging USB ports right at surface level so you never have to crawl under dinette seats to plug in your charger.
💡 Rattle Prevention Tip
Wrap small adhesive felt dots around plastic cable bricks where they rest against thin camper walls to stop annoying rattles while rolling down the highway.
- Bundle display cables, power cords, and internet lines together through a flexible zippered sleeve.
- Fasten the bundle along table legs using reusable silicone ties rather than single-use plastic zip ties.
- Keep six inches of slack near the laptop port to prevent cord strain when adjusting your monitor angle.
19. Build a Removable Center Console Desk for Mid Size Class C Cabs
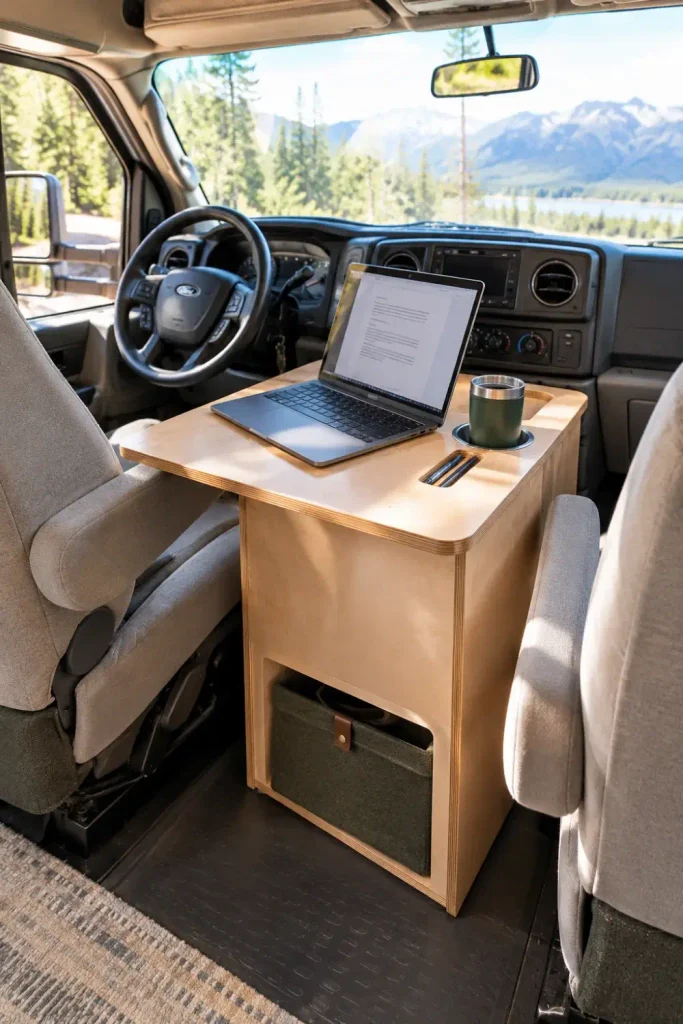
The space between the front bucket seats in Ford E-Series or Chevy Express cutaway cabs often sits as an awkward, open floor dip. Building a custom dropped wooden console creates a solid workstation that stays level while parked.
Notch the underside of your console base to fit snugly over the transmission doghouse. This secures the table firmly in place without drilling permanent holes through the factory metal floor pan.
Always verify your emergency brake lever and doghouse service latches clear your custom console base completely before hitting the highway.
- Top surface size: 16 by 22 inches easily supports a 15-inch laptop and a mouse pad.
- Base material: Use three-quarter-inch cabinet-grade plywood for weight and stability.
- Storage extra: Add a recessed cup holder and pencil groove along the top back edge to keep pens from rolling away on uneven parking spots.
Carving out a functional office on the road does not require a brand-new rig or an expensive custom build. Making simple adjustments to your existing floor plan, using sturdy drop-leaf tables, and managing power off your house batteries creates a comfortable workstation anywhere you choose to camp. Implementing these rv workspace ideas will help you stay focused during the workday so you can shut your laptop and enjoy the outdoors when you wrap up.
Save this list to your Pinterest travel board so you can reference these layout ideas and hardware tips before your next camper project.