
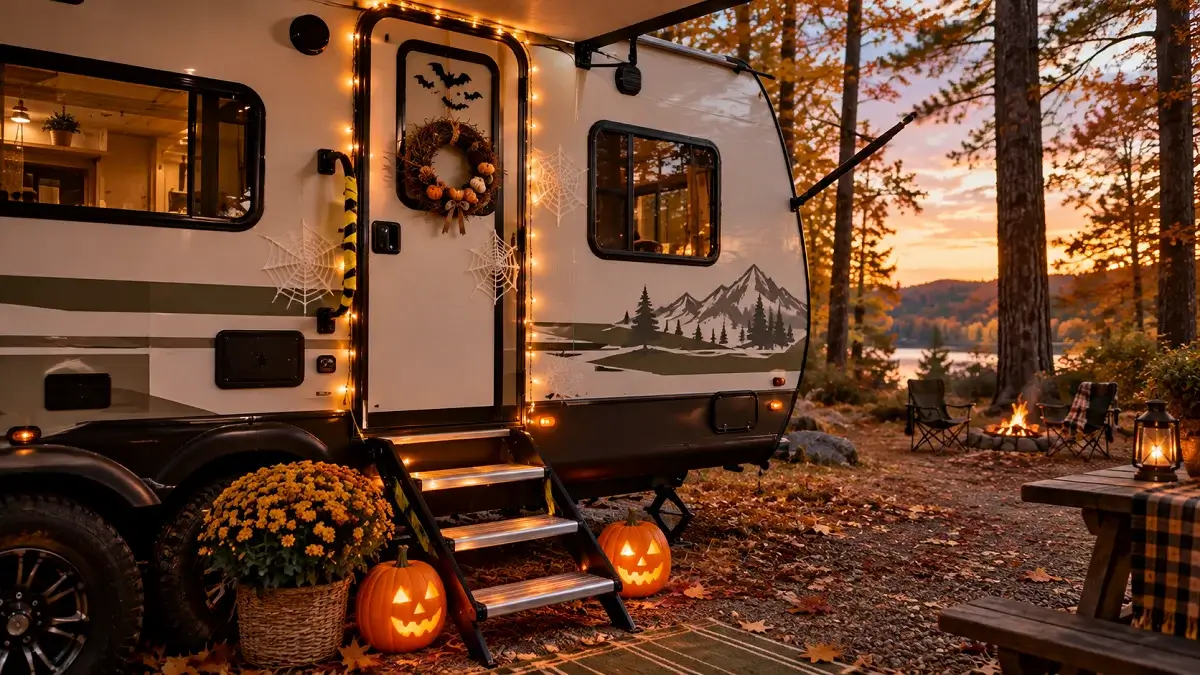
Decorating an RV door for spooky season brings a few real challenges that regular house decor never has to face. Standard wreaths bang against thin metal panels every time the wind picks up. Sticky tapes leave gummy residue under the hot sun, and bulky plastic props make grabbing the door handle awkward in the dark.
You want your camper entrance to look fun and festive for walking campground trick-or-treaters without damaging your exterior finishes. Traditional decorations often feel too fragile for road life or too messy to pack away once November arrives.
The good news is that you can build high-impact rv halloween door decorations using lightweight, travel-tested tricks. These ideas protect your rig, stay put during sudden gusty weather, and pack flat into small storage bins when the season ends.
Here are the best ways to turn your camper entry into a Halloween showstopper without drilling a single hole.
1. Secure Magnetic Spiderwebs To Your Metal Frame
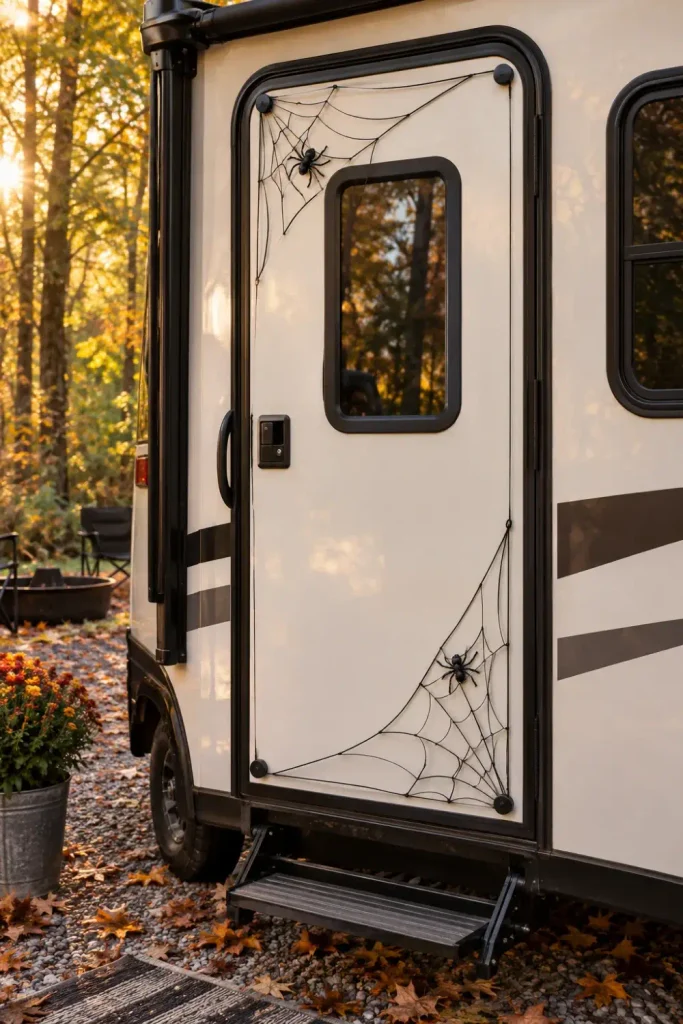
Most factory RV entry doors and screen frames contain enough steel to hold small, strong magnets. Instead of taping fuzzy polyester webbing that shreds and sticks to weatherstripping, use coated craft wire webs anchored with rubber-dipped rare earth magnets.
Set four magnets around the outer perimeter of your door frame, then stretch your wire web between them. Add lightweight plastic spiders directly onto the web strands so they dance in the breeze without scratching the paint.
- Rubberized magnet bases stop metal-on-metal scratching on bumpy camp days.
- Pre-stretched wire webs unpack instantly without tangling into a giant mess.
- Spiders clip directly to wire rings, preventing loose plastic from blowing away.
💡 Pro Camper Tip
Test your door exterior with a fridge magnet first. If your outer shell is fiberglass or aluminum, anchor the magnets to the interior steel frame edges instead.
2. Hang A Lightweight Skeleton Using Over The Door Hooks
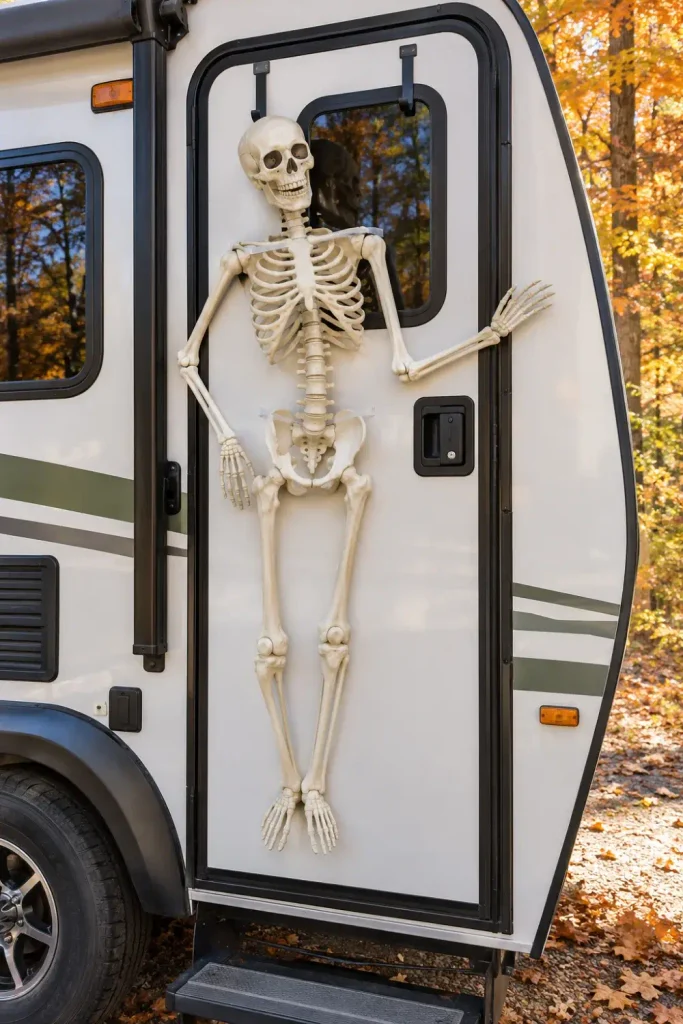
A full-sized plastic skeleton gives instant curb appeal across the campground, but drilling mounting brackets into a camper wall is out of the question. Low-profile metal over-the-door hooks slip right over the top edge of your camper door without pinching the rubber weather seals.
Fasten the skeleton at the collar and hips with clear zip ties so it sits flat against the surface. When guests open the door, the skeleton moves smoothly with the panel rather than swinging wildly into the screen.
- Slide two flat over-the-door pantry hooks across the top door seam.
- Drop a loop of black paracord through the skeleton’s neck joint.
- Secure the knee joints loosely with twist ties to eliminate plastic clatter.
Heavy plastic skeletons hung with tape fall off, flap in the wind, and bang against delicate camper walls at night.
Over-the-door brackets keep the skeleton flush, quiet, and stable, swinging naturally with every door movement.
3. Stick Removable Shadow Silhouettes On The Glass
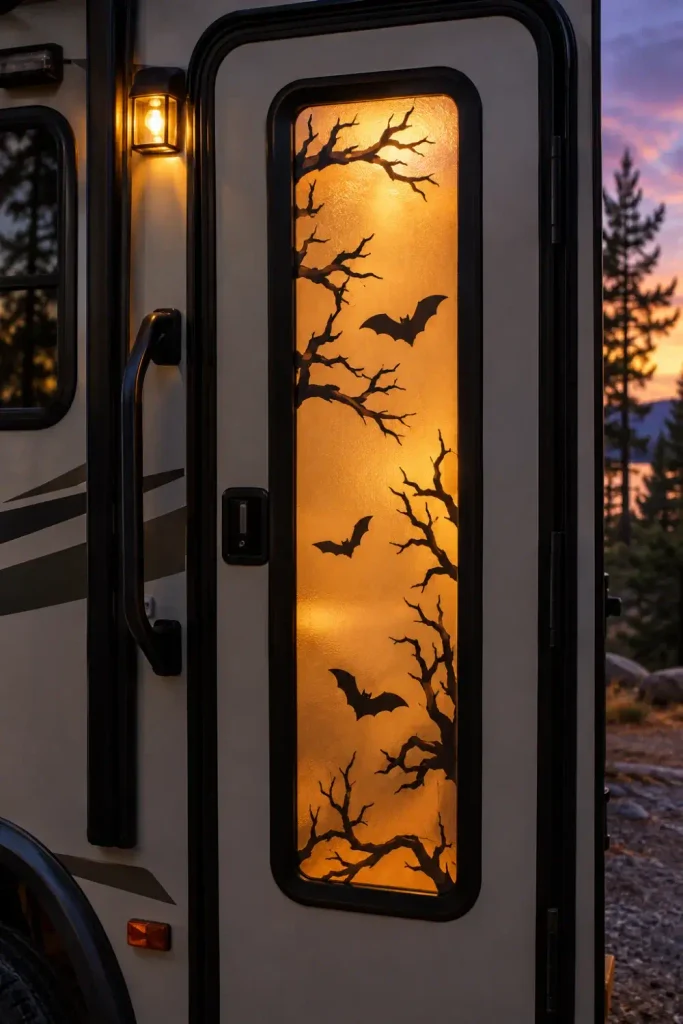
Campers often feature vertical frosted or tinted glass inserts right next to the handle. Cutting spooky silhouettes from removable static-cling vinyl turns that window into an eerie, backlit shadow box the moment you flip on your interior hall lighting.
Witches, creepy trees, and reaching hands work best because their distinct profiles read clearly from fifty feet away. Because static cling needs no adhesive glue, you can peel it off in seconds without scraping sticky goo off your window tinting.
Wipe the exterior glass thoroughly with rubbing alcohol to remove campsite dust.
Spray a fine mist of plain water onto the glass surface before placing the decal.
Smooth out air bubbles with a plastic card, working from center outward.
4. Mount A Mini Pumpkin Wreath With Heavy Duty Command Strips
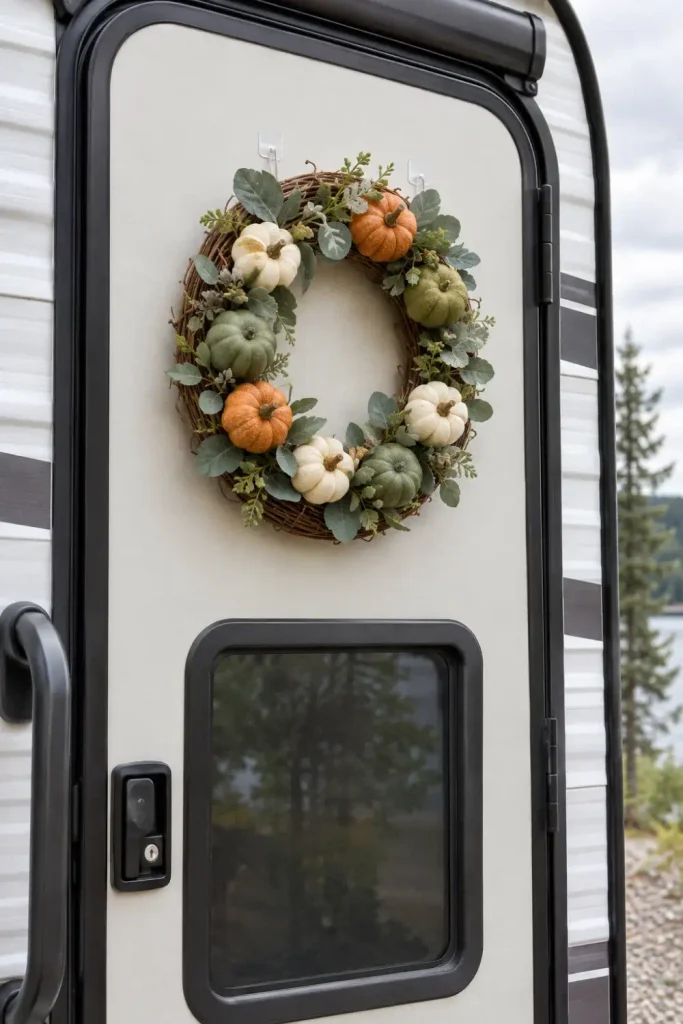
Standard residential wreaths measure twenty-four inches across, which overhangs camper door frames and catches on your screen door latches. Swapping to a compact twelve-inch grapevine wreath packed with miniature faux pumpkins solves the clearance problem completely.
Outdoor water-resistant adhesive strips hold up against humidity and temperature swings much better than indoor mounting tape. Use two strips on the back of the wreath form so it cannot twist or swing while you walk in and out with groceries.
- Choose lightweight foam pumpkins over ceramic or real squash to save weight.
- Keep the overall wreath depth under three inches so the screen door closes freely.
- Clean the door mounting spot with isopropyl alcohol before pressing the strips into place.
5. Outline The Frame With Battery Powered Orange Eyeball Lights
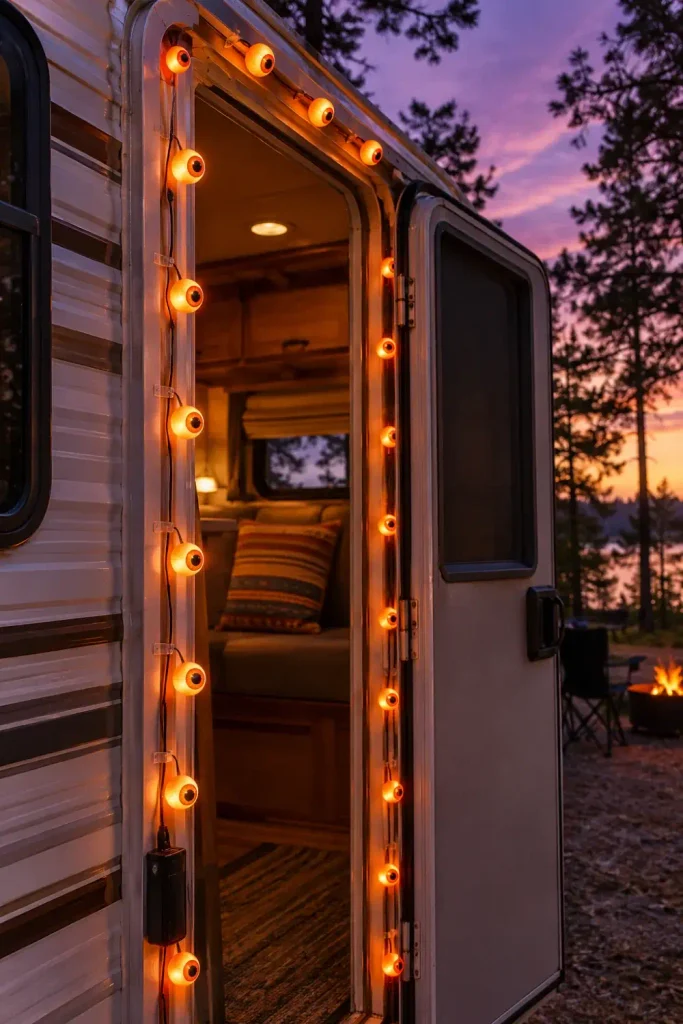
Lining your camper doorway with novelty eyeball string lights frames your entry and gives just enough ambient glow to guide trick-or-treaters up your stairs safely. Outdoor battery packs tuck into small magnetic pouches attached discreetly to the exterior wall.
Instead of running cords across walking paths, run small wire clips along the aluminum molding trim. Look for strings that run on an automatic six-hour timer so your rig lights up right at dusk without you having to remember to flip a switch.
Campground Lighting Checklist
6. Wrap The Exterior Handle In Faux Crime Scene Tape
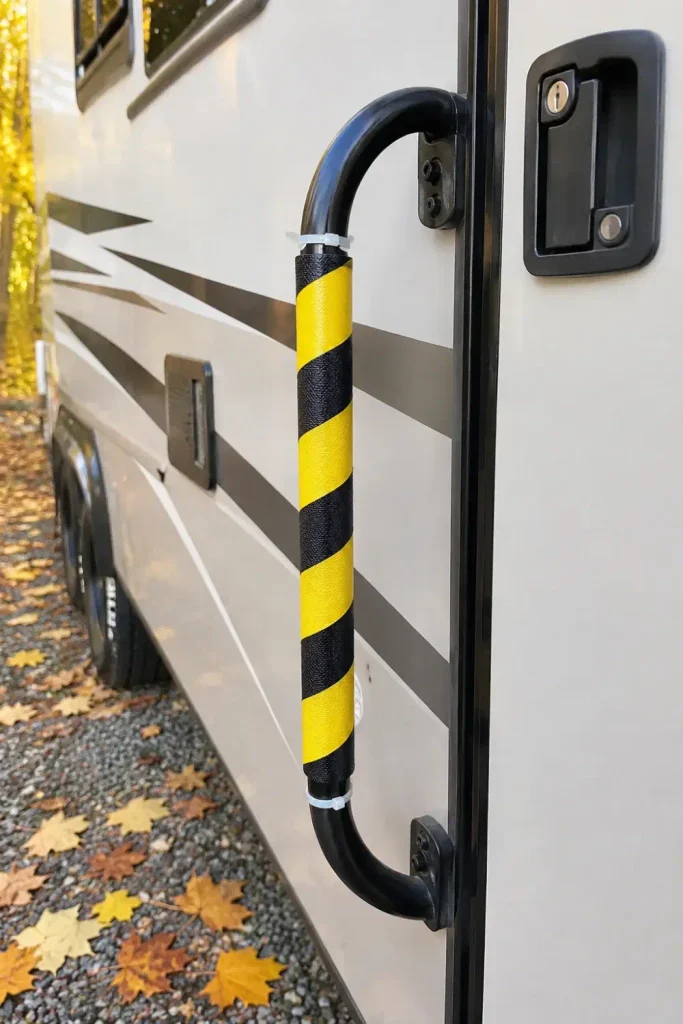
RV grab handles see heavy use every time someone steps in or out of the camper. Wrapping the folding bar in yellow “Caution: Zombie Outbreak” or “Haunted RV” barricade tape turns a practical piece of hardware into an instant campsite focal point.
Secure the ends with clear zip ties rather than sticky duct tape to prevent gummy adhesive from baking onto the powder coating under the sun. Leave the inner grip area slightly loose so hands can still wrap around the handle firmly when climbing steep entry stairs.
- Start wrapping from the top joint down so moisture sheds off the overlapping seams.
- Leave the door latch paddle completely uncovered so the lock operates smoothly.
- Trim any dangling tape tails that might catch on sleeves or dog leashes.
Use weather-resistant plastic tape secured with zip ties.
Keep the primary door latch mechanism completely bare.
Using paper-based tape that dissolves in rain.
Wrapping directly across the deadbolt or keyhole cylinder.
7. Apply Glow In The Dark Vinyl Decals Near The Latch
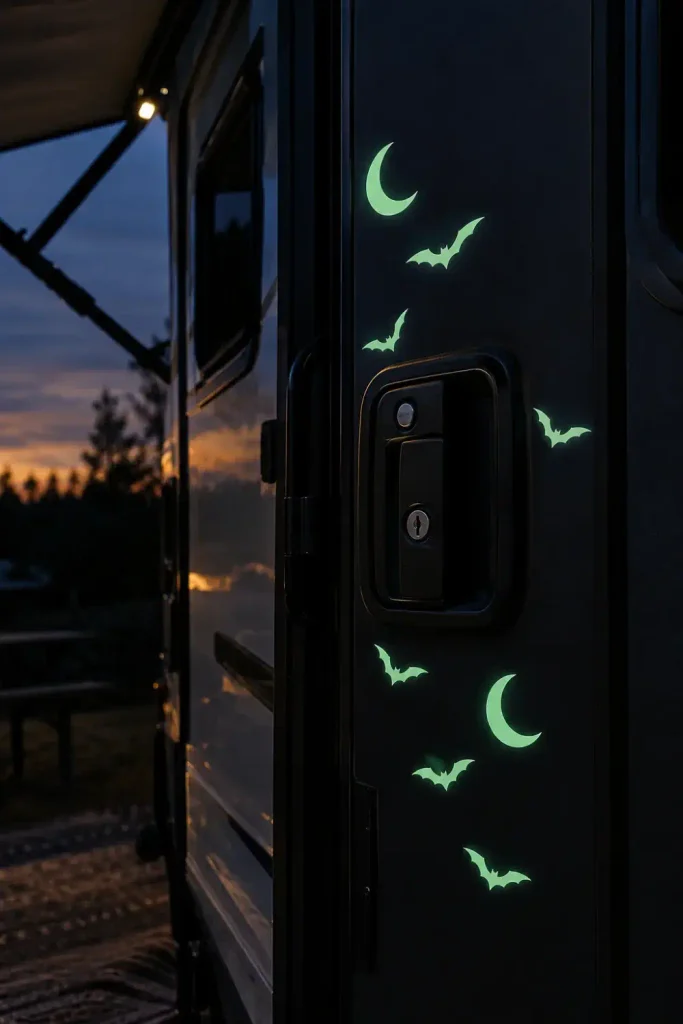
Dark campsites make finding your camper lock tricky once the main awning lights are turned down. Small luminescent vinyl stickers shaped like bats, moons, or creepy eyes serve double duty as fun decor and a practical night locator.
These decals charge under normal daytime sunlight or campsite porch lights, glowing softly green for hours after dusk. Removable vinyl peels cleanly off gel-coat fiberglass and painted aluminum without scratching clear coats.
| Removable Craft Vinyl | Paper Glow Stickers |
|---|---|
| Weatherproof against morning condensation | Sogs and curls after one damp evening |
| Peels off in one single piece without glue | Leaves paper shreds and sticky residue |
| Recharges brightly through deep dusk | Fades quickly within twenty minutes |
8. Turn The Screen Door Into A Giant White Ghost Face
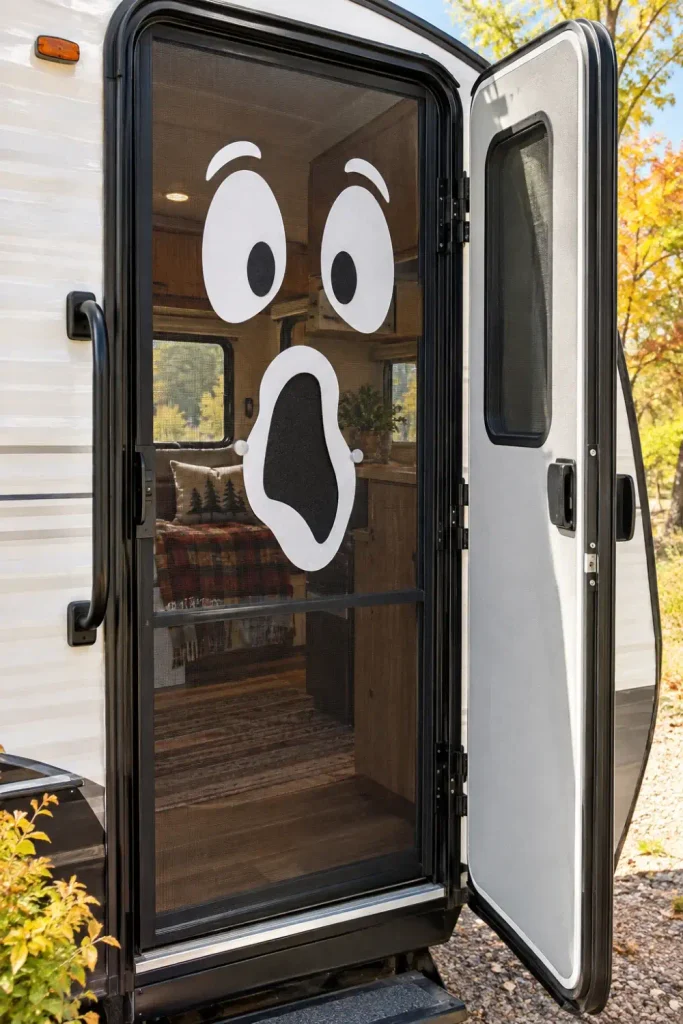
When warm autumn afternoons roll in, keeping your solid outer door latched open lets in crisp campground air. You can turn your exposed black wire screen into a glowing ghost by cutting oversized eyes and an open howling mouth from white craft foam.
Attach the foam pieces using small craft magnets on opposite sides of the fine mesh. This sandwiches the screen safely without punching holes in the wire or restricting refreshing airflow into your camper living area.
- Cut two large oval eyes and a curved mouth out of waterproof white EVA foam sheets.
- Place a small nickel magnet on the inside face of each cutout.
- Align a matching magnet on the interior screen side to lock the shapes into place.
Never use glue, hot adhesives, or pins on screen mesh. Magnetic pairing holds lightweight foam securely and leaves zero permanent holes.
9. Suspend Plastic Bats From The Awning Arms Above The Door
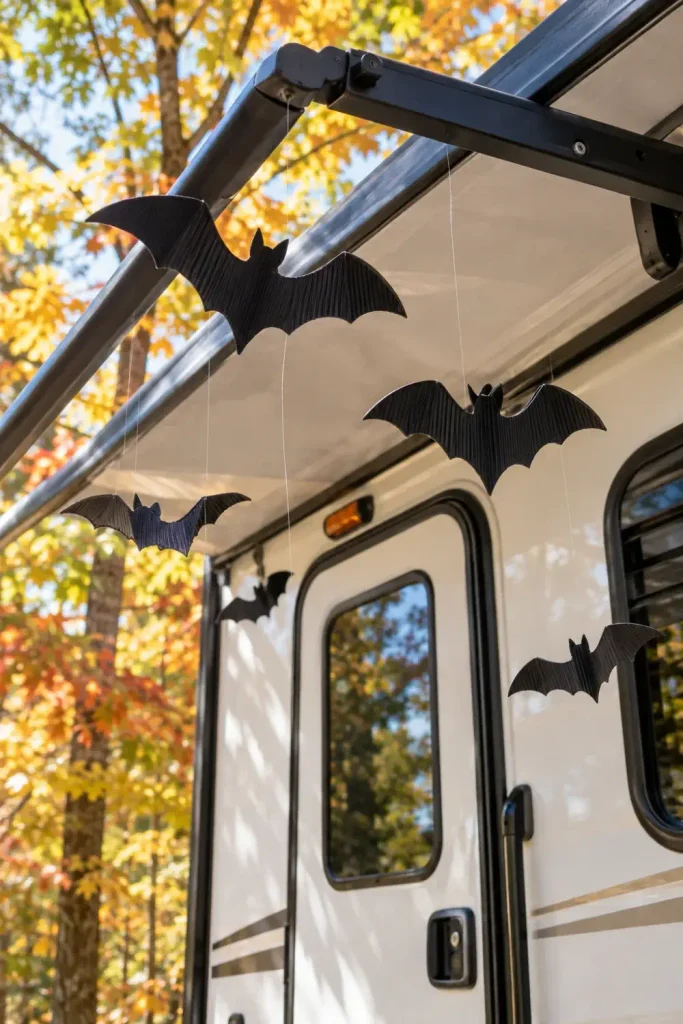
The space directly above your camper door often looks empty unless you utilize your awning support struts. Hanging lightweight black plastic bats at varying heights creates a dynamic, swooping illusion right over visitors’ heads as they approach the doorway.
Clear fishing line creates an invisible suspension that makes the bats look like they are actively fluttering in the wind. Tie the lines to small velcro straps wrapped around the metal awning channel rather than adhesive hooks that might fail under damp evening dew.
- Stagger the drop lengths between six and eighteen inches to create natural depth.
- Keep the lowest bat above head height to prevent bumping into walking guests.
- Use plastic corrugated sheet bats rather than heavy resin figurines for safety.
⚠️ Awning Warning
Always use quick-release velcro loops to hang overhead items. If sudden severe winds force you to roll up your awning quickly, you can strip the line away in seconds without tangling the fabric roller.
10. Place Bloody Handprint Gel Clings Below The Handle

Jelly window clings are cheap, reusable, and pack completely flat inside a small zip-top bag between trips. Arranging a set of bright red gel handprints climbing toward the exterior door handle creates a fun haunted house effect that kids love.
These clings grip glossy fiberglass and glass surfaces without any adhesives. Clean the target spot with a damp rag first to wipe off road grime, then press the gel firmly to evacuate trapped air bubbles beneath the surface.
11. Flank The Entry Steps With Glowing Foam Pumpkins
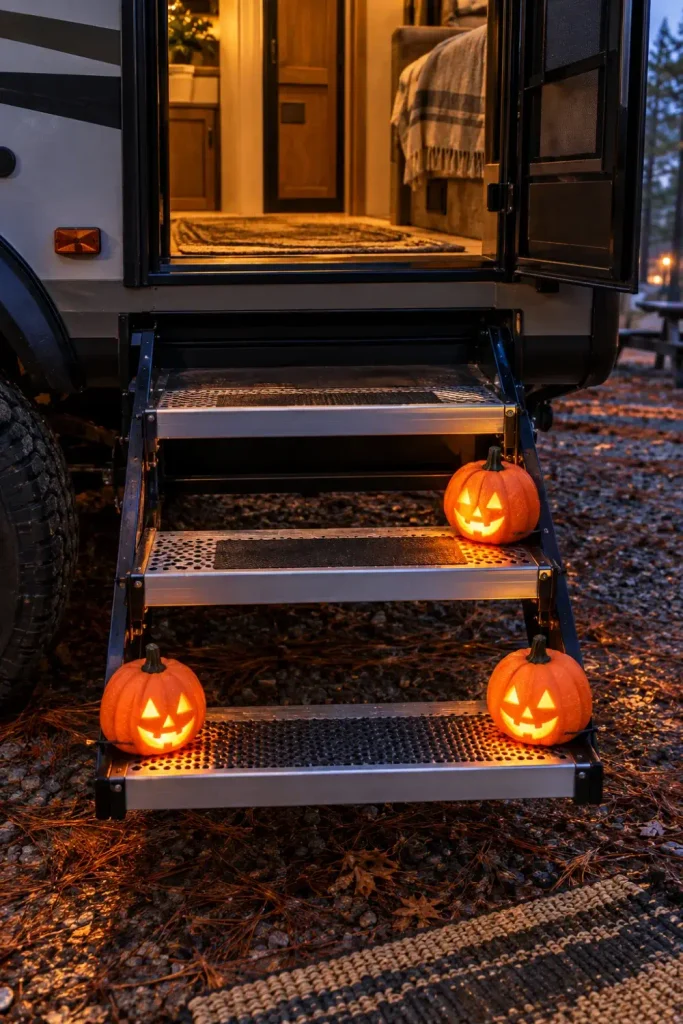
Carved real pumpkins rot quickly in small storage bays and attract curious campsite critters overnight. Hollow craft foam jack-o’-lanterns offer the same warm glow without the sticky mess or added tongue weight.
Because empty foam pumpkins blow across the campground at the first gust of wind, they need a clean anchor. Run reusable zip ties or heavy-duty velcro straps through the drainage slots in your fold-out aluminum RV steps to keep them pinned securely.
Camper Step Safety Checklist
12. Hang A Rustic “Camp At Your Own Risk” Wood Sign
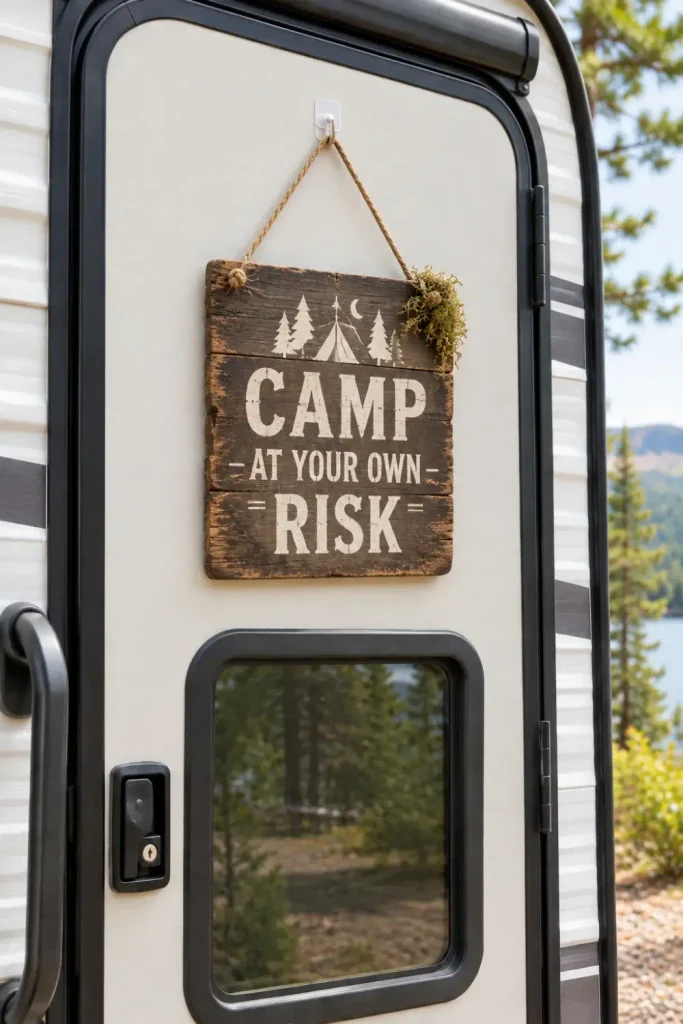
A lightweight cedar or balsa sign hanging right at eye level sets a fun campsite tone before visitors even tap on the door. Distressed lettering and faux moss add rugged woodland charm that fits right in with state park settings.
Instead of heavy iron hardware, use outdoor rated adhesive hooks mounted directly to your door skin. Pair the hook with a short length of thick jute twine so the plaque sits flat against the door panel without swinging while you drive campsite stakes.
- Opt for hollow craft wood blanks that weigh under eight ounces.
- Stick clear silicone bumper dots on the back corners to silence any vibration against the door.
- Spray the wood front with a clear matte sealant to protect paint from sudden morning rain showers.
13. Crisscross White Crepe Paper For A Quick Mummy Wrap
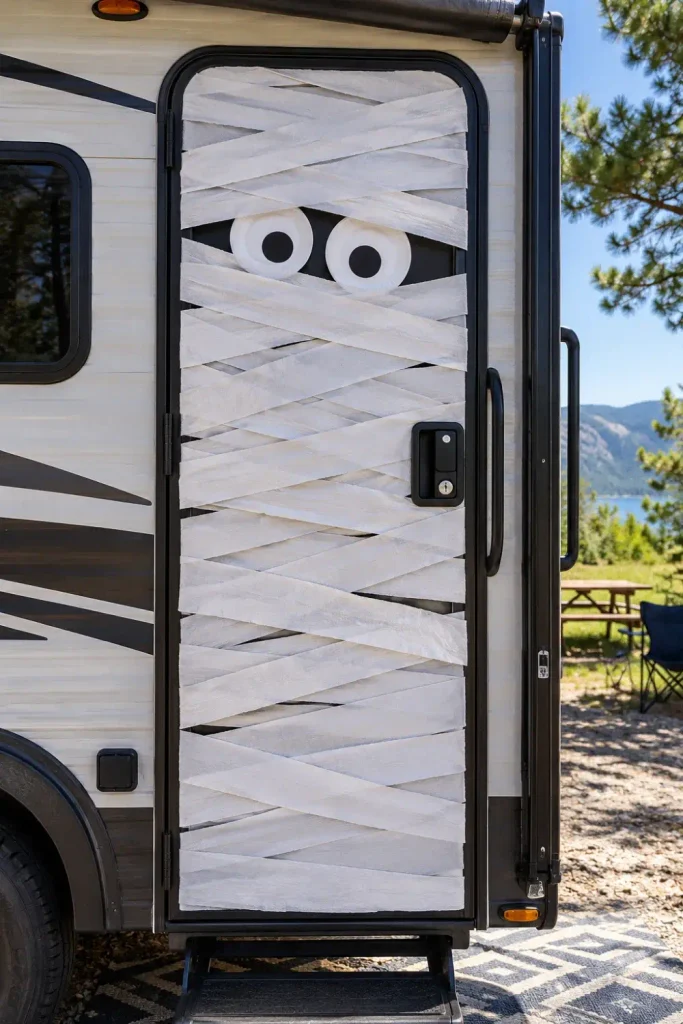
Wrapping your solid camper entrance like a giant cartoon mummy delivers maximum visual pop for pennies. Thin white party streamer paper wraps around the door panel in minutes and tears away cleanly when packing up camp on Sunday afternoon.
Tuck two oversized paper plate eyes between the paper bands near the top window. Keep the wrap thin and intentionally loose near the jamb so the latch mechanism clicks shut securely every time you enter.
Anchor streamer ends on the door’s interior edge with low-tack painter’s tape.
Crisscross paper diagonally across the exterior face, skipping around the handle assembly.
Slide cut cardboard eyes under the top diagonal bands and press lightly to set.
Bring Spooky Season To The Campsite
Decorating your rig should feel like an exciting part of camping rather than a packing headache. You do not need heavy props, drill bits, or bulky plastic tubs to create memorable rv halloween door decorations that make fellow campers smile during evening walks.
Focus on clever anchors like magnets, suction cups, and lightweight vinyl that pack flat and respect your camper walls. These small adjustments keep setup fast and tear-down effortless, leaving you more time to sit around the campfire and share stories with friends.
Save this list to your favorite RV lifestyle board on Pinterest for the next time you plan a fall camping trip.

