
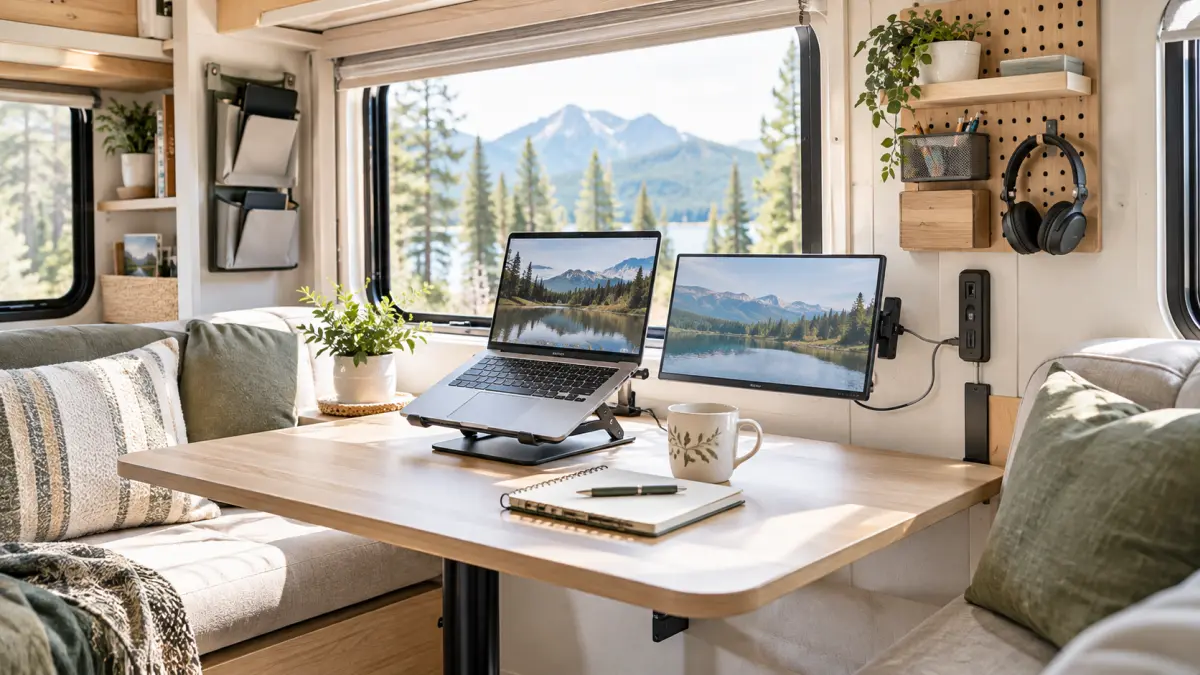
Working remotely from a camper van or travel trailer sounds like pure freedom until your back aches from a foam dinette cushion, your laptop battery dies during an afternoon call, and your desk doubles as the cutting board. Most factory RV setups were built for weekend camping trips, not for sitting through eight hours of focused spreadsheet reviews and client presentations.
Trying to wedge a standard residential desk into a compact camper living room creates bottlenecks in your walking paths and clutters your main living zone. When your workspace feels chaotic, your work output slows down and your downtime stops feeling relaxing.
You do not need a forty foot luxury motorhome to build a reliable workstation. With thoughtful hardware choices and clever space zoning, you can create a comfortable, mobile workspace that stays secure while towing down washboard backroads. Here are eighteen practical rv office setup ideas to keep you productive and organized anywhere your wheels take you.
1. Convert Dinette Benches into Deep Filing Drawers
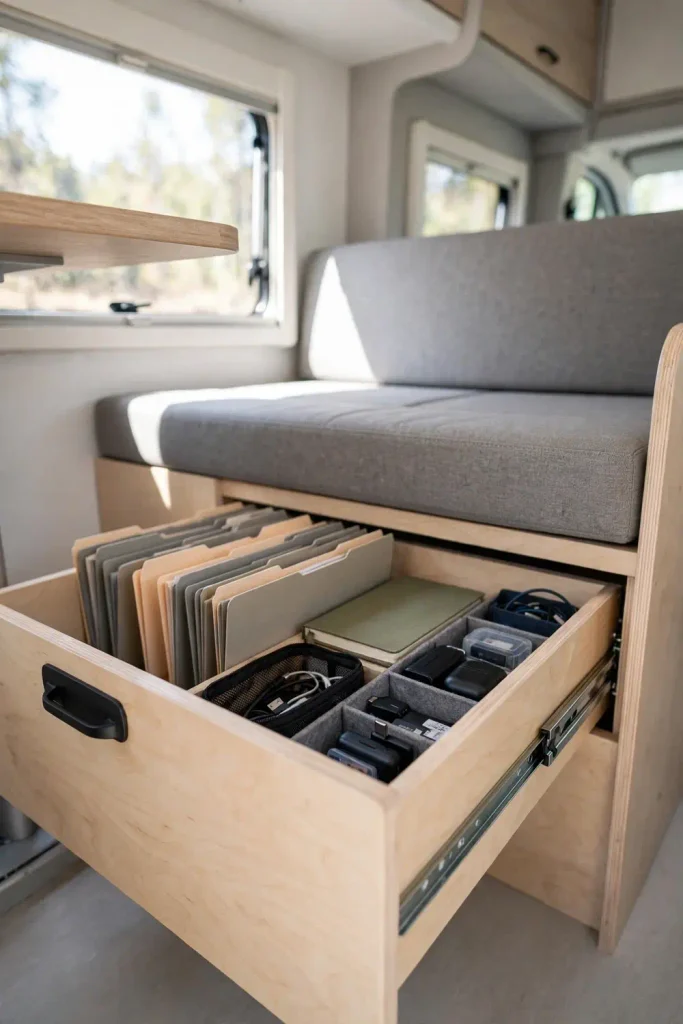
Factory dinette benches hide deep storage under plywood panels, but lifting heavy cushions and mattress toppers every time you need printer paper or client files gets old fast. Installing bottom-mounted, full-extension drawer slides allows you to pull your entire work station out from the aisle without disturbing the seating area above.
Reinforce the front face with half-inch Baltic birch plywood and mount heavy-duty cabinet handles that sit flush. Add internal dividers to keep paperwork standing upright and prevent tech accessories from sliding around on steep mountain turns.
- Install twenty-eight-inch full extension ball bearing drawer slides.
- Fit push-to-close marine latches rated for forty pounds of force.
- Drop in adjustable birch plywood dividers for clean paper zones.
Lifting bulky vinyl cushions and wrestling raw plywood lids just to find a single client folder.
Smooth rolling aisle drawers that pull out in one motion with every document neatly indexed.
2. Mount a Heavy-Duty Monitor Arm to Solid Framing Screws
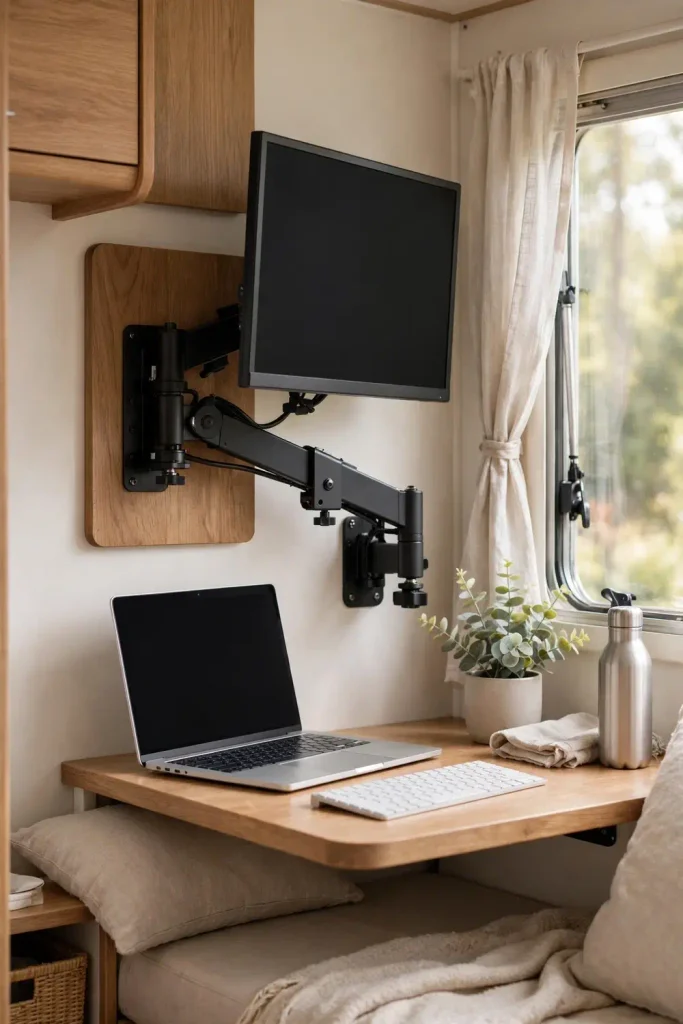
Hollow RV walls are usually made of thin luan paneling with foam insulation inside. Screwing an expensive widescreen display directly into that thin skin will tear out holes on the first rough highway expansion joint.
Use a stud finder to locate the vertical aluminum studs or solid wooden framing ribs behind the wall surface. Bolt a thick hardwood backing plate across two studs to distribute the load before attaching your articulating VESA arm bracket.
💡 Quick Tip
Always use a quick-release VESA plate. Slide the screen off the wall arm and tuck it onto your bed before driving on gravel roads.
3. Install a Drop-Leaf Walnut Slab Behind the Passenger Seat
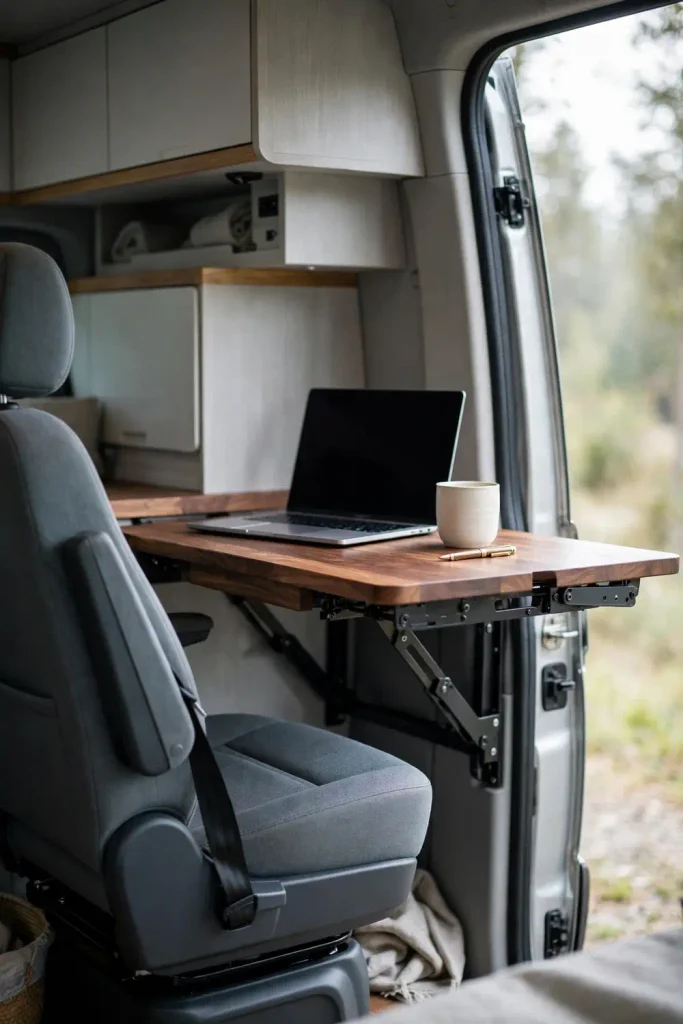
The empty pocket of air behind the cab seats in Class C rigs and camper vans often becomes a dumping zone for dirty boots and dog gear. Mounting a fold-down wood slab turns that dead space into a dedicated secondary standing desk.
Pair heavy-duty locking folding shelf brackets with a piece of sealed butcher block or hardwood plank. When meetings wrap up for the afternoon, release the spring pins and let the surface drop flat against the partition wall.
| Feature | Specification | Practical Purpose |
| Bracket Type | 16-inch locking triangular arms | Holds up to 150 lbs when locked open |
| Surface Size | 18 inches deep by 32 inches wide | Fits a laptop and coffee mug with room to spare |
| Folded Depth | Under 2 inches off the wall | Restores the open cabin walkway instantly |
4. Run Dedicated 12-Volt USB-C PD Chargers Directly from House Batteries
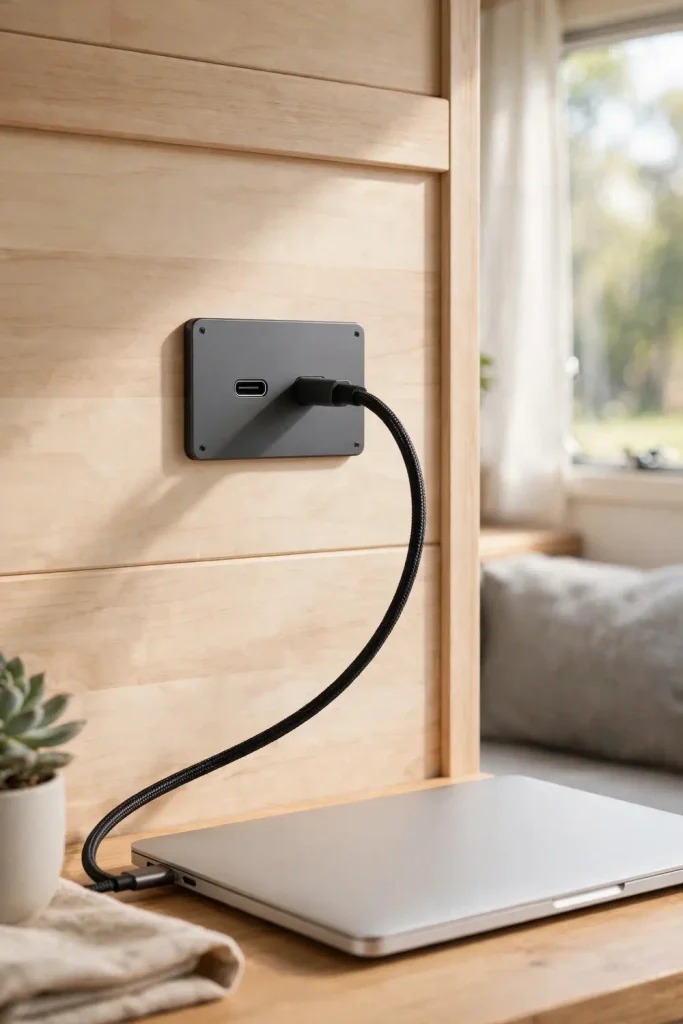
Powering a large inverter all day just to plug in a small brick charger wastes a significant amount of battery energy through heat conversion and idle draw. This extra drain reduces your off-grid camping time quickly.
Tapping directly into your twelve-volt fuse box with a high-wattage USB-C Power Delivery socket gives you modern laptop charging without touching your inverter switch. A sixty-five or one-hundred watt direct socket can recharge professional laptops quietly without running the cooling fans on your power hub.
| Inverter Wall Brick | Direct 12V USB-C PD |
|---|---|
| Runs constant inverter standby power | Zero phantom draw when idle |
| Loses fifteen to twenty percent power to heat | Delivers clean power straight to the laptop |
5. Turn the Overhead Cab Bunk into a Stand-Alone Studio Desk
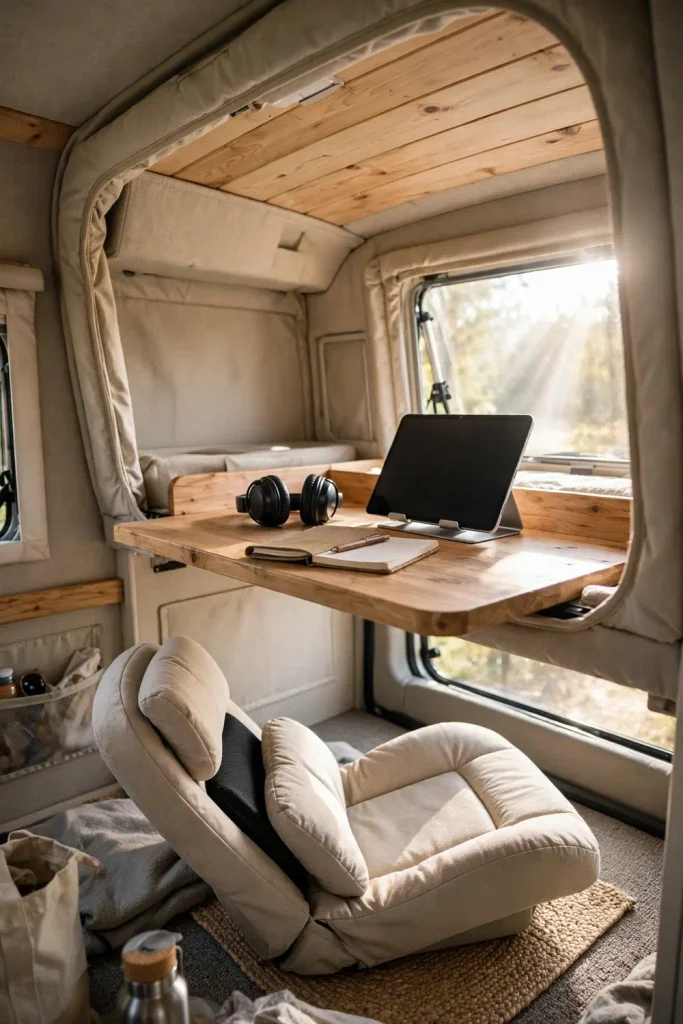
The cabover bed in Class C motorhomes often becomes a disorganized storage catchall for sleeping bags and laundry baskets. Clearing that platform creates an elevated office suite that remains out of your partner’s walking path downstairs.
Cut a piece of lightweight cabinet grade plywood to set across the cabover entryway as a workstation surface. You can leave monitors, microphones, and notebooks set up permanently without having to pack them down when it is time to make dinner.
- Set up an ergonomic floor cushion with lower back support.
- Add clip-on dimmable warm reading lights to the ceiling lip.
- Secure power cords along the cab edge with cable raceways.
6. Hang a Heavy Linen Blackout Curtain on a Ceiling Track for Video Calls

Nobody on your morning team standup needs to see an unmade bed, a stack of dirty breakfast dishes, or your partner walking to the bathroom. Installing a ceiling curtain track creates a clean, professional backdrop in three seconds.
Select a heavy linen fabric lined with light-blocking material. The dense weave stops light glare from rear camper windows and helps absorb vocal echoes inside fiberglass and aluminum walls.
What to grab first
7. Use a Pneumatic Lift-Top Coffee Table in the Living Slide

If your camper layout has a sofa inside the main slide-out instead of a booth, a mechanical lift-top table bridges the gap between lounging and typing. The surface pulls up and forward toward your chest, positioning the keyboard at natural arm height.
Look for a mechanism powered by hydraulic gas pistons rather than basic coil springs. Gas struts open smoothly without throwing pens across the room, and they lock securely at full height under typing pressure.
Anchor the base legs securely to the plywood floor with mounting brackets.
Store external keyboards and mice inside the hidden internal box compartment.
Do not leave heavy coffee cups or glassware on the top while lifting the lid.
Avoid free-standing metal coffee tables that slide across the floor on highway turns.
8. Build a Slide-Out Keyboard Tray with Locking Drawer Slides
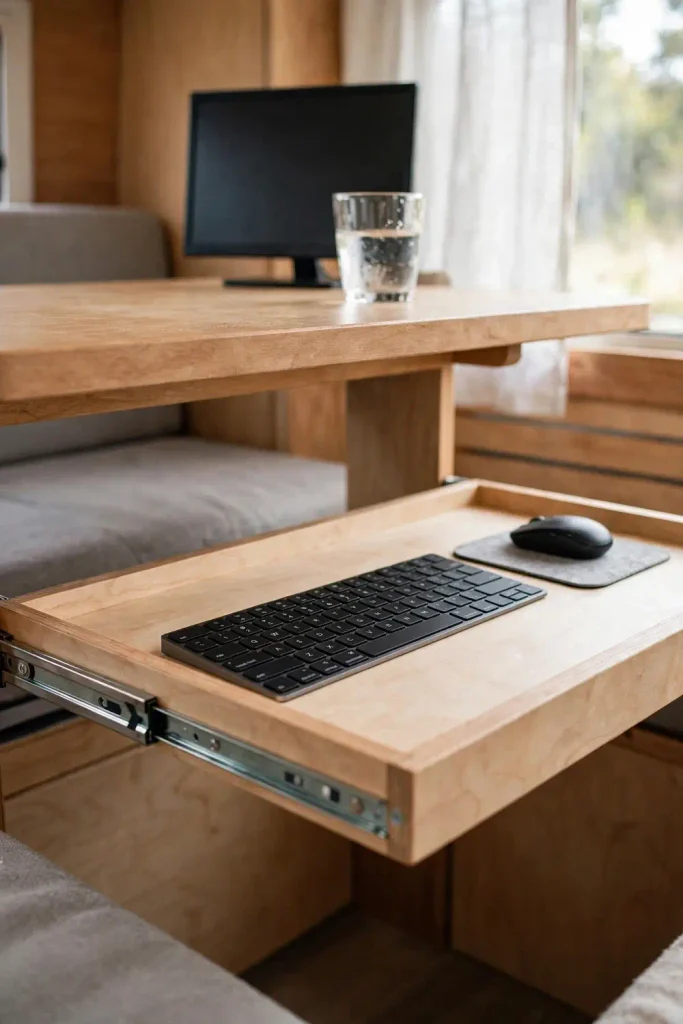
Typing for hours with your forearms resting on a tall kitchen dinette causes strain in your shoulders and wrists. Bringing your typing plane down three inches below table level restores neutral joint alignment.
Construct a low-profile hardwood tray underneath your main table board. Using locking ball-bearing runners guarantees the tray stays firmly open during long writing sessions and stays tucked away when you are on the road.
- Measure twenty-four inches of width along the underside of your tabletop.
- Fasten heavy-duty angle brackets into the tabletop frame with half-inch wood screws.
- Attach locking drawer rails that latch open when extended and lock when closed.
Measure wrist-to-elbow height while seated to confirm your clearance distance.
Screw heavy-duty slide brackets into the structural bottom frame of the table.
Mount locking tracks that click into place so your tray does not slide out on turns.
9. Anchor a Starlink Mini to the Roof Ladder with a Quick-Release Clamp

Reliable internet is essential for working remotely, but packing away a tripod antenna every time you change camp becomes tedious. Mounting a lightweight satellite receiver onto your exterior ladder keeps your connection ready without taking up cabinet space.
A machined aluminum pipe clamp holds the dish securely above the roofline away from camper obstructions. Route the low-voltage power cable through an exterior refrigerator vent or slide-out seal to reach your internal battery bank without drilling into outer walls.
Route communication lines through existing weather strips to avoid putting new drill holes in your exterior roof.
10. Replace the Factory Swivel Base with an Ergonomic Low-Back Task Chair
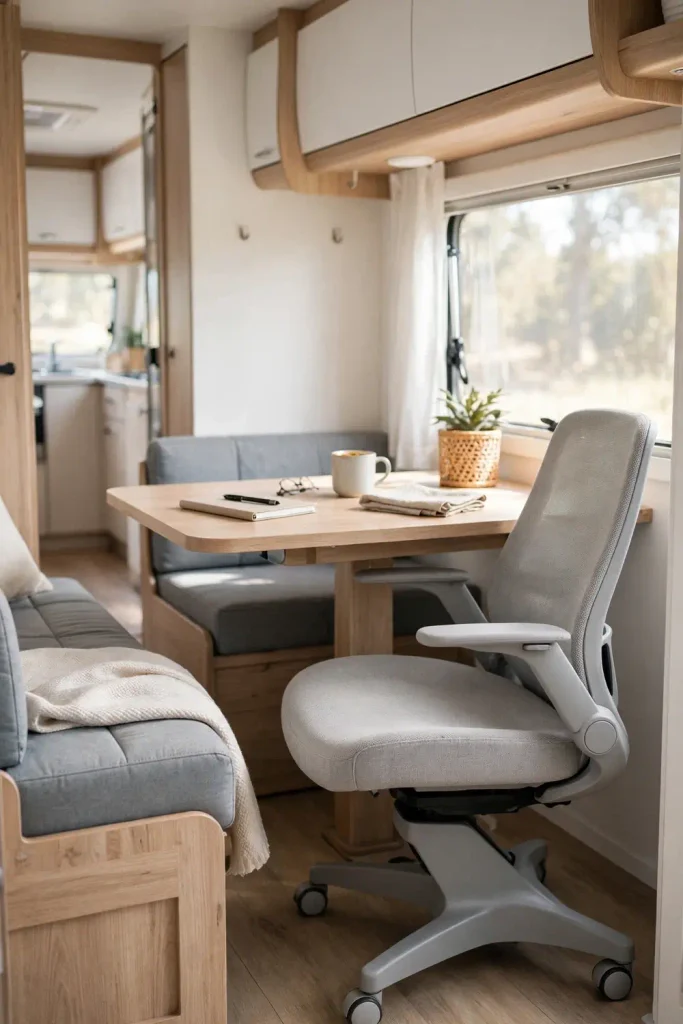
Standard swivel chairs in motorhomes have thick foam cushions designed for highway cruising, but they lack the adjustable lumbar and neck support needed for an eight-hour work day.
Swap your passenger seat base or dinette chair for a compact office chair with a shorter backrest that slips neatly beneath the desk surface. Select a model with flip-up armrests so you can slide the chair fully under the counter to keep walking aisles clear.
⚠️ Watch Out
Check the lip height of your slide-out floor. Rolling castors can drop off the edge of elevated slide rooms and damage subfloor wiring.
11. Fit a Collapsible Standing Desk Converter Over the Kitchen Counter
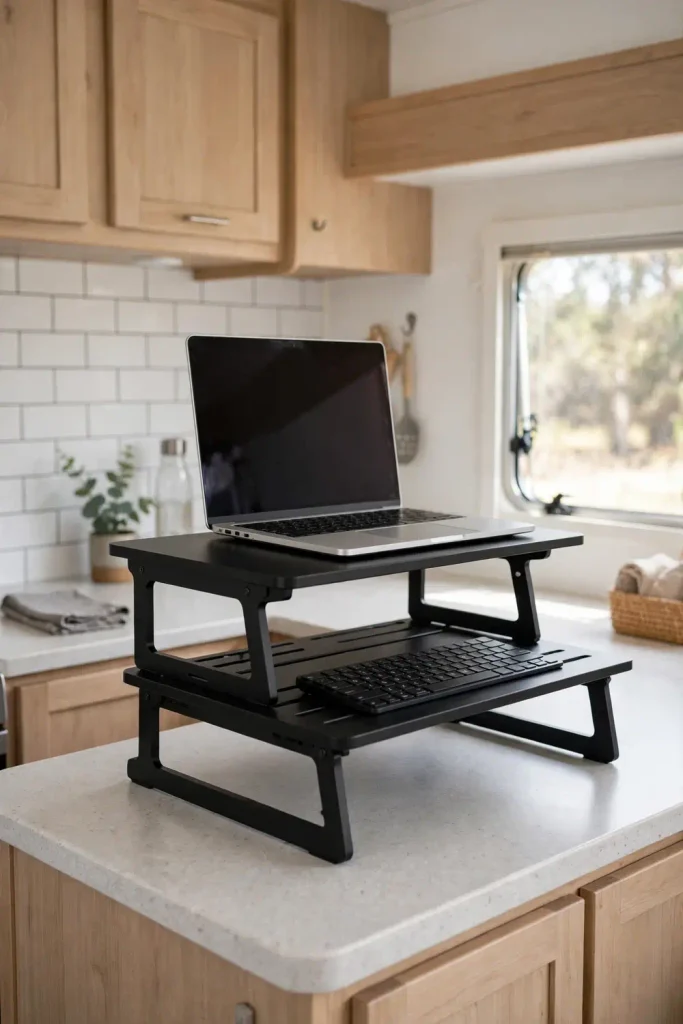
Kitchen counters in campers are typically thirty-six inches tall, which is close to natural standing height for many people. Setting a slim, folding desk riser on the galley countertop lets you switch easily between sitting and standing throughout the day.
Look for scissor-action risers with gas struts that fold down to two inches thick when closed. You can slide the collapsed riser into the narrow gap beside your refrigerator or slip it behind the sofa when cooking starts.
| Feature | Standing Counter Setup | Standard Dinette Setup |
| Working Posture | Upright with open hip angle | Fixed ninety-degree sitting angle |
| Counter Height | 36 inches off camper floor | 29 to 30 inches off floor |
| Storage Need | Folds flat against cabinet side | Permanent fixed footprint |
12. Line the Work Nook with Sound-Dampening Felt Slats

Thin RV walls, aluminum window frames, and fiberglass shells bounce sound waves around the cabin, making your voice sound like you are inside an empty storage container on client calls. Adding felt wall panels absorbs this audio reverberation.
Wood-look acoustic slat panels with a recycled felt backing look high-end and weigh very little. Install them on the wall directly facing your workstation using lightweight peel-and-stick mounting strips to avoid putting screws through exterior panels.
- ▸Reduces sharp vocal echoes inside hard-sided camper shells.
- ▸Provides a soft pinboard surface for sticky notes and paper calendars.
- ▸Adds an extra layer of thermal insulation against cold exterior walls.
13. Mount an Under-Cabinet Document Scanner Inside the Wardrobe
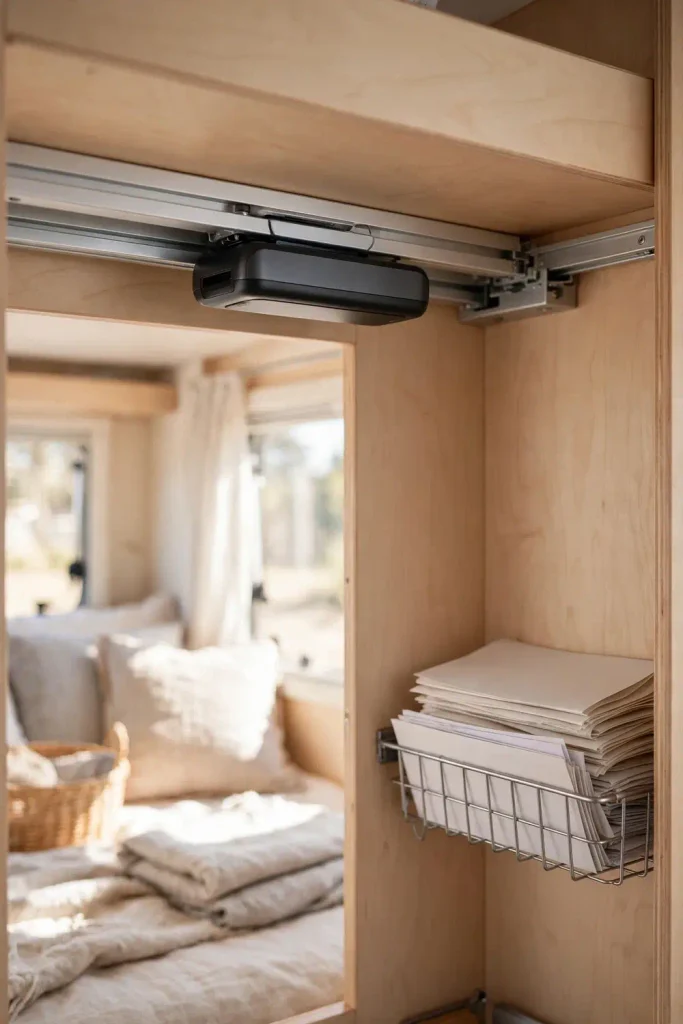
Paper receipts, fuel logs, and client contracts take over small camper surfaces when they have nowhere to go. Hiding a compact feeding scanner inside your hanging wardrobe keeps horizontal surfaces clear.
Attach an aluminum under-shelf sliding tray to the bottom of your bedroom closet shelf. Wire a dedicated power drop from your nearby twelve-volt battery panel to run the scanner without trailing extension cords across the bedroom aisle.
- Use a scanner that pulls power directly over a single USB cable.
- Secure the unit with marine-grade hook and loop tape to absorb road bumps.
- Keep a dedicated document bin beside the tray for digitized papers.
Piles of paper tax receipts and equipment manuals cluttering the galley countertop.
Documents run through an organized closet scanner and digitize right to cloud folders.
14. Run a Dual-Band Cellular Router with Exterior Puck Antennas
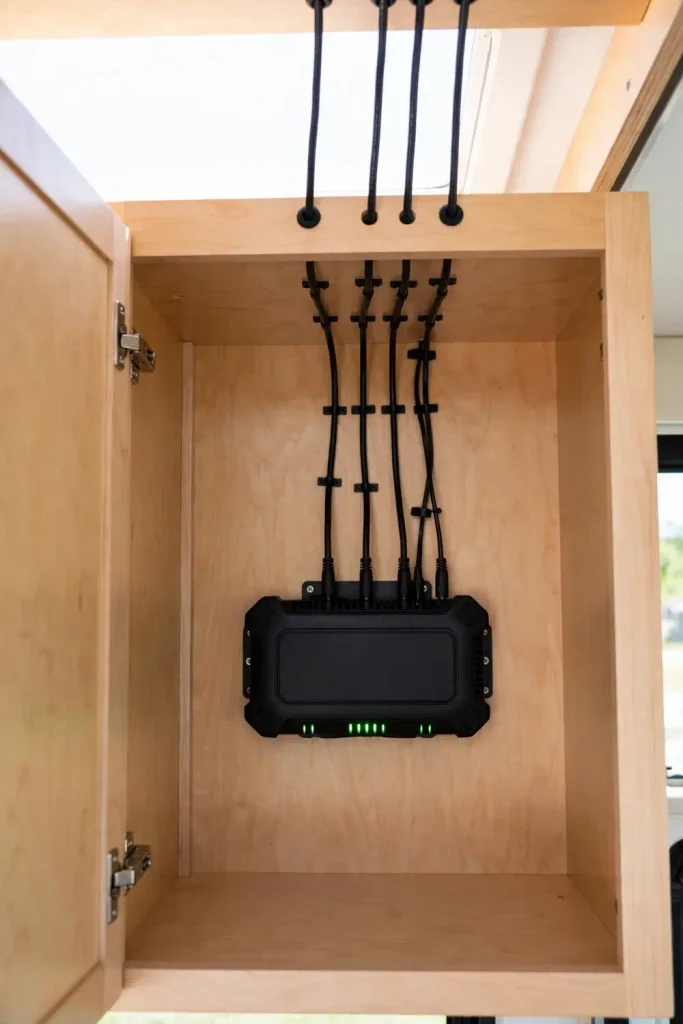
Relying solely on campground Wi-Fi usually leads to dropped calls and frozen screens during peak morning work hours. Installing a multi-carrier cellular router inside an overhead cabinet gives you a steady, private connection.
Pairing an enterprise router with a roof-mounted omnidirectional antenna pulls in weak tower signals from miles away across open desert or forest. A router with dual SIM slots can swap seamlessly between data providers without dropping active video calls.
| Campground Shared Wi-Fi | Dedicated Cellular Router |
|---|---|
| Bandwidth bottlenecks when parks fill up | Dedicated private connection for your devices |
| Signal struggles to penetrate aluminum RV siding | Roof antenna captures strong signals outside the rig |
15. Secure Laptop Riser Brackets with Knurled Brass Thumb Screws
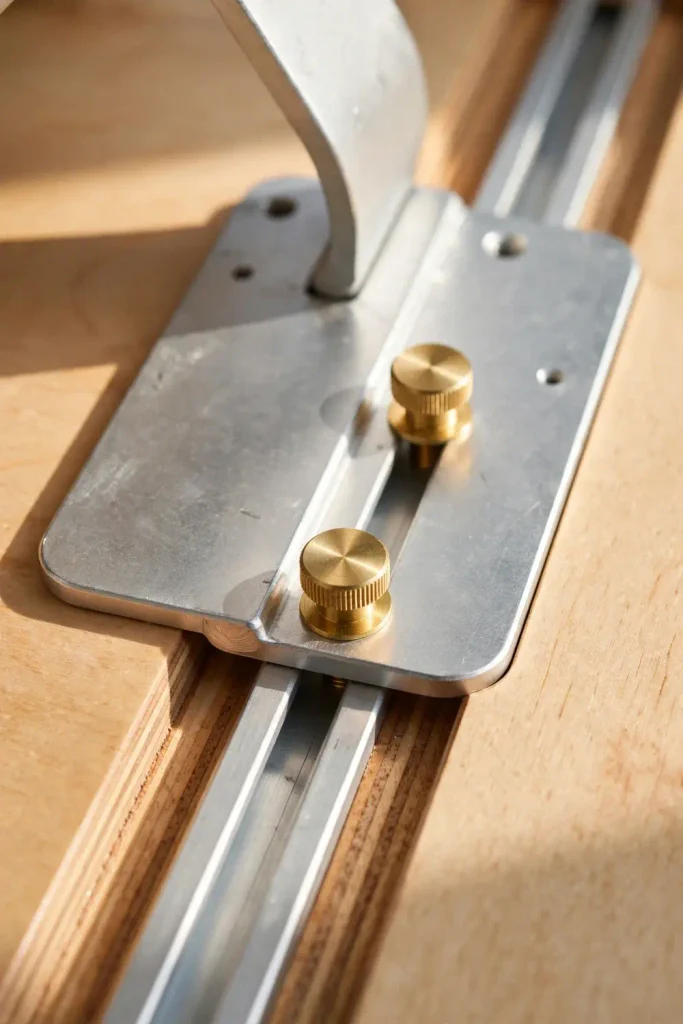
Adjustable laptop stands improve screen height, but standard desktop risers slide across smooth laminate counters as soon as your RV shifts on its leveling jacks.
Screw two low-profile slotted brass tracks directly into your wooden desktop. Thread knurled brass thumb bolts through the riser base plates into these tracks so your hardware remains securely anchored during work hours.
- Clean the desk area with rubbing alcohol to mark your screw track locations.
- Fasten the brass tracks flush with the desk surface.
- Tighten the knurled screws by hand to lock the stand at your preferred viewing angle.
16. Install an Under-Desk Cable Management Raceway with Reusable Velcro Ties
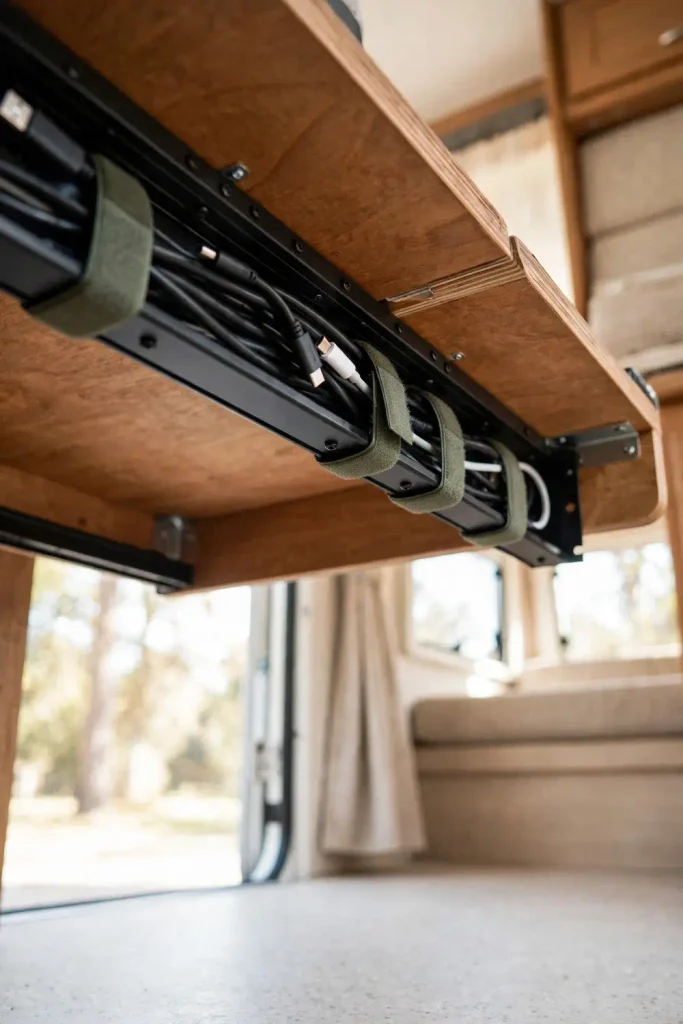
Cables that dangle around your feet inside an RV are more than just an eyesore. They get tangled in moving slide-out mechanisms and catch on shoes when you walk through the rig in the dark.
Mount a metal J-channel wire tray along the rear underside of your desk surface. Bundle thick power cords away from sensitive microphone wires using heavy-duty Velcro ties to keep your work station quiet and organized.
Mount a sturdy cable tray along the back edge of the table frame.
Separate alternating current cables from audio and monitor cords to prevent interference.
Secure the lines using reusable fabric ties instead of single-use plastic zip ties.
17. Tuck a Compact Fold-Flat Footrest Under the Dining Table
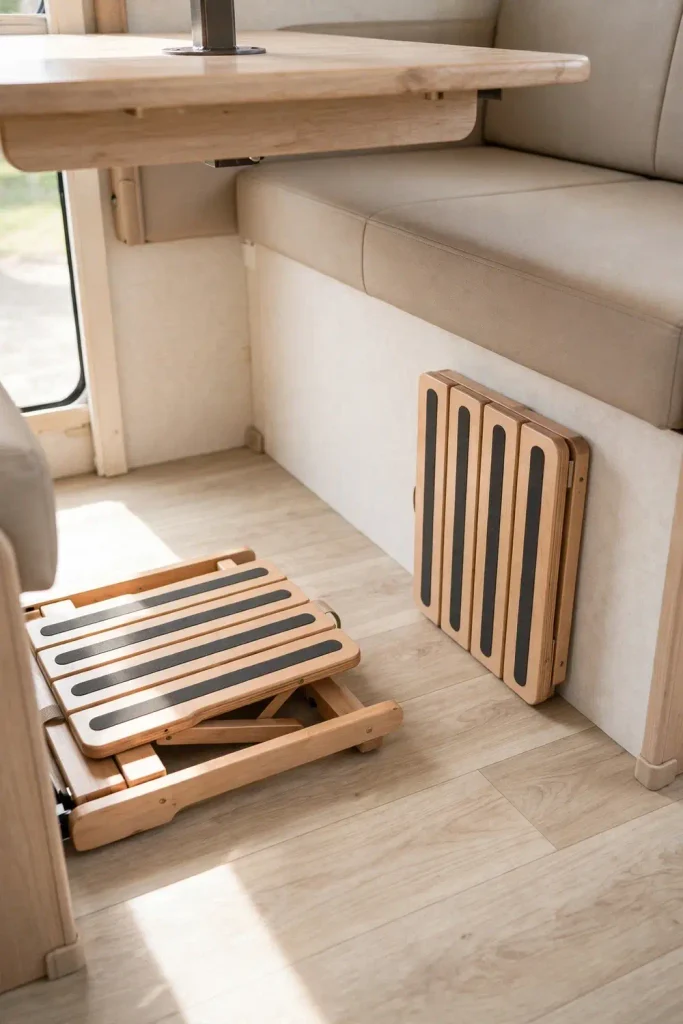
Standard RV dinette seats are fixed in place, and their height cannot be adjusted to fit different leg lengths. When your feet dangle or rest at an odd angle, your lower back takes on added stress throughout the day.
A simple folding footstool gives your feet a stable, raised platform that helps take pressure off your hamstrings. When work wraps up, fold it flat and slip it under the table base or behind your dinette cushion.
Choose a footrest with textured rubber feet so it stays put on smooth vinyl flooring.
Fold the frame flat against the dinette wall before closing up your slide rooms.
Do not leave heavy plastic step stools loose in the central aisle while driving.
Avoid resting your feet directly on fragile warm-air heater vents near the floor.
18. Use Magnetic Wall Mounts for Everyday Work Gear and Hard Drives
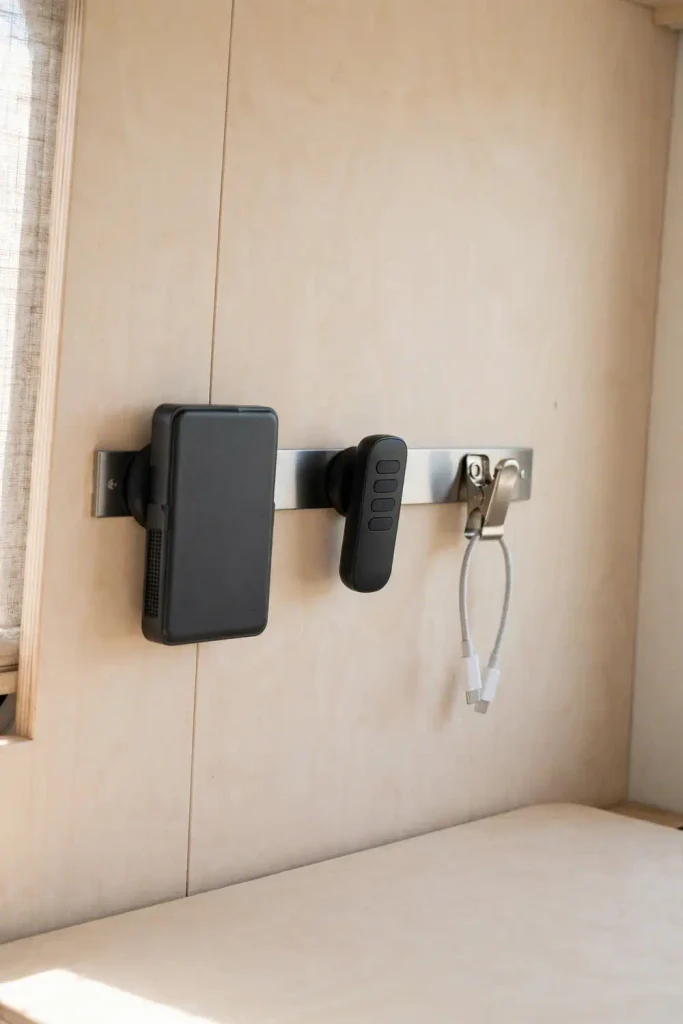
Counter space is precious in any recreational vehicle, and loose hard drives can take a damaging tumble if someone steps inside and rocks the rig. Using magnetic strips keeps small accessories organized and off the table.
Mount a steel backing strip against an interior wall and stick rubber-coated neodymium magnets to your hard drive cases and charging hubs. Your gear stays held in place while you work, but detaches easily whenever you want to take your laptop outside to the picnic table.
What to grab first
Building a functional workstation inside your rig does not mean you have to remodel your entire floor plan. Making small, targeted improvements to your desk posture, power efficiency, and cable organization will keep your workday comfortable wherever your travels take you.
Save this list to your favorite Pinterest board so you have these rv office setup ideas ready when you plan your next camper upgrade.