
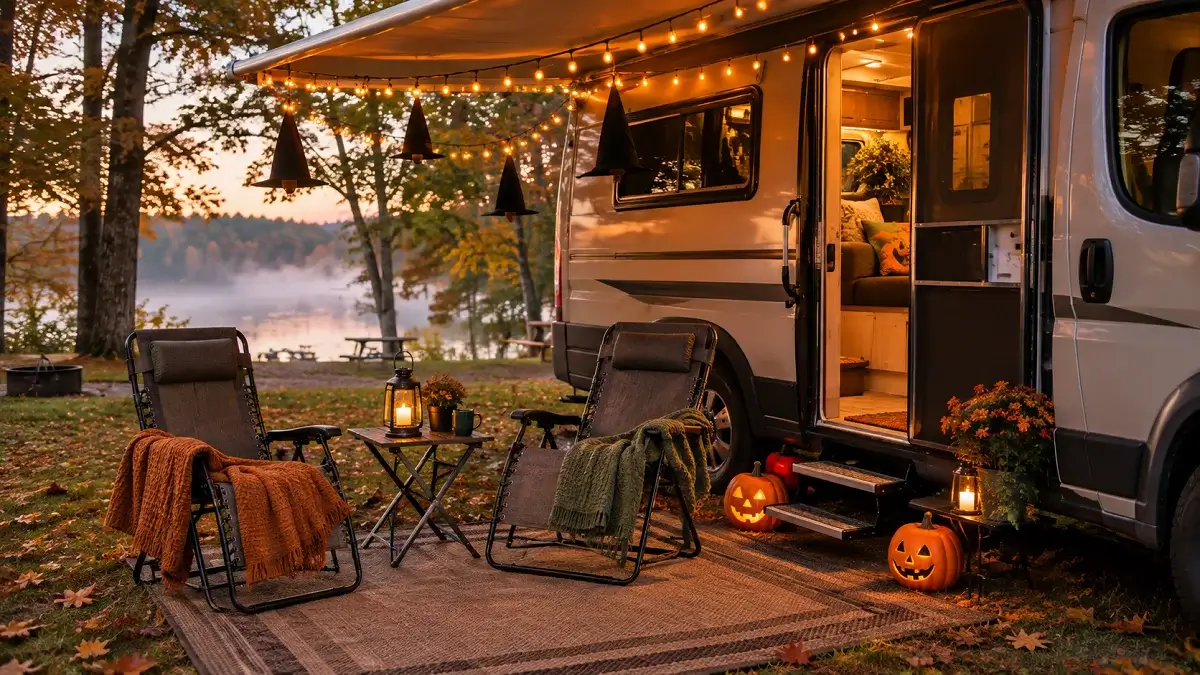
Decorating a camper for Halloween usually hits a wall the second you realize how little square footage you actually have. Traditional haunted house props are bulky, fragile, and impossible to store once travel day rolls around. If an item cannot pack flat, handle road vibration, or peel away without stripping RV wall panels, it simply does not belong in a rig.
The trick is focusing on surfaces you already use every day. Windows, grab bars, cabinet faces, and exterior hitch posts can carry plenty of festive spirit without stealing countertop space or turning into loose projectiles on the highway.
These practical rv halloween decorating ideas lean into lightweight materials, zero-damage fasteners, and clever storage habits so you can enjoy campground festivities without cluttering your living space.
1. Magnetic Ghost Silhouettes for the Range Hood and Fridge
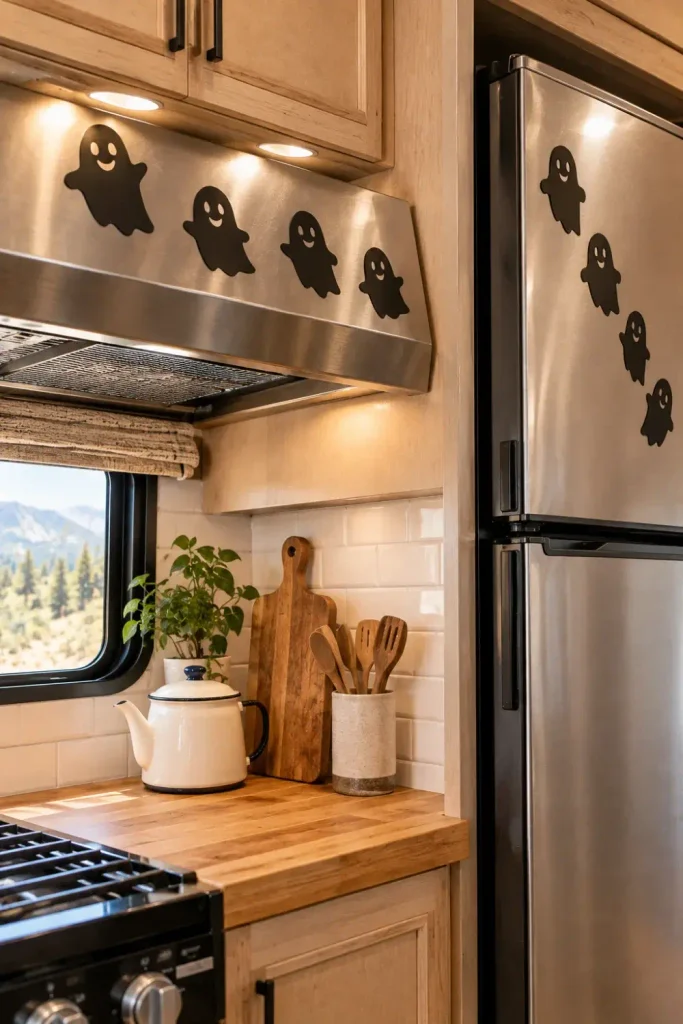
Your RV galley has prime metal real estate that often gets ignored. A metal range hood or residential-style steel fridge panel provides a sturdy base for flat magnetic cutouts that take up zero functional space.
Cut simple ghost profiles out of black construction paper or thin craft foam sheets. Glue a small, flat magnet to the back of each shape to keep them anchored while you boil water or prep meals.
- Cut shapes out of lightweight cardstock to reduce weight.
- Glue small adhesive magnets near top edges so corners do not curl.
- Wipe down metal surfaces with rubbing alcohol before placing to remove grease.
When packing up camp, stack them together and slide them into an envelope. They take up practically zero storage space between seasons.
2. Jack-O’-Lantern Cutouts Taped Inside Window Pleated Shades
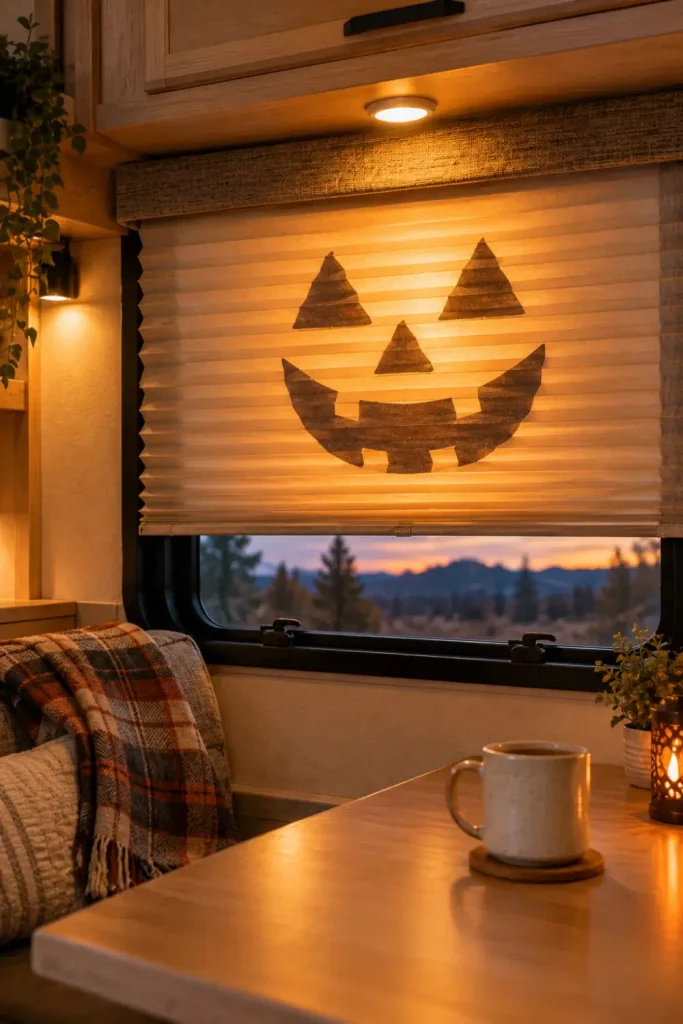
RV pleated night shades act as giant lightboxes the moment your interior cabin lights kick on after dark. Using this backlit setup lets you project glowing jack-o’-lantern faces out toward the campground loop without hanging exterior floodlights.
💡 Quick Tip
Use gentle painter tape or low-tack washi tape on shade fabrics. Standard clear tape can leave gummy residue or snag delicate cords when shades accordion back up.
Trace classic pumpkin eyes, noses, and toothy grins onto black cardstock. Tape these shapes to the window-facing side of your day shades or directly against the glass.
- Measure your window panes first so the cutout stays centered.
- Stick paper shapes directly to the glass pane rather than thin cellular fabric.
- Lower your sheer pleated shades so cabin lights diffuse the cutout into a silhouette.
When you switch on the overhead LEDs at dusk, your windows show bright, grinning jack-o’-lanterns to passing trick-or-treaters outside.
3. Battery Fairy Lights Woven Through Cabinet Grab Handles
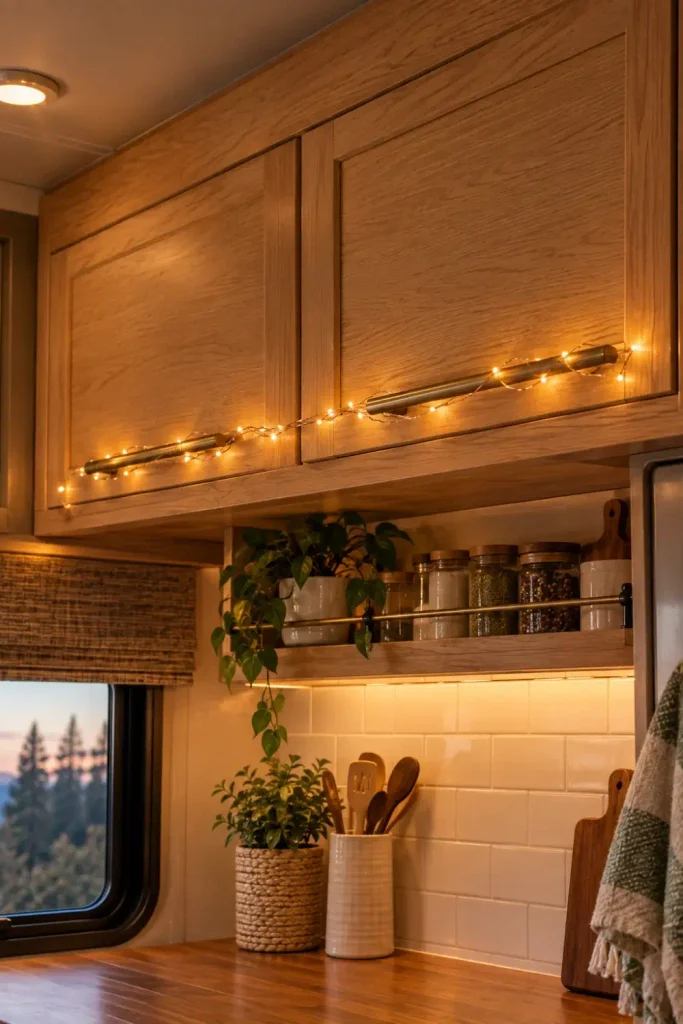
Overhead RV LED puck lights can feel harsh and clinical at night. Waving warm, battery-operated fairy lights through your upper cabinet handles softens the room while providing practical accent lighting.
Look for copper wire strands featuring miniature orange or purple bulbs. The bendable wire holds its shape effortlessly around cabinet pulls without needing clips or adhesive hooks.
- Choose lights with integrated six-hour timers so you do not drain batteries overnight.
- Secure the battery pack with a small strip of hook-and-loop tape inside a cabinet door.
- Leave enough slack near door hinges so doors swing fully open without snapping the wire.
The gentle amber glow keeps the main cabin easy to navigate after dark without needing bright, power-hungry main lighting fixtures.
4. Removable Spiderwebs Stretched Across Bunk Ladder Rungs
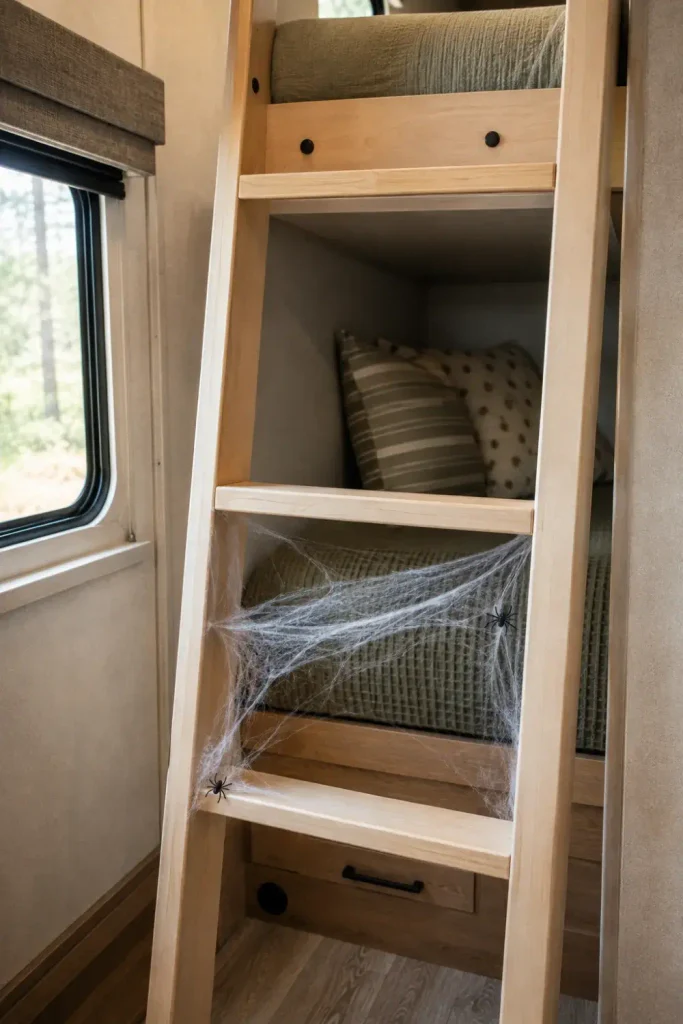
Bunkhouse ladders sit unused during daylight hours and make natural frames for decorative cobwebs. Using standard stretchy synthetic webbing transforms this functional piece into a spooky focal point.
Webbing Essentials Checklist
Pull the web material as thin as possible across the rungs. Dense clusters look artificial, but pulled-out fibers look surprisingly realistic under soft indoor lamps.
- Anchor the web corner at the top mounting bracket of the ladder.
- Stretch the material diagonally down toward the opposite rail to create anchor points.
- Hook lightweight plastic spiders into the strands using their existing leg loops.
Make sure to leave the rungs clear if children climb into bunks for midday naps, or keep the display on the outer sides of the rails.
5. Faux Gauze Runner Across the Dinette Table with Mini Foam Pumpkins
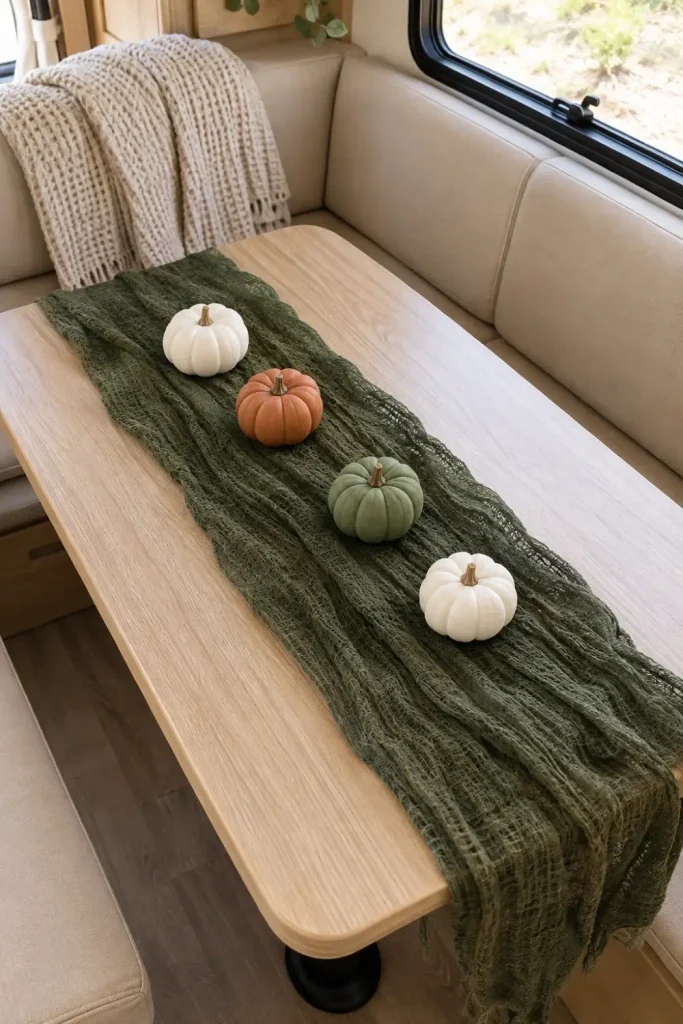
Dinette tables serve triple duty in an RV as a workspace, meal zone, and homework station. A table runner made from dark cheesecloth or shredded gauze adds immediate seasonal texture while clearing away in seconds.
Bulky gourds slide around on driving days, risk cracking tabletops, and require dedicated plastic tubs during storage.
Featherlight materials pack into a gallon storage bag, stay put on the table, and pose zero safety risks on transit days.
Lay a dark green, charcoal, or orange loose-weave cloth along the center spine of the dinette table. Scatter three or four ultra-light painted foam pumpkins across the fabric.
| Decor Item | Weight | Road Prep Time | Storage Size |
| Mini Foam Gourds | Under 2 oz | 30 seconds | Sandwich bag |
| Loose-Weave Gauze | Under 3 oz | 1 minute | Pouch pocket |
| Ceramic Pumpkin | 2 to 4 lbs | 5 minutes | Padded plastic bin |
When dinner time comes, pick up the runner by its corners, lift the pumpkins off in one motion, and set them aside on the galley counter.
6. Screen Door Bat Decals Using Reusable Window Clings
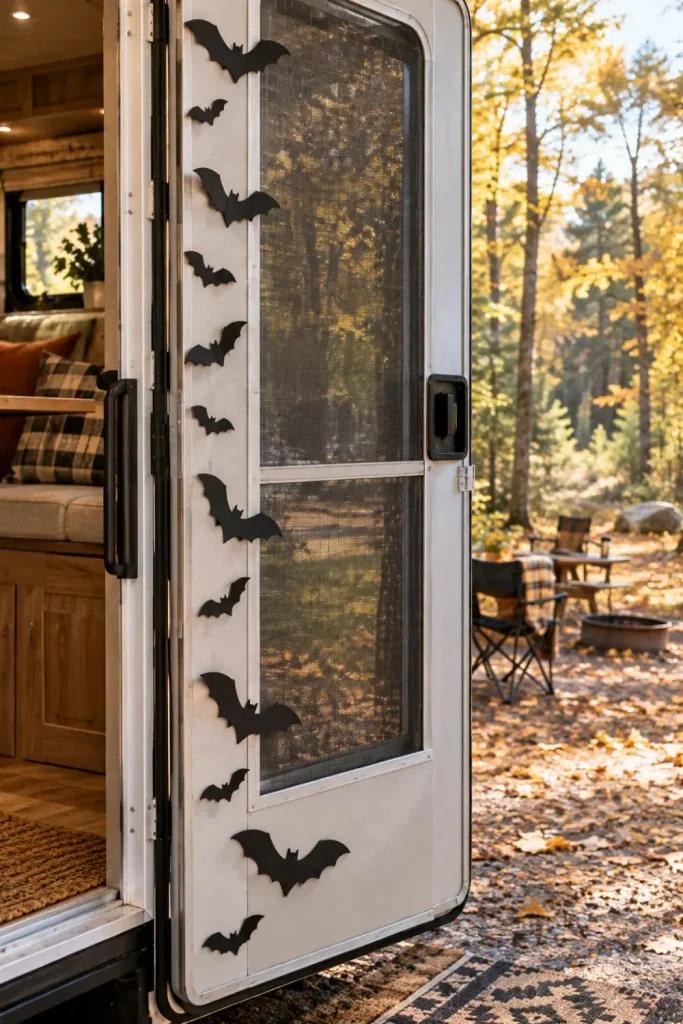
The camper screen door is the first thing guests see when they walk up to your site. Applying vinyl window clings or cardstock bat shapes along the mesh turns a plain entry into an engaging seasonal feature.
Wipe the exterior screen frame clean with a dry microfiber cloth to remove road dust.
Attach adhesive-backed micro dots or small hook-side fastener tabs to the bat cutouts.
Press shapes gently along the outer frame and solid lower kick panel in an upward spiral.
Vary the sizes of the bat cutouts to create the illusion of a swarm taking flight toward the sky. Put the largest bats near the handle and smaller ones near the upper corners.
- Stick shapes to the aluminum door frame or solid lower kick panel for better grip.
- Crease paper wings down the center line to create a dimensional 3D look.
- Avoid placing stickers directly on flexible nylon mesh to prevent tearing.
The door still operates normally, letting fresh evening air circulate without disturbing your display.
7. Floating Witch Hats Suspended Under the Outdoor Awning Roller
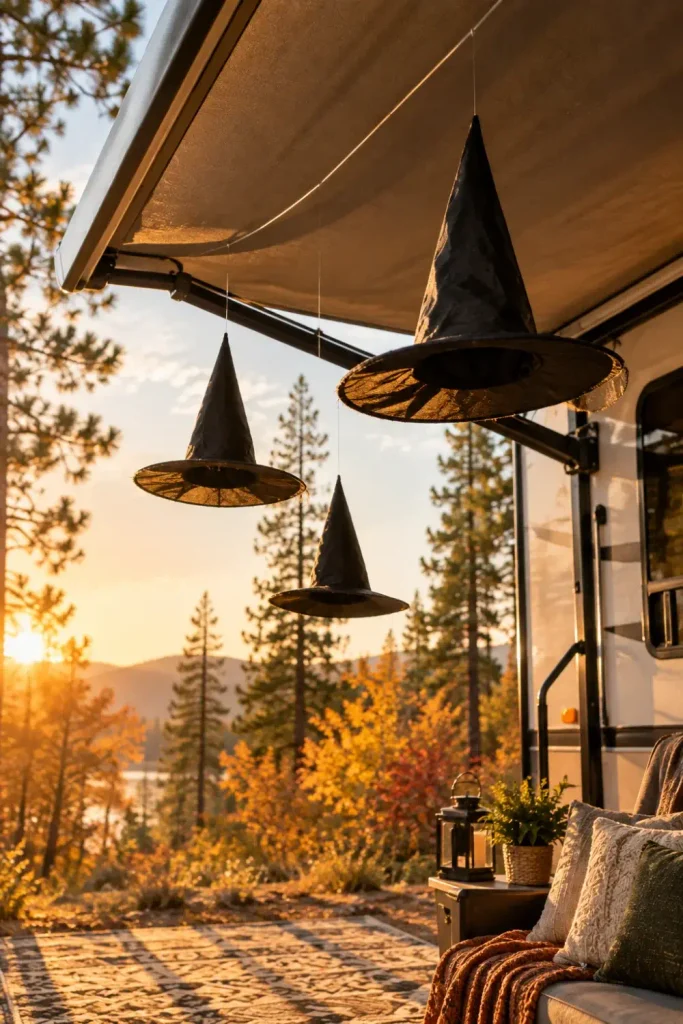
Awning arms and roller tubes give you convenient overhead hanging spots outside. Suspending cheap pointed witch hats with clear fishing line gives the appearance of floating accessories hovering around your patio mat.
Use lightweight nylon hats that shed rain.
Hang with quick-clip awning utility hooks.
Heavy fixtures that can whip in high winds.
Tying ropes tightly around the main fabric roller.
Run clear monofilament fishing line through the pointed tip of each hat using an ordinary sewing needle. Tie off a loop at your preferred drop height.
- Thread an LED tea light into the inside apex of each hat for an internal glow.
- Use awning roller slot hooks so you can slide them off instantly if bad weather rolls in.
- Stagger the hanging heights so the brims do not collide during breezy afternoons.
Because fabric hats squash down flat like pancakes, half a dozen of them can easily tuck away inside a camp chair bag when stored.
8. Witch’s Potion Spice Jars with Chalkboard Labels on the Galley Ledge
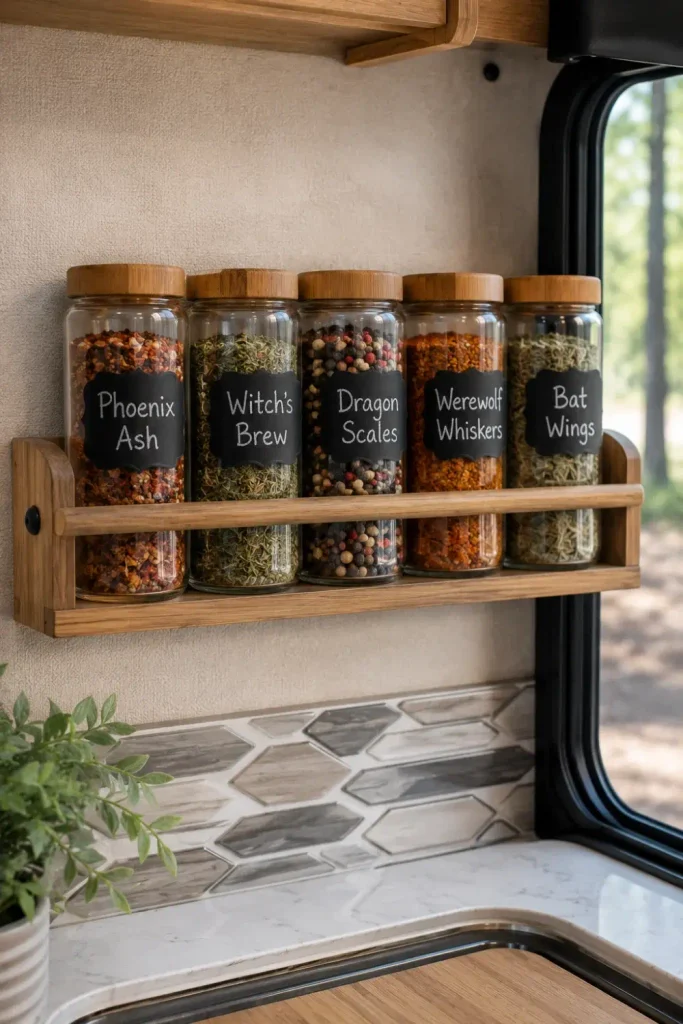
Every RV kitchen features a spice rack or shelf ledge to keep cooking seasonings from rattling around. Swapping out your everyday seasoning names for playful potion titles adds seasonal humor without introducing useless knickknacks.
| Everyday Pantry Spice | Campground Potion Name |
|---|---|
| Crushed Rosemary | Dried Werewolf Whiskers |
| Ground Paprika | Phoenix Ash Powder |
| Flaky Sea Salt | Crushed Bone Dust |
Purchase a small sheet of peel-and-stick vinyl chalkboard labels. Write funny names with a liquid chalk pen, let them dry, and smooth them over your existing spice containers.
- Pick labels with gentle adhesives that peel cleanly off glass after the holiday.
- Write real contents in tiny lettering on the bottom edge so dinner recipes stay edible.
- Leave standard clear glass jars in their dedicated travel brackets to prevent spills.
This idea keeps your counter spaces clear, utilizes items you already travel with, and gives campsite visitors a fun laugh whenever they grab a drink.
9. Outdoor Campfire Skeleton Lounging in a Zero Gravity Chair
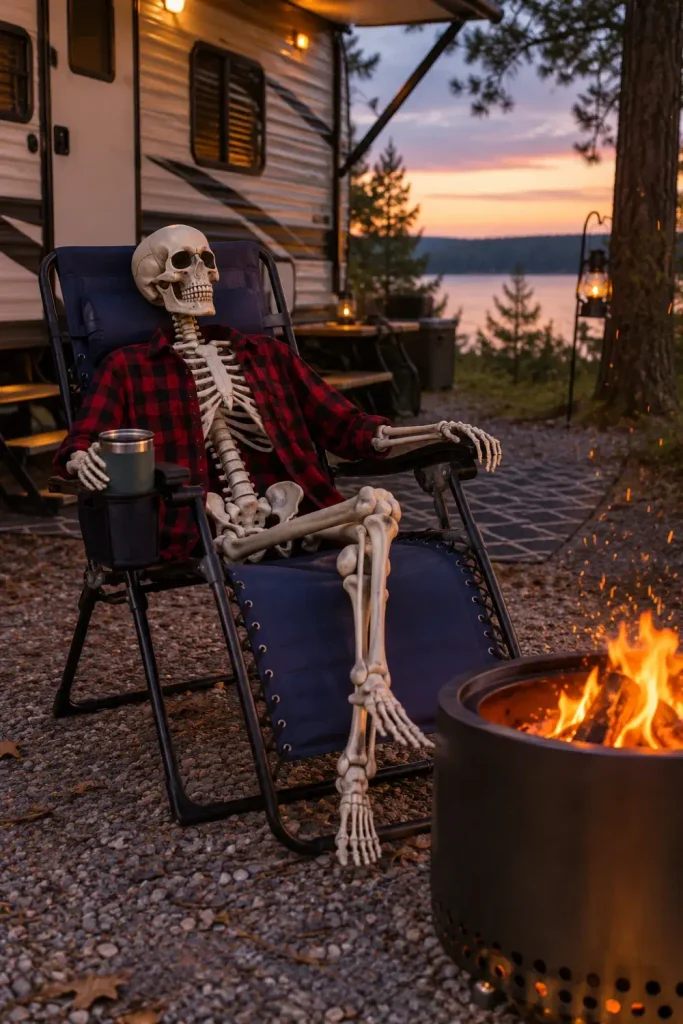
Campground loops are active social hubs in late autumn. Instead of leaving empty camp chairs parked by your fire ring while you explore town, pose a full-sized plastic skeleton in your recliner to welcome neighbors.
Always secure poseable plastic skeletons to the chair frame using reusable bungee cords so wind gusts do not send bones flying across the campground loop.
Pick up an inexpensive five-foot posable plastic skeleton with locking joints. Position it slouched casually across the fabric seat with its legs crossed at the ankles.
- Slide a foam drink koozie into one bony hand for added campsite personality.
- Loop a zip-tie around the pelvic spine and chair crossbar to prevent theft or tip-overs.
- Toss an old flannel shirt over the shoulders to fit the outdoor camper theme.
At pack-up time, fold the joints together. The plastic frame can ride flat under your RV master bed or tucked between packed camp chairs in the pass-through storage bay.
10. Tension Rod Black Lace Valance Above the Galley Window
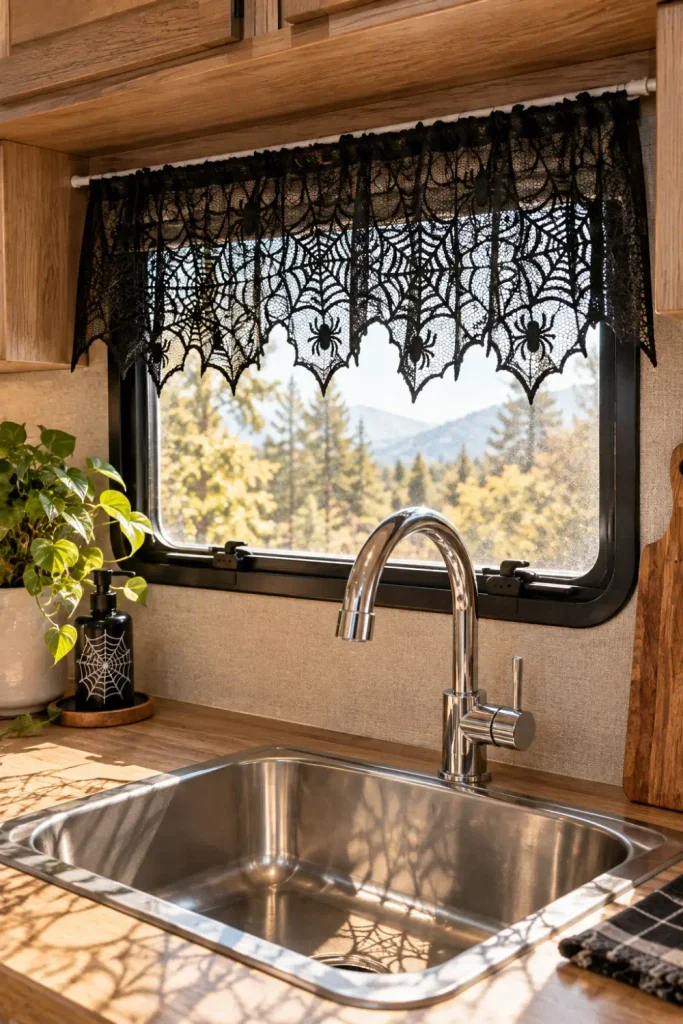
Permanent RV window trim can look boxy and plain. Adding a temporary tension rod with dark lace valance fabric softens the window frame while introducing a Victorian haunted look.
📌 Good To Know
Spring-loaded tension rods require zero screw holes, making them completely renter- and RV-warranty-friendly. Add rubber tips on rod ends to protect thin wall paneling from scuffs.
Purchase an inexpensive black lace mantel scarf or table runner. Slide a slim spring tension rod through the open lace pattern and wedge it firmly between your window valance boxes.
- Twist the tension rod until it sits snug against the interior window framing.
- Drape dark lace evenly across the top to hide the hardware.
- Trim excess fabric length with scissors so it does not hang near kitchen burners.
The lace filters outdoor daylight into cool, patterned shadows across your counter while rolling up into a tight roll whenever you change camps.
11. Glow-in-the-Dark Tire Ring Planters with Faux Mums
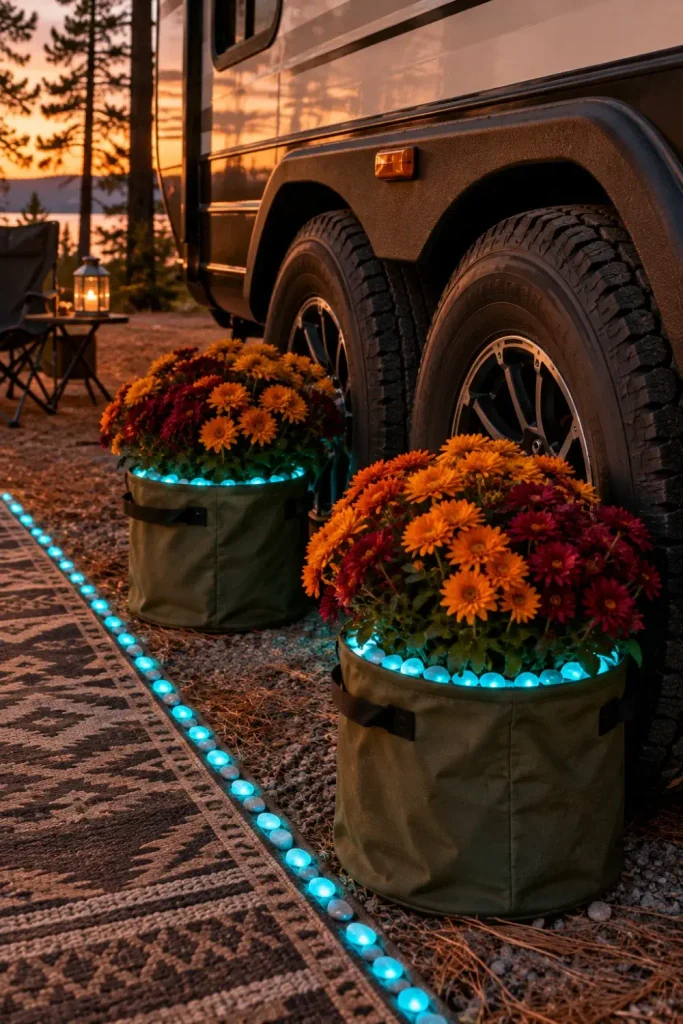
RV trailer tires take up a noticeable portion of your outdoor campsite patio. Turning tire wheel wells into decorative planters conceals muddy treads while adding warm curb appeal to your site.
Set two collapsible fabric bins directly on your ground mat against the trailer tires. Fill the tops with artificial rust-colored mums and faux trailing ivy.
- Drop two smooth river stones inside each bin base to weigh them down against wind.
- Tuck battery-operated waterproof glow pebbles around the base of the stems.
- Keep plants clear of hot brake drums if you just pulled into camp.
The arrangement disguises dirty rubber wheels and marks the edge of your campsite so visitors avoid bumping into slide corners or stabilizer jacks at night.
12. Command Hook Ghost Garland Strung Across the Slide-Out Trim
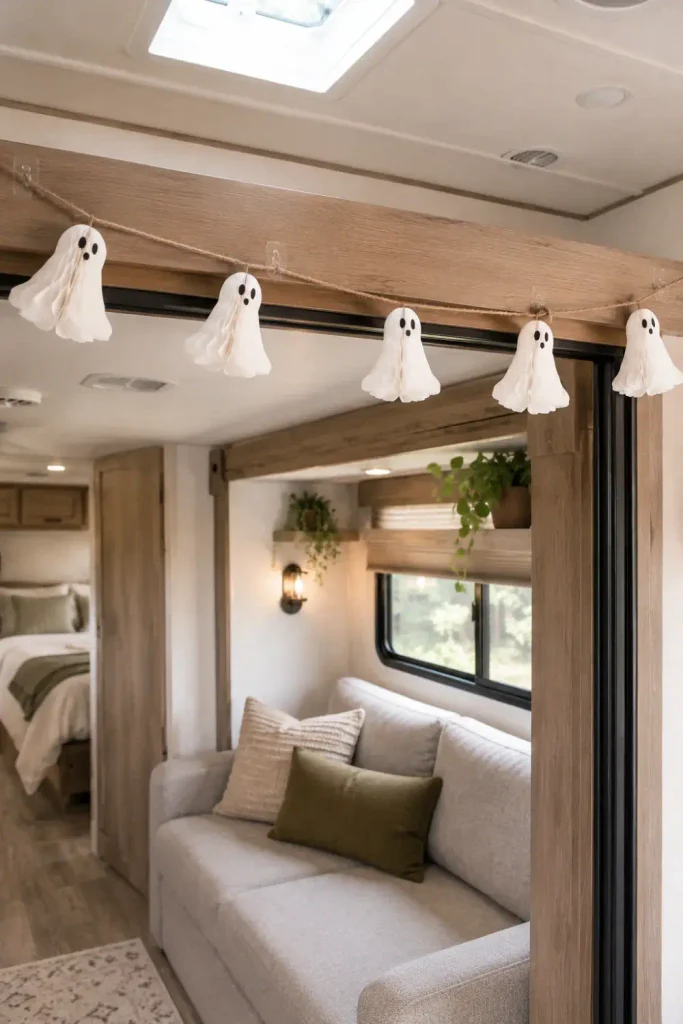
The wooden or vinyl fascia framing your slide-out makes an ideal stage for lightweight garlands. Clear adhesive hooks let you drape paper ghost garlands without puncturing interior paneling.
Slide-Out Decorating Best Practices
String mini paper tissue honeycomb ghosts along white twine. Hang the ends using clear utility clips installed at opposite corners of the main slide trim.
- Space hooks roughly three feet apart to keep the string from sagging down into walking headroom.
- Choose collapsible tissue paper ghosts that fold completely flat for off-season storage.
- Always remove overhead garlands before moving slide-outs inward to prevent catching mechanisms.
The white ghosts stand out crisply against dark wood grain finishes and add instant festive charm to the center of your living space.
13. Entryway Step Riser Monster Mouth Using Painters Tape
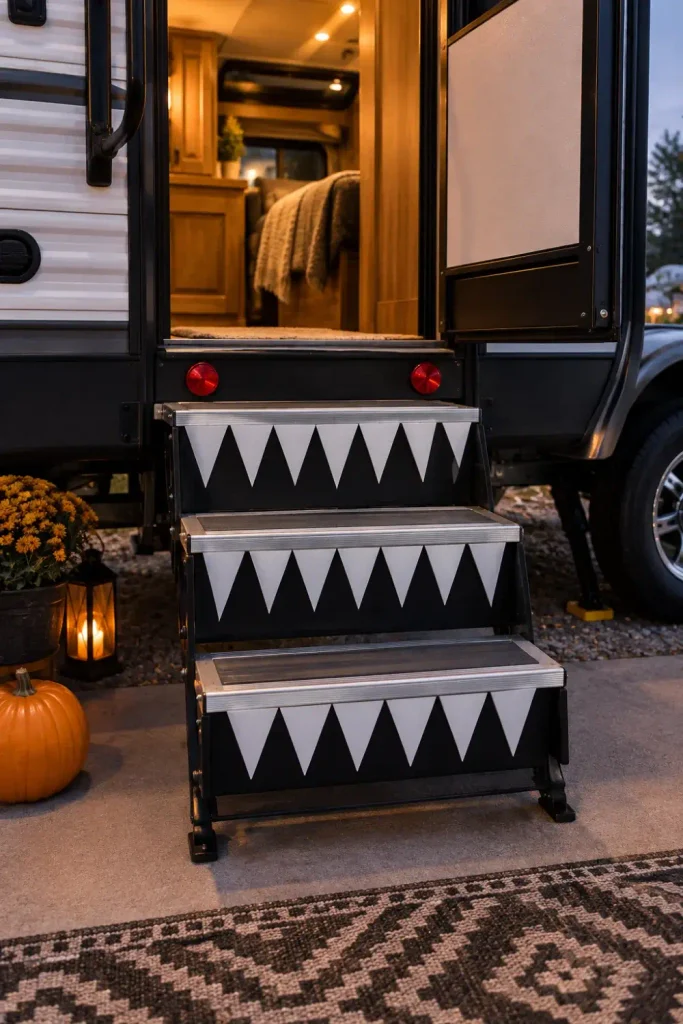
Camper entry steps are narrow and can be hard to see in low-light campground conditions. Applying high-contrast monster teeth cut from masking tape turns practical safety visibility into a Halloween design feature.
Cut sharp triangle shapes out of wide white painter tape or outdoor vinyl tape. Stick the flat edges along the top of each vertical step riser to form pointed monster fangs.
- Apply teeth exclusively to vertical step risers, never on horizontal tread surfaces where feet land.
- Add two large circular red reflective stickers above the top step to act as glowing eyes.
- Wipe aluminum steps with a dry cloth before applying tape to ensure good contact.
The bright white triangles catch your porch light, making steps far easier to see for visiting trick-or-treaters while navigating camp at night.
14. Velcro-Backed Burlap Jack-O’-Lantern Face on the Spare Tire Cover
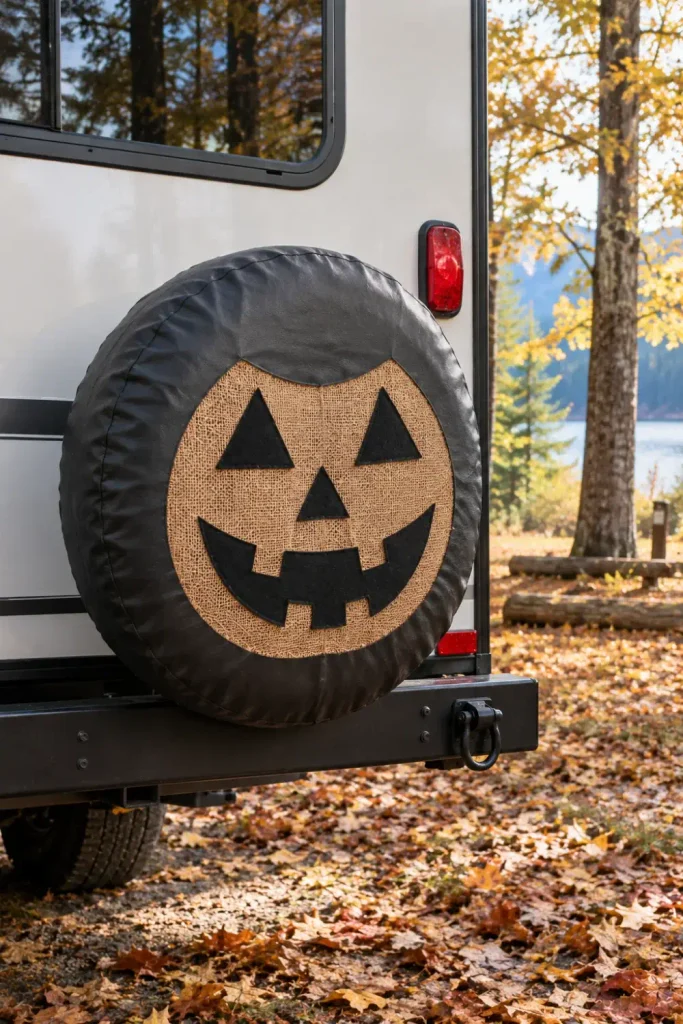
The rear bumper spare tire cover is a blank, vertical canvas seen by everyone driving through your camping resort loop. Adding an expressive jack-o’-lantern face gives your rig a cheerful back profile.
Cut eyes, nose, and mouth pieces out of weather-resistant black outdoor felt or marine vinyl.
Adhere heavy-duty outdoor hook-and-loop strips to the rear side of each cutout piece.
Press the pieces directly against vinyl or canvas tire covers to build your pumpkin expression.
Because felt and marine vinyl resist water, damp mornings and highway road mist will not destroy your artwork.
- Use rounded corner cuts so wind cannot catch edge tabs while driving.
- Select heavy-duty outdoor-rated hook fasteners that withstand temperature swings.
- Peel cutouts away and stack them flat inside a zip-top bag when the season ends.
This quick modification keeps your bumper looking fun without requiring specialized custom tire covers or messy exterior paint.
15. Hanging Mason Jar Solar Lanterns on the Exterior Grab Handle
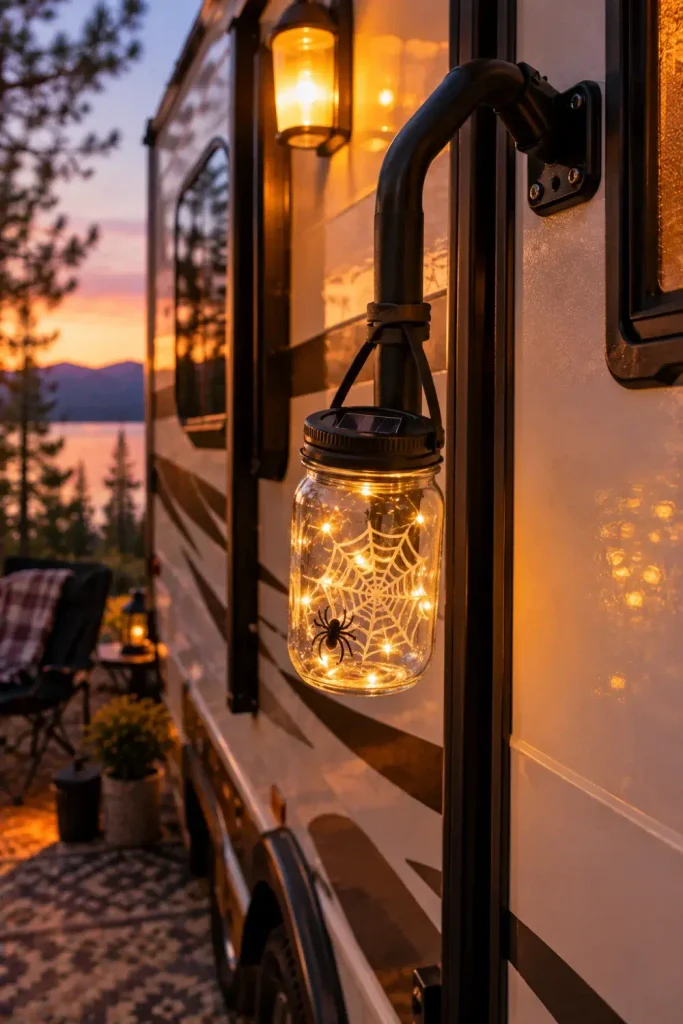
The folding entry grab handle outside your RV door provides an accessible mounting post for mood lighting. Plastic solar jars clamped to the handle illuminate your door lock without burning battery reserves.
Clear PET shatterproof plastic jars.
Self-charging solar jar lids with built-in cells.
Heavy glass canning jars that can shatter on concrete.
Open candle flames near entry door canvas.
Fill lightweight plastic jars with loose orange faux spiderweb fibers or plastic bats. Screw on a solar jar lid that charges automatically during afternoon daylight hours.
- Fasten lanterns to the bar with padded silicone gear ties to prevent metal rattling.
- Keep the jar tucked close to the door frame so it does not snag sleeves when entering.
- Unclip the lantern and store it in an interior drawer before driving down rough roads.
The soft glow lights your entry lock cylinder when coming back from campground activities after dark.
16. Cabinet Knob Monster Eyeballs Made from Painted Wooden Beads
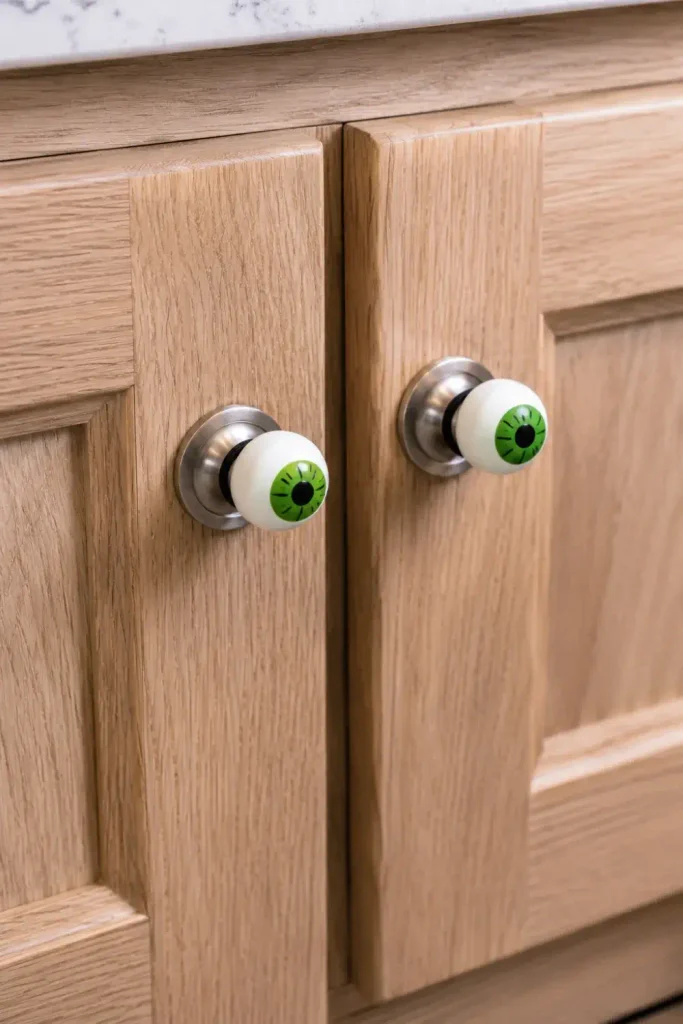
Camper cabinet hardware can look identical across the entire interior. Sliding temporary painted bead covers over existing knobs adds quirky personality to every drawer in your kitchen or bath.
| Attachment Method | Pros and Suitability |
|---|---|
| Elastic Cord Loop | Fast install, zero adhesive residue, stretches over unusual knob shapes. |
| Poster Putty Dot | Works on completely flat hardware, easy to adjust alignment. |
| Silicone Cup Sleeve | Protects cabinets from scratches, stays snug against road vibration. |
Paint large wooden craft beads white with bold green, yellow, or bloodshot iris centers. Thread a small piece of stretchy elastic cord through the center hole to create a loop.
- Slip the loop around the base of round cabinet knobs for an instant snug fit.
- Keep beads small enough so they do not block adjoining cabinet doors from swinging open.
- Pack them into a pocket organizer or tackle box tray when travel day arrives.
This small craft requires minimal materials, keeps children entertained during setup, and removes easily without tools.
17. Campsite Hitch Post Mummy Wrap with White Vet Wrap Bandages
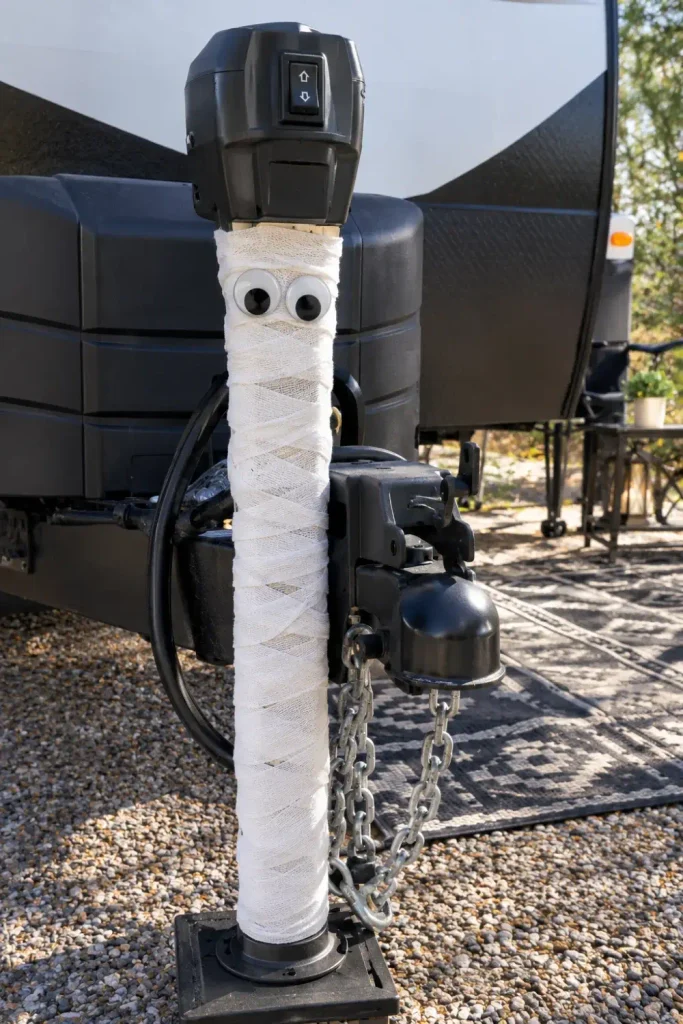
The metal trailer hitch tongue and electric tongue jack can look industrial and grease-stained sitting on your patio. Wrapping this hardware in self-adhering white bandage wrap transforms an eyesore into a spooky mummy display.
Exposed coupler balls and grease-coated jack posts leave dirty stains on visitors pants and look unsightly in campsite photos.
Self-clinging medical wrap seals off grease, adds fun festival character, and peels off in seconds without leaving sticky adhesive residue.
Self-adhering veterinary cohesive wrap sticks only to itself, meaning it won’t pull off paint or leave gummy residue on electrical tongue jack housings.
- Wrap the jack post from base to top, overlapping layers by roughly half an inch.
- Tuck plastic wiggle eyes or neon foam shapes between the wraps near the top.
- Leave key switches and emergency brake break-away cables exposed for safety.
The bandage wrap resists light morning moisture and keeps kids from accidentally brushing up against greasy ball couplers while playing outside.
18. Collapsible Fabric Storage Bins Swapped for Black and Orange Canvas
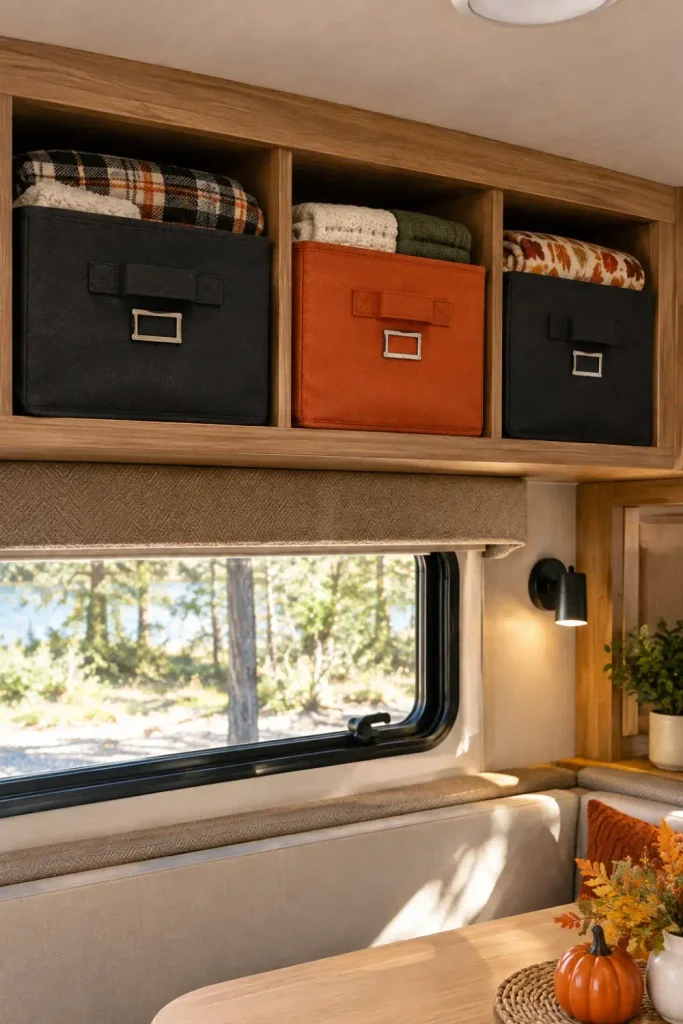
Most RVers use fabric cubby cubes to keep clothes and pantry goods organized on overhead shelves. Swapping everyday beige baskets for black and orange storage cubes adds functional holiday style without using extra storage room.
- ▸Seasonal bins replace everyday cubes one-for-one with zero added clutter.
- ▸Collapsible cardboard inserts fold completely flat when not in use.
- ▸Deep fabric colors hide road dirt and trail dust far better than pale canvas.
Transfer your everyday items directly into seasonal canvas bins for the month of October. Slide the everyday baskets flat under the mattress until November arrives.
- Measure your open cubbies beforehand to find cubes with an exact fit.
- Label handles with small chalkboard clips to identify snacks and gear easily.
- Stick with sturdy side panels that keep their boxy shape when loaded with pantry goods.
Your living space looks festive and styled while maintaining the practical storage systems that keep everyday camper life running smoothly.
Enjoying the fall season on the road comes down to keeping things functional and low-stress. By relying on lightweight items, damage-free fasteners, and spaces you already use, you can build a welcoming campsite without cluttering your rig. Save this list for your upcoming autumn camping adventures!

