
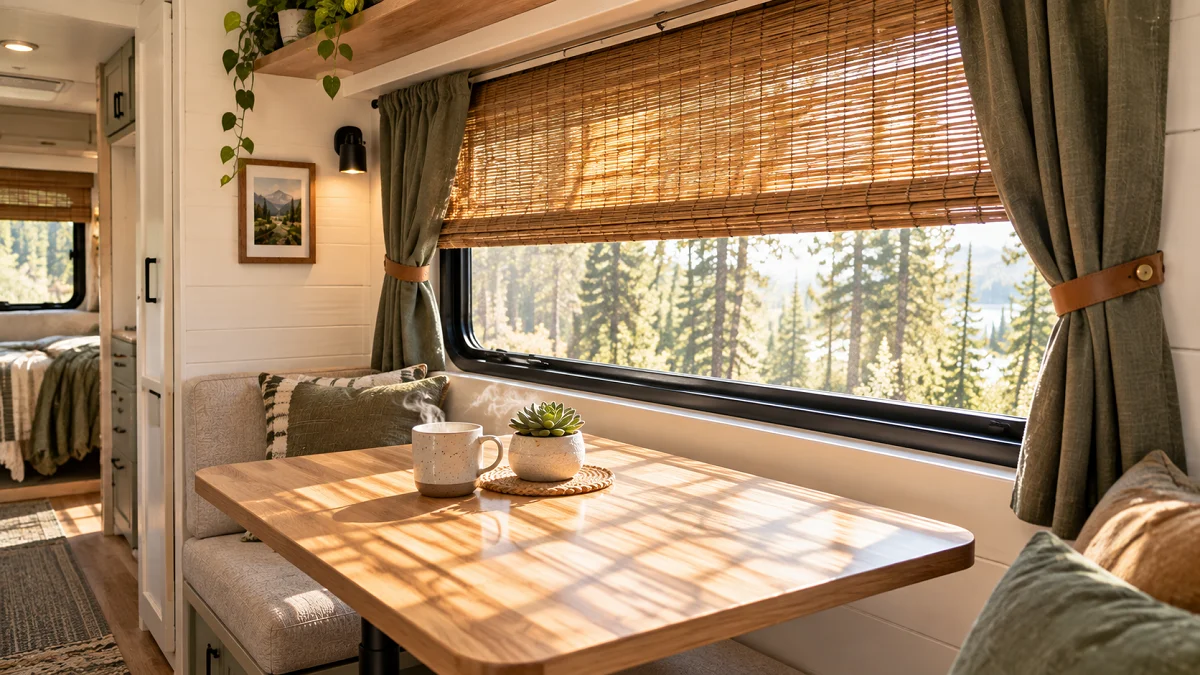
Factory camper shades have a special way of testing your patience. Between thin pleated paper that tears on the second trip, plastic strings that tangle in the night, and bulky padded valances that feel like a dusty hotel room, stock setups rarely get the job done. They either block the sunlight completely or leave you visible to every dog walker in the park the moment you turn on a reading lamp.
Upgrading your setup does not require custom order RV cabinetry prices or professional upholstery skills. With a few thoughtful swaps, you can block desert heat, keep your rig private at crowded campgrounds, and give your living area a finished, residential look.
Here are fifteen practical rv window treatment ideas that hold up to bumpy backroads, fit inside shallow window wells, and make small camper spaces feel like a real home.
1. Snap-On Insulated Canvas Panels for Cold Nights
Factory RV glass lets cold air pour straight into your sleeping area. Sewing insulated canvas panels with snap fasteners creates a tight, draft-proof seal right against the aluminum frame.
Because these sit flush inside the window recess, they do not flap around while you tow or eat up precious space around the edge of the mattress.
- Use heavy cotton duck cloth on the side facing inside the camper to match your interior cushions.
- Sandwich a layer of low-bulk thermal batting or foil insulation between the fabric pieces.
- Screw nickel-plated screw-stud snaps directly into the metal frame every eight inches.
Thin accordion paper lets outside chill radiate into bed, while exposed strings catch and fray during travel.
Blocks drafts at the perimeter, rolls up into a neat bundle during the day, and keeps interior heat locked inside.
Roll the canvas up and secure it with two small button loops when you want daylight, or take them down completely and store them under the dinette bench when summer starts.
2. Tension Rod Linen Cafe Curtains for Kitchen Sinks
Kitchen windows in campers sit low, right behind the faucet and prep counter. Full-length blinds in this spot quickly collect water spots, cooking grease, and coffee splatters.
A cafe curtain covers only the bottom half of the glass. This lets daylight pour over your prep counter while keeping your kitchen counters hidden from neighboring campers walking by.
- Measure the inside width of the window frame and pick a lightweight, rubber-tipped tension rod that spans the distance without screws.
- Hem a pair of breathable linen fabric scraps so the bottom edge sits half an inch above the faucet hardware.
- Slide the curtain pockets onto the rod, twist the rod into place, and secure the tension until it resists light road vibration.
💡 Road Clearance Tip
Add a tiny drop of mounting putty behind the rubber ends of the tension rod. It stops the rod from sliding down the slick metal wall frame when driving over washboard dirt roads.
Linen dries quickly if dishwater splashes against it, and you can pull it off the rod to toss in the wash after a messy meal.
3. No-Drill Cellular Honeycomb Blinds Mounted with Heavy-Duty Dual Lock
Drilling screws into RV walls is always risky because wall panels are thin and hidden wiring runs close to window cutouts. Cellular honeycomb blinds give you clean, modern lines and insulation without mounting screws.
The cellular pockets trap air against the glass, slowing down heat transfer during hot sunny afternoons.
| Feature | Factory Mini-Blinds | Cellular Shades with Dual Lock |
| Install Method | Screws into thin wall studs | 3M Dual Lock interlocking strips |
| Road Rattle | High metal clatter while driving | Zero noise; fabric absorbs vibration |
| Thermal Barrier | None; transfers heat directly | Trapped air pockets slow heat gain |
| Cleaning | Dusty individual plastic slats | Quick pass with a handheld vacuum |
Mount the top headrail using three pieces of interlocking fastener tape directly to the window trim.
Stick a small adhesive-backed magnet to the bottom sill to snap the bottom rail firmly into place when pulled down so it never sways on bumpy turns.
4. Macrame Driftwood Hangings for Daytime Light and Texture
Some windows do not face a common campground walkway and do not need total blackout fabric. Accent windows beside dinettes or next to slide-outs benefit more from texture and light filtering.
A flat macrame panel made with lightweight cotton cord adds a soft, relaxed feel to boxy camper interiors while breaking up direct sun glare.
- Pick a smooth piece of fallen branch or wooden dowel that spans slightly wider than your window frame.
- Tie simple square knots that leave plenty of open negative space for daylight to filter through.
- Keep the overall drop an inch above the sill so fringes do not drag on surfaces or collect dust.
What to grab for a lightweight build
Because it hangs flat on decorative wall hooks, you can lift the entire piece off the wall in two seconds when you want an unobstructed view outside.
5. Woven Bamboo Roman Shades Trimmed to Custom Depths
Factory RV interiors tend to feature repetitive brown laminates and neutral vinyls. Woven wood or bamboo shades introduce organic grain and warm up the living area instantly.
Off-the-shelf home shades are often too wide or long for compact travel trailer frames, but basic bamboo blinds are surprisingly simple to modify at home.
- Buy an inexpensive cordless bamboo roll-up blind closest to your window opening width.
- Mark the excess width on both sides using painter tape to keep the individual reeds from splintering.
- Cut straight down the taped line using a sharp, fine-tooth rotary saw or heavy utility shears.
- Mount the header bracket into the wooden valance support backer behind your wall trim.
The filtered light makes your camper interior feel airy during the day while giving you full daytime privacy from anyone outside.
6. Double Track Blackout Rollers with Magnetic Bottom Latches
If you camp in bright parking lots or enjoy sleeping in past dawn, standard blinds leave noticeable gaps on the sides. A dual roller shade system pairs a sheer solar screen with a heavy vinyl blackout layer.
Adding discreet neodymium magnets to the bottom pull bar keeps the shade firmly secured against the sill, preventing drafts and roadside rattling.
- Mount a slim-profile dual roller bracket directly onto the ceiling or the top frame edge.
- Pull the shade completely down until the bottom metal bar touches the sill trim.
- Glue tiny disc magnets to the sill matching the contact points on the shade bar.
Mount the dual cassette tightly against the wall to eliminate top light leakage.
Drop the sheer mesh during daytime to block 80% of heat without sacrificing the outside view.
Pull the blackout vinyl layer down at night until the base magnets click firmly into the sill.
The magnetic connection keeps the shade from swinging into the room when your travel trailer is parked slightly unlevel on a campsite pad.
7. Frosted Static-Cling Film for Bathroom and Entry Door Ovals
Bathroom and entry door windows need full-time privacy without hanging fabric that gets soaked by showers or caught in door latches. Adhesive contact papers bubble up and leave behind gummy messes under direct desert sun.
Non-adhesive static cling vinyl stays put using water surface tension and peels off cleanly whenever you want a change.
Spray glass heavily with soapy water so you can slide the film into place easily.
Trim with a razor blade leaving a 1mm gap around the rubber gasket to prevent edge curling.
Never use sticky permanent contact paper; summer glass heat turns the glue into rock.
Avoid applying dry vinyl; trapped air pockets become permanent cloudy bubbles.
- Wipe down the glass with isopropyl alcohol to remove factory grime before starting.
- Cut an oversized piece, smooth it from the center outward with a silicone squeegee, and trim the excess edges.
- Enjoy total day-and-night privacy without sacrificing natural light in your shower stall.
8. Reupholstered Box Valances Wrapped in Textured Neutral Fabric
Bulky camper cornices with floral prints and faux-suede trims date an RV faster than almost anything else. Removing them completely can leave unsightly holes in your wall paneling.
Instead of discarding them, strip off the dated fabric and recover the original wood frames with a fresh, durable weave.
| Method | Total Replacement | Reupholstering Existing Shell |
| Effort | Demolition, hole patching, custom wood builds | Unscrewing frame, stapling fabric, rehanging |
| Wall Impact | Leaves mounting holes and faded wallpaper marks | Uses existing factory brackets and screw holes |
| Cost | High lumber and finishing supply costs | Low; requires staple gun and two yards of fabric |
| Weight | New hardwood adds unwanted tongue weight | Zero added structural weight to your trailer walls |
Pull the valance off the wall brackets, wrap it tightly in warm oat or olive linen-look fabric, and secure the back with heavy upholstery staples.
| Step | Action Detail |
|---|---|
| 1. Prep | Unscrew L-brackets and vacuum out old factory dust from the corners. |
| 2. Wrap | Pull fabric snug over existing batting, folding tidy hospital corners at the edges. |
| 3. Rehang | Drive original short screws back into the factory wall anchors without new holes. |
The updated fabric conceals the hardware and top roller gaps while giving the entire room a clean, bespoke finish.
9. Reflectix Inserts Sewn Inside Quilted Duck Cloth
Silver foil bubble insulation is the gold standard for stopping baking summer sun, but raw silver sheets make an RV look abandoned or low-rent from the outside.
Sewing the foil between two layers of sturdy canvas gives you the massive heat-stopping power of radiant foil with the clean appearance of custom upholstery.
- Cut heavy canvas two inches wider than your window glass.
- Cut flexible reflective insulation to match the exact dimensions of the glass.
- Sew the sandwich together with a simple grid stitch to keep the foil core from shifting.
The quilted cover stops condensation buildup between the foil and glass during humid nights, preventing mold while blocking up to 85% of incoming solar heat.
You get a dark, cool sleeping space during afternoon naps without turning your camper windows into shiny tinfoil panels.
10. Sliding Chambray Track Curtains for Bunk Windows
Bunk windows are small, recessed, and placed where children or guests sleep. Rigid blinds or pull strings get tangled, crushed, or pulled off the wall during the night.
Flexible ceiling-mount curtain tracks paired with soft chambray fabric slide effortlessly and bounce back when knocked into by elbows or pillows.
📌 Emergency Exit Safety Check
Never screw tracks or rods over red emergency egress latches. Make sure any fabric covering an emergency window pulls clear with a single flick so handles remain accessible at all times.
- Mount a low-profile plastic track directly to the ceiling seam above the bunk entrance.
- Use nylon gliders that clip directly into curtain header tape for a flush, rattle-free slide.
- Sew a magnetic closure tab onto the center seam so curtains stay firmly shut when lights are on inside.
The fabric creates a private sleep pod that keeps the main cabin lights from waking bunk sleepers.
11. Wood Slat Plantation-Style Folding Shutters
If you want a fixed, high-end residential feel, lightweight wooden louvered shutters transform plain camper walls into a grounded space.
Because they fold back on small hinges, you can swing them completely open during scenic lake days or close the louvers to direct sunlight up toward the ceiling.
- Source unfinished lightweight pine shutters and cut them down to match the height of your side frame.
- Paint or stain them to match your cabinet doors using a satin exterior-grade urethane.
- Add brass roller ball catches to the bottom frame to hold the shutters firmly closed while towing down highways.
They add architectural character that hides plastic window latches and frames.
12. Velvet Blackout Drapes Hung with Bendable Aluminum Ceiling Tracks
Many newer travel trailers have curved front caps and sloped side walls that make straight curtain rods unusable. Velvet blackout drapes hung from bendable aluminum tracks contour to any ceiling curvature.
Velvet naturally dampens noise inside echoes and traps warm air, which makes a big difference when sleeping near a highway.
- Shape a flexible aluminum track by hand along the curve of your ceiling molding.
- Fasten the track every ten inches using short, broad-head wood screws into solid ceiling framing.
- Hook heavy velvet drape panels with thermal backing onto the rolling track gliders.
Essential hardware for curved ceilings
Cinched tightly at night, this setup creates total darkness even under bright campground floodlights.
13. Accordion Pleated Paper Blinds as a Quick Dollar-Store Stopgap
Renovating an RV happens in stages, and you often need an immediate privacy solution while you wait to tackle permanent carpentry. Temporary pleated paper shades cost very little and install in seconds.
While not a lifetime solution, they keep you fully hidden on your initial shakedown trips while you plan permanent designs.
Cut the width with an ordinary utility knife right through the folded stack.
Use the included plastic clips to set daytime view heights in two seconds.
Do not rely on the factory peel-and-stick adhesive strip in summer; baking heat drops them within hours.
Do not leave them clipped down when traveling with open windows to prevent tearing.
- Trim shades with a sharp blade for an exact edge-to-edge glass fit.
- Reinforce the top adhesive header strip using clean painter tape that peels away without pulling off delicate camper wallpaper.
- Keep the plastic lift clips in an easy-to-reach cup by the entryway.
They buy you time to test which windows require total blackout and which ones you prefer open for daylight.
14. Leather Strap Roll-Up Canvas Shades with Brass Snaps
Roll-up canvas shades evoke the timeless charm of vintage canvas safari tents. They handle road abuse without fragile internal springs, plastic clutches, or cords to untangle.
Securing the rolled fabric with oiled leather straps and brass hardware adds a warm, handcrafted element to simple plywood camper conversions.
Staple or screw the top edge of a heavy canvas panel directly onto a wooden wall batten.
Slide a wooden dowel through a hem sewn along the bottom edge to weight the canvas when rolled down.
Roll the fabric around the dowel and snap two leather retention straps around the bundle for travel days.
- Use full-grain leather strips cut from an old belt or craft remnant.
- Install durable marine-grade snap fasteners so the straps never unhook on the highway.
- Choose dark olive or natural linen canvas to hide road dust and grease marks.
This layout gives you dependable, mechanical simplicity with zero moving parts to fail on remote trails.
15. Drop-Down Exterior Mesh Sunscreens for Dinette Picture Windows
Large side picture windows let in expansive campsite views, but they turn modern rigs into greenhouses when afternoon sun beats against the glass.
Interior blinds trap that heat inside the camper once light passes the glass. Snapping a commercial 90% UV mesh shade onto the outside of the window stops solar heat before it ever touches your glass pane.
- Mount marine-grade screw snaps into the exterior window frame trim.
- Cut heavy-duty PVC solar mesh to cover the entire exterior glass and frame surface.
- Snap the mesh into place whenever you park in unshaded boondocking areas.
During the daytime, you can see outward onto your campsite, but neighbors walking past see only an opaque screen.
Upgrading your camper window setups changes how comfortable your trips feel every single day. The right mix of heat-blocking layers and simple custom fabrics turns a generic camper box into a peaceful, private retreat that stays cool in summer and cozy in winter.
Pick one or two high-priority spots to start with, like your bedside panels or the kitchen counter, and save this guide to your RV board for your next camper upgrade project.

