
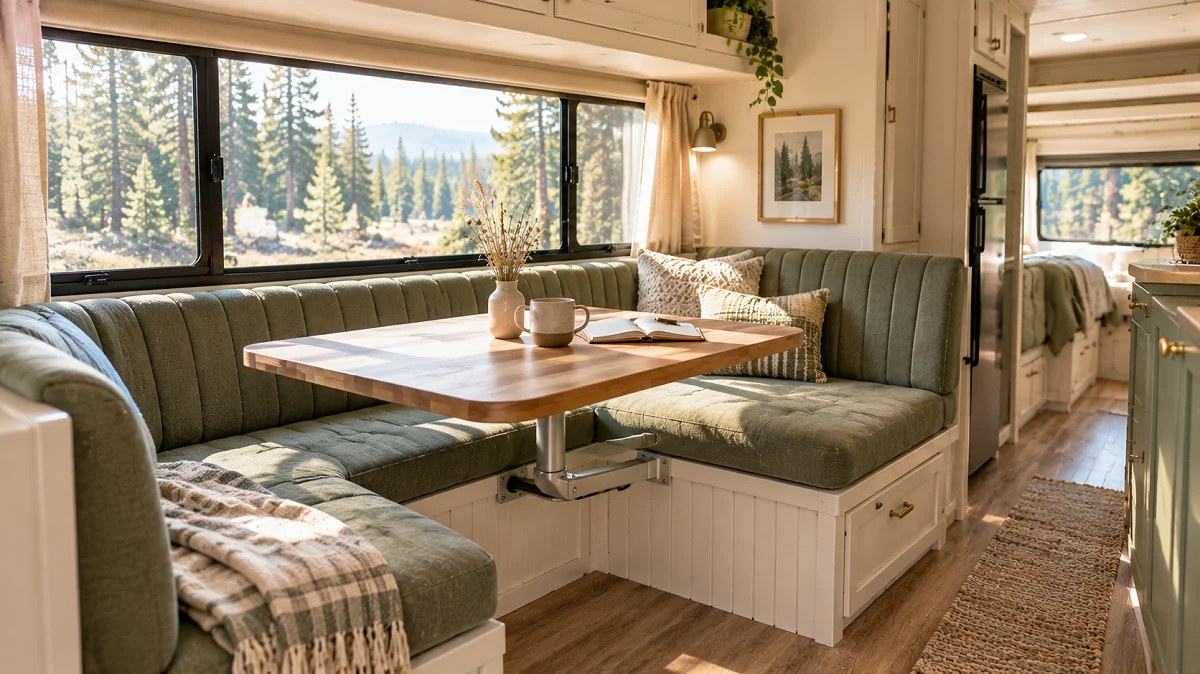
Factory RV dinettes are famous for three things: stiff vinyl cushions, awkward legroom, and tables that wobble the second you set down a coffee cup. Most rigs come with a bulky booth that eats up valuable floor space while offering stiff, uncomfortable seating nobody wants to use after a long drive.
Tackling an overhaul does not mean you need an entire carpenter workshop. A few smart adjustments to the layout, cushion materials, and hardware can completely change how your living area functions. You can open up tight slide-out walking paths, build deeper storage, or create a cozy corner that works as both an office desk and an evening dining spot.
These practical rv dinette remodel ideas will help you ditch factory clunkiness for a setup that actually fits your travel routine. Let us get your dining space feeling open, comfortable, and easy to live with on the road.
1. Rip Out the Booth for a Wall-Mounted Drop-Leaf Table
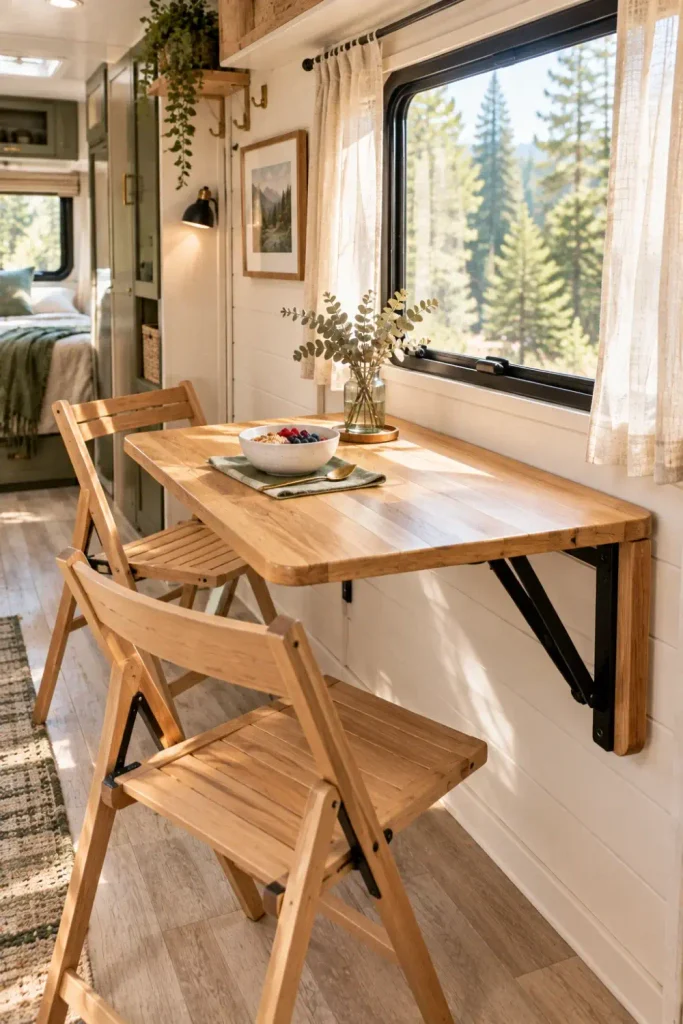
Factory booth frames take up massive floor space and trap your knees against rigid bench backs. Removing the outer bench entirely and bolting a solid wood drop-leaf directly to the exterior wall or slide rib gives you your walking path back instantly.
When dinner is over, drop the leaf down flush against the wall. You gain almost two feet of open floor area, which makes small travel trailers feel twice as wide on rainy afternoons.
- Anchor a heavy-duty folding shelf bracket into the aluminum wall studs using sheet metal screws.
- Pair the wall table with two slim folding wooden chairs that stow under the bed during travel days.
- Leave four inches of clearance beneath the leaf so floor heat registers stay completely uncovered.
Heavy plywood boxes, fixed legroom, and a dark hallway feeling that blocks foot traffic through the rig.
Folds flat in five seconds, frees up walking lanes, and adapts easily between meal times and remote laptop work.
2. Swap Bulky Foam Cushions for High-Density Marine Foam and Linen Covers
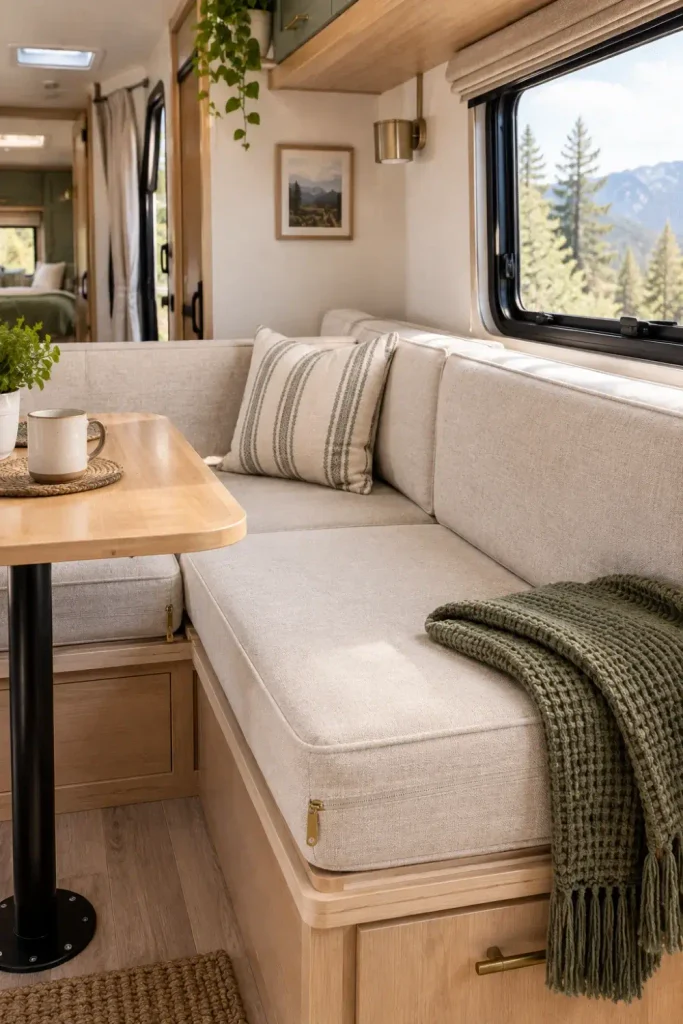
Standard RV cushion foam usually breaks down within two seasons, leaving you bottoming out on bare plywood. Replacing the inserts with four-inch medium-firm marine-grade foam stops the sag while holding its shape through extreme camper temperature swings.
Wrap the new foam tightly in polyester batting before pulling on zippered linen slipcovers. The layer of batting rounds out the edges, gives the cushions a high-end tailored finish, and prevents the covers from bunching up when you slide in and out.
💡 Upholstery Pro Tip
Spray silicone dry lube along your cushion zippers before stuffing thick foam. It keeps teeth from snagging tough upholstery fabric and prevents tearing at the seams.
- Order Lux High-Density foam cut one inch wider than your bench base for edge-to-edge support.
- Mist spray adhesive over the core and roll 0.75-ounce Dacron batting around all four edges.
- Slide the batting-wrapped core into breathable zippered covers with heavy-duty nylon pulls.
3. Turn Both Benches into Deep Pull-Out Rolling Drawers
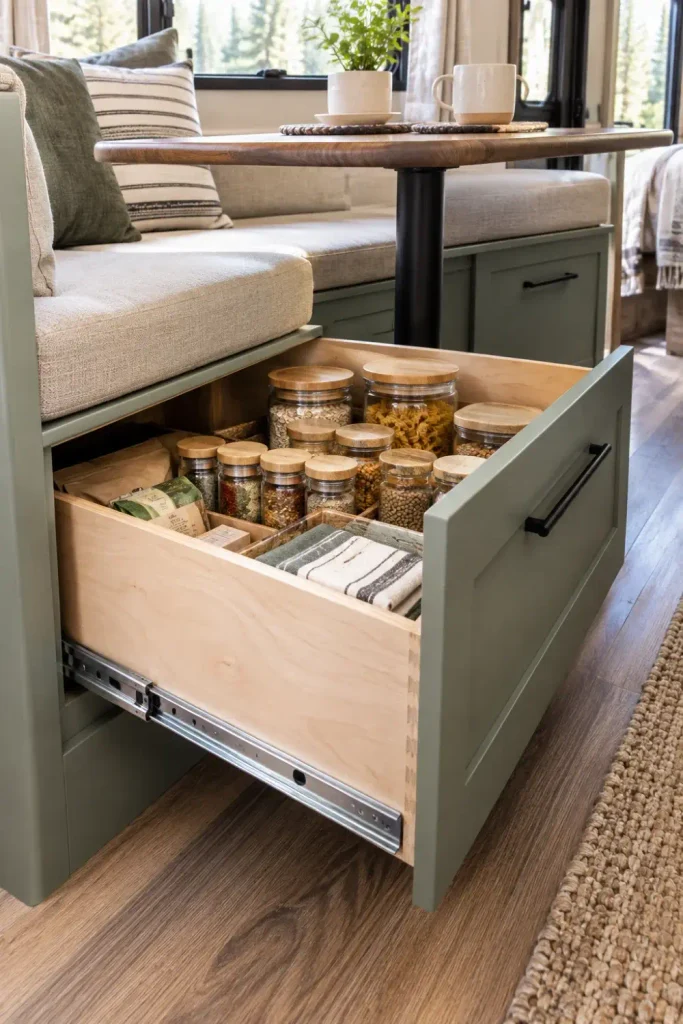
Lifting heavy plywood bench tops just to reach a frying pan gets old fast, especially when full cushions are resting on top. Converting the solid face framing of your dinette benches into rolling drawer boxes gives you instant access to pantry staples without disturbing anyone seated.
Use heavy-duty full-extension ball-bearing slides rated for at least 75 pounds. Add mechanical push latches or heavy magnetic catches so the drawers cannot slide open across the camper floor while taking mountain curves.
- Cut out the thin factory bench face using an oscillating multi-tool for clean corner cuts.
- Build your inner drawer boxes out of 0.5-inch pre-finished birch plywood to keep weight low.
- Rely on heavy-duty drawer slides with built-in travel detents to prevent road rattle.
4. Install a Sturdy Lagun Table Leg for Multi-Angle Swivel
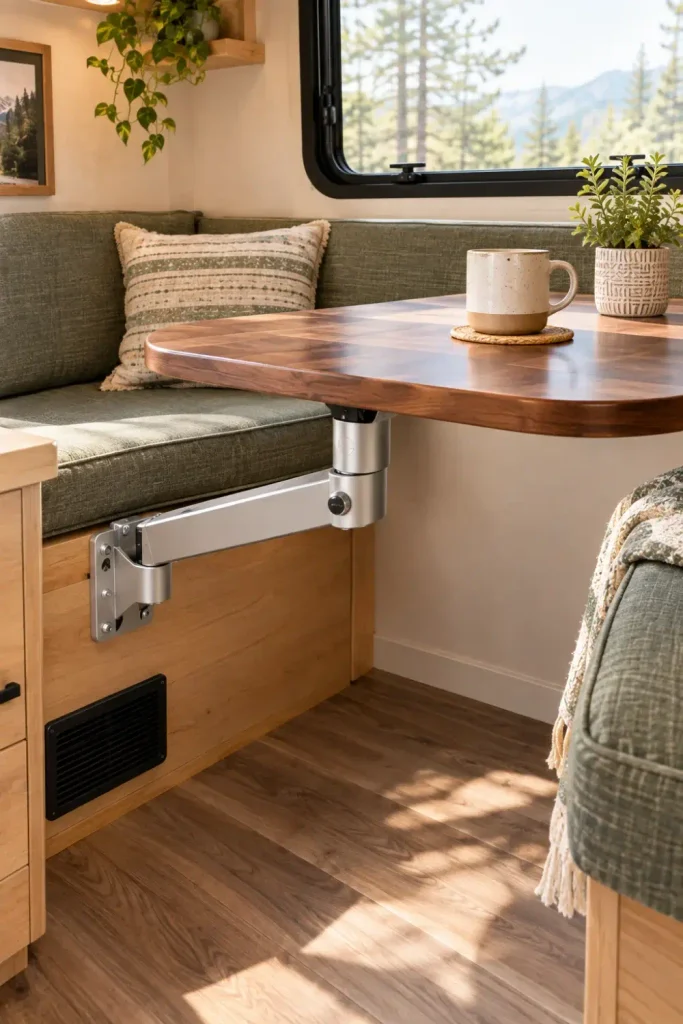
Center floor pedestal posts are notorious for knee-banging and annoying table wobble. A Lagun mounting system bolts to the vertical bench face, completely eliminating floor poles while letting the tabletop pivot 360 degrees out of your way.
Because the arm locks in place at two pivot points, you can push the table tight against the window wall to create a roomy lounge during the day. At dinner, swing it out over the cushions with a single hand turn.
Back the inside of the dinette bench wall with a scrap piece of 0.75-inch solid plywood to distribute bracket tension.
Bolt the aluminum bracket through the reinforced bench wall using through-bolts and locking aircraft nuts.
Slide the arm assembly into the bracket and torque down the quick-lock handle until fully rigid.
- Pick a lightweight tabletop blank under twenty pounds so the bracket arm moves smoothly.
- Store the tabletop flat on the main bed while driving over steep or washboard roads.
5. Convert the Window Wall into a Built-In Daybed Lounge
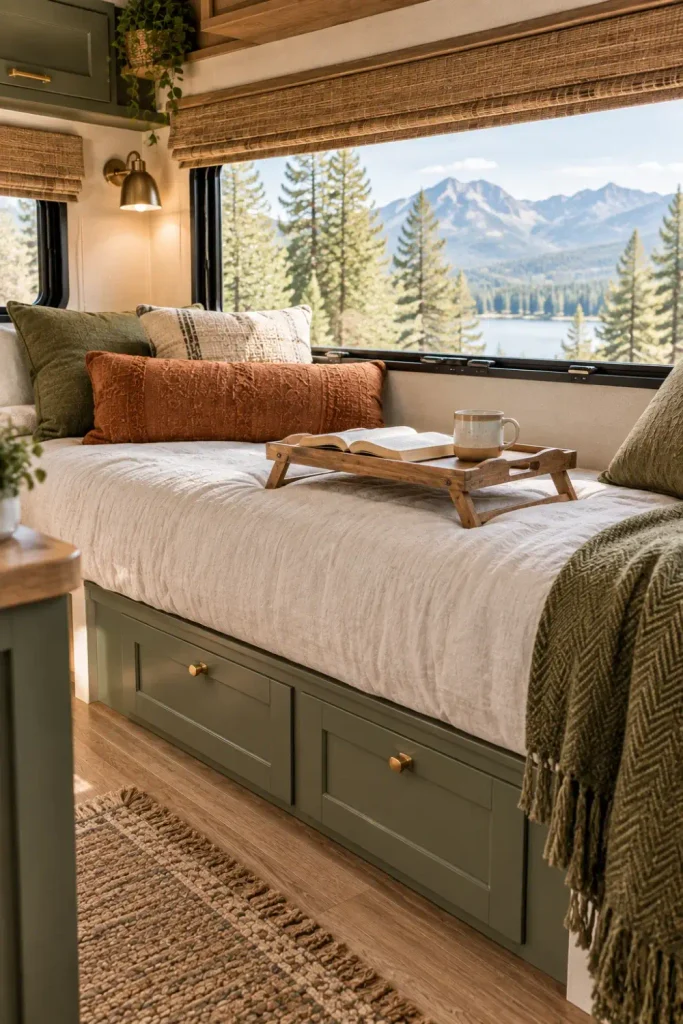
Traditional face-to-face booths force you into an upright, formal posture that is exhausting after hours of travel. Transforming the entire dinette footprint into an open daybed lounge gives you a plush reading couch by day and an easy guest bed by night.
Keep the base frame flat across the window width, top it with a twin-size memory foam mattress cut down to fit, and load the back wall with durable bolster pillows. You get a deep lounging sofa where you can actually put your feet up while keeping the storage bays below intact.
- Cut high-density foam with an electric carving knife to match window angles perfectly.
- Line the wall behind your bolster cushions with faux leather to protect the thin camper wallpaper from scuffs.
6. Replace the Heavy Plywood Top with an Edge-Glued Acacia Butcher Block
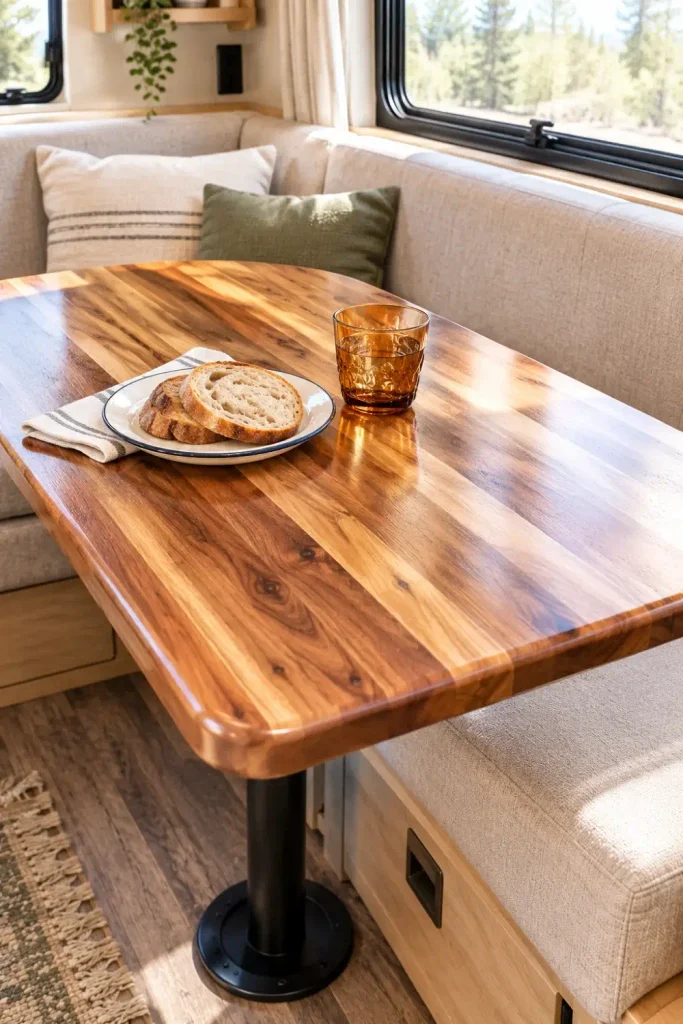
Factory RV dinette tables are almost always constructed from cheap particleboard covered in thin, peel-prone plastic veneer. They scratch quickly, swell permanently if water touches an exposed seam, and feel hollow when you work on them.
A pre-cut edge-glued acacia or birch butcher block panel brings real warmth and organic character to your camper. Acacia is naturally dense, holds screws exceptionally well, and weighs roughly the same as factory pressed board when sealed properly on all six faces.
| Feature | Factory RV Table | Sealed Acacia Block |
|---|---|---|
| Moisture Resistance | Swells when water hits seams | Repels spills completely with poly finish |
| Screw Holding Strength | Easily strips out around flanges | Solid wood grain locks hardware tight |
| Tactile Quality | Cold, slick synthetic plastic | Warm, satin real-wood grain texture |
- Sand down all factory sharp edges with 220-grit sandpaper using smooth, rounded corner passes.
- Apply three thin coats of clear water-based polyurethane to prevent yellowing over time.
- Pre-drill every leg mounting screw hole to avoid splitting the seasoned hardwood grain.
7. Add Top-Hinged Piano Hinges and Gas Struts for Easy Bench Access
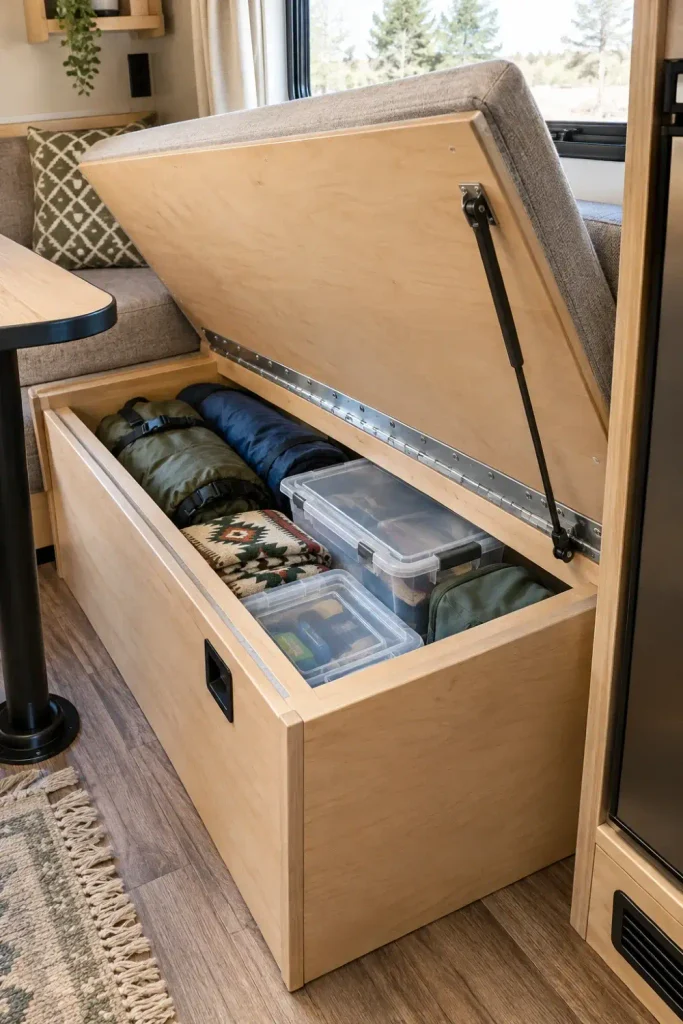
If you prefer keeping your original under-seat storage bays intact, lifting those loose plywood lids while balancing heavy cushions is an annoying hassle. Upgrading the seat deck with a continuous metal piano hinge creates a sturdy, dedicated lid that opens smoothly every time.
Adding a small 20-pound gas lift strut to each lid holds the wood door open hands-free. You can pull out extra blankets, tool kits, or canned goods using both hands without the lid slamming shut on your fingers.
Hardware Checklist for Bench Conversion
- Cut two inches off the back edge of the loose plywood deck to serve as a fixed hinge anchor point.
- Fasten the piano hinge along the top seam so the lid lifts straight upward toward the window.
8. Build a Freestanding Breakfast Bar with Slender Counter-Height Stools
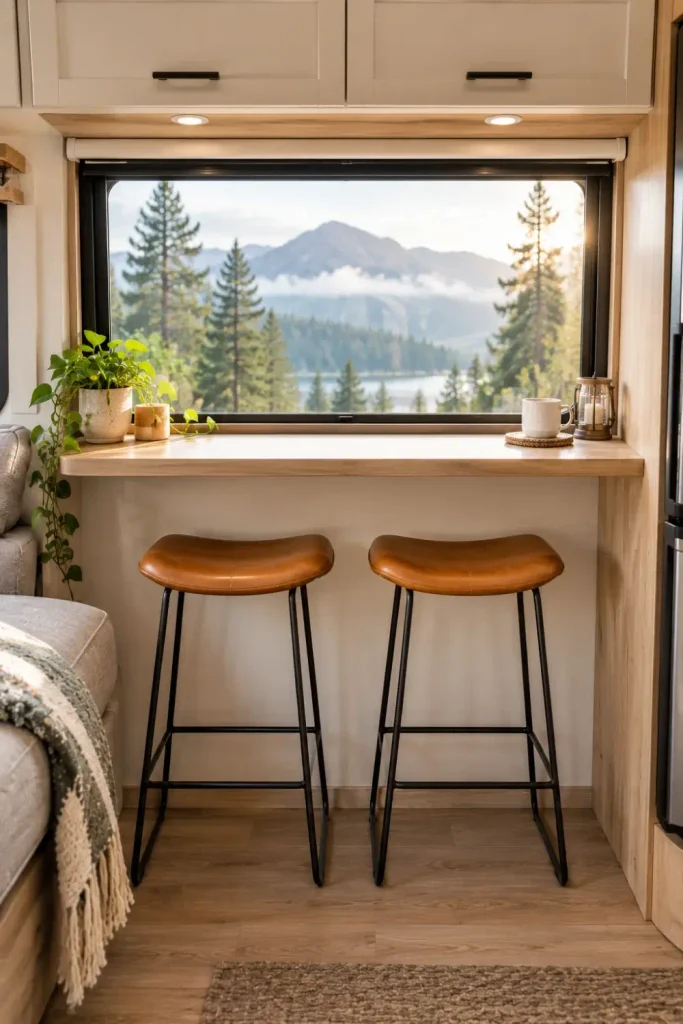
Full booths take up considerable room across the width of a slide-out. If you usually travel solo or as a couple, replacing both benches with a slim breakfast counter opens up the whole floor plan while preserving an amazing window view.
Fasten an 18-inch deep bar top against the window frame and slide two low-back, counter-height stools underneath. You end up with a panoramic view during morning coffee and plenty of open walking area behind you.
Choose backless or low-profile stools with slender metal hairpin legs to keep visual lines open.
Use heavy bungee straps or floor anchor clips to secure stools during transit.
Do not buy heavy swivel barstools with wide round cast-iron bases that scuff floor vinyl.
Avoid deep 24-inch countertops that extend past the slide-out box perimeter.
- Check slide-out wall thickness carefully before choosing screw lengths for wall-mounted angle brackets.
- Pad stool feet with heavy felt or rubber pads to prevent floor scuff marks on bumpy roads.
9. Wrap the Dinette Surround in Lightweight Stick-on Wood Slat Paneling
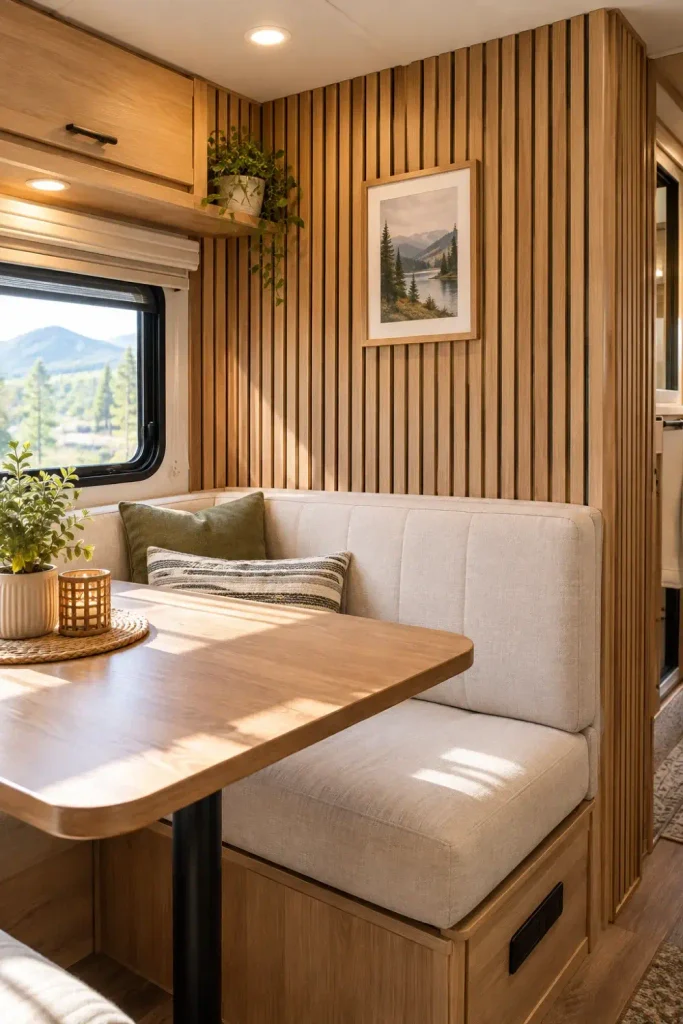
Factory dinette walls usually have bland, scrub-resistant wallpaper that feels sterile and dated. Adding thin acoustic wood slat panels or real wood peel-and-stick planks creates an accent nook that makes the dining area feel like a custom cabin corner.
Always keep overall rig cargo capacity in mind during decorative updates. Real wood composite slats can add unwanted tongue weight if overused, so choose ultralight Paulownia wood or hollow-core PVC slat profiles that weigh less than five pounds per sheet.
⚠️ Watch Out: Slide Clearance
Check your slide-out rubber bulb seals before installing wood paneling on the side walls. Anything thicker than 0.25 inches can catch, pull, or tear the weatherstripping when bringing the slide in.
- Clean the wall board thoroughly with isopropyl alcohol to remove accumulated cooking oils.
- Apply flexible construction adhesive along with adhesive backing strips for a bond that withstands summer heat.
- Tack top corners with 18-gauge headless pin nails driven into inner wood framing.
10. Tuck a Compact Desk Console in Place of the Rear Bench for a Road Office
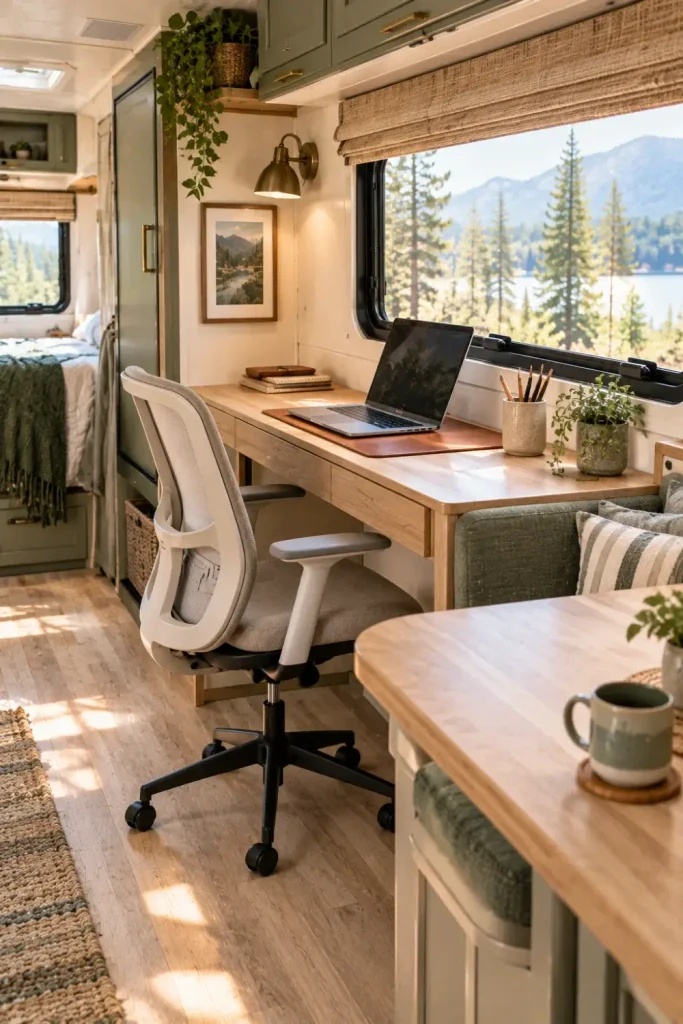
If you work remotely from your camper, the standard booth layout quickly causes back fatigue. Removing the rear bench and building a dedicated desk console turns your dining corner into an ergonomic workstation with room for monitors, power strips, and storage bins.
Keep the front bench so you still have dining seating, but mount a smaller articulating table between them. You can slide in an ergonomic desk chair during office hours and use the front bench for guest meals when your work day wraps up.
Never compromise your desk seating posture for dining booth aesthetics. A dedicated swivel chair that stows securely on travel days prevents back strain across long working trips.
- Run a surface-mounted multi-outlet power strip with direct USB ports along the back edge of the console.
- Build a raised shelf along the wall to elevate your laptop screen closer to eye level.
11. Mount a Recessed Flush-Floor Pedestal Base to Stop Table Wobble
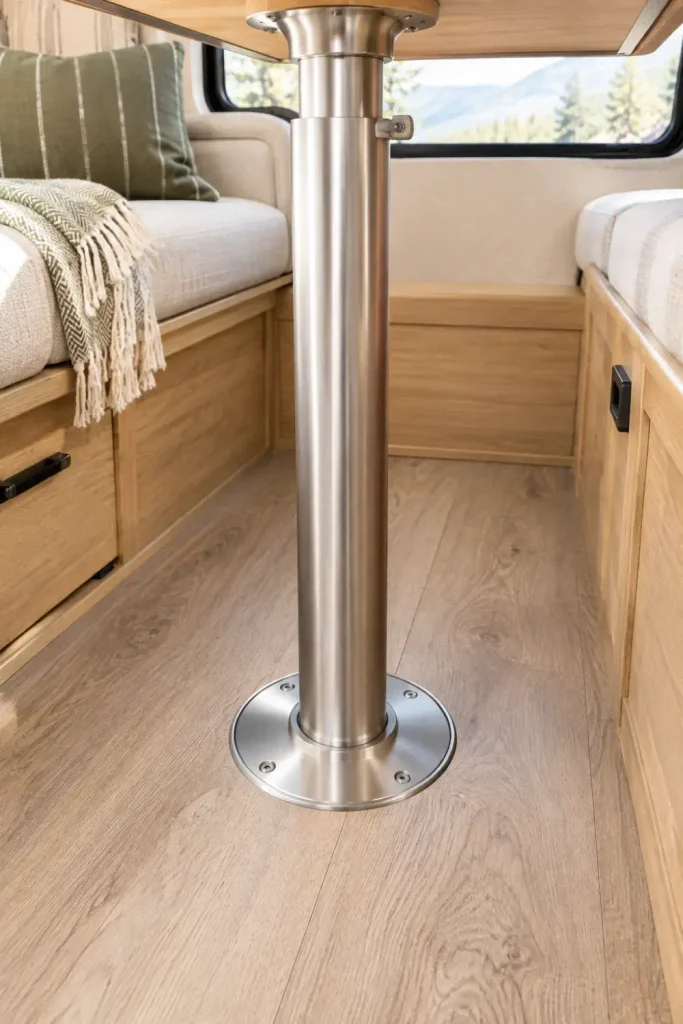
Raised surface-mounted metal floor flanges are classic toe-stubbers when the table is down for bed mode. They also loosen over time as screws pull out of soft OSB subfloors, causing that familiar, annoying wobble every time you lean on the table edge.
Installing a recessed flush-mount base drops the locking collar beneath floor level. The table leg locks in place with a solid mechanical twist, giving you a steady work surface while leaving the floor totally flat when the pole is removed.
Check underneath the camper floor or slide box with a flashlight to verify there are no wiring looms or water lines.
Cut the recessed hole through the subfloor using an arbor hole saw matched to your new collar dimensions.
Seat the flange with marine silicone sealant and anchor it through the floor with stainless machine bolts and washers.
- Confirm your slide-out floor thickness before drilling; many slide floors are only 0.75-inch solid plywood.
- Pick a locking system with tapered splines so the post never seizes up in humid coastal weather.
12. Upholster Bench Backrests with Vertical French Fluting
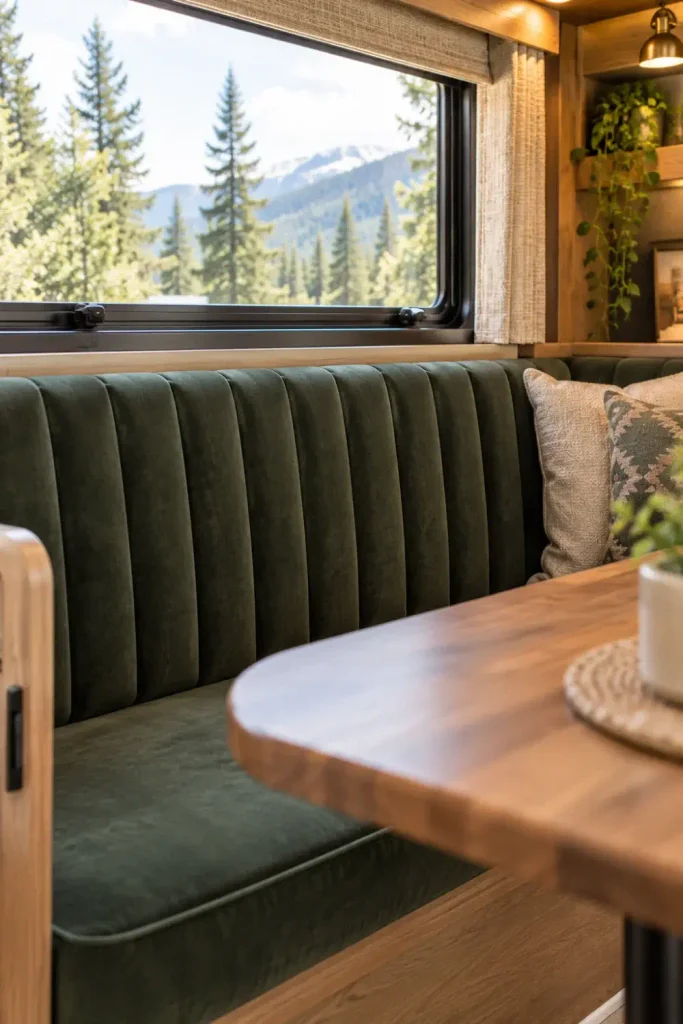
Flat, boxy bench cushions make a camper interior look utilitarian and plain. Upgrading the backrest pads with vertical channel tufting (French fluting) adds welcoming texture, gives better mid-back support, and brings a custom boutique feel to the dinette.
You do not need professional upholstery tools to get crisp vertical ribs. Using half-round pipe insulation foam or cut foam dowels adhered over a thin plywood backer panel lets you stretch fabric into tight, even channels using a basic pneumatic hand stapler.
One-piece vinyl slab that wrinkles easily, sticks to skin during warm weather, and offers zero lumbar support.
Individually padded vertical rolls that cradle your back, breathe better in summer, and hold their shape.
- Space your vertical channel flutes between 3.5 and 4 inches apart for a balanced look.
- Use commercial stain-resistant performance velvet or Crypton fabric to make dog mud and food spills wipe off easily.
13. Create an L-Shaped Corner Nook with Floor-Mounted Bolster Pillows
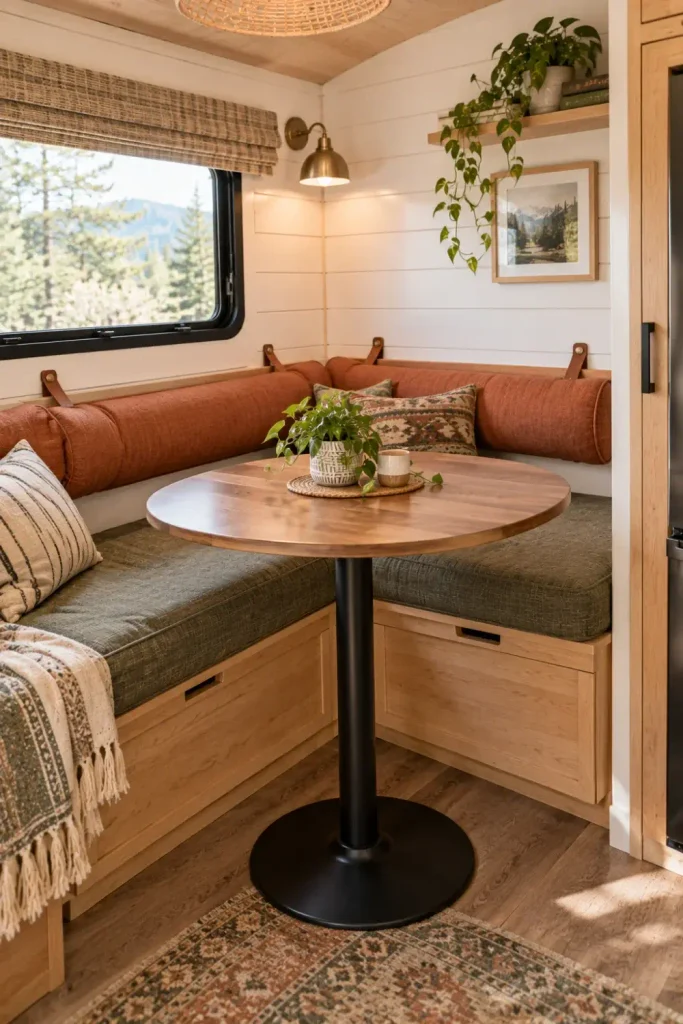
If your floor plan includes a side window next to a forward wall, a booth can feel cramped and closed off. Reconfiguring the framing into an open L-shaped sectional creates more seating for guests while connecting the dining area directly to the kitchen.
Anchor thick bolster cushions against the wall using heavy-duty hook-and-loop strips or marine snap fasteners. This keeps the cushions upright on travel days while opening up the center floor so the whole interior feels wider.
Materials for a Sturdy Corner Nook
- Build your corner intersection at a 90-degree angle with a lift-out wood top to preserve corner storage.
- Pair with a round, single-pedestal table so people can slide in and out of the corner seat easily.
14. Drop in a Custom Tiled Tabletop Using Lightweight Vinyl Peel-and-Stick Tiles
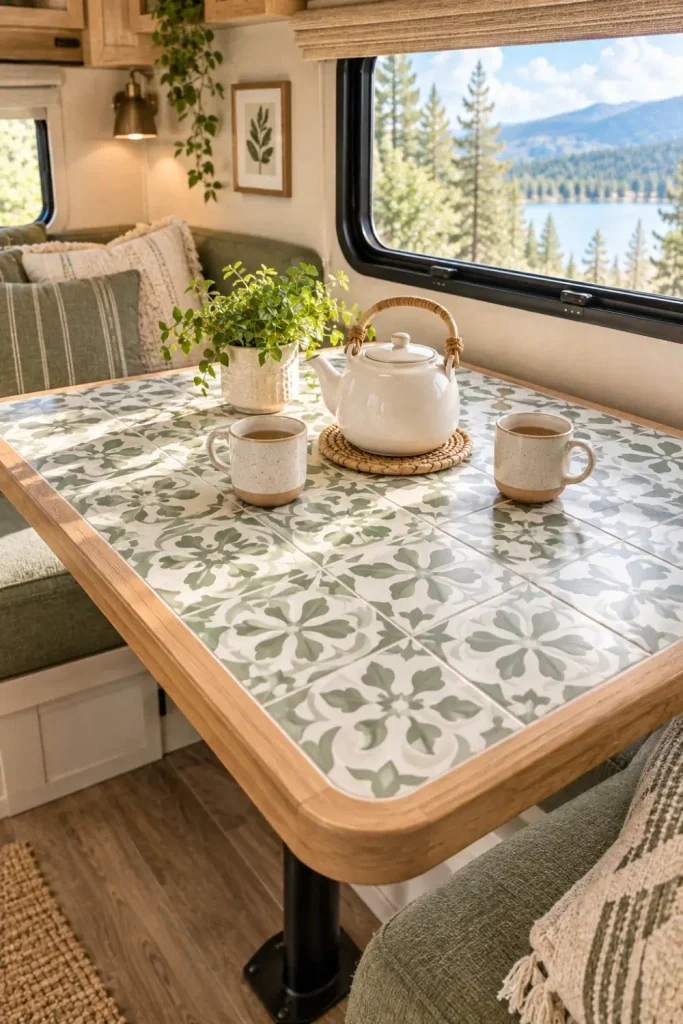
Real ceramic tile looks beautiful, but adding heavy mortar and grout to an RV table is asking for trouble. Road vibration will quickly crack rigid cement grout lines, and the excess weight puts unnecessary strain on your camper suspension.
You can get the same handcrafted look by applying luxury vinyl peel-and-stick tiles over a sanded plywood base, finishing the joints with flexible acrylic silicone grout. The flexible acrylic flexes with every highway dip without cracking, giving you a wipe-clean, durable surface that weighs under six pounds.
- Prime the raw plywood top with a latex tile primer to ensure the peel-and-stick backing adheres permanently.
- Lay your pattern from the center outward, trimming edge tiles neatly with a sharp utility knife.
- Frame the table edges with thin natural hardwood trim molding to seal and protect tile corners.
15. Add 12V Puck Sconces on a Dimmer Switch Right Over the Table
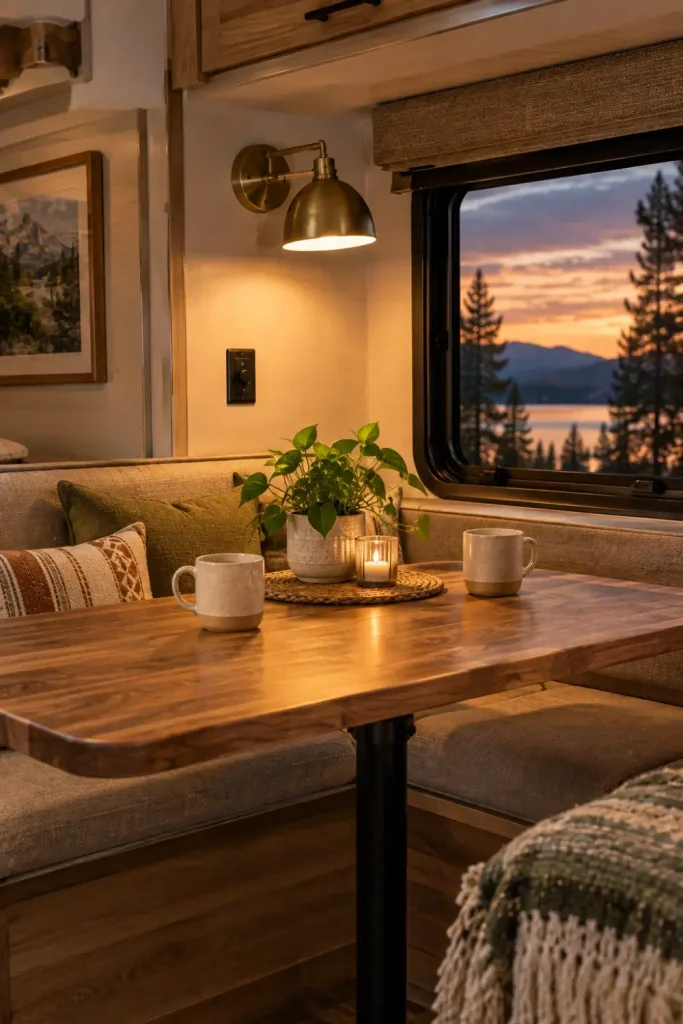
Most factory campers light the dinette area with a glaring, cool-white overhead dome light that feels like an interrogation room. Replacing that harsh fixture with warm-white directional wall sconces turns your dining nook into a warm, inviting place to relax.
Tap into your existing 12V lighting circuit on the ceiling or inside the slide-out wall. Installing a fixture with an integrated rotary dimmer knob lets you brighten the nook for card games and dim it down to a soft glow for late-night meals.
📌 Good to Know: 12V Polarity
RV 12V wiring uses automotive standards where white or black with white stripes is often negative/ground. Always test lines with a simple digital multimeter before connecting new LED lighting fixtures.
- Choose LED fixtures rated for 2700K color temperature to give your dining nook a warm, natural ambiance.
- Pick low-profile fixtures with flexible gooseneck arms so you can direct light away from anyone sleeping nearby.
16. Tuck Pull-Out Wire Basket Organizers Inside the Bench Cavities
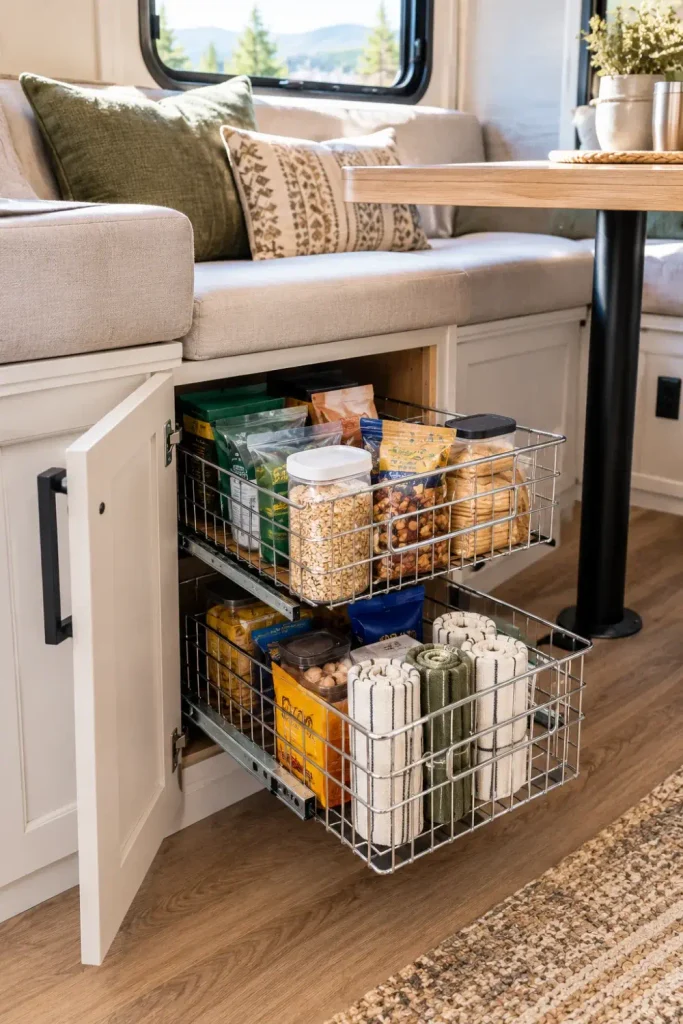
Deep dinette benches often become disorganized clutter zones where gear gets lost. Standard plastic bins help, but you still have to remove the top lid and dig through stacks of gear to find small items.
Installing tiered, sliding metal pantry baskets inside the bench openings organizes your space neatly. With full-extension slides, you can pull the entire basket out into the aisle, spot what you need in seconds, and push it closed with a quick tap.
| Storage Solution | Standard Plastic Bins | Sliding Wire Baskets |
|---|---|---|
| Visibility | Items buried at the bottom stay hidden | Open wire frame allows instant visual scanning |
| Ease of Access | Must lift, carry, and unstack bins | Glides out into the aisle with one finger |
| Ventilation | Traps condensation in humid weather | Constant airflow keeps dry goods fresh |
- Mount slide tracks on small wood risers so the baskets clear outer door frame lips easily.
- Line basket bottoms with clear silicone shelf liner to prevent small spice jars from tipping over.
17. Anchor Removable Leather Hanging Straps for Cushion Security on Travel Days
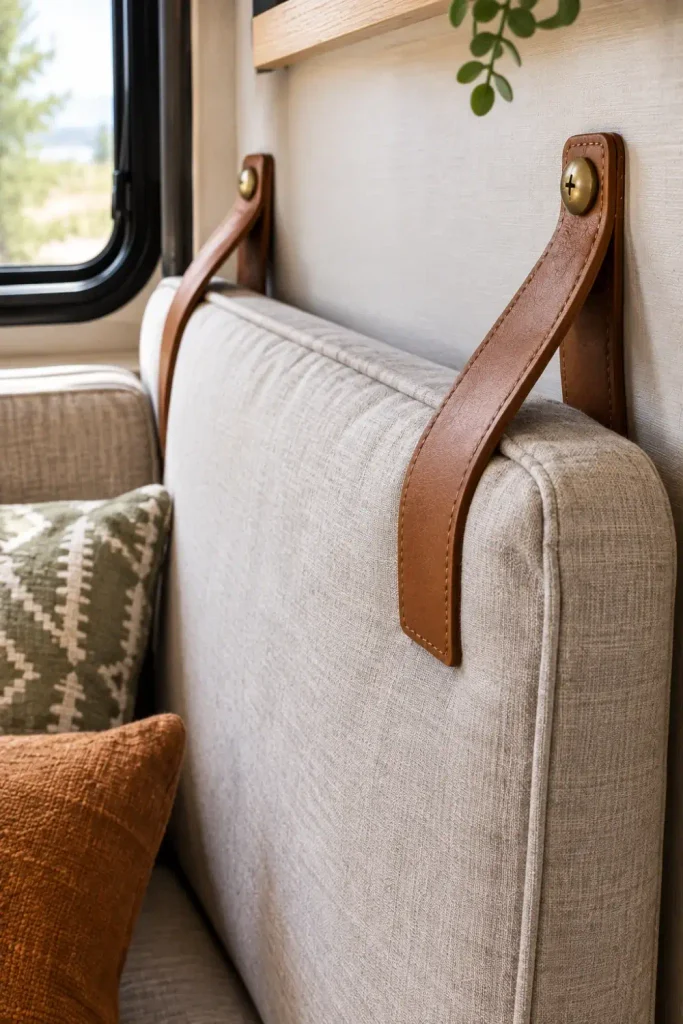
Nothing is more frustrating than arriving at a campsite only to find your dinette cushions tossed all over the camper floor. Road vibrations and emergency braking easily dislodge loose backrest pads from their wall mounts.
Riveting heavy saddle-leather hanging straps with brass snaps to the wall keeps your back cushions securely in place while adding a clean, finished detail. During travel, the straps hold the pads firmly against the wall, keeping your interior neat and tidy when you pull into camp.
- Use heavy 6-ounce vegetable-tanned leather straps to prevent stretching over time.
- Fasten wall snaps directly into wood studs or hollow-wall anchors for a reliable, wobble-free hold.
Upgrading your dinette is one of the quickest ways to make your entire RV feel more spacious, comfortable, and tailored to your travel lifestyle. Whether you build rolling bench drawers, install a wobble-free swivel leg, or switch to cozy high-density cushions, you do not need to gut your entire camper to notice a big difference. Pick one or two smart updates that match how you live on the road, and enjoy a dining area that finally works for you.
Save this list to your favorite camper Pinterest board so you have these remodeling ideas handy when you are ready to update your space.

