
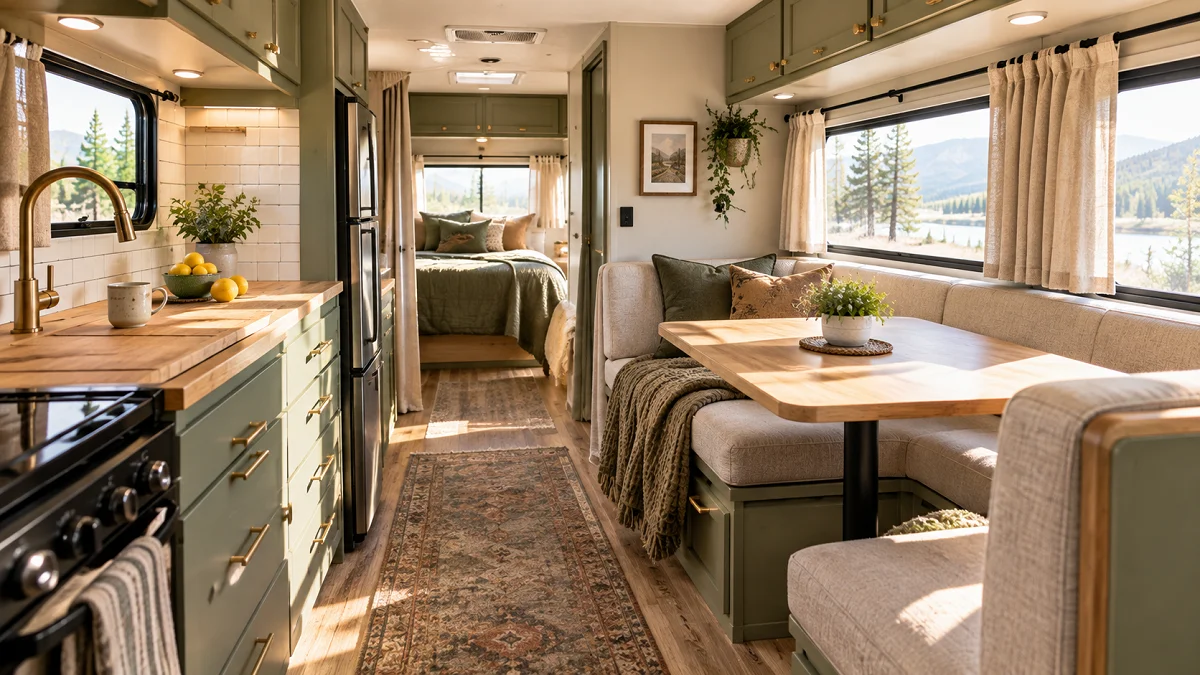
Most factory travel trailers come off the lot looking like brown plastic hotel rooms from 2004. You get heavy pleated window cornices, dark faux-wood vinyl, and dull tan cushions that absorb every bit of outdoor light. Spending a weekend in a tight layout with poor lighting can make the entire rig feel cramped instead of cozy.
The real challenge is personalizing a camper without adding unwanted weight, drilling holes through thin hollow walls, or spending thousands on professional custom cabinetry. You do not need to tear out the whole floorplan to make it feel like a custom cabin on wheels.
A handful of intentional upgrades can shift the entire mood of your trailer in two days flat. Here is how to apply practical, road-tested small camper decor ideas to build a brighter space that looks incredible and stays completely secure on travel days.
1. Swap Factory Valances for Lightweight Linen Curtain Panels
Those bulky upholstered window boxes block natural light and make narrow camper walls feel even tighter. Unscrewing the hidden corner brackets instantly opens up two to three inches of clear wall space around every window frame.
Replace them with simple tension rods or lightweight wooden dowels hung on adhesive brackets. Choose unlined linen or cotton drop-cloth panels that let sunlight filter through while keeping the evening private.
Bulky foam padded boxes with pleated floral prints that crowd the window glass and trap road dust.
Airy oatmeal linen panels on slim black tension rods that frame the view and slide back easily.
To keep curtains from fluttering while driving or blowing into the galley burner, sew a tiny pocket at the lower seam and insert a flat craft magnet that clicks straight to the metal window edge.
2. Mount Peel-and-Stick Gel Tile on the Galley Backsplash
Camper kitchen splash guards are often plain wallpaper seams that easily stain from cooking grease. Stick-on subway or hex tiles give the look of authentic glazed ceramic without the road-rattling weight of real mortar.
Wipe down the wall board with isopropyl alcohol first to strip off road dust, grease residue, and silicone film. Measure around outlet boxes with a paper template before cutting the tile sheets with utility shears.
💡 Pro Adhesion Tip
Use a hair dryer on medium heat over the vinyl wallboard right before pressing each tile down. The warmth activates the adhesive backing for a solid bond that resists high summer humidity.
Run a fine bead of clear silicone caulk along the bottom seam where the counter meets the wall. This keeps stray dishwater from seeping behind the lower tile row and lifting the sheets over time.
3. Anchor the Dinette with Custom Foam Cushion Slipcovers
The default dinette vinyl either sticks to your legs in the summer or feels freezing on crisp autumn mornings. Reupholstering cushions might sound intimidating, but wrapping them in durable duck canvas or heavy textured chenille breathes fresh life into the main seating nook.
You can tackle this project without a sewing machine by using the wrap-and-staple plywood base method, or order tailored zip covers in washable outdoor performance fabrics.
Choose earth tones like olive, warm sand, or charcoal to hide the trail dust that inevitably tracks into the rig. Add two patterned throw pillows with down-alternative inserts to make the bench inviting for morning coffee.
4. Install Warm Brass Touch Puck Lights Under Cabinets
Standard RV ceiling domes cast harsh, cold light that glares directly into your eyes when you are sitting on the couch. Soft under-cabinet task lighting creates a cozy, residential glow while giving you plenty of counter visibility for cooking.
Rechargeable magnetic LED bars or brass touch pucks eliminate the need to splice into the 12-volt wiring harness. Simply stick the magnetic mounting plate to the underside of your upper storage locker and snap the light into position.
Clean the cabinet underside with an alcohol wipe and let it dry completely.
Firmly press the peel-and-stick magnetic steel bracket against the wood for 30 seconds.
Snap the light puck in place and select a warm 2700K color temperature setting.
When travel day comes, unclick the pucks and slide them into a galley drawer so road vibration will not shake them loose from their bases.
5. Line Open Shelf Rims with Natural Leather Fiddles
Open display shelves make a camper feel open and airy, but open ledges become dangerous catapults once your tires hit freeway bumps. Adding a flexible leather retention strap keeps your favorite items safely in place without making the shelves look closed off.
Cut strips of vegetable-tanned leather to match the shelf length. Fasten each end into the cabinet face frame using small brass furniture tacks or short wood screws finished with decorative washer caps.
The tan leather patinas naturally over time, adding an organic, tailored touch while keeping small coffee canisters and paperbacks planted on the shelf.
6. Layer Washable Low-Pile Runner Rugs with Non-Slip Backers
Factory vinyl flooring gets cold on bare feet, shows pet hair instantly, and often has a sterile sheet-vinyl pattern. Rolling out an earthy vintage-style runner immediately warms up the center aisle and dampens ambient road noise.
Look for machine-washable polyester runners with an ultra-flat weave so they clear the bottom edge of slide-out seals and low cabinet doors.
| Standard Woven Rug | Washable Low-Pile Runner |
|---|---|
| Thick fibers catch door swings | Slim profile clears cabinet bottoms |
| Traps fine campground dirt | Shakes out in seconds outside |
| Slides across smooth camper vinyl | Rubberized backing stays put while walking |
If your runner does not come with integrated grip, cut a piece of open-weave rubber shelf liner to match the exact size and lay it underneath to stop sudden slides.
7. Replace Hollow Cabinet Hardware with Solid Warm Brass Pulls
Factory camper cabinets almost always feature cheap plastic handles or flimsy hollow metal pulls painted in dated satin nickel. Changing these out for solid brushed brass, antique bronze, or knurled black pulls gives the whole interior a solid, residential feel every time you open a door.
Measure the distance between the existing screw holes center-to-center before ordering replacements. Most RVs use standard 3-inch or 96-millimeter spacing, meaning you can swap them in minutes without drilling new pilot holes.
Always reuse the original factory mounting screws. Camper cabinet faces are thinner than home cabinetry, and standard retail screws are often too long and will punch clean through the front panel.
The solid weight in your hand makes a noticeable difference, transforming hollow-core cabinet doors into sturdy cabinetry with very little effort.
8. Hang Heavy-Duty Magnetic Spice Jars on the Range Hood
Counter space is precious in any camper galley, and spice bottles love to fall out of cabinets and spill everywhere when you open them after a long drive. Moving spices onto a vertical metal surface frees up entire pantry bins and keeps seasonings right at eye level.
Look for food-safe metal tins with strong rear neodymium magnets and clear view lids. They grip the side of your range hood, galley wall plates, or an enameled refrigerator side panel without budging.
What to grab before setting up:
Make sure the jars feature twist-sift lids so you can sprinkle pepper or garlic powder directly over the pan without fumbling with twist-off lids while you cook.
9. Frame Panoramic Windows with Removable Roman Shades
Factory paper pleated accordion blinds are notorious for breaking strings, bending out of shape, and rattling loudly against the wall whenever the roof fan runs. Tailored fabric Roman shades bring a softer, finished look to the living room windows.
To avoid drilling into the delicate fiberglass skin or hollow interior framing, use heavy-duty hook-and-loop strips along the top edge of the window frame to hold the fabric header board.
Use outdoor rated hook-and-loop strips rated for high heat resistance.
Pick blackout insulated linen backings to keep out direct mid-day summer sun.
Using long drywall screws that penetrate exterior fiberglass walls.
Installing loose, dangling pull cords that whip against windows during towing.
Cordless magnetic fold shades let you adjust privacy levels with one hand and stay completely quiet while you are traveling down the road.
10. Brighten Dark Walls with Breathable Mineral Peel-and-Stick Paper
Dark wood-grain vinyl paneling can make a small travel trailer feel dark and cave-like on overcast afternoons. Covering a single feature wall behind the bed or dinette with light, patterned peel-and-stick wallpaper creates an open, custom look.
Choose vinyl-free or breathable mineral contact paper with woven texture so air pockets can escape easily during installation.
⚠️ Watch Out for Temperature Swings
Never install wallpaper in an unheated rig during deep winter. Freezing temperatures make the backing brittle, causing seams to lift when the camper warms up in spring. Apply only when the cabin is between 65°F and 75°F.
Focus on one focal wall rather than the whole rig. A subtle olive botanical leaf or soft cream grid pattern visually expands tight quarters without overwhelming the compact space.
11. Add Woven Wire Baskets to Dead Space Over the Bed
The shallow ledge or cubby directly above camper beds is often underutilized, collecting stray charging cords, water bottles, and crumpled books that slide around in the dark.
Adding light wire baskets with brass or matte black finishes turns that awkward recess into organized, stylish storage. Line the bottoms with felt to stop items from sliding or clattering while you rest.
Loose socks, rolled cables, and hats rolling off the top bunk shelf onto the mattress below.
Mounted wire baskets that keep evening essentials corralled and add clean, modern lines to the bedroom.
Secure the baskets to the lower shelf wood using rubber-coated P-clamps or two small cable straps so they stay firmly in place around sharp highway curves.
12. Turn the Sink Cutout into a Hardwood Cutting Board Display
Factory plastic sink covers often look clinical and scratch up easily. Replacing them with a thick, edge-grain butcher block insert provides an immediate touch of natural warmth right in the center of your galley.
You can cut a standard acacia or maple board to fit the outer lip of your specific sink basin using a jigsaw and sand the edges smooth.
- ▸Trace the outer perimeter of your existing sink cover directly onto 3/4-inch hardwood.
- ▸Affix silicone bumper feet to the bottom lip to lock it securely inside the basin rim.
- ▸Condition the wood with two coats of food-grade walnut oil and beeswax paste.
The heavy wood adds solid prep surface when the faucet is off and doubles as an elegant charcuterie board for outdoor picnic tables.
13. Hang Macrame Produce Hammocks Under Upper Lockers
Finding space for fresh fruit, avocados, and bread can be tricky in a compact trailer. Counter bowls take up food prep room, and tossing delicate produce into dark cabinets usually leads to bruised fruit after a day on the road.
Suspending a mini woven cotton macrame net under the galley cabinets creates practical, airy storage that keeps items off the counters and out of harm’s way.
The flexible cord netting cradles produce gently as the rig sways, keeping air circulating around your fruit to help it stay fresh through long off-grid weekends.
14. Soften Bunk Corners with Thick Quilted Jersey Bedding
Making bunk beds inside a camper can be an exhausting wrestling match with stiff mattresses and tight corners. Traditional flat sheets bunch up against the walls and look messy the minute anyone sits down.
Switching to pre-fitted jersey cotton duvet setups or zip-up bedding systems keeps the bunk line crisp and tailored with almost no morning effort.
Place elastic sheet fasteners diagonally across the bottom of the mattress corners.
Tuck an all-in-one quilted jersey cover over the top, folding the side edge into the wall gap.
Top with a dense waffle-knit throw blanket to keep the corner looking tailored and neat.
Neutral bedding tones make narrow, enclosed bunk openings feel brighter and invite afternoon reading instead of looking like dark storage compartments.
15. Create an Entry Drop Zone with Flat Wall Hooks
The space right next to an RV entry door turns into a dumping ground for damp dog leashes, dusty jackets, and ball caps if you do not have dedicated hooks. Adding low-profile coat hooks keeps the entryway clear and functional.
Use flat matte black or brass folding coat hooks that swing closed flush when not in use so they will not catch on clothing or backpacks as people walk through the door.
Mount hooks onto an exterior plywood backer board with high-strength VHB tape.
Place hooks at least 4 inches away from screen door swings and latch hardware.
Using standard residential wall anchors that rip out of thin camper paneling.
Letting heavy winter parkas hang directly from lightweight adhesive plastic hooks.
Staggering three or four hooks down the wall provides a practical landing pad for keys and gear the second you step inside from the trail.
16. Place Battery-Operated Rattan Sconces in Dim Corners
Most small campers lack warm reading light around the master bed or dinette corners, forcing you to rely solely on the bright, flat light of the main ceiling fixture.
Battery-powered woven rattan sconces add rich organic texture during the day and cast a soft, warm pattern across the ceiling at night without requiring any electrical work.
What you will need:
Mount the shade base to the wall using hook-and-loop picture strips and pop the rechargeable LED puck into the center socket. You get warm, dimmable lighting whenever you curl up with a book, with no wiring needed.
Upgrading your travel trailer does not require weeks of demolition or an expensive renovation budget. By focusing on texture, warm layered lighting, and functional storage that holds up to highway speeds, you can make your rig feel open, bright, and uniquely yours in a single weekend. Take on one or two of these simple updates before your next trip, and see how much more comfortable your home on wheels feels at camp.
Save this list for the next time you want to refresh your camper before hitting the road.

