
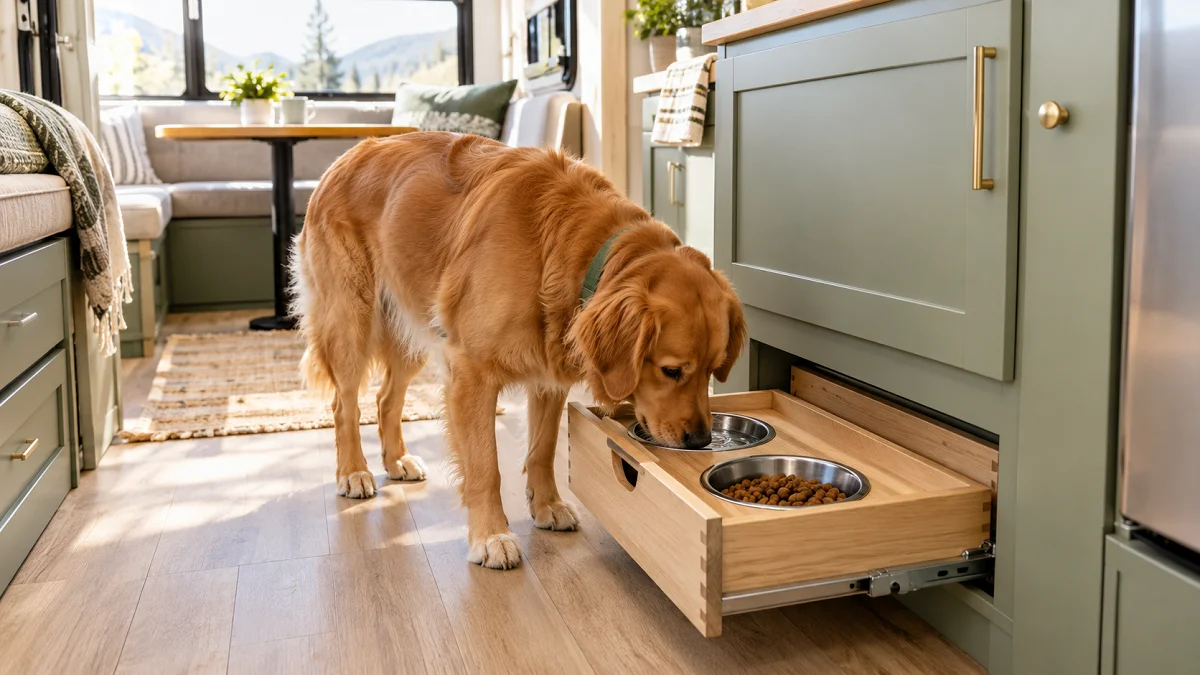
Every dog owner who travels in a camper knows the midnight sound of a metal water bowl sliding across the floor. You hit a small bump or walk past the dinette in the dark, and suddenly your socks are soaked in cold water. Tight living quarters mean standard pet bowls turn into trip hazards within minutes.
Setting up reliable rv dog bowl ideas comes down to securing the feeding zone against sudden motion. You do not need expensive commercial setups to keep the floor clean. Simple hardware tweaks, thoughtful layout choices, and heavy-duty silicone can protect your subfloors from moisture damage.
Here are 19 practical, field-tested setups that keep pet feeding areas neat, stable, and completely out of the main walkway.
1. Mount a Recessed Feeder Inside the Bottom Cabinet Toe Kick
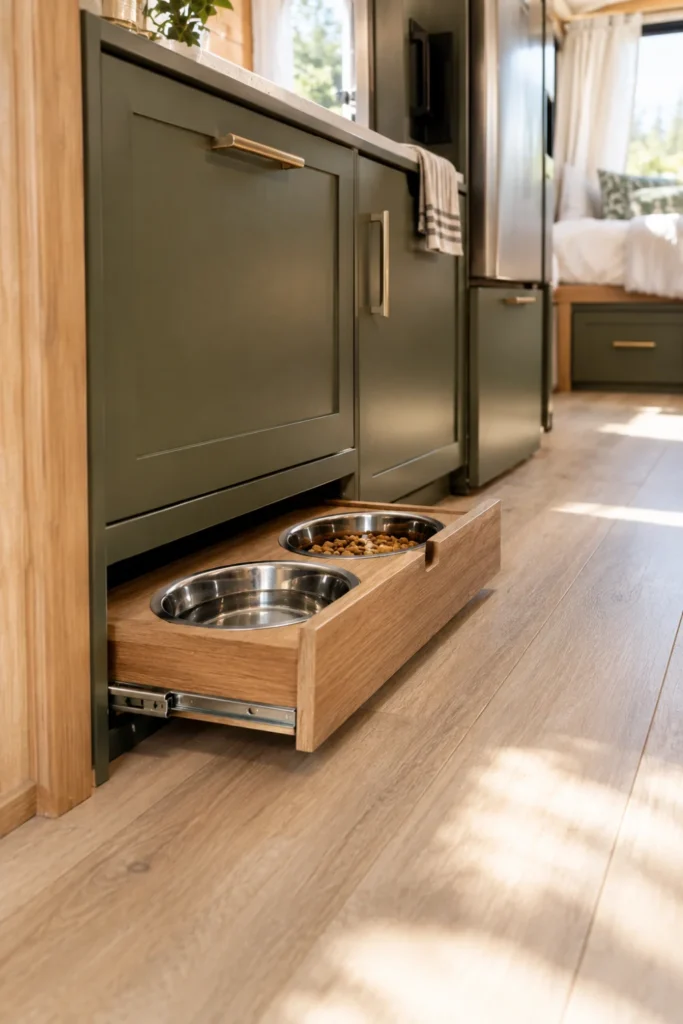
The wasted hollow area directly under your lower kitchen cabinets offers prime real estate for pet dishes. Installing a shallow slide-out platform right into the toe kick cavity keeps the bowls off the main floorboards entirely.
When mealtime ends, simply nudge the drawer shut with your foot. This stops anyone from kicking a full bowl while cooking dinner in a tight galley.
- Use 12-inch heavy-duty drawer slides with a soft-close lock.
- Seal the wood cutout with marine spar urethane to resist drips.
- Measure your dog’s snout reach to ensure the cabinet face does not block their collar.
Two loose stainless dishes sitting directly in the middle of the narrow galley aisle, catching every footstep.
Bowls sit flush inside the bottom wood trim, pulling out for feeding and locking shut during travel days.
2. Secure Heavy Stoneware Bowls with a Non-Skid Silicone Boot
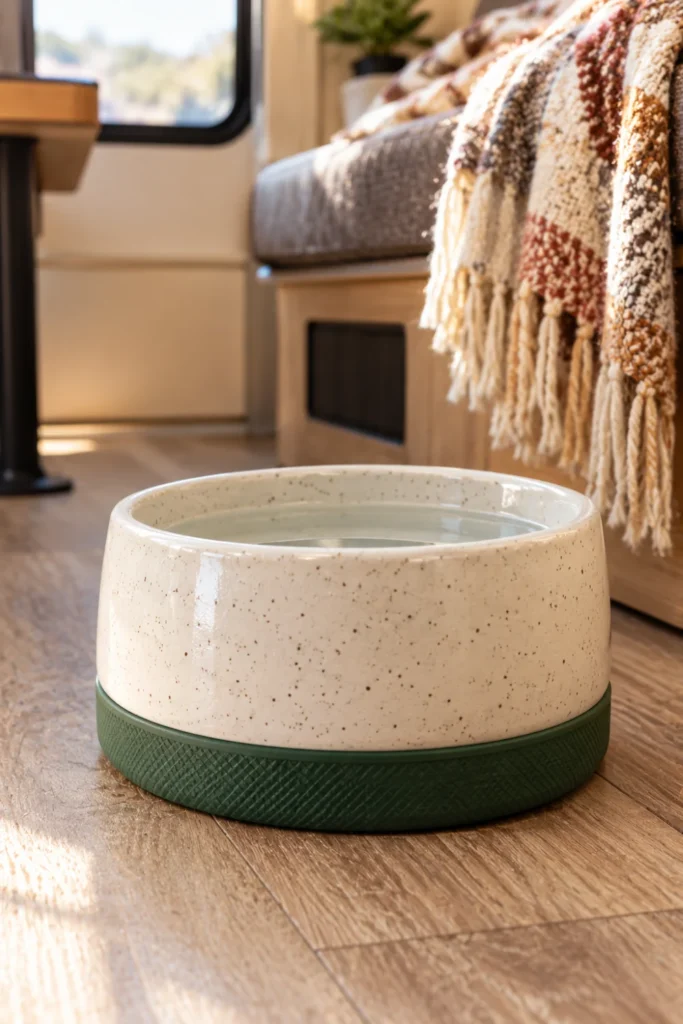
Lightweight plastic bowls bounce all over the rig the moment you hit highway speeds. Dense ceramic or stoneware dishes stay anchored much better simply due to their sheer physical mass.
Slipping a thick, textured silicone boot over the base adds essential friction. This pairing absorbs engine vibration and prevents ceramic rims from chipping against metal table legs.
- Clean the outer bottom rim of your stoneware crock with rubbing alcohol.
- Stretch a food-grade silicone boot firmly over the base edge.
- Place the dish against an interior wall corner away from foot traffic.
💡 Quick Tip
Pick low-profile ceramic baking dishes or crocks with flat, wide bottoms rather than tapered pet dishes. Wide bases lower the center of gravity, preventing accidental tip-overs on rough backroads.
3. Slide Heavy-Duty Splash Trays Under the Dinette Bench
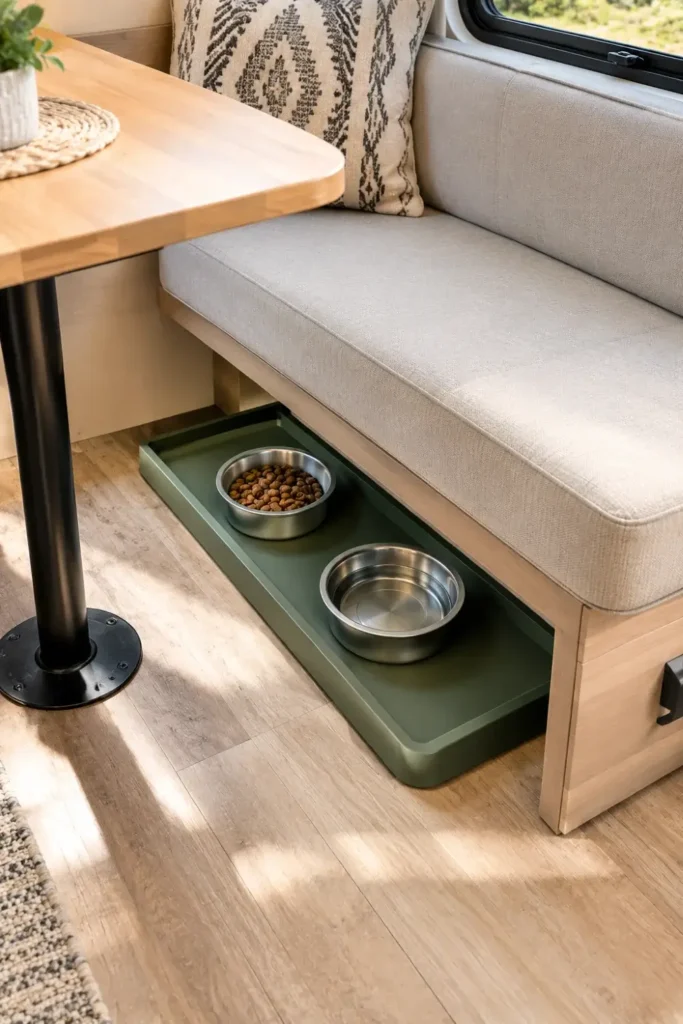
The recessed space beneath a dinette bench table often turns into dead storage. Dropping a deep-rimmed utility tray into this gap creates an out-of-the-way feeding station that catches errant kibble.
Because the dinette bench overhangs the floor slightly, it shields the water supply from being stepped on. High rubber walls keep rogue water from reaching the exposed edges of your vinyl flooring.
4. Install a Fold-Down Wall Feeding Shelf with Latched Bowl Cutouts
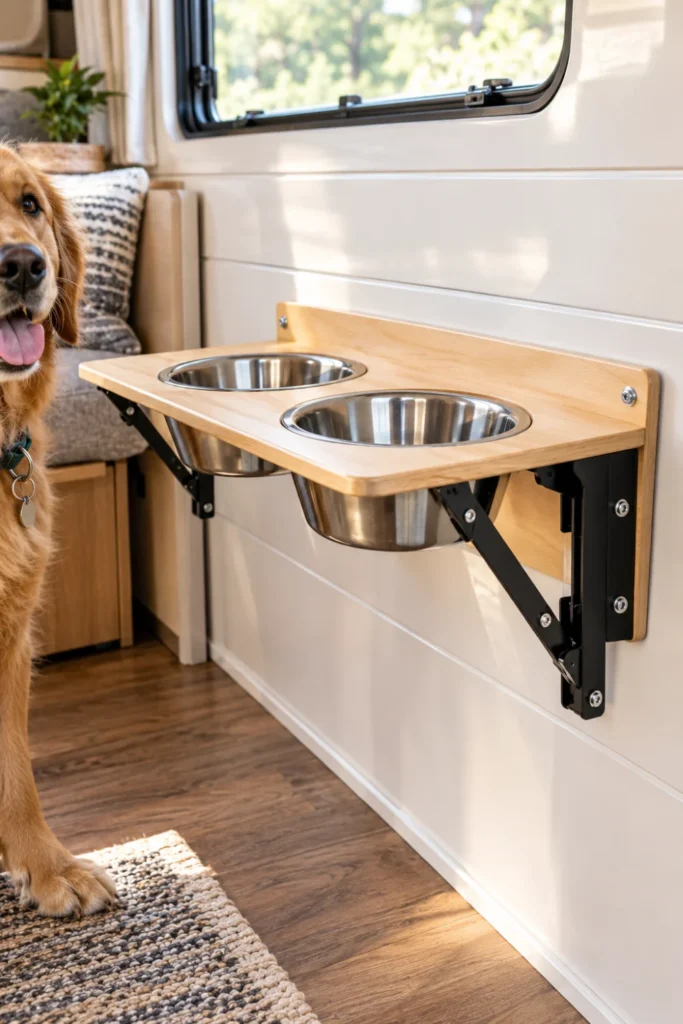
Wall-mounted drop-leaf brackets let you lift bowls up to your dog’s comfortable chest height. When dinner is finished, the entire shelf drops down flat against the wall framing.
Cutting circular openings directly into the shelf surface locks the rim of each dish in place. The dishes cannot slide, tip, or spin around while your dog finishes every last bite.
- Heavy-duty locking folding shelf brackets (rated for 50+ lbs).
- 1/2-inch baltic birch plywood panel cut to size.
- Jigsaw and hole saw bit matching the bowl diameter.
- Barrel bolt slide latch to hold the shelf up securely.
Tools & Hardware for Hollow RV Wall Mounting
5. Use a Floating Splash-Proof Water Bowl for Travel Days
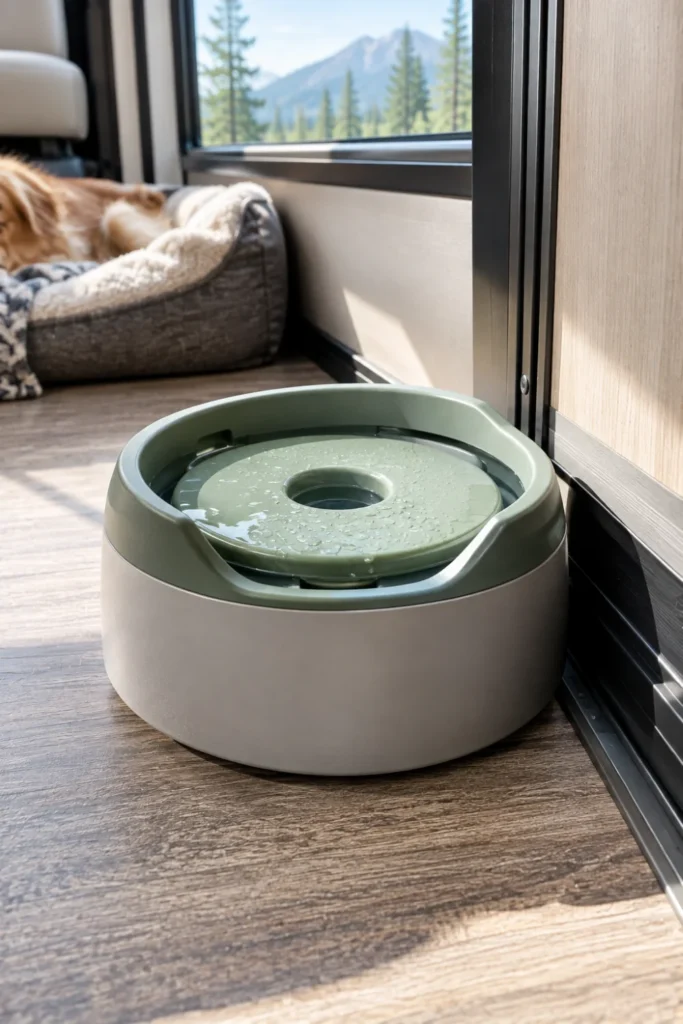
Regular water dishes cannot handle braking, turning, or steep hill climbs without soaking the rig. Specialized floating-disk bowls solve this by restricting the water surface to a tiny center hole.
Your dog pushes their tongue down on the floating disk to access water on demand. The remaining liquid stays trapped under the floating baffle, eliminating splashing during transit.
- Pick a model featuring a detachable outer splash rim that locks to the bowl body.
- Fill the reservoir to roughly two-thirds capacity to allow expansion room during bumps.
- Clean the internal float weekly to prevent mineral deposits from clogging the flow channels.
Check the disk buoyancy after washing to ensure it floats level.
Wipe down the outer rim lock rings so road grit does not jam the latch.
Never leave the bowl completely full to the top edge while moving.
Avoid thin open dishes that lack a fixed mechanical top boundary.
6. Tuck a Custom Silicone Double Feeder Into the RV Stairwell Step
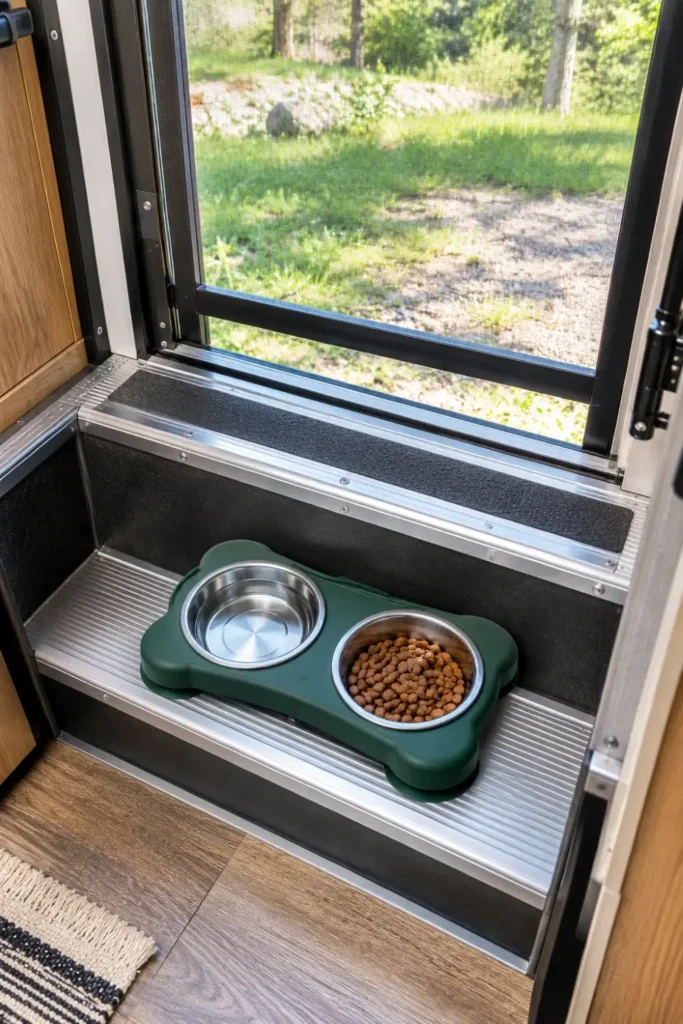
The recessed entrance well inside motorhomes and fifth wheels makes an ideal feeding hub. Placing bowls on the bottom interior step puts them below eye level and well out of the central walkway.
Because steps are boxed in on three sides, the dishes cannot slide around. A fitted silicone double feeder grips the metal step tread and catches stray water easily.
- Measure the exact depth and width of your lowest entrance step tread.
- Pick a dual silicone feeder where the bowls sit sunken directly into the mat structure.
- Check that the front entry screen door clears the bowl rim when swinging closed.
Vacuum grit and dirt from the aluminum step runner to ensure total suction.
Press the silicone mat down firmly against the flat center surface of the step.
Fill the dishes only after the mat is completely seated and checked for door clearance.
7. Anchor Stainless Steel Bowls with Industrial Magnetic Bases
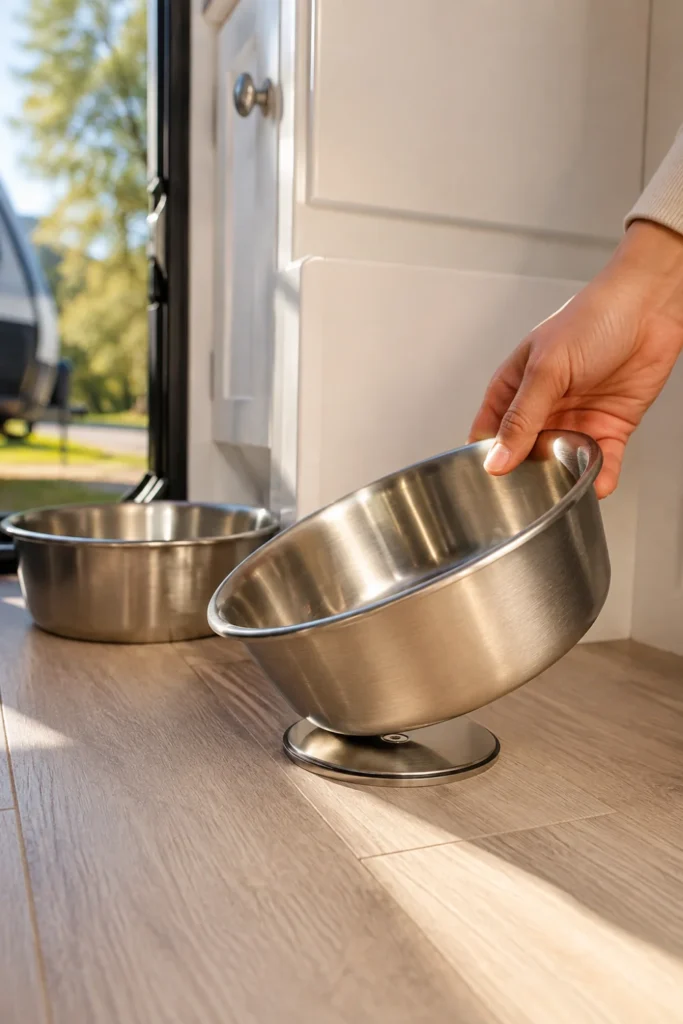
Neodymium magnets offer an invisible, rock-solid method for keeping dishes pinned to the floor. By securing a small steel plate to your subfloor, the magnetic base holds the bowl firmly in place.
When you need to refill water or wash the bowl, simply tilt it sideways to break the magnetic seal. This setup withstands aggressive eaters who love pushing their dishes around the room.
8. Build a Low-Profile Pull-Out Drawer in the Kitchen Base
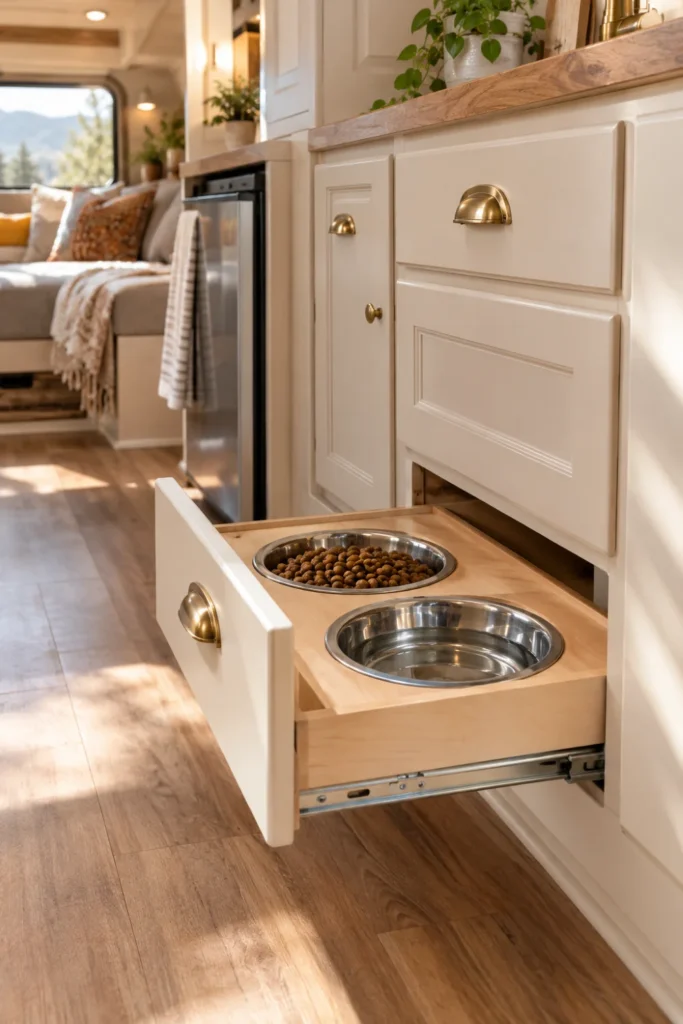
Converting an unused lower pots-and-pans drawer into a feeding hub is one of the cleanest camper modifications you can make. The entire drawer slides out for dinner and tucks away right after.
Using an insert board with fitted cutouts prevents bowls from rattling inside the drawer box. It keeps your companion fed while protecting the rest of your kitchen storage from moisture.
- Remove your lowest cabinet drawer box and measure the interior dimensions.
- Cut a sheet of 3/8-inch sealed plywood to rest snugly across the drawer frame walls.
- Trace and cut holes for two stainless steel bowls using an electric jigsaw.
- Drop the bowls inside the holes and add child-safety magnetic latches to hold the drawer shut during transit.
| Custom Built Drawer | Premade Plastic Drop-In |
|---|---|
| Fits non-standard RV cabinet shapes perfectly. | Faster installation with no power tools required. |
| Allows marine-grade sealing against damp dog food. | Can flex or crack under heavy water bowl weight. |
9. Switch to Suction-Cup Base Bowls on Smooth Vinyl Flooring
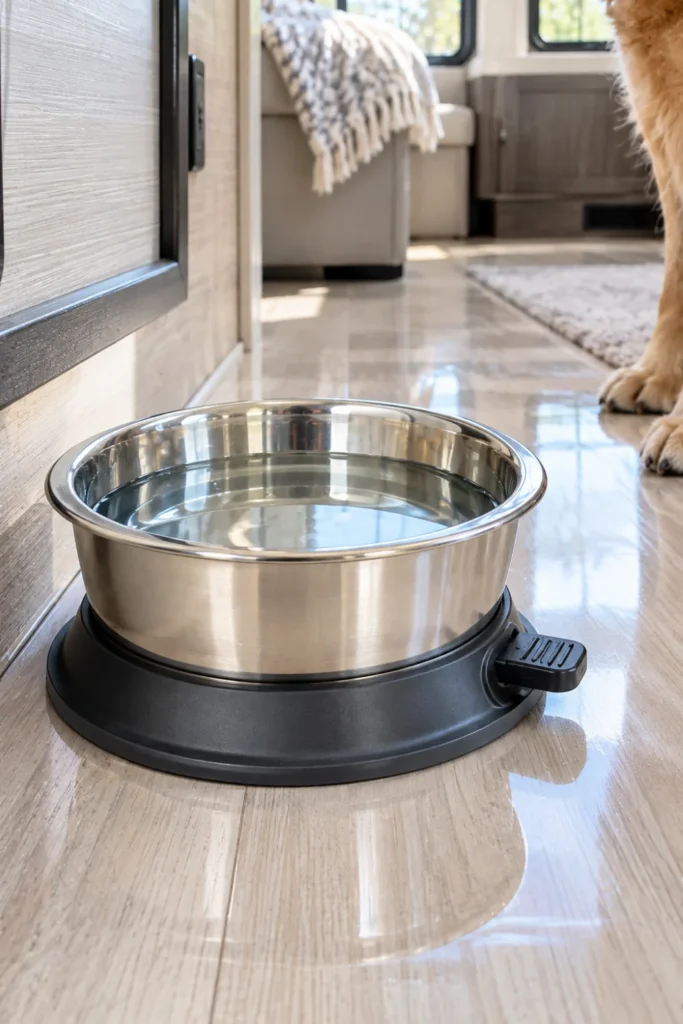
If drilling holes or modifying RV cabinetry is out of the question, heavy-duty suction bases offer a simple rental-friendly solution. These bowls lock firmly onto high-gloss vinyl or linoleum without tools.
A lever-activated vacuum base creates substantial downward tension. Your dog can eagerly lick the bowl completely clean without pushing it across the main living room floor.
- Release the vacuum latch before lifting to avoid stretching your camper’s vinyl flooring.
- Wipe the floor spot clean with a damp microfiber cloth before locking down the suction seal.
- Smooth linoleum floors hold suction significantly better than textured, faux-wood vinyl planks.
Always release suction manually via the pull tab; yanking on the bowl body can peel glued vinyl flooring right off the thin plywood subfloor.
10. Hang Removable Heavy-Duty Canvas Feeding Pouches Outside
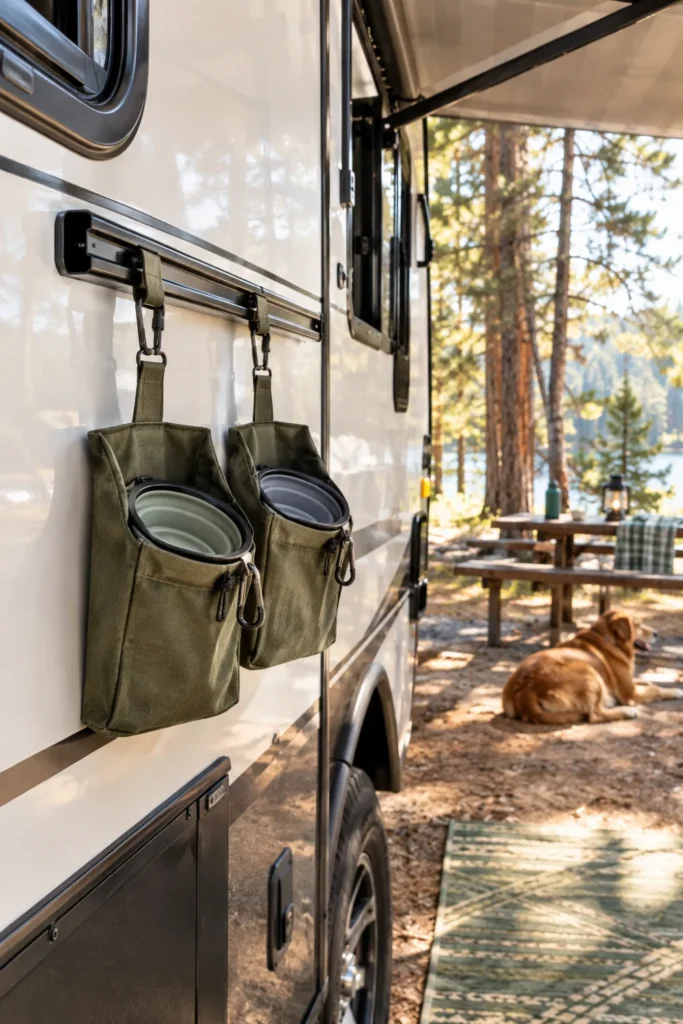
Moving mealtimes outdoors keeps kibble crumbs and dripping jowls completely out of your interior space. Hanging heavy canvas or Cordura bowl cradles from your camper’s exterior utility rail provides an effortless outdoor dining station.
These pouches hold collapsible silicone bowls at standing height. Once feeding is done, rinse the bowls under the outdoor shower and pack them away dry.
⚠️ Watch Out
Always bring outdoor feeding pouches inside before turning in for the night. Leftover food grease quickly attracts raccoons, rodents, and bears directly to your camper entrance door.
11. Place Weighted Non-Tip Cone Bowls in the Bedroom Corner
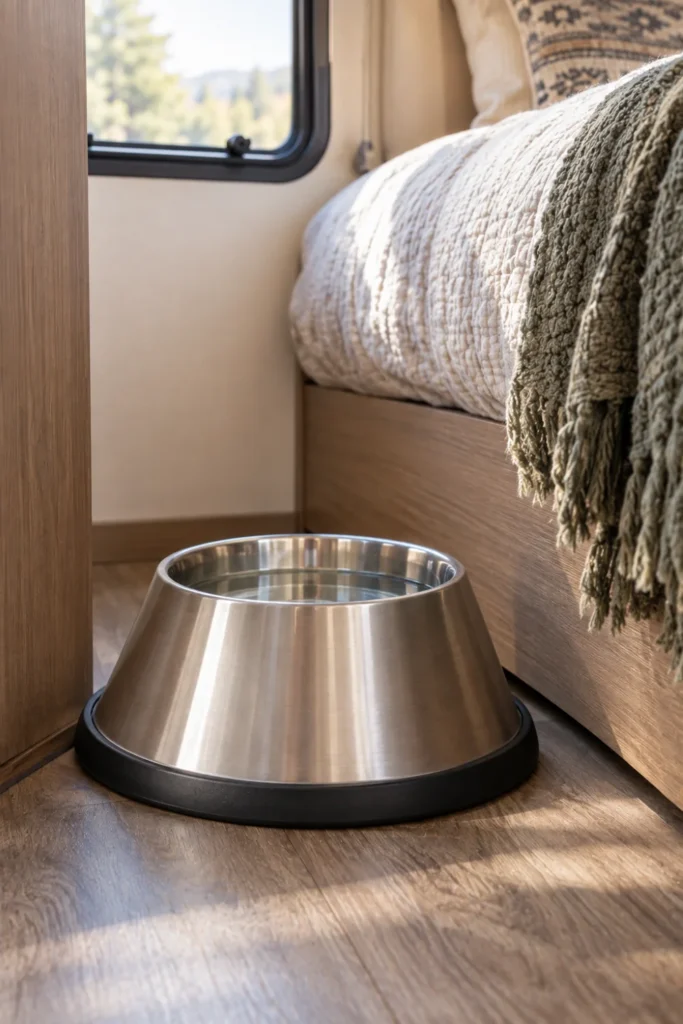
Cone-shaped bowls feature wide, broad bases that flare out much wider than their top rims. This flared geometry makes them virtually impossible for passing pets or owners to kick over accidentally.
Tucking one of these flared bowls into the corner next to your walk-around camper bed gives your dog quiet night access to water. The wide base keeps it upright even during midnight stretches.
- Look for weighted conical designs featuring vulcanized rubber gaskets bonded along the base perimeter.
- Position the dish flush in a 90-degree corner wall junction to restrict lateral shifting.
- Choose brushed matte stainless steel to prevent loud clanging if collar tags hit the rim.
12. Set Up a Roll-Up Waterproof Silicone Mat Under the Slide-Out
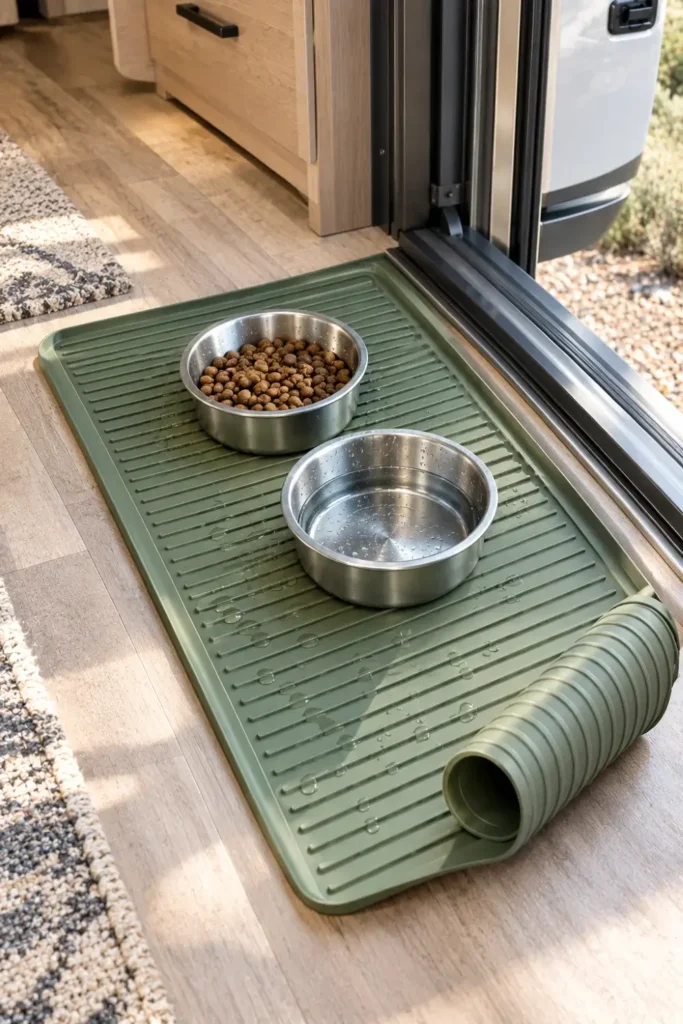
Slide-out seams and floor transitions represent vulnerable areas where spilled water can seep down into internal slide mechanisms. Placing a flexible, roll-up silicone mat over these joints shields the underlying floor seams.
The raised borders on these mats capture drips and stray kibble before they slip under your slide carpet. When travel day arrives, roll the mat up tightly and stash it in a pantry drawer.
- Pick high-grade silicone with raised raised containment ridges running along all four outer edges.
- Check that the mat width does not bind or snag when opening slide-out walls.
- Wipe clean with white vinegar to cut through pet slobber without dulling floor shine.
- ▸Containment Ridges: Choose mats with at least 0.5-inch border lips to trap water volume.
- ▸Quick Storage: Rolls up to the size of a water bottle for simple travel-day stowage.
- ▸Floor Protection: Keeps moisture far away from exposed slide subflooring seams.
13. Repurpose an Open End Table Cubby into a Dedicated Feeding Nook
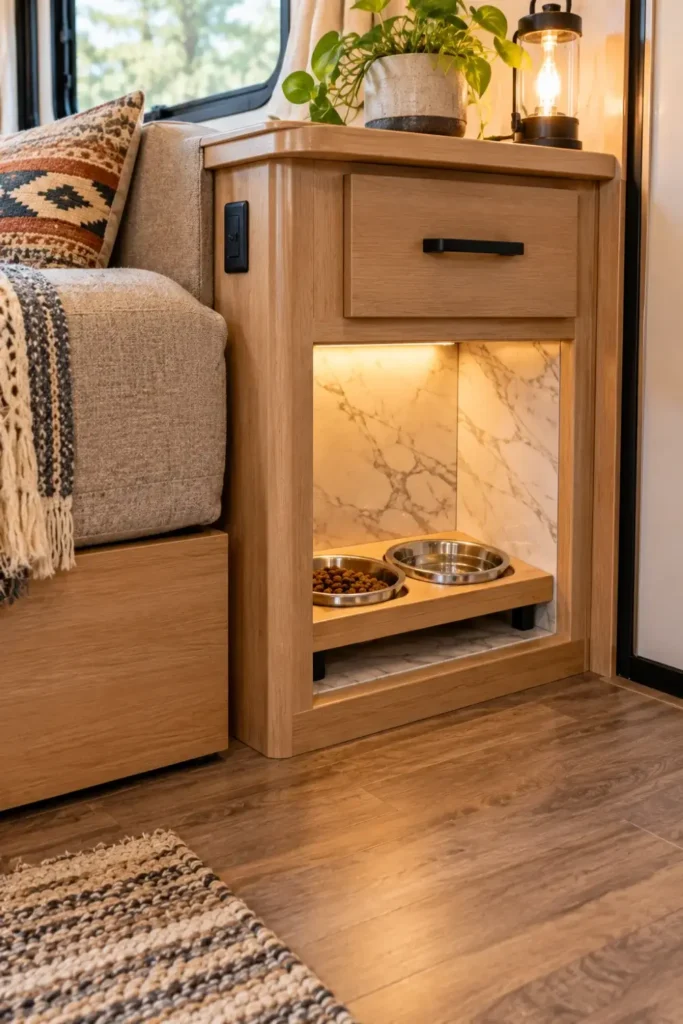
Many camper layouts include open nightstands or couch end tables with empty cubbies. Converting this underutilized lower shelf into a feeding hub isolates the dishes away from main thoroughfares.
Line the interior walls of the cubby with peel-and-stick vinyl tiles to waterproof the camper cabinetry. This converts a dust-collecting nook into an attractive, built-in pet station.
- Measure your nightstand’s bottom cubby opening height and width.
- Line the bottom and side walls with self-adhesive vinyl plank samples.
- Slide in a two-bowl silicone feeding station designed for compact footprints.
An empty, dark end table shelf gathering dust, stray dog hair, and random charging cords.
A clean, waterproofed dining cubby that keeps bowls protected under solid table furniture.
14. Use Deep-Wall Ceramic Crocks with Rubber O-Ring Rims
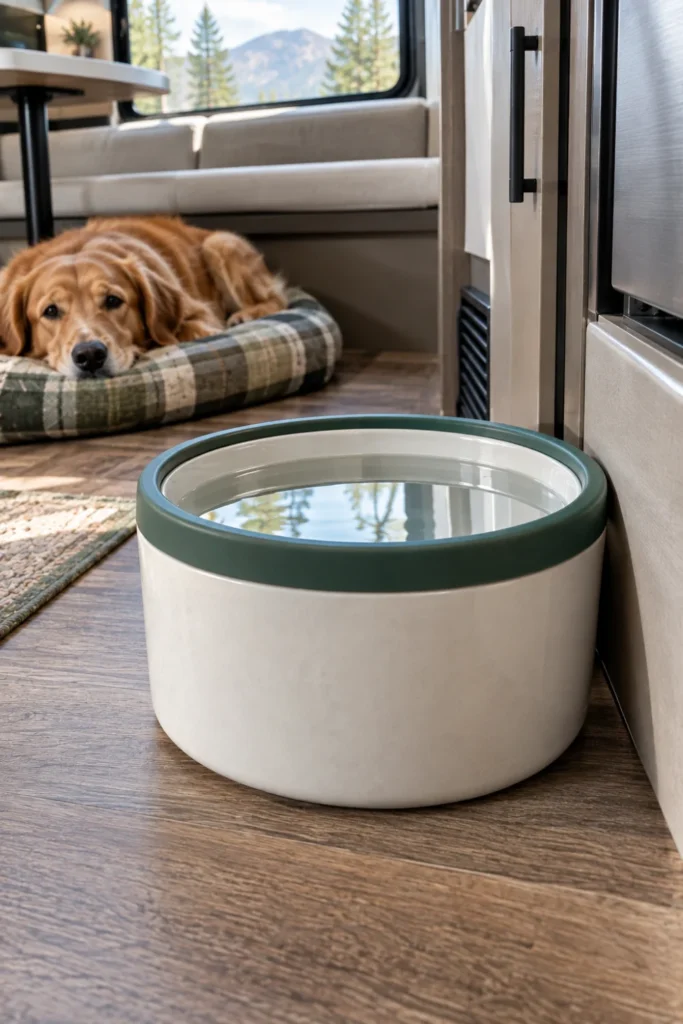
Deep, straight-sided crocks prevent active lap-drinkers from spraying water over the edges. Unlike angled pans, vertical walls force water down against the bottom rather than up and out.
Adding a removable silicone O-ring to the top outer rim protects the ceramic against bumps from cabinetry. It also creates a soft buffer if the bowl vibrates against camper walls during road trips.
What to Look for When Choosing Sturdy Crocks
15. Install a Collapsible Silicone Bowl Bar on the Screen Door Frame
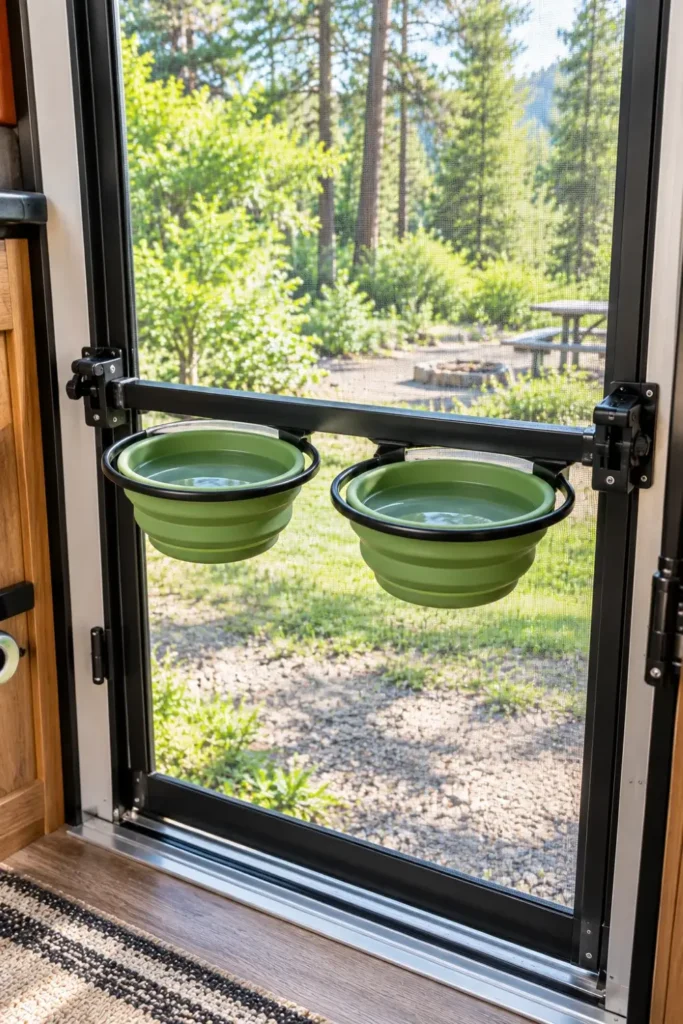
When campsite space is restricted, utilizing the solid lower crossbar of your screen door keeps bowls elevated and out of the floor plan. Lightweight silicone bowls collapse flat against the screen when not in use.
Quick-release clamp brackets latch straight onto standard rectangular camper door framing. This elevated approach works especially well for medium-sized dogs while camping with the main door hooked open.
- Clamp the mounting bar low enough that it clears your external door latch handles.
- Remove water bowls before swinging the door shut to prevent sudden splashing.
- Use food-grade silicone bowls that collapse down to less than one inch in profile.
Check screen door hinge screws to make sure they can support the weight of water.
Collapse bowls flat before securing the main exterior door for travel.
Never mount heavy ceramic or metal bowls to lightweight aluminum door screens.
Avoid clamping across sliding window track channels.
16. Slide a High-Back Splash Guard Shield Behind the Station
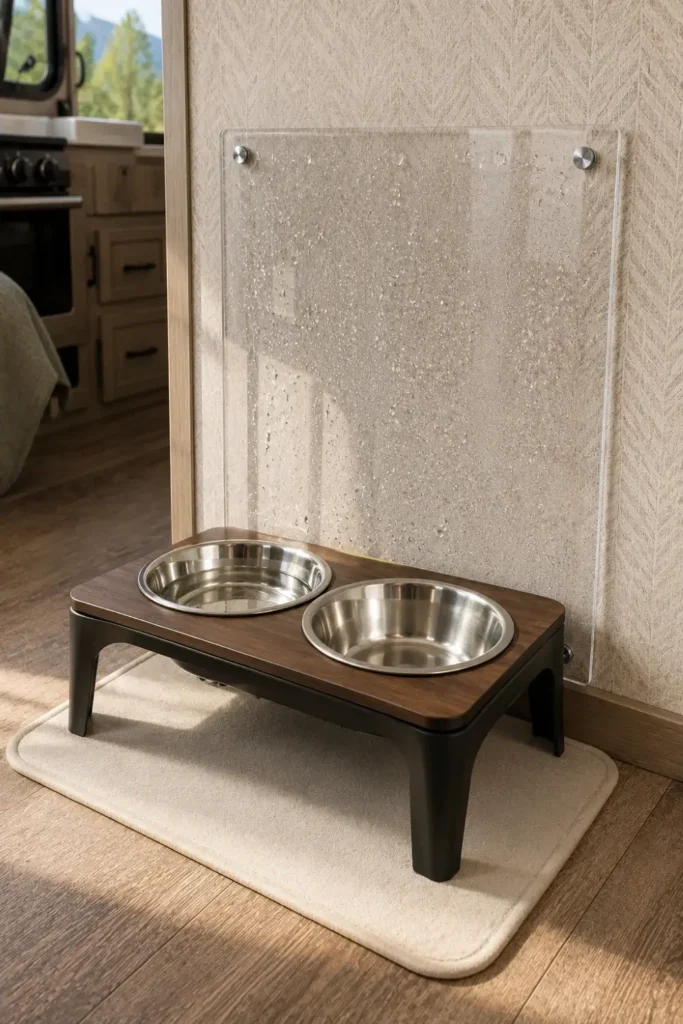
Camper walls are typically made from thin luan plywood covered with delicate vinyl wallpaper. Water splashes and oily food remnants will peel this wallpaper over time if left unprotected.
Mounting a removable acrylic or polycarbonate sheet behind the feeding station acts as a wipe-clean backsplash. It absorbs stray droplets and preserves your camper’s wall finish.
- Cut a lightweight sheet of clear acrylic to fit your wall nook dimensions.
- Apply removable damage-free adhesive strips along the top and bottom back edges.
- Press firmly against the wall panel behind your dog’s bowls for 30 seconds.
Wipe the camper wallpaper with a dry cloth to clear dust before attaching strips.
Position the bottom edge of the acrylic sheet one inch below the bowl rim line.
Clean the splash shield using a damp microfiber towel without abrasive cleaners.
17. Stash Nesting Stainless Travel Bowls Inside the Outdoor Kitchen Bay
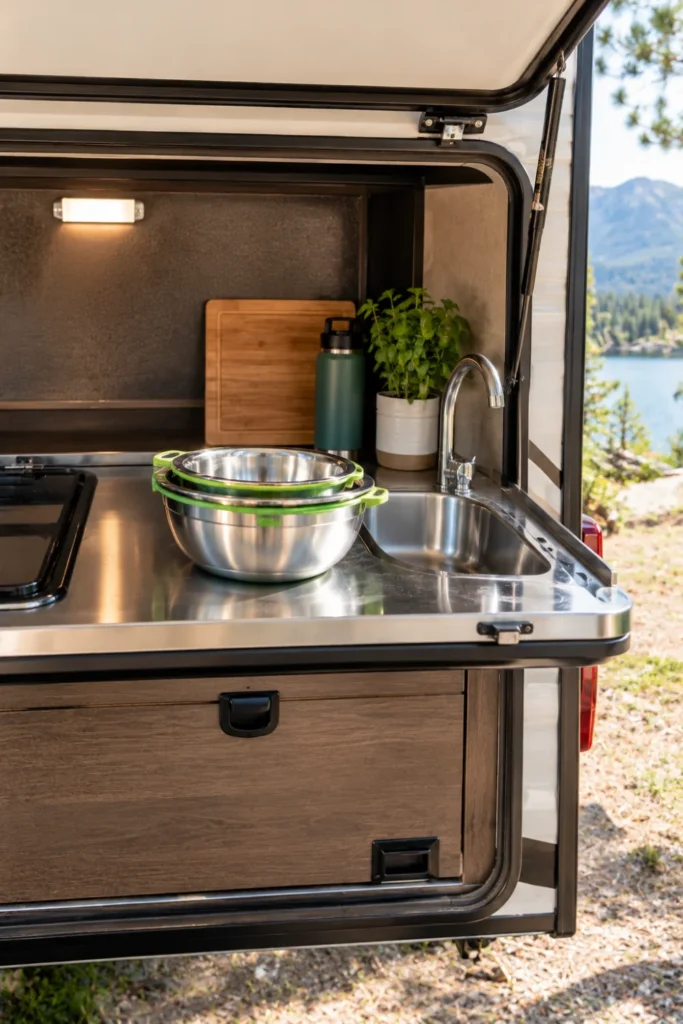
Exterior camper kitchen compartments provide easy water connections and tough composite surfaces that handle moisture without issue. Setting up mealtime here keeps indoor spaces pristine.
Nesting stainless bowls pack down compactly alongside your camp stove gear. Because the bay is built with drainage channels, cleaning up spilled water takes just a quick wipe.
18. Drop Bowls Into a Marine-Grade Flush Floor Hatch
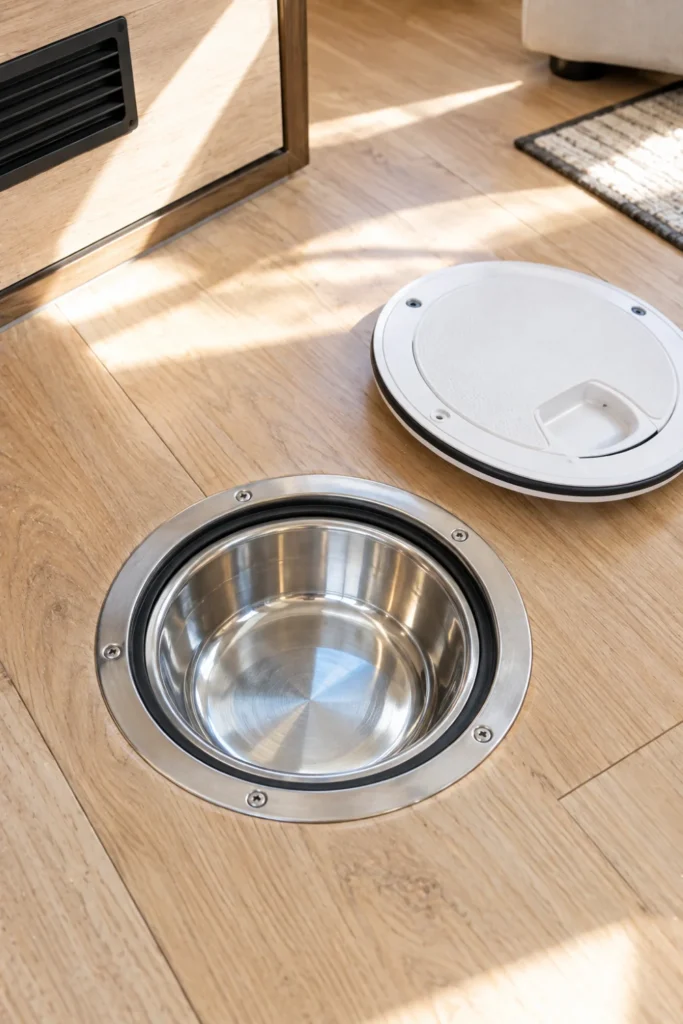
For serious DIY remodelers, mounting a recessed marine inspection hatch creates a feeder that sinks straight into the floor. The dishes rest flush with the flooring surface, completely eliminating any raised edges.
When travel day begins, pop the bowls out and snap the flush hatch cover back over the opening. You regain every square inch of flat floor space without leaving hazards behind.
- Verify subfloor depth and check holding tank clearances before cutting any floor openings.
- Choose marine inspection hatches with rubber water-tight compression seals.
- Seal all exposed raw plywood edges with multiple coats of water-resistant sealant.
📌 Good To Know
Always inspect your camper’s underbelly before cutting into floor planks. Heating ducts, 12-volt wiring bundles, and black or grey water holding tanks often run within inches of the subfloor framing.
19. Secure an Over-the-Threshold Silicone Mat for Sloppy Drinkers
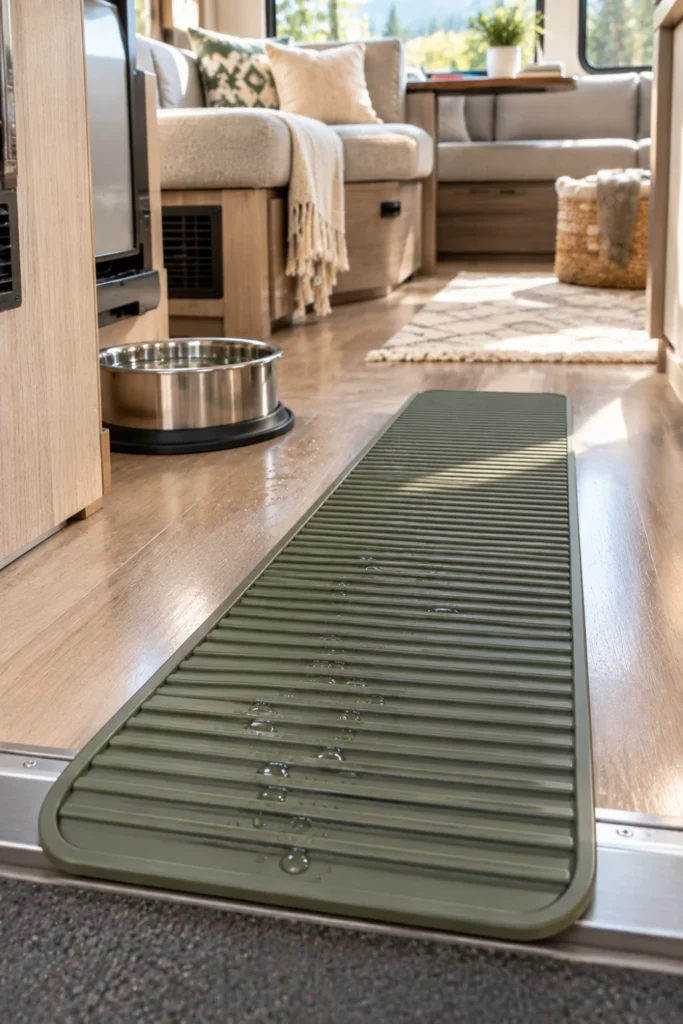
Sloppy drinkers love carrying water in their jowls, shaking it across the living area as they walk away from the bowl. An elongated threshold runner mat catches these trailing drops before they reach bare flooring.
Placing an extended ribbed mat directly along your camper’s main walking line protects high-wear flooring. The micro-ribs scrape moisture off paws while channeling spills away from your subfloor seams.
- Lay the extended runner along the high-traffic route leading away from the water bowl.
- Secure the front leading edge using double-sided carpet tape to prevent tripping.
- Pick a silicone runner featuring deep water-trapping ridges that can be hosed down at the dump station.
Water damage near slide-out edges and floor thresholds is one of the leading causes of subfloor rot in trailers; containing traveling droplets before they reach these seams saves thousands in repairs.
Managing pet mealtime in a small camper does not mean dealing with soaked socks or tripped-over dishes every day. Implementing one or two of these rv dog bowl ideas keeps your walkways clear, protects your rig’s interior finishes, and gives your dog a stable, mess-free spot to eat.
Save this list to your favorite Pinterest board so you have these camper layouts handy for your next road trip upgrade.

