
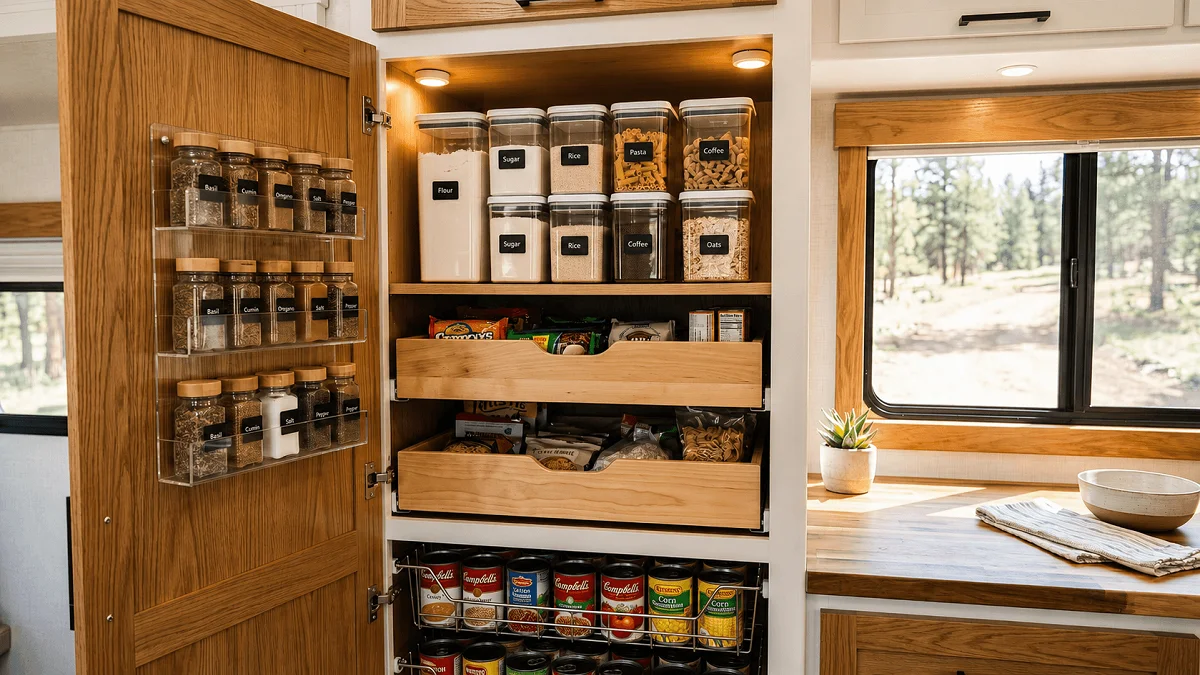
Most stock RV pantries are either narrow dark gaps or deep black holes where spices vanish until season two. When you hit the highway, anything unanchored turns into a flying projectile, ending in a messy jar avalanche the second you open the cabinet door.
Finding the right rv pantry storage ideas is not just about making things look pretty on social media. It comes down to keeping your food secure on rough roads, stopping extra weight from cluttering your rig, and making dinner prep simple inside a tiny kitchen.
Here are 15 real-world pantry upgrades that keep your food organized, accessible, and completely road-safe.
1. Anchor Heavy Cans at the Bottom with Non-Skid Wire Baskets
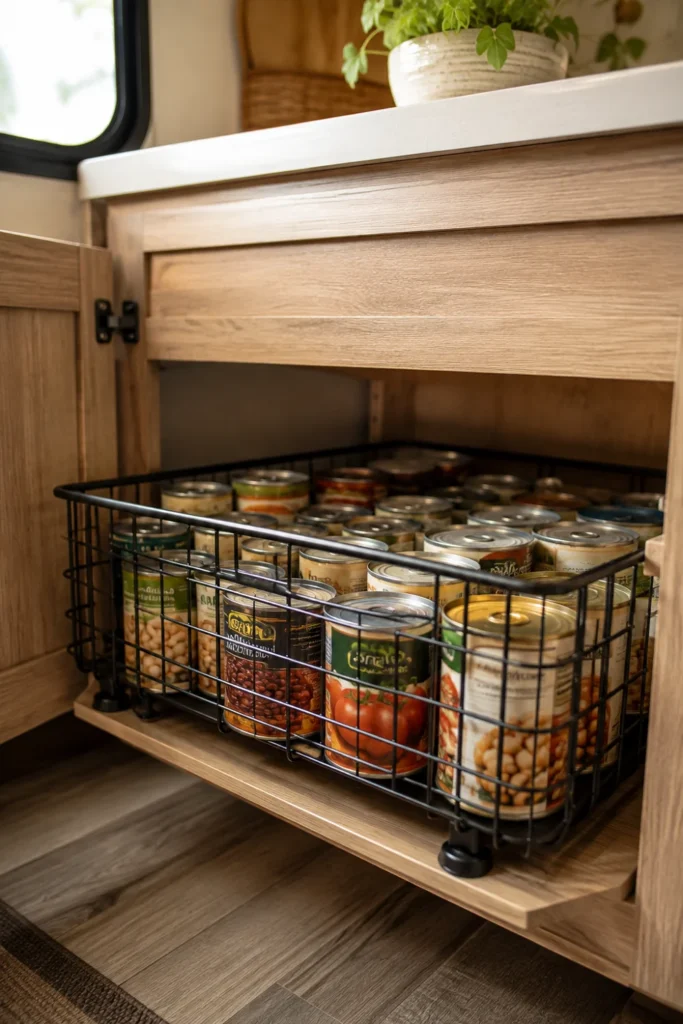
Heavy canned goods can quickly damage thin cabinet shelving if left to roll around during transit. Storing them low keeps your rig’s center of gravity stable while protecting fragile upper cabinets from stress cracks.
Open wire baskets allow you to see your stock at a glance without pulling everything out. Choosing models with rubber feet prevents the basket itself from sliding around on smooth wood veneers.
- Best items for wire baskets: Canned beans, crushed tomatoes, and soup tins.
- Safety rule: Never store glass jars on top of heavy tin cans.
- Pro tip: Line the basket floor with felt to stop metallic clanking while driving.
2. Mount Acrylic Door Pockets for Spice Jars and Small Packets
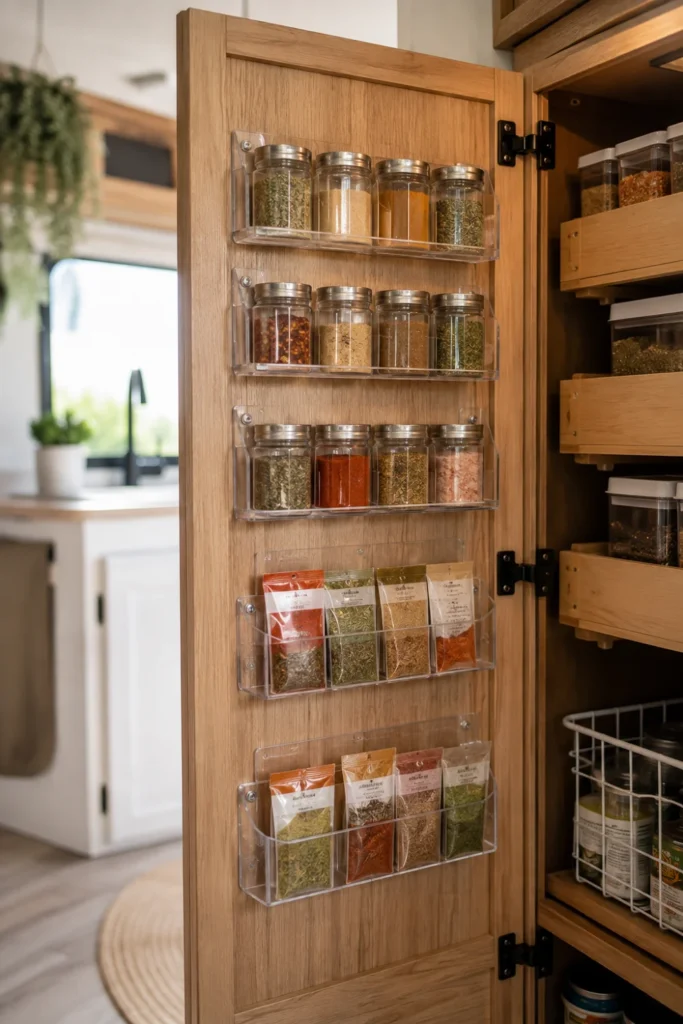
Pantry doors represent underutilized real estate in almost every camper. Installing lightweight clear acrylic bins directly to the inside door panel turns dead air space into a dedicated spice rack.
Clear pockets make every label visible immediately, so you stop buying duplicate garlic powder. They also keep small packet items like gravy mixes or taco seasonings from getting lost in deep drawers.
💡 Quick Tip
Always measure the clearance between your shelf edges and the inside door frame before screwing or sticking acrylic pockets in place. Leaving a two-inch buffer ensures the pantry door closes completely flush.
- Use heavy-duty mounting tape instead of screws on hollow RV core doors.
- Group spices by frequency of use, keeping salt and pepper in the bottom pocket.
- Add a thin strip of foam tape inside the pocket to keep glass spice bottles silent.
3. Swap Cardboard Boxes for Uniform Square Airtight Containers
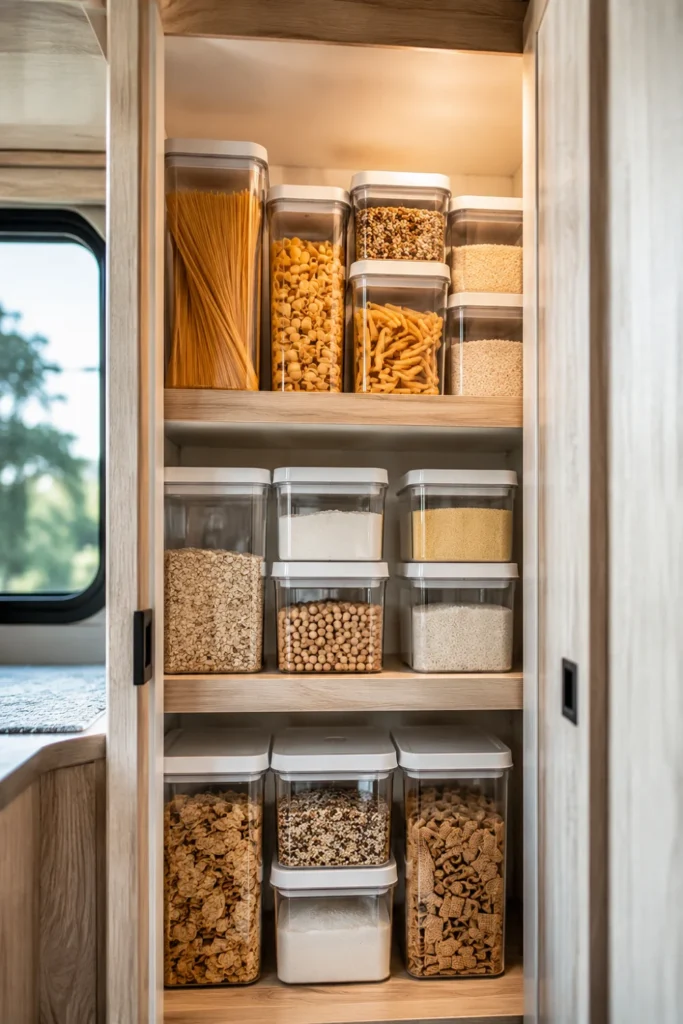
Original cardboard packaging wastes space and invites humidity, moisture, and pests into your pantry. Cardboard boxes are rarely full, leaving dead air in your cabinets while making shelves look chaotic.
Transferring dry goods like cereal, rice, and pasta into square or rectangular airtight containers reclaims up to thirty percent more usable space. Square shapes stack tightly without leaving awkward round gaps between jars.
Half-empty cardboard boxes, mismatched bag clips, stale cereal, and wasted vertical headroom between shelves.
Uniform clear containers stacked two-high, airtight silicone seals, pest protection, and instant inventory checks.
- Dump original cardboard packaging at home or before restocking the rig.
- Cut out cooking instructions or expiration dates and tape them to the container bottom.
- Label the front with a washable chalk marker for quick contents recognition.
4. Hang Undershelf Slide-Out Baskets for Flat Items
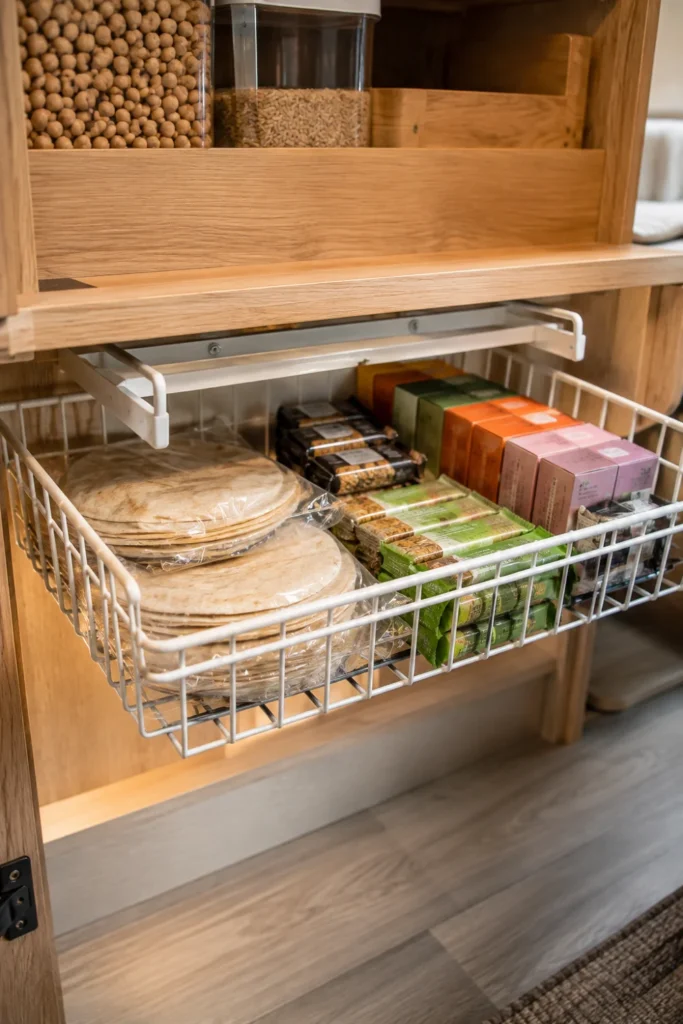
Tall pantry shelves often leave three to four inches of unused empty space right below the shelf above. Hanging wire slide-out baskets onto existing shelves makes use of this dead vertical zone without requiring tools or drilling.
These wire baskets work well for flat, lightweight goods that usually end up crushed under heavier items. They slide on easily and can be moved around whenever your grocery needs shift.
Slide the basket arms firmly onto the fixed shelf board.
Apply adhesive pad strips under the mounting arms so they do not scratch the shelf finish during travel.
Load lightweight items inside and test door clearance to make sure it shuts completely.
- Ideal items to store: Tortillas, aluminum foil boxes, snack bars, and tea boxes.
- Weight limit: Keep total contents under five pounds to avoid sagging.
5. Install Heavy-Duty Full-Extension Drawer Slides
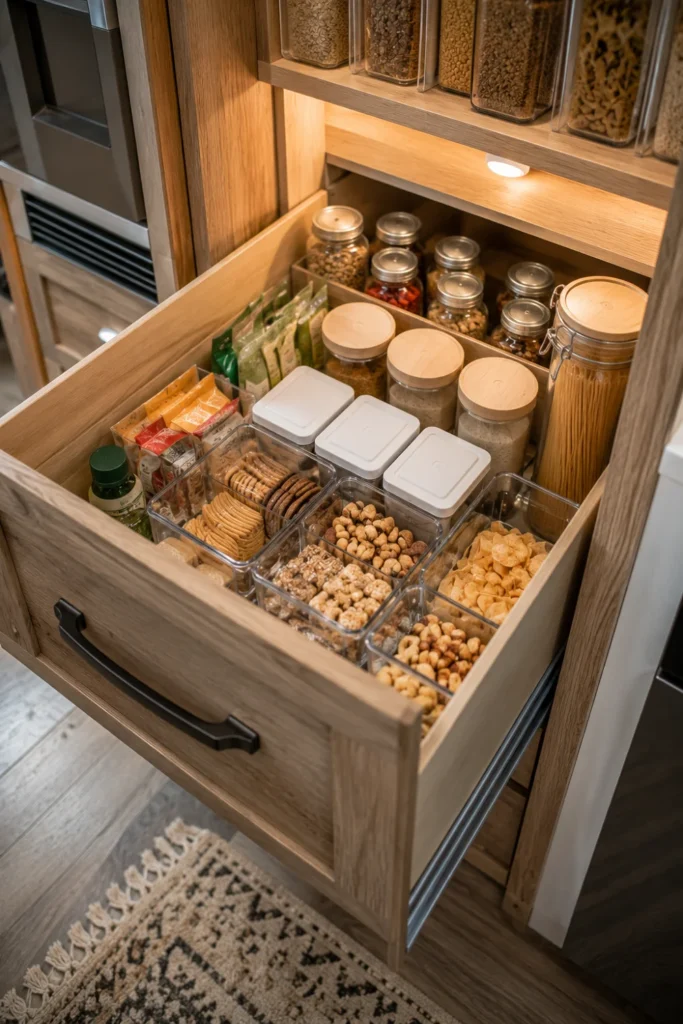
Deep fixed pantry shelves force you to dig through layers of food, often leaving items forgotten near the back wall. Converting fixed shelves into smooth pull-out drawers brings everything out into full view with minimal effort.
Using full-extension ball-bearing slides ensures the very back of the drawer comes out past the cabinet face. This simple modification stops you from buying duplicate supplies you already owned but could not see.
| Feature | Standard Fixed Shelf | Pull-Out Extension Drawer |
|---|---|---|
| Visibility | Front items only | 100% full top-down visibility |
| Accessibility | Requires removing front items | One smooth pull action |
| Road Safety | Items shift and tip over | Retained safely inside high drawer walls |
6. Mount Tension Rods Across Open Shelves to Prevent Travel Avalanches
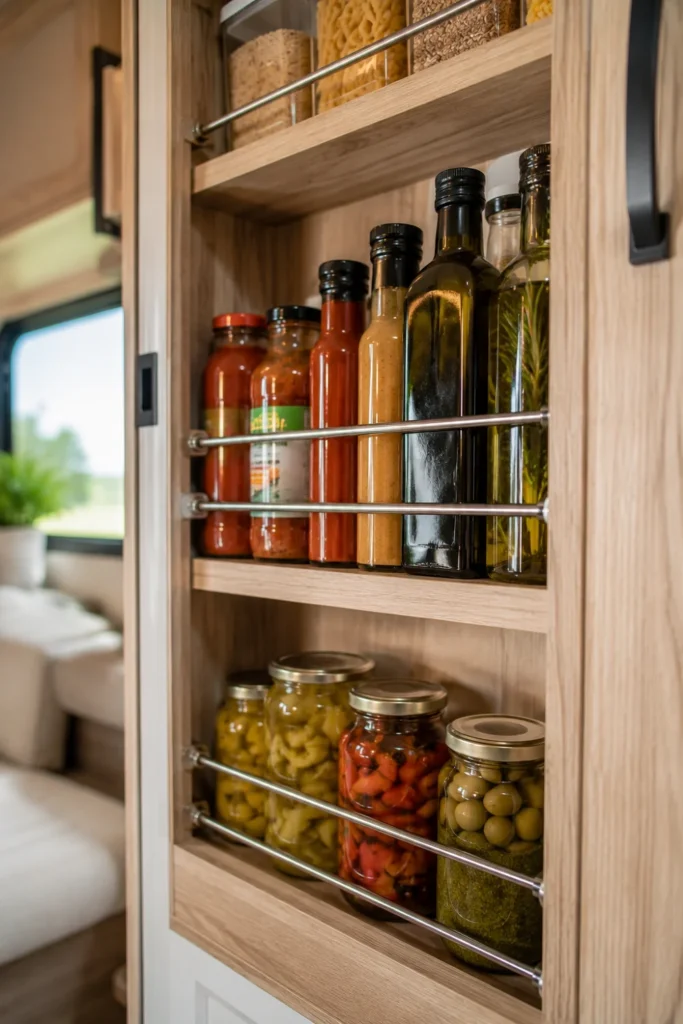
Opening an RV pantry after a long travel day can lead to groceries falling out onto the floor. Installing small spring-tension curtain rods across the front of each shelf creates a simple safety barrier.
These spring-loaded rods adjust to match your exact cabinet width without drilling holes or leaving permanent marks. They hold items in place while driving, yet compress easily when you need to pull an item off the shelf.
Tension Rod Setup Checklist
- Use double rods on tall shelves storing tall bottles or oil containers.
- Look for rods with heavy-duty rubber ends to prevent slipping against smooth cabinet laminate.
- Remove rods easily when camped for an extended stay if you prefer unimpeded access.
7. Use Clear Lazy Susans with High Lips in Deep Cabinets
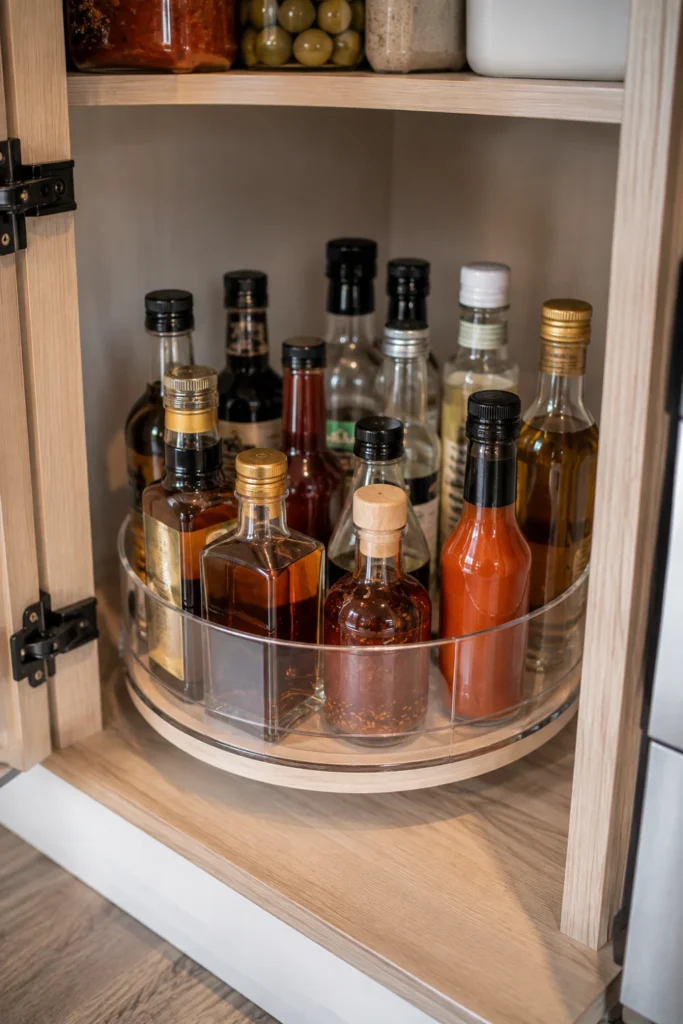
Corner pantries and deep square shelves often have hard-to-reach zones where condiments go to hide. A rotating turntable brings items from the back around to the front with a quick spin.
Standard household turntables with flat edges will let items slide right off when turning on the move. Selecting models with two to three-inch raised outer walls keeps containers contained safely inside the tray during transit.
Choose turntables with 3-inch high exterior walls.
Place heavy oils and vinegars right near the center pivot point.
Avoid flat rimless wooden or glass spinning trays.
Never overload the turntable edges with heavy glass jars.
- Measure cabinet depth carefully before buying to leave corner rotation clearance.
- Stick small rubber non-skid dots to the bottom of the turntable base.
- Group like items together: oils on one, hot sauces and spices on another.
8. Secure Loose Bags with Pegboard and Heavy Clips
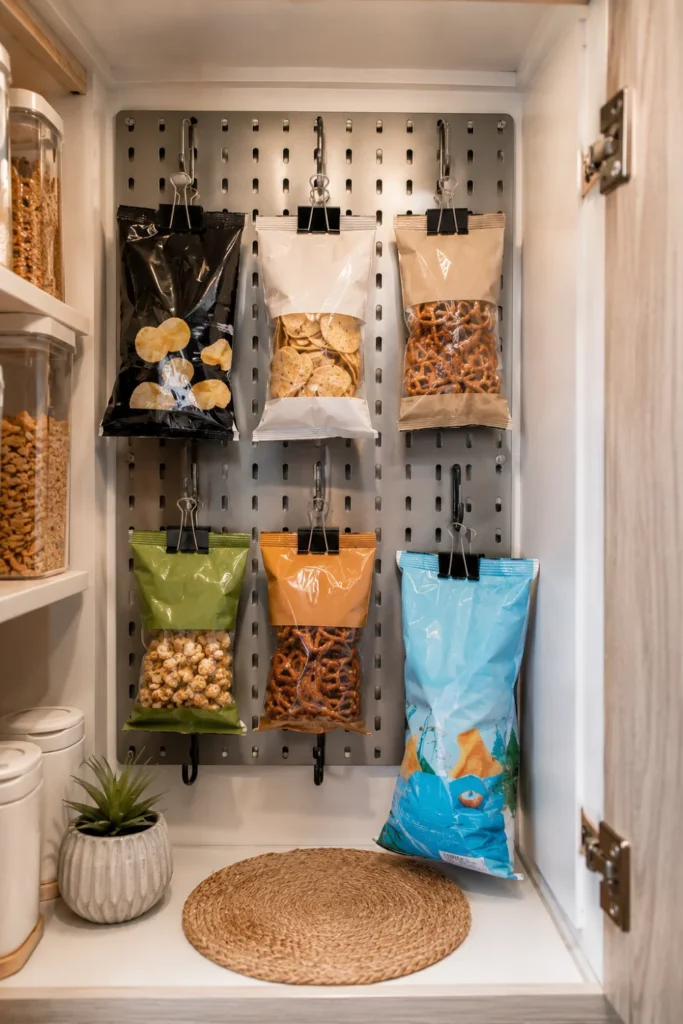
Half-empty bags of chips, pretzels, and baking ingredients quickly turn into a messy pile on open pantry shelves. Mounting a compact metal or plastic pegboard panel to the back wall of your pantry gives you a practical spot to hang bagged goods off the shelf surface.
Using heavy-duty metal binder clips or pegboard hooks keeps bags sealed tight while utilizing vertical wall space. This keeps delicate snacks from getting crushed under heavier boxed items.
| Storage Choice | Best For | Main Advantage |
|---|---|---|
| Wall Pegboard | Bags of chips, snacks, pouches | Keeps snacks from getting crushed |
| Adhesive Hooks | Produce bags, aprons, oven mitts | Zero-damage installation on wood |
- Hanging chip bags stops them from sliding around on travel days.
- Metal pegboards provide stronger support for heavier snack bags than thin plastic panels.
- Pegboard hooks can hold measuring spoons, kitchen timers, or small silicone funnels.
9. Line Every Shelf with Heavy-Grip Shelf Liners
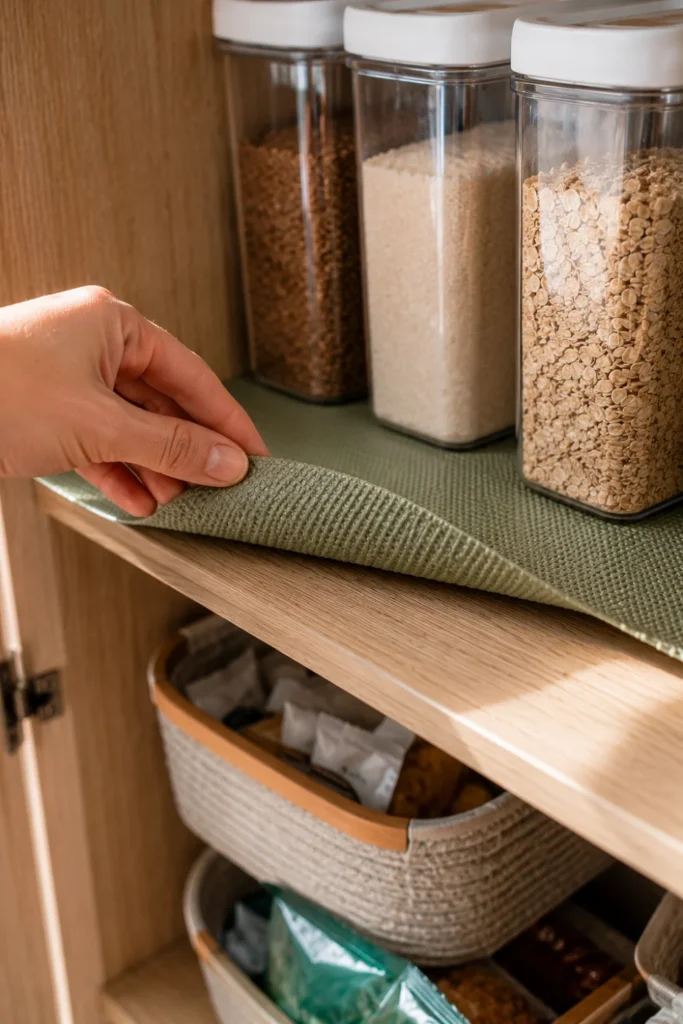
Smooth factory cabinet surfaces allow plastic boxes and cans to slide around during turns. Installing thick non-adhesive grip liners creates traction that holds pantry items in place while you drive.
Non-adhesive liners are easy to remove, rinse, and re-lay whenever spills happen. They also cushion delicate shelving surfaces from denting, scratches, or sticky oil residue.
⚠️ Watch Out
Avoid cheap adhesive paper shelf liners in RVs. Rig temperature swings can cause sticky adhesives to bake onto cabinet wood, creating a gummy, difficult mess to clean off later.
- Cut liners slightly oversized so they fit snugly against cabinet wall edges.
- Pick washable rubberized grid patterns for easy maintenance and solid grip.
- Place leftover scraps under cutting boards to stop them from slipping on countertops.
10. Store Baking Sheets and Cutting Boards Vertically with Pan Organizers
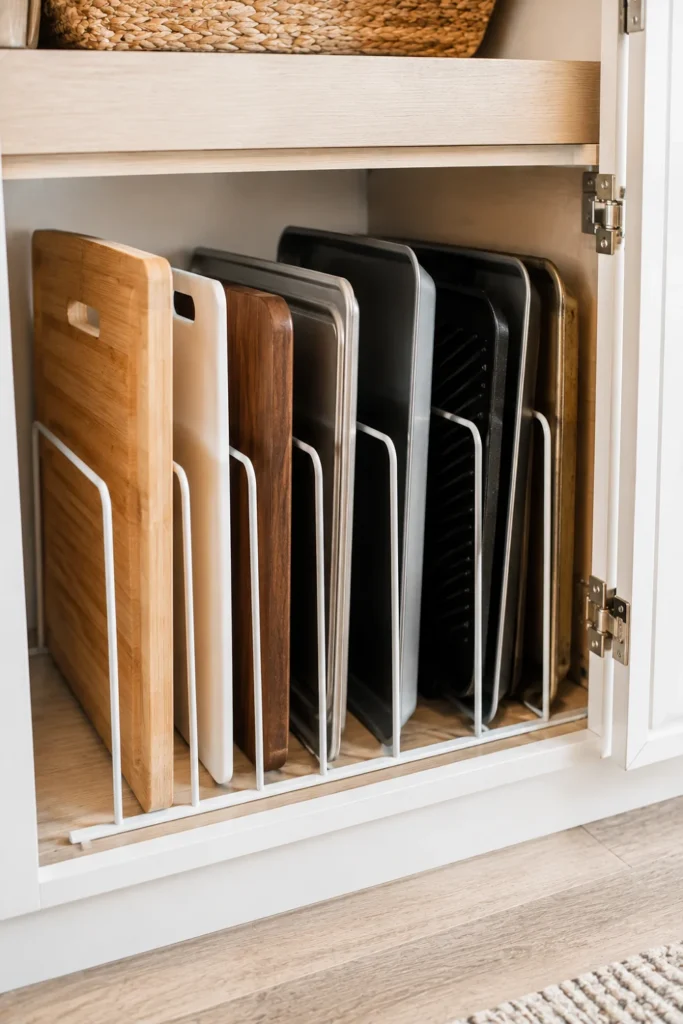
Stacking cutting boards, baking trays, and muffin tins horizontally creates a frustrating stack where you always need the item at the very bottom. Pulling one piece out usually causes the rest to clatter around.
Installing a vertical wire pan divider lets you store flat kitchen tools upright like books on a shelf. This arrangement makes sliding any single tray out quick without disturbing the rest of your kitchen gear.
Store flat items vertically instead of stacking them horizontally. Stacking creates friction and makes items hard to access, while vertical slots make every tray easy to reach in a single move.
- Secure the vertical rack base to the cabinet shelf using short wood screws or Command strips.
- Slide cutting boards into narrower slots and thick cake pans into wide slots.
- Place quiet silicone mats between metal pans to prevent annoying travel rattles.
11. Attach Magnetic Strips to Cabinet Walls for Tin Containers
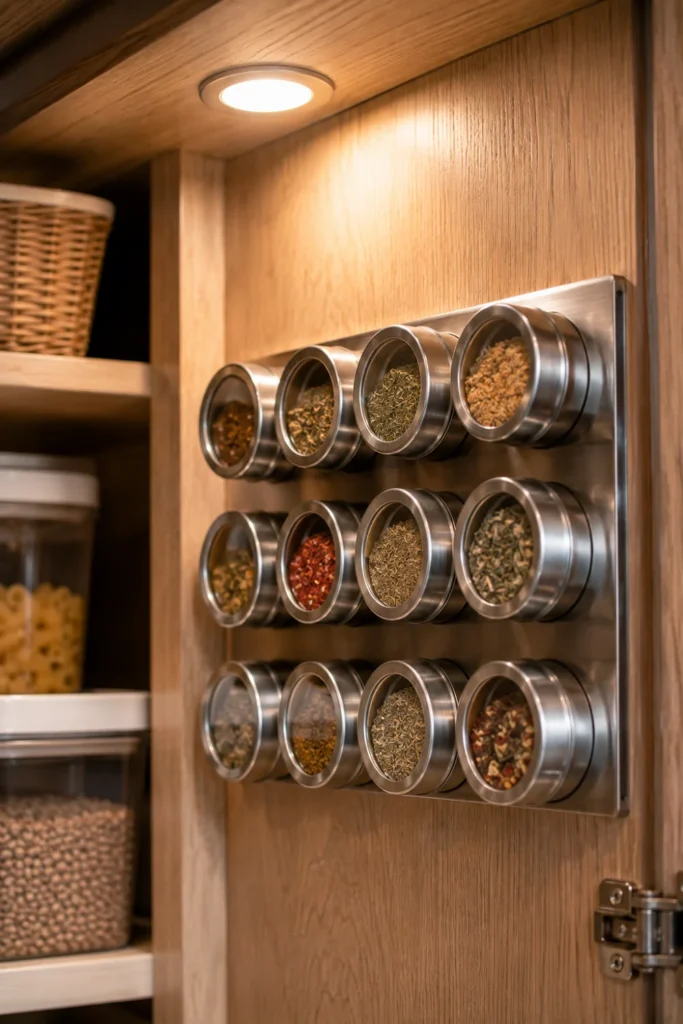
Utilizing open internal wall surfaces keeps counters clear while turning blank walls into functional storage zones. Mounting a strong magnetic tool strip to the inner sidewall of a cabinet provides a secure hold for small metallic items.
Small stainless steel containers with clear lids snap onto the magnetic strip easily. Storing light spices, tea bags, or matches this way keeps them off primary shelves entirely.
Clean the interior wall thoroughly with rubbing alcohol to clear dust and manufacturing oils.
Mount the magnetic bar using heavy-duty outdoor mounting tape rated for at least 15 pounds.
Attach metal tins, ensuring magnetic contact is solid enough to withstand road bumps.
- Best items to store: Light dried herbs, twist ties, bouillon cubes, and tea bags.
- Safety tip: Avoid hanging heavy glass jars on magnetic strips; stick to lightweight tins.
12. Use Stackable Can Dispensers That Lock Cans in Place
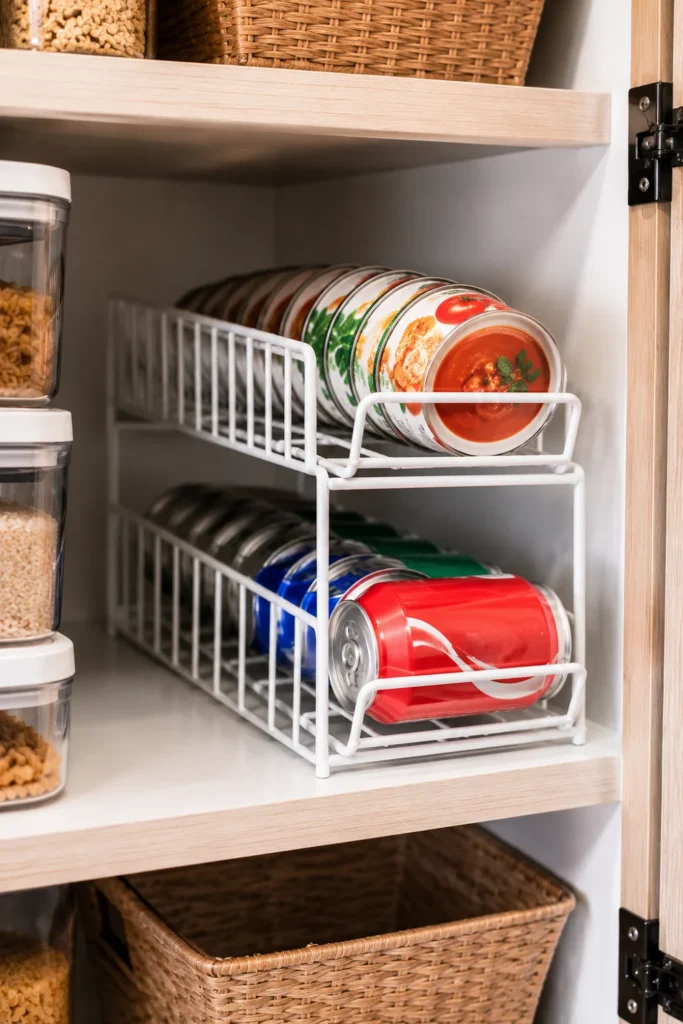
Throwing loose soup and soda cans onto a wide shelf creates a chaotic pile that shifts around on every turn. Gravity-fed rack dispensers keep cans organized in neat, single-file lines while rolling the next can forward automatically.
Look for front-loading models designed specifically for RVs that feature a small front retaining lip. This lip stops cans from rolling forward off the rack onto the floor when you open cabinet doors after a drive.
- Use stackable wire designs to turn tall, narrow shelf gaps into double-decker can storage.
- Place beverage cans on lower shelves and lighter soup tins higher up.
- Measure your standard can diameter before buying to avoid fitting issues.
13. Hang Under-Cabinet Canvas Produce Hammocks
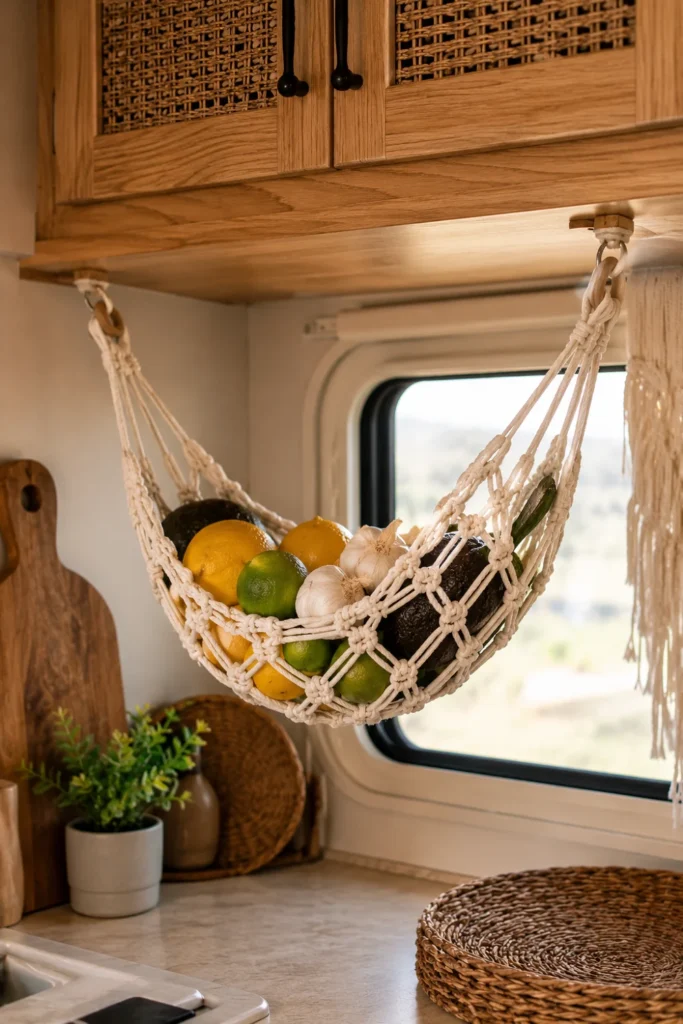
Fresh produce like onions, potatoes, and fruit take up valuable counter space and spoil quickly if trapped inside dark, unventilated drawers. Hanging macrame or woven canvas fruit hammocks under your upper kitchen cabinets keeps air circulating around your produce.
Suspending produce allows items to sway gently with the movement of your rig, keeping delicate fruit from bruising. It frees up primary pantry shelves for boxed goods while keeping healthy snacks visible.
Produce Hammock Essentials Checklist
- Best produce to store: Avocados, limes, lemons, onions, and bananas.
- Travel tip: Take heavy, rolling produce out of the hammock and store it securely on long travel days.
14. Group Ingredients by Meal Type into Grab-and-Go Caddies
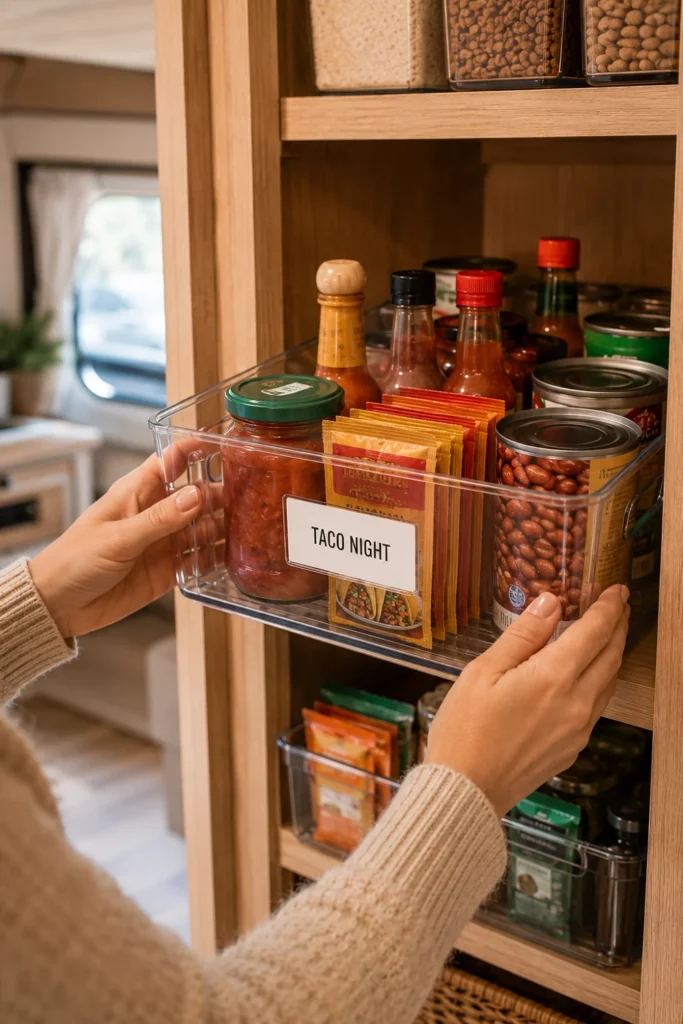
Digging through five different shelves to find dinner ingredients gets old fast when working in a compact RV kitchen. Grouping related items into clear, open-topped plastic bins creates thematic cooking kits you can grab in a single motion.
When it is time for breakfast or taco night, simply pull the labeled caddy out and set it on the counter. All necessary spices, oils, and canned ingredients are right together, saving prep time and keeping shelves tidy.
Searching three separate shelves for salsa, taco seasoning, hot sauce, and beans every Tuesday night.
One labeled “Taco Night” bin pulled out instantly, keeping ingredients contained in one place.
- Popular Caddy Ideas:
- Coffee & Tea: Sugar packets, filters, coffee beans, tea bags.
- Baking Essentials: Vanilla extract, baking powder, chocolate chips, flour.
- Pasta Night: Marinara jars, spices, parmesan cheese, olive oil.
15. Add Motion-Sensor LED Puck Lights to Dark Cabinet Corners
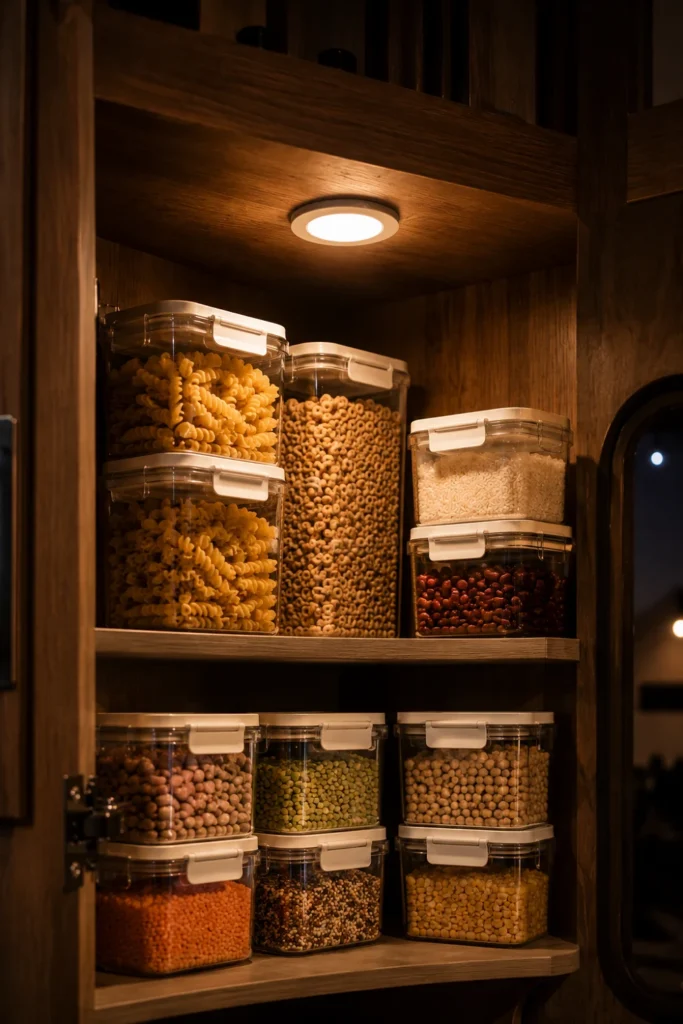
Dark RV pantries make finding ingredients difficult, especially when boondocking and keeping overhead lights low to save battery power. Sticking battery-operated motion-sensor LED puck lights on cabinet ceilings illuminates dark corners instantly.
These small lights activate automatically when you open the cabinet door and turn off shortly after it shuts. They install without complex wiring and run for months on a set of batteries or USB charge.
📌 Good To Know
Opt for USB-rechargeable LED light strips over traditional AAA battery pucks. You can easily recharge them using your RV’s 12V USB outlets while driving, eliminating the need to buy disposable batteries on the road.
- Select warm white LEDs (3000K) to keep cabinet lighting soft and natural.
- Mount lights high on cabinet roofs so they illuminate every shelf level evenly.
- Use magnetic mounting strips for easy removal when recharging unit batteries.
Organizing Your RV Pantry for the Long Haul
Maximizing your RV pantry comes down to securing your items for motion while making full use of every inch of vertical space. By replacing loose, bulky boxes with square containers, adding vertical dividers, and using simple grip liners, you turn a chaotic storage space into an organized, stress-free kitchen setup.
Pick two or three of these rv pantry storage ideas to start with this weekend. You will notice an immediate difference in how easy cooking in your rig becomes and you won’t have to worry about flying groceries every time you pull into camp.
Save this post to your RV Living Pinterest board so you can easily reference these tips for your next camper upgrade!

