
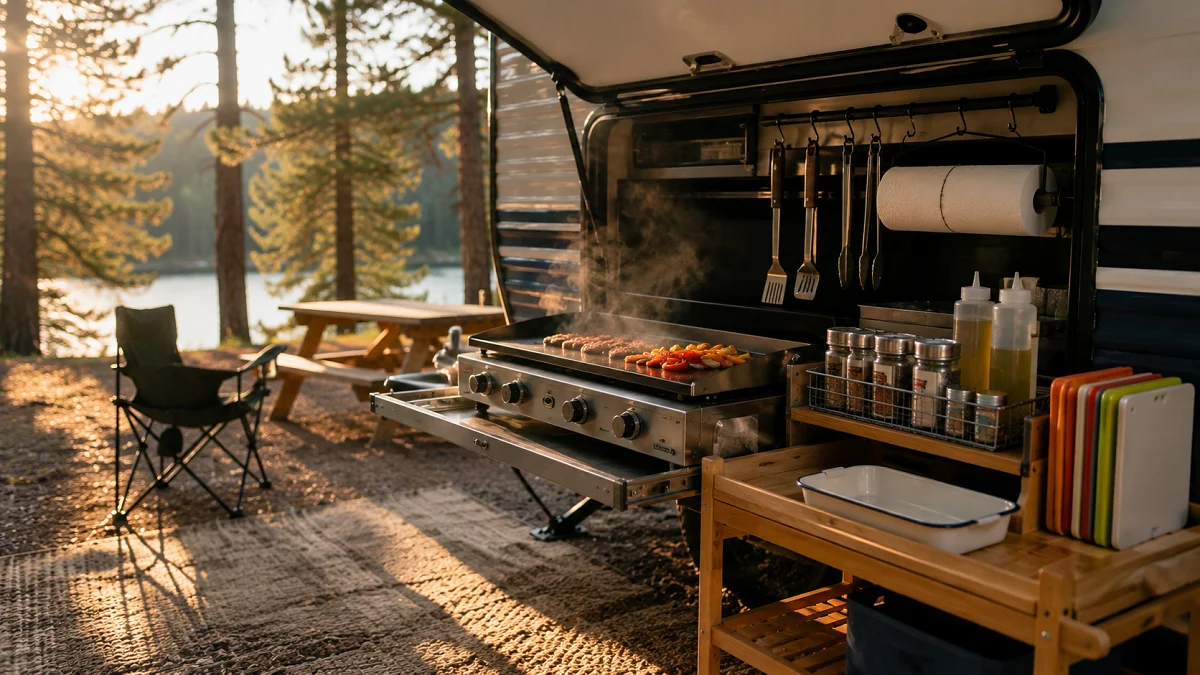
Cooking outside is one of the best parts of traveling in an RV. It keeps heat and strong food smells out of your camper, frees up indoor floor space, and lets you stay out in the fresh air with your family.
Yet, outdoor meal prep can quickly turn frustrating if your gear is unorganized. Running in and out of the trailer for a forgotten spatula, fighting wind gusts that cool down your burner, and scrubbing greasy picnic tables eats into your relaxing campsite time.
A few smart gear tweaks and layout upgrades can completely change your cooking routine. With the right rv outdoor kitchen ideas, you can cut your prep time in half, streamline messy cleanups, and cook delicious meals right at your site without stress.
1. Mount Heavy-Duty Magnetic Tool Bars for Your Spatulas and Knives
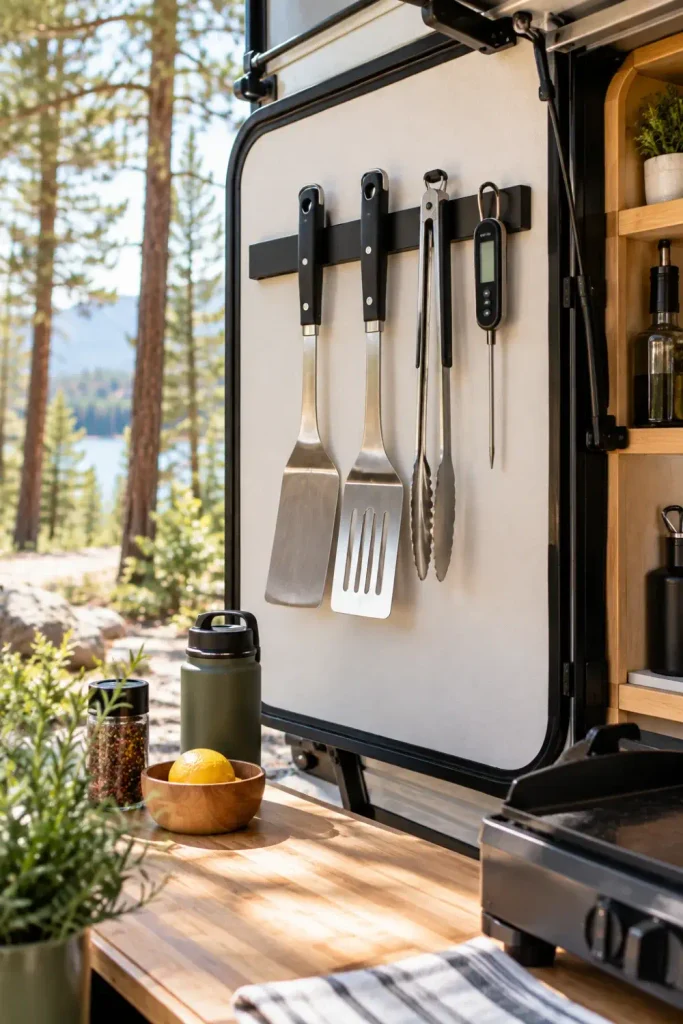
Keeping your metal tongs, spatulas, and chef knives in a deep drawer creates clutter and dulls blades fast. Screwing or mounting a coated magnetic knife bar inside an exterior storage bay door gives every tool an instant, visible home.
You will never have to dig through messy plastic bins with greasy fingers again. Just reach up, grab your turner, and put it right back when you flip your food.
- Pick a coated bar with neodymium magnets so tools do not slide off while you cook.
- Mount the bar on the inside of a bay hatch or along the frame of your slide-out shelf.
- Keep your most-used items on the bar: long griddle spatulas, heavy tongs, and an instant-read meat thermometer.
2. Set Up a Dedicated Two-Bin Wash and Rinse Station on a Folding Stand
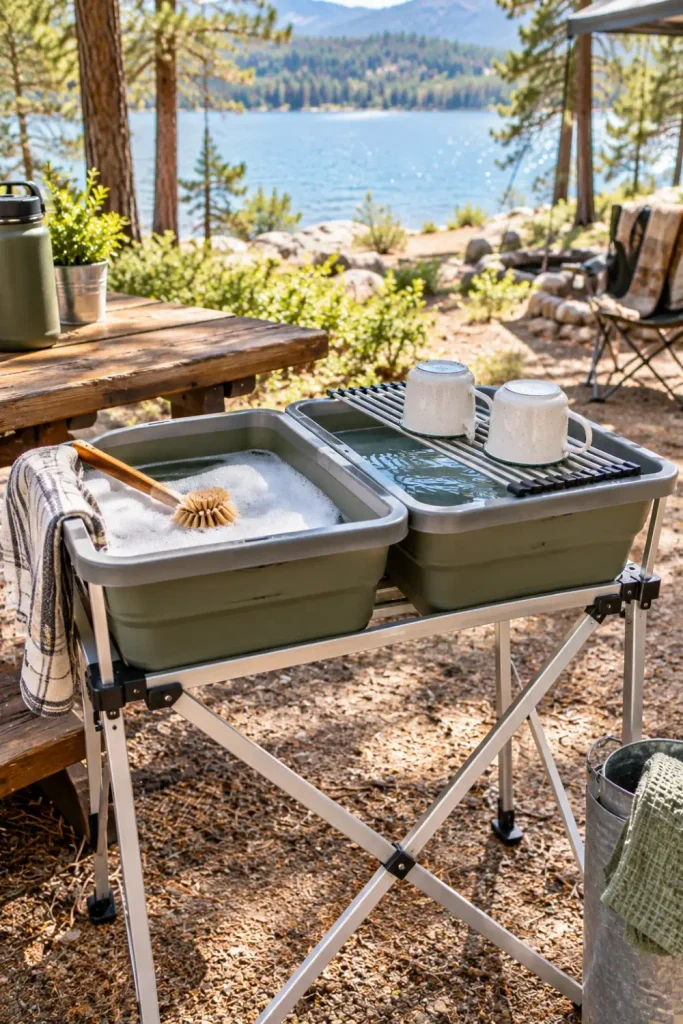
Washing greasy pans inside a tiny camper sink fills your grey tank quickly and splatters water all over your indoor counter. A simple folding camp stand with two shallow plastic basins creates a practical outdoor wash bay.
Fill bin one with warm water and biodegradable camp soap, and fill bin two with fresh rinse water. You can wash dishes outside right next to the picnic table, keeping water use minimal and your camper floor bone dry.
⚠️ Watch Out
Always catch dish runoff in your wash basins. Dump dirty greywater into designated campground utility sinks or RV sewer inlets rather than pouring it onto campsite dirt, which can attract wildlife.
| Wash Station Element | Ideal Setup | Practical Camp Advantage |
| Wash Basin | Collapsible silicone tub | Flattens to 2 inches for easy bay storage |
| Soap Choice | Biodegradable dish liquid | Safe for outdoor environments and quick rinsing |
| Drying Rack | Roll-up stainless steel grid | Sits across the rinse tub to air-dry utensils |
3. Hang an Industrial Tension Rod for Overhead Towels and S-Hook Tongs
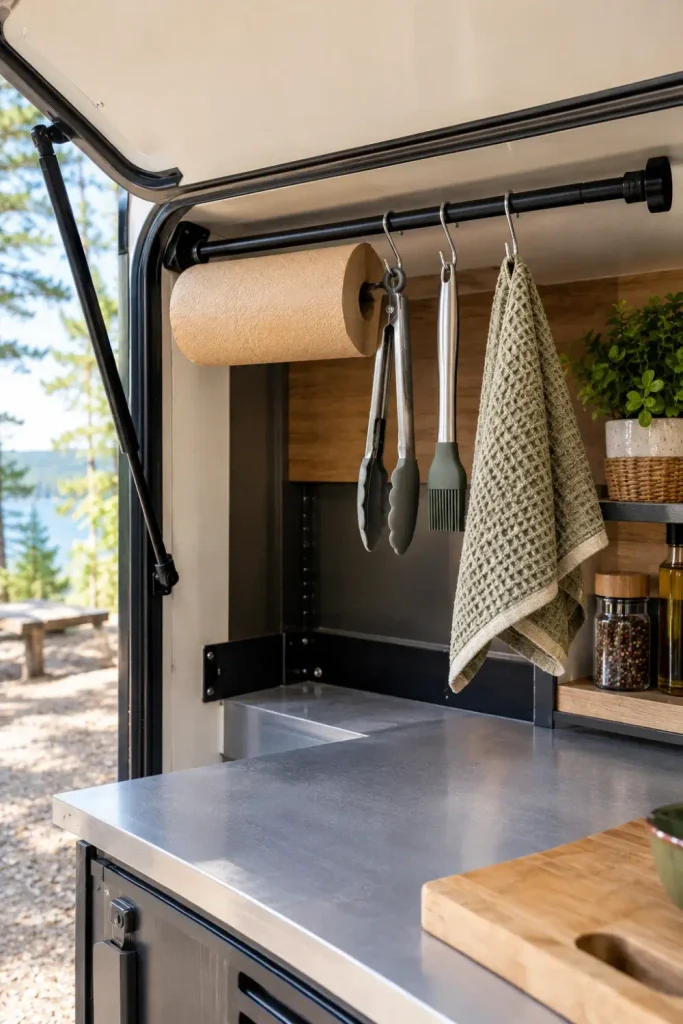
Outdoor counter space disappears rapidly once you set down cutting boards, condiment tubs, and plates of raw burgers. You can reclaim that lost surface by using vertical air space under your outdoor kitchen hatch door or awning arms.
A sturdy shower tension rod set between two interior hatch walls holds paper towels, pot holders, and basting brushes up off your workspace.
Paper towel rolls roll off greasy tables, and wet dish rags take up prime prep space on cutting surfaces.
Everything hangs cleanly at eye level on S-hooks, leaving your fold-out shelf completely clear for active prep work.
- Slide your roll of paper towels directly onto the rod before setting the tension.
- Clip heavy-duty metal S-hooks across the center for pot holders and long spatulas.
- Pop the tension rod down and lay it flat in your front pass-through bay before hitting the road.
4. Run a Low-Pressure Quick-Connect Propane Hose Straight to the RV Tank
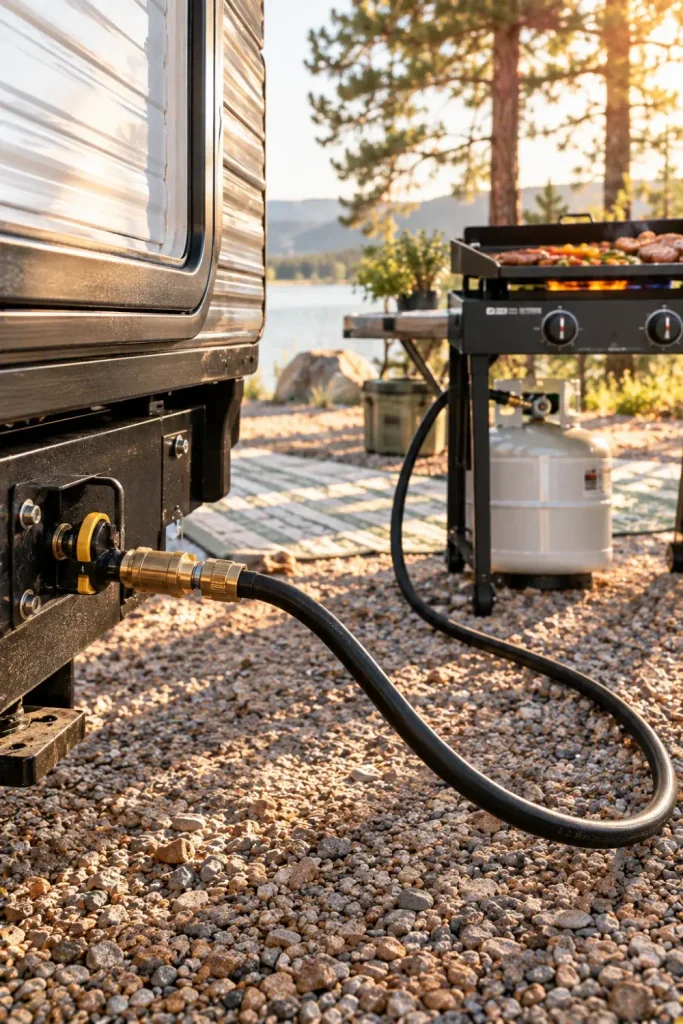
Swapping out disposable 1-pound green propane bottles is expensive, wasteful, and inconvenient when a bottle empties halfway through frying breakfast.
Most modern RVs have an onboard low-pressure propane quick-connect port plumbed into the chassis near the passenger side. Running a 10-foot rubber extension hose directly to your portable griddle or camp burner provides an uninterrupted gas supply right from your rig’s main tank.
Remove the stock regulator from your portable camp stove or griddle using a quick-connect conversion fitting.
Push the brass quick-connect sleeve into the RV chassis port until it clicks firmly into locked position.
Turn the brass shutoff valve quarter-turn inline with the hose and run a soapy water leak test before lighting.
- Always inspect the rubber O-rings on the male fitting for dry rot or dirt grit.
- Keep a dust cap plugged into the RV chassis port whenever the hose is disconnected.
- Choose a hose with a built-in quarter-turn brass shutoff valve for instant emergency cutoffs.
5. Pack a Flat-Pack Collapsible Bamboo Prep Cart Next to the Griddle
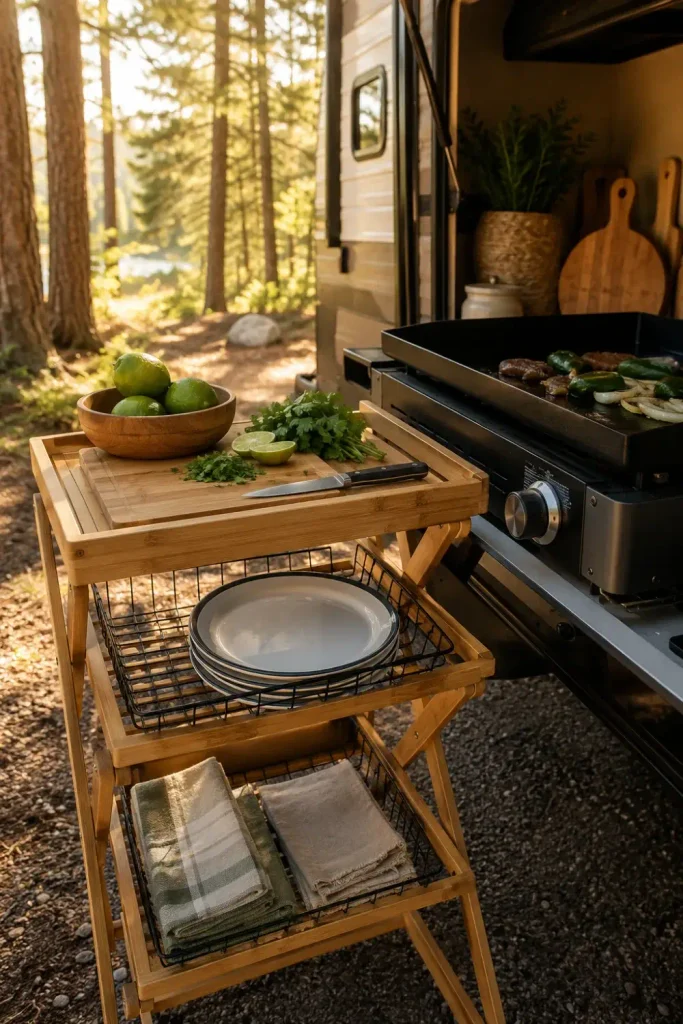
Even the best factory RV outdoor kitchens lack sufficient countertop space once you lay out your seasonings, serving bowls, and cutting boards. Adding a sturdy, collapsible utility cart next to your cooking station gives you a standalone prep island without taking up precious bay room in transit.
Bamboo stands up well to campsite humidity, resists knife scrapes, and wipes clean with a damp towel.
- Unfold the locking legs and ensure the safety pins click completely into place.
- Place the cart on the upwind side of your burner so grease mist does not coat your chopped ingredients.
- Use the bottom wire rack to hold clean serving plates and your dry towel basket.
6. Secure Squeeze Bottles and Oil Cruets in a Wall-Mounted Wire Spice Basket
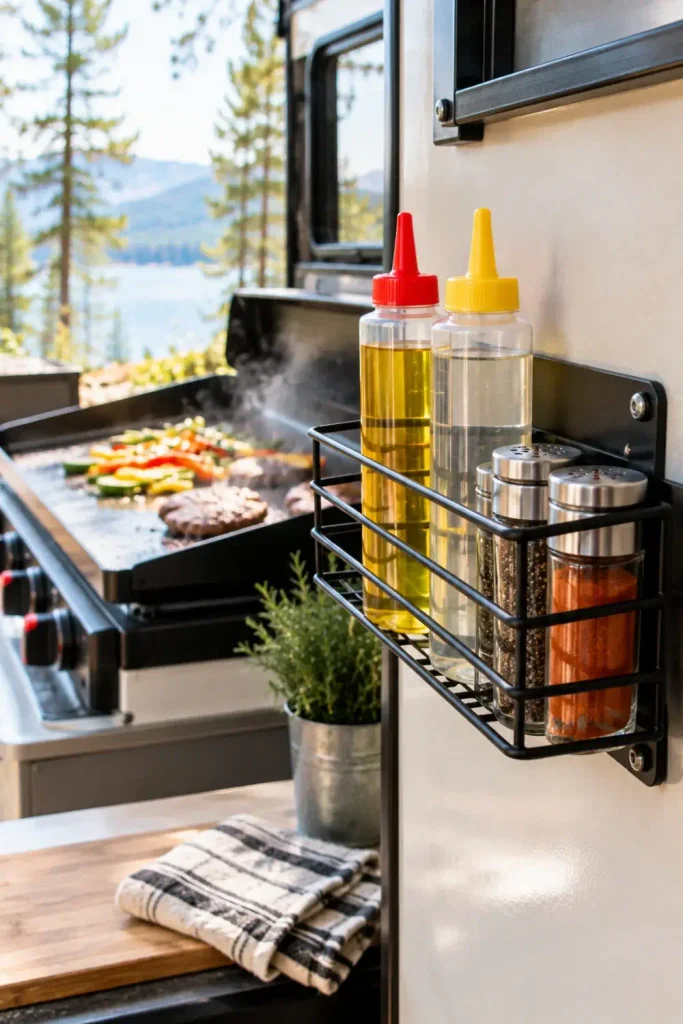
Loose bottles of cooking oil, water, and barbecue sauce tip over the second you bump your camp prep table or roll over an uneven spot on the campsite gravel.
Screw an open wire shower caddy or spice basket directly into the interior framing of your outdoor kitchen slide. Your cooking liquids stay upright, leak-free, and ready to grab with one hand while you work the grill.
Top Squeeze Bottles to Keep Outside
- Choose wide-mouth plastic bottles so they are easy to refill from your bulk pantry jugs inside.
- Cut the nozzle tips back slightly with kitchen shears to allow thicker sauces to flow smoothly.
- Line the bottom of the wire basket with a silicone scrap to catch any stray drips.
7. Clip a Rechargeable Warm-LED Clamp Light to the Awning Arm
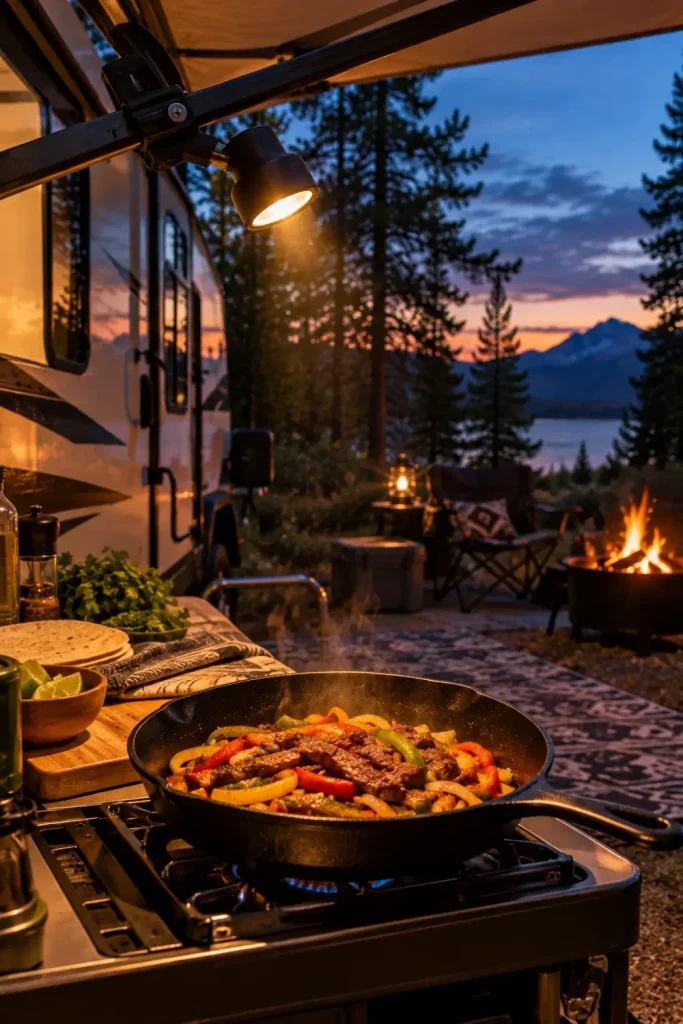
Most factory exterior RV porch lights are bright amber bug lights or cold white floodlights that produce harsh glare without properly lighting your cooking surface.
A battery-powered rechargeable work light with a spring clamp clips onto your awning tube or kitchen hatch rim. It lets you direct a warm, focused beam right over your cutting board and skillet.
Use warm 2700K to 3000K light angled downward directly at your skillet.
Charge it via your RV’s exterior 12V USB ports between cooking sessions.
Do not use cold white floodlights that blind your campsite neighbors.
Avoid lights that attract swarms of moths directly over your open food.
- Look for models with a heavy rubber-coated spring clip that will not scratch paint or awning fabric.
- Set the beam angle behind your head so your body does not cast shadows across the grill.
- Store the light plugged into your outdoor kitchen USB outlet so it is always ready by dinner.
8. Slide Heavy Dutch Ovens and Skillets into a Lidded Tough-Tote on Slide Runners
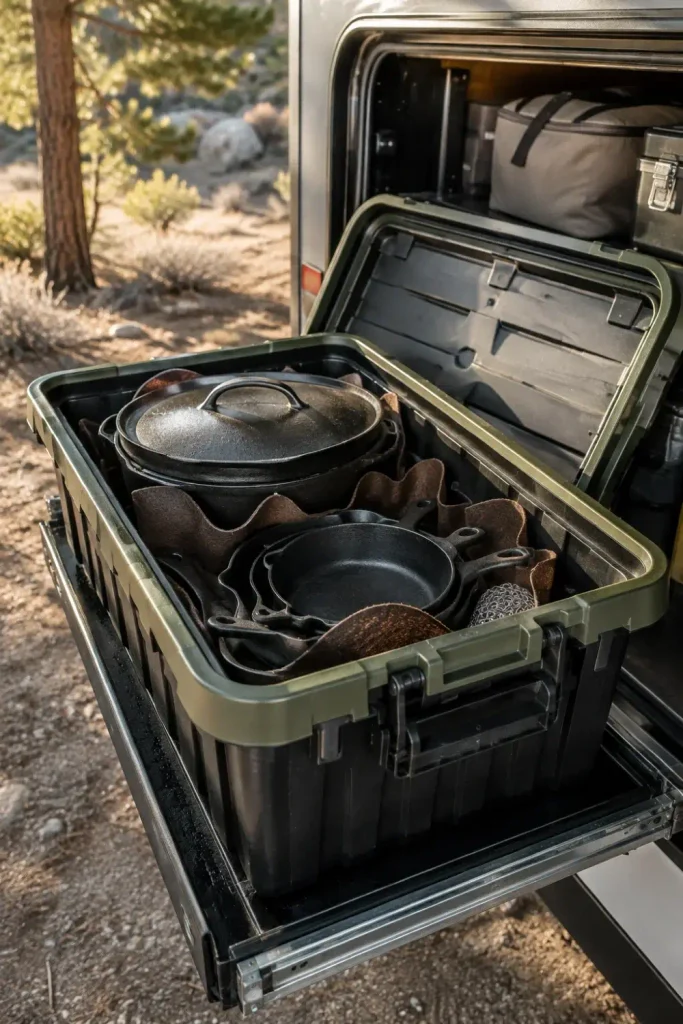
Cast iron is the gold standard for campsite cooking, but storing heavy skillets inside tall camper cabinets can bend hinges or crack cabinet frames on bumpy backroads.
Keeping your outdoor cookware in a rugged, lidded plastic tote in an exterior pass-through bay keeps heavy cast iron down low over the trailer axles where the ride is smoother.
| Storage Method | Physical Effort | Rig Impact & Protection |
| Interior Upper Cabinets | High lift; heavy reach every meal | Hinges loosen; shifts during travel |
| Lower Pass-Through Tote | Waist-height pull from exterior | Heavy weight sits safely on trailer floor |
| Under-Bed Storage | Requires lifting bed mattress | Traps cast iron cooking smells indoors |
- Place silicone pan dividers or cardboard rounds between stacked skillets to stop metal rattling.
- Pack a box of baking soda and a chainmail scrubber directly inside the tote for quick pan maintenance.
- Keep the tote near the kitchen-side baggage door so you never have to crawl into the bay.
9. Drop Heat-Resistant Silicone Mats Over the Entire Prep Counter
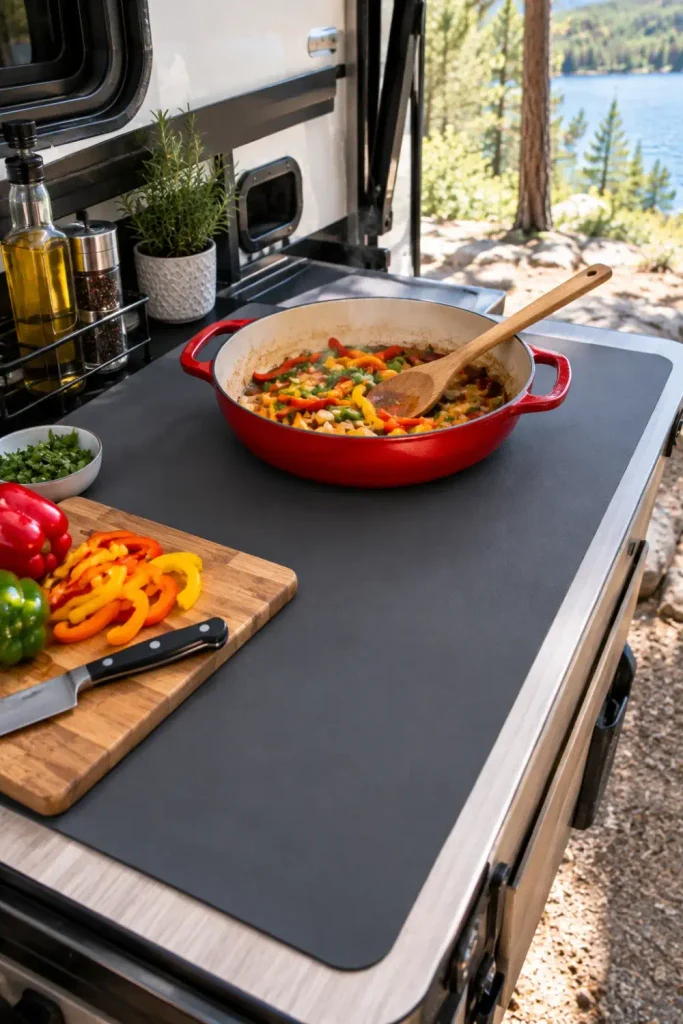
Outdoor laminate counters and pull-out metal shelves can scratch easily and degrade under direct summer sunlight. Dropping a pair of extra-large silicone pastry or grilling mats across the counter creates a clean, durable surface.
Silicone stops hot pans from scorching composite surfaces and keeps cutting boards from sliding around while you chop vegetables.
Silicone mats protect exterior camper finishes from hot pans and wash clean in seconds with a simple soapy wipe.
- Pick mats with raised spill rims around the edges to catch marinade leaks and tomato juice.
- Roll them up loosely and slide them into an exterior bay corner when packing up.
- Use food-grade silicone mats that can handle temperatures up to 450 degrees Fahrenheit.
10. Use a Pop-Up Wire Mesh Food Tent Over Every Prepared Dish
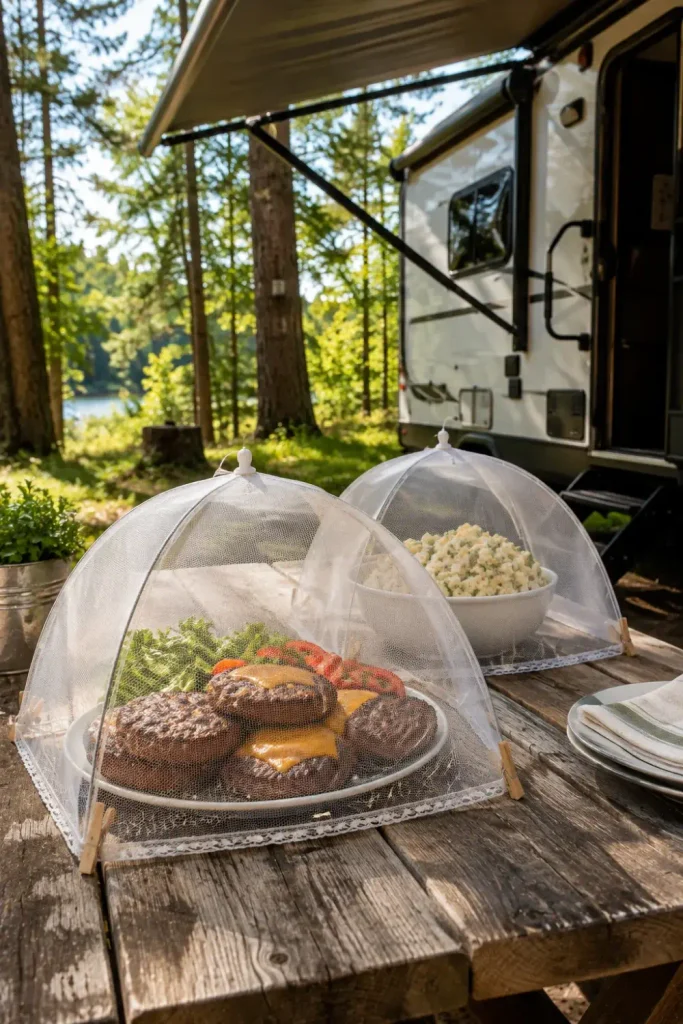
Flies, bees, and falling pine needles can spoil a bowl of grilled chicken or side salad quickly. Lightweight pop-up umbrella-style mesh food tents sit over plates and platters while you finish cooking the rest of the meal.
They take up almost zero storage space when folded down and save you from having to wrap every dish in aluminum foil.
💡 Quick Tip
Clip two wooden clothespins to the bottom edge of your mesh food tent. The tiny bit of extra weight stops sudden campsite breezes from blowing the tent off the picnic table.
- Open the food tent by pulling the top cord until it clicks firmly into place.
- Set the tent directly over your finished food platters the second they come off the grill.
- Wipe the mesh down with a damp cloth after use before pulling the release pin to fold it flat.
11. Mount a Heavy-Duty Bungee Cord Across the Paper Towel Holder
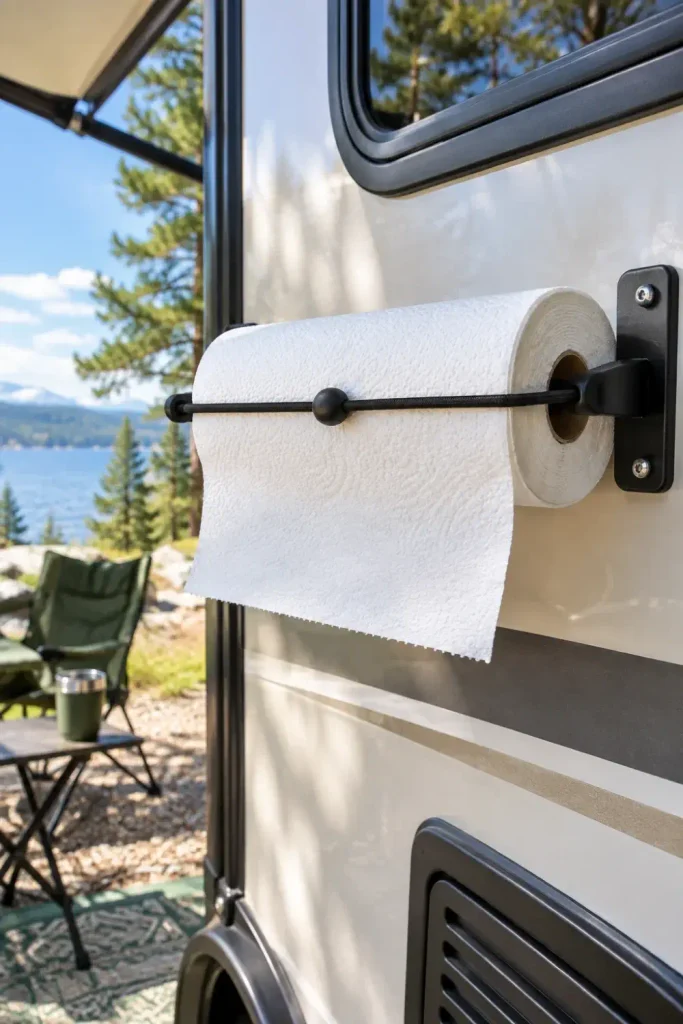
Campsite wind loves unraveling a full roll of paper towels, leaving dozens of wasted sheets blowing across the gravel before you can grab them.
Running a short bungee cord tightly across your exterior paper towel bracket creates instant friction against the roll. The tension lets you tear off one sheet with one hand while holding a greasy pan with the other.
A gust of wind catches the paper roll, spinning twenty feet of towels across the campground dirt.
Constant bungee tension holds the paper roll flat, allowing clean, controlled single-sheet tears in any wind.
- Pick a 10-inch or 12-inch ball bungee cord that matches your paper towel holder width.
- Thread the cord directly over the roll face and hook the ends around the mounting brackets.
- Adjust the tension as the roll gets thinner to maintain consistent friction against the roll.
12. Dedicate a Weatherproof Poly Caddy for Full-Meal Table Condiments
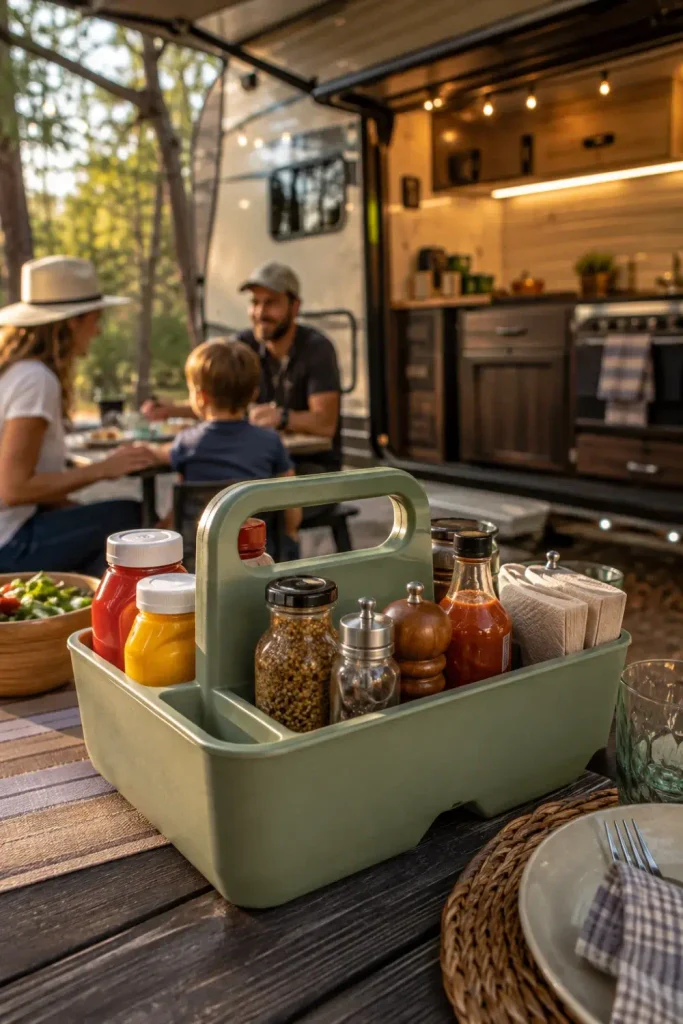
Few things interrupt an outdoor meal faster than walking back inside the camper five times for ketchup, mustard, napkins, and hot sauce.
A divided plastic cleaning or shower caddy with a sturdy center handle makes a simple condiment tote. Keep it stocked with your family’s favorite sauces and meal essentials so dinner setup takes one trip.
What to Pack in the Meal Caddy
- Store the caddy on a low shelf in your outdoor kitchen mini-fridge if it holds dairy or mayo.
- Wipe the caddy base down with hot water weekly to keep sticky ring marks off your table.
- Carry the whole caddy straight to the picnic table when serving food, then return it in one go.
13. Install Fold-Down Drop-Leaf Hinges to Extend Exterior Counter Space
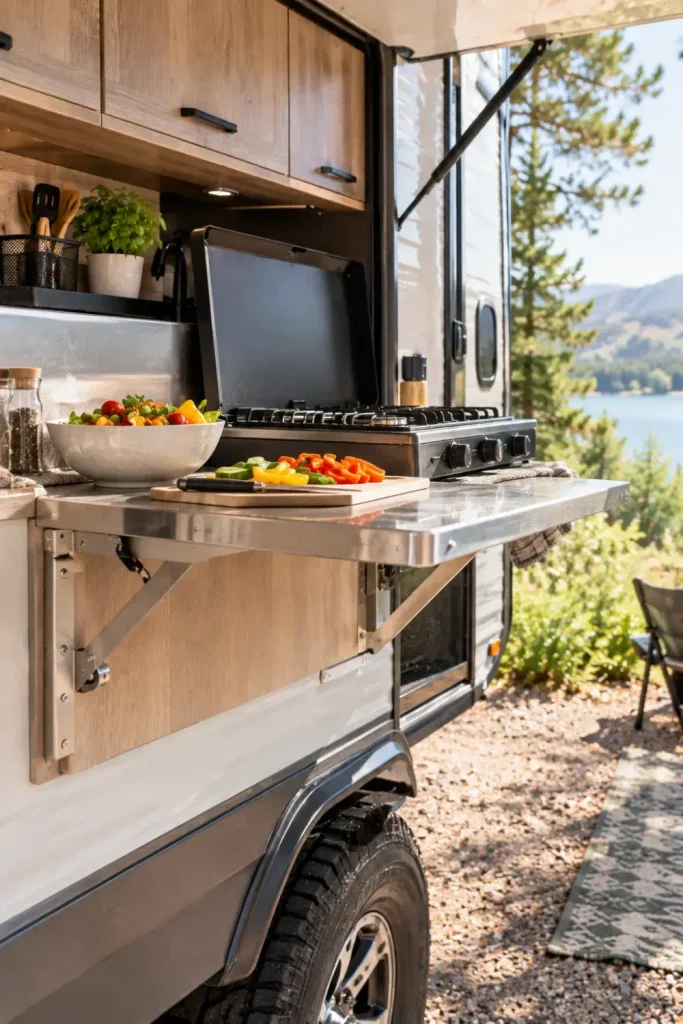
If your RV outdoor kitchen has a small slide-out shelf with just enough room for a stove, you can easily add an extra foot of prep space.
Mounting a pair of locking, heavy-duty stainless steel folding shelf brackets to the side of the existing cabinet gives you a flip-up wing. Top it with a lightweight poly cutting board to create an instant staging spot for spices, bowls, and tools.
- Check the clearance inside your baggage compartment to make sure the folded leaf will not hit the door frame.
- Fasten the drop-leaf brackets into solid cabinet framing using stainless wood screws.
- Lift the shelf up until both bracket arms click loudly into their 90-degree locked position.
14. Use Color-Coded Cutting Mats That Slide Flat Against the Bay Wall
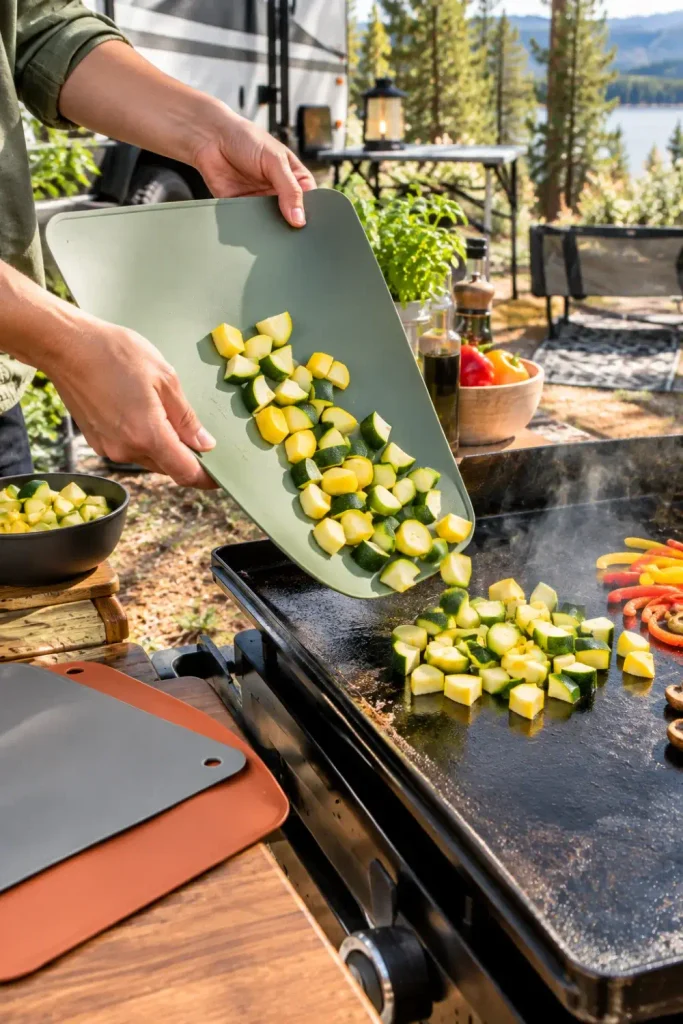
Bulky wooden butcher blocks look nice on kitchen counters, but they are heavy, hard to sanitize without running water, and prone to warping in outdoor humidity.
Flexible, color-coded plastic cutting mats give you multiple sanitary prep surfaces in a package that weighs just ounces. You can dedicate red for raw meats, green for produce, and yellow for cooked foods.
| Cutting Board Type | Weight & Storage | Cleanup & Campsite Sanitization |
| Heavy Wood Block | 5–8 lbs; takes up valuable drawer space | Hard to sanitize without lots of hot running water |
| Flexible Plastic Mats | Under 1 lb; stores flat against bay walls | Hand-wash in seconds; bends to funnel food into pans |
| Glass Cutting Board | Fragile; risks shattering on bumpy roads | Dull knife blades quickly; slippery when wet |
- Slip the flat mats between the side of your outdoor fridge and the cabinet wall for storage.
- Curl the flexible mat into a funnel to dump chopped onions directly into your skillet without spilling.
- Disinfect the mats with a quick spray of diluted white vinegar and hot water after each use.
15. Run a 5-Gallon Gravity-Fed Beverage Jug with a Lever Spigot for Hand Rinsing
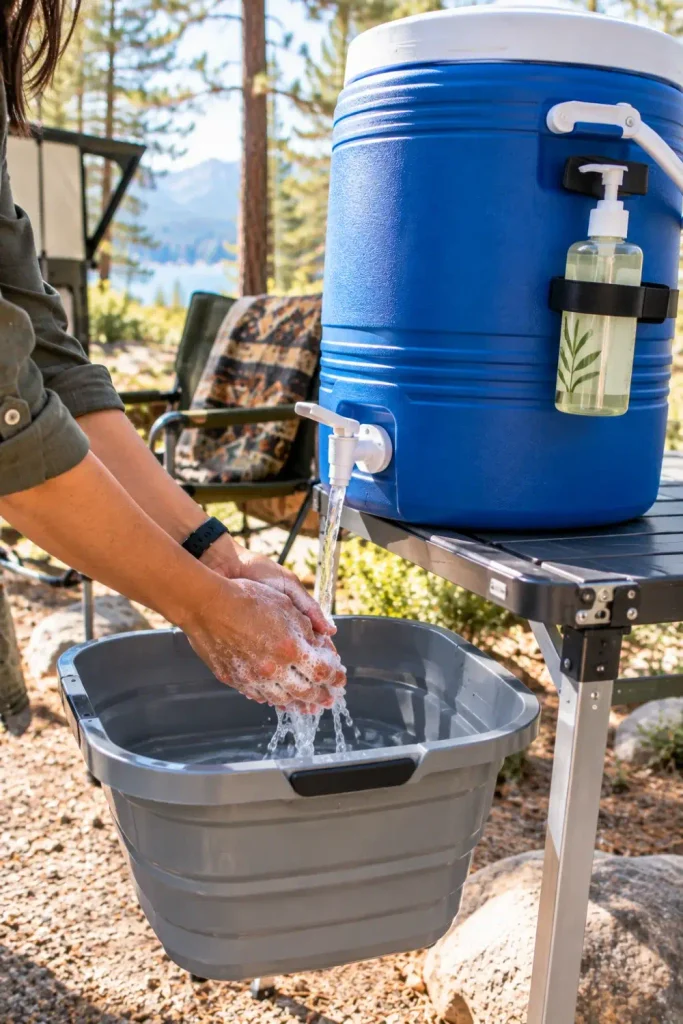
Washing raw burger juice off your hands should not require turning camper door handles and tracking dirt onto indoor rugs.
Setting a dedicated 5-gallon insulated beverage cooler on the corner of your outdoor table gives you an instant, pressurized hand-washing sink. Look for a model with a continuous-flow lever spigot rather than a push button so you can wash both hands at the same time.
- Fill the jug with warm water from your RV outdoor shower hose on brisk mornings.
- Place a small plastic tub directly underneath the spout to catch hand-rinse runoff.
- Hang a cloth hand towel from the cooler handle using a simple carabiner clip.
16. Keep a Dedicated Griddle Scraping and Steaming Squeeze Bottle Kit
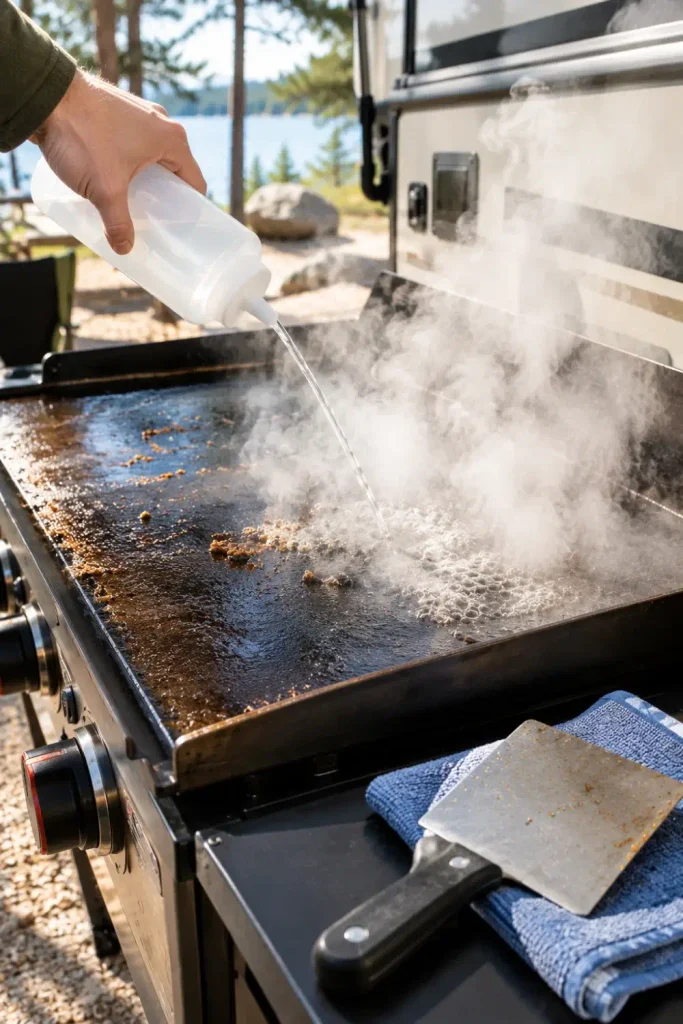
Flat-top griddles are popular in modern RVs, but cleaning them improperly can ruin their non-stick seasoning and leave a messy grease buildup.
A dedicated cleaning kit kept in an exterior compartment makes post-dinner cleanup take less than two minutes. All you need is a scraper, a water squirt bottle, and a pack of heavy paper towels.
Scrape loose food bits forward into the grease catch trough while the steel griddle is still warm.
Squirt cold water across the surface to produce steam that lifts stubborn sugars and marinades.
Wipe clean with a folded shop towel, then rub on a thin layer of oil to protect against rust.
- Use a scraper with beveled edges so you do not nick or gouge the cooktop metal.
- Avoid using cold water on smoking-hot cast iron to prevent thermal shock and metal warping.
- Store your cleaning tools together in a metal loaf pan to keep grease off your storage shelves.
17. Hook a Collapsible Mesh Pop-Up Hamper for Bagged Trash to the Table Leg
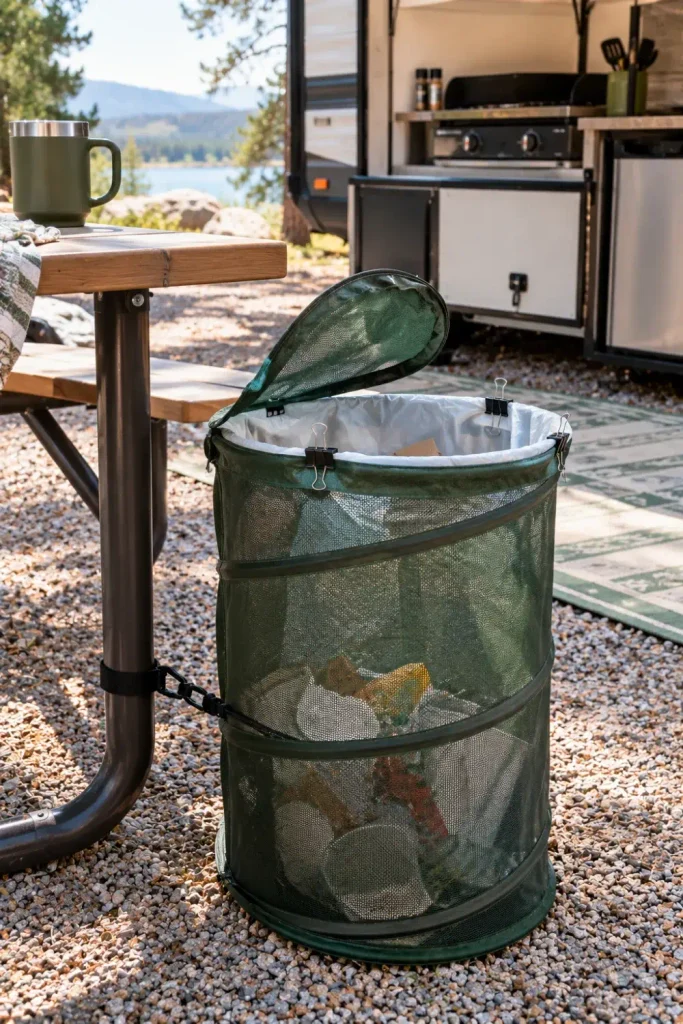
Tying a plastic grocery sack to the edge of your camp table often results in torn handles, spilled trash, and uninvited visits from neighborhood raccoons.
A spring-loaded collapsible mesh laundry hamper works as a stable, lightweight outdoor trash can. Slip a standard 13-gallon kitchen trash bag inside and secure the rim with two heavy binder clips.
Anchor the hamper handle to a picnic table leg using a reusable rubber gear tie.
Tie the garbage bag up and place it in the campground dumpster every night.
Do not leave thin grocery sacks hanging where wind gusts can scatter wrappers.
Never leave food scraps outside overnight near your sleeping quarters.
- Pick a zippered pop-up hamper model to keep flies and yellowjackets out of your cans during dinner.
- Place a flat stone or clean brick in the bottom of the hamper to keep it standing in stiff breezes.
- Collapse the hamper into a flat disc and slide it under your outdoor drawer when packing up.
18. Store Ready-to-Use Dry Rubs and Seasoning Blends in Stackable Twist Tins
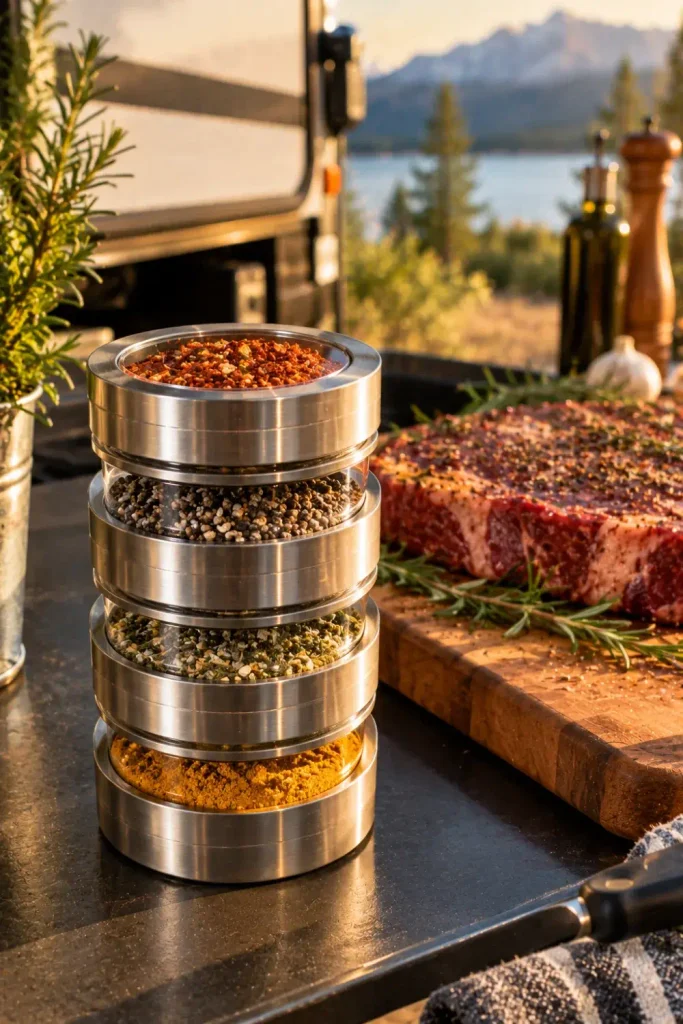
Original spice containers from the grocery store take up unnecessary cabinet height and are prone to spilling their powder caps on the road.
Transferring your main barbecue seasonings, taco spices, and garlic salts into shallow stainless steel twist-top tins keeps your outdoor spices compact and organized. Magnetic-backed tins stick directly to the interior frame of your kitchen bay hatch.
📌 Good To Know
Outdoor morning humidity can make powdered seasonings clump quickly. Drop a food-safe silicone desiccant packet or a few dry grains of rice into each tin to keep your rubs flowing freely.
- Use a fine-tip paint marker to write blend names and dates on the bottom of each tin.
- Choose tins with clear window lids so you can see your spice levels at a glance while cooking.
- Keep a small measuring spoon clipped to the tin holder so you never have to guess quantities.
19. Keep an Infrared Thermometer Gun in the Utensil Caddy
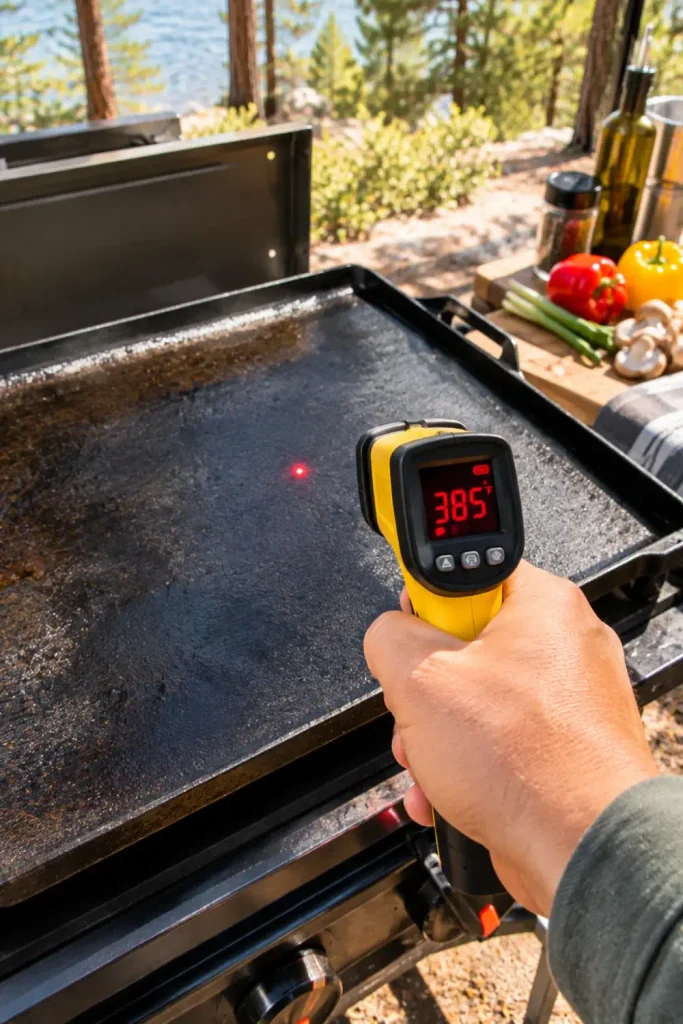
Throwing burgers or pancakes onto an outdoor griddle before it reaches proper temperature leads to torn food and unevenly cooked meals. Wind patterns and ambient air temperatures can make dial thermometers inaccurate.
An inexpensive infrared thermometer gun gives you an instant, exact surface temperature reading of any point on your cast iron skillet or flat top.
Point-and-click surface temperature readings eliminate guesswork, so you never put delicate foods onto cold metal.
- Aim the infrared laser dot two to three inches above the metal cook surface.
- Check both the center and the corners to locate heat zones across your burner setup.
- Wait until your flat-top shows between 375 and 400 degrees Fahrenheit before dropping burger patties.
20. Lay an Open-Weave Outdoor Ground Mat Directly Below the Cooking Station
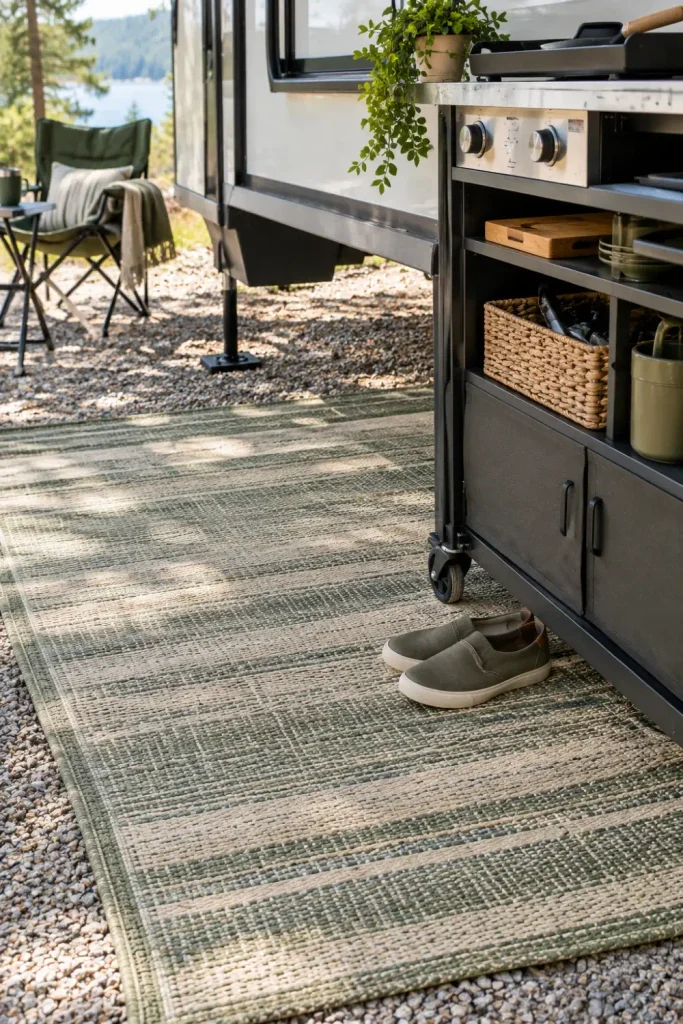
Grease mist, oil spatters, and boiling water drips can create slick mud puddles right where you stand to cook. An open-weave poly patio mat placed directly in front of your outdoor kitchen slide gives you a clean, level place to work.
Water, sand, and tiny dirt pebbles fall right through the porous weave instead of collecting on top of the mat.
Why Ground Mats Help Your Kitchen Area
- Drive heavy plastic tent stakes through the corner grommets to anchor the mat in windy spots.
- Use a mat woven from recycled polypropylene tubes that will not absorb grease or mildew smells.
- Spray the mat down with your RV exterior rinse hose on travel morning and let it air dry.
21. Install Magnetic Cabinet Catches to Keep Hatch Doors Firmly Latched Upwards
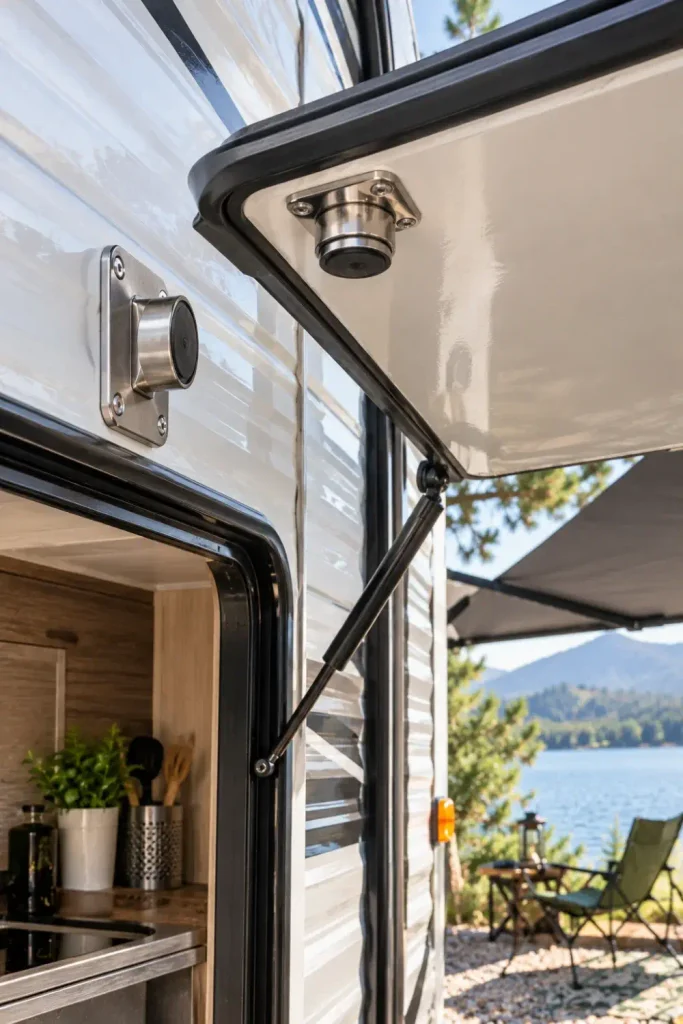
Factory plastic clips designed to hold exterior kitchen doors open get brittle in the sun and can fail in strong gusts of wind, causing the heavy door to drop on your head while you are cooking.
Replacing worn plastic latches with stainless steel magnetic catches gives you a dependable, automatic hold. The strong magnets latch tightly the instant you push the door up, keeping your outdoor workspace open and safe.
Sun-baked plastic clips snap in sudden gusts, dropping the heavy metal hatch door onto your head while you cook.
Industrial rubber-encased magnets hold the door securely open, even in strong winds, without rattles or slipping.
- Fill old screw holes with marine-grade silicone sealant before driving new screws into your sidewall.
- Pick rare-earth magnetic catches rated for at least 30 pounds of holding force.
- Mount the base bracket firmly to an internal wall stud or reinforced aluminum backer.
Practical Setup for Relaxed Camp Meals
A functional outdoor setup does not require buying an expensive new camper or replacing every piece of gear. Pick two or three of these practical rv outdoor kitchen ideas to try on your next trip, whether that means hanging a tension rod for paper towels or hooking up a low-pressure propane hose.
Small adjustments that keep tools off your counter and streamline your cleanup make outdoor cooking fun instead of a chore.
Save this list to your RV boards on Pinterest so you have these practical outdoor cooking hacks handy for your next campsite setup.

