
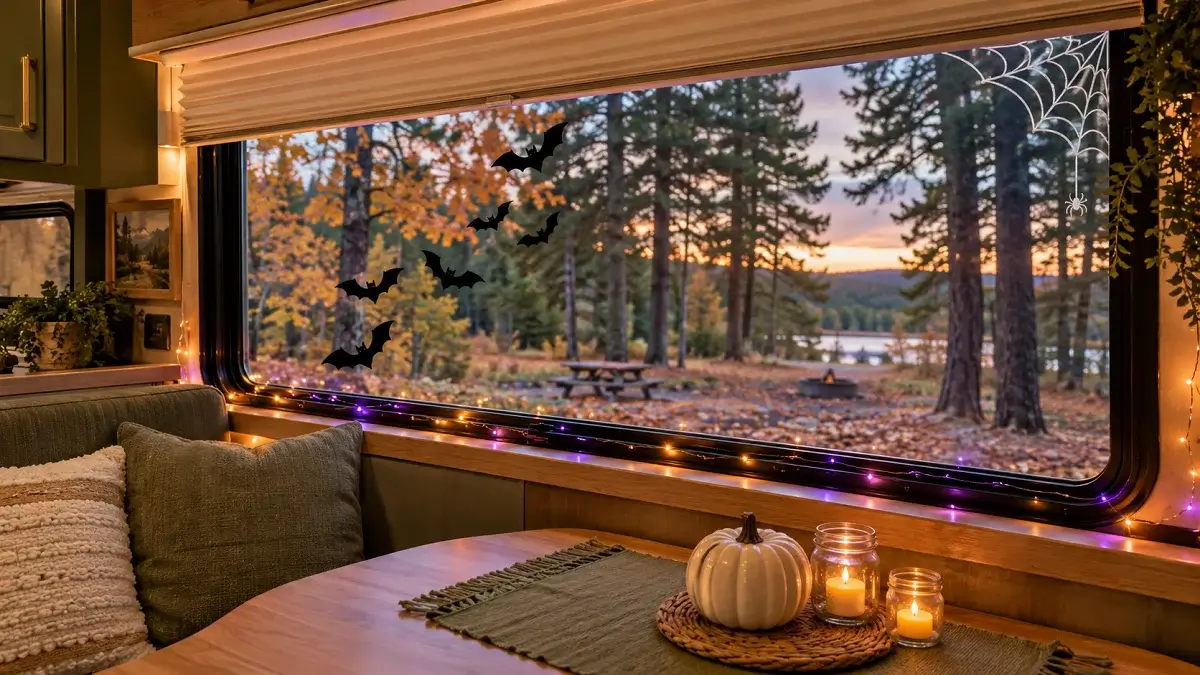
You pull into the campsite just as dusk settles between the pine trees. The campfire smoke smells sweet, dry leaves crunch under your camper tires, and the whole campground feels quiet and cozy. Then you step inside your rig, look at those bare factory blinds, and realize your rig looks completely plain from the gravel loop outside.
Standard holiday decorations rarely work inside a camper. Bulky plastic pumpkins hog valuable bench storage, sticky adhesive hooks risk pulling thin laminate right off the paneling, and delicate glass pieces never survive a single bumpy travel day.
Decorating your camper windows gives you maximum festive impact without eating an inch of your actual living space. These practical rv halloween window decor ideas stay secure on the road, protect your factory window tint, and pack down completely flat when Sunday check-out rolls around.
1. Static-Cling Bat Silhouettes on Frosted Valance Glass
A swarm of deep black bats scattered across your largest living area window creates an instant eerie mood. Because static film uses zero glue, it clings tightly to the smooth glass without bubbling or leaving sticky residue on your factory tint.
The real trick is backlighting. When your interior ceiling puck lights glow in the evening, the silhouettes stand out sharply to anyone walking their dogs around the campground loop.
- Cut various sizes from black static cling rolls using sharp craft scissors.
- Spray the window pane with a tiny mist of plain tap water before applying.
- Smooth each piece flat using the edge of an old credit card to push out trapped air.
Paper bats taped with clear tape that curl up from morning window condensation and leave crusty glue behind.
Water-applied static cling vinyl that peels off cleanly, wipes dry with a towel, and rolls up flat inside a cardboard tube for next season.
When it is time to hitch up and leave, simply peel them from the corner and slap them back onto their original backing sheets.
2. Battery Fairy Lights Tucked Behind Accordion Day-Night Shades
Camper accordion blinds naturally trap soft light between the fabric pleats and the glass. Running a strand of warm amber or purple micro wire lights along the bottom sill turns the entire window frame into a glowing lantern.
Thin copper wire lights weigh almost nothing. You can tuck the wire along the inner aluminum track without snagging the tension strings that operate your blinds.
- Unroll a ten-foot copper strand with warm orange or purple micro LED bulbs.
- Weave the strand loosely along the lower aluminum sill beneath the pleated blind edge.
- Anchor the slim battery pack to the bottom corner frame with a single strip of removable hook-and-loop tape.
💡 Camper Safety Tip
Always pick battery strands with an automated six-hour built-in timer. You can set them at dusk, and they will turn off automatically before you fall asleep without draining your house batteries.
The pleats soften the direct bulbs into a smooth, ambient camp glow that looks upscale from outside your slide-out.
3. Black Cardstock Peeking Monsters Tucked into Window Track Gaskets
Kids walking through the campground love spotting little cartoon monsters peeking over the sill. Cardstock silhouettes sit neatly inside the lower felt gasket of sliding RV windows, which means you do not need any adhesives at all.
The black silhouettes stand out cleanly during daylight and turn into pitch-black shadow figures once your interior lamps come on at dinner.
- Heavier Paper: Use eighty-pound cardstock so damp morning air does not cause the paper ears to wilt.
- Track Tuck: Slide the bottom half-inch straight down into the rubber window channel.
- Travel Routine: Slide them out in five seconds before sliding your dinette room back inside.
Keep your silhouettes around six to eight inches tall so they do not block your daytime views of the campsite trees.
4. Hanging Mini Knit Pumpkins from Tension Rod Valance Hooks
Fabric window valances in travel trailers are notoriously fragile. Instead of piercing the fabric with metal pins or tacking clips onto thin wood framing, use a lightweight spring tension rod tucked directly underneath the valance box.
You get a solid, temporary mounting bar that holds small plush or knit pumpkins without leaving any holes behind.
Twist a slim spring tension rod until it sits firmly between the interior side walls of the window valance box.
Tie four or five lightweight knit yarn pumpkins to lengths of natural jute twine at varying drop heights.
Loop the twine over the rod and pull your accordion blinds down slightly to hide the upper mounting bar.
The plush yarn texture adds wonderful warmth to cold camper glass, and the soft pieces will not shatter if one drops onto the floor while you are driving down a washboard road.
5. Removable Liquid Chalk Marker Webs on the Main Entry Door Window
The frosted vertical window on your camper door is prime decorating real estate. Drawing giant, sweeping cobwebs directly onto the glass with white liquid chalk gives you a custom hand-drawn look in under ten minutes.
Liquid chalk markers dry completely matte, will not smear when people brush past the screen door, and wash away with plain warm water.
Draw only on smooth interior glass surfaces that stay shielded from rain.
Wipe off with a damp microfiber cloth and dry thoroughly with a paper towel.
Never use chalk markers over tinted aftermarket film, which can trap white pigment.
Avoid oil-based paint pens that require harsh solvents to dissolve.
- Sketch radiating spokes from the top corner of the glass outward toward the center.
- Connect the spokes with gentle sagging arcs to form the web pattern.
- Add a small dangling chalk spider hanging near the bottom lock handle.
The crisp white lines catch the glow of your camper porch light beautifully without blocking you from seeing who is knocking outside.
6. Cheesecloth Mummy Wraps Secured with Mini Suction Cups
Inexpensive grade-10 cheesecloth creates a gauzy, antique mummy texture across your wide dinette window. When stretched loosely across the glass, the open weave lets natural daylight filter into your breakfast booth while still giving you cozy privacy from the gravel campsite road.
Because cheesecloth is practically weightless, clear mini craft suction cups hold the drape tightly against the inner glass without pulling loose during chilly fall nights.
Camper Supply Checklist
- Cut the fabric into slightly jagged strips rather than straight ribbons.
- Crisscross the pieces diagonally across the window frame to form mummy bandages.
- Leave a small center opening between the layers so the two giant eyes can peer out into the dark.
When your camp trip wraps up, bundle the cloth into a small zip bag. It takes up less room in your under-bed storage bin than a pair of wool socks.
7. Window-Frame Burlap Bunting Strung with Felt Candy Corns
Rustic burlap blends naturally with the wood tones and warm neutral walls of modern camper interiors. A slim bunting garland strung right along the upper edge of your slide-out window brings autumn festivity without feeling childish or cluttered.
Felt shapes stay soft and silent against the wall, so you will not hear tapping noises when a crisp breeze blows through the screen vents at night.
- Mount two small clear removable cable clips on the outer plastic trim of your window box.
- String lightweight jute cord taut between the hooks, avoiding any moving slide seals.
- Space felt candy corn triangles three inches apart along the cord using wooden mini clothespins.
Because felt does not wrinkle permanently, you can leave it rolled loosely around a paper towel tube during your drive to the next state park.
8. Cardboard Haunted House Skyline Taped to the Dinette Sill
A silhouette skyline of crooked roofs, spooky chimneys, and bare twisted branches turns your dinette window into a moody storybook scene. Sitting right along the bottom sill, the cutout frames your daytime forest views without blocking natural light.
Cardboard gives you crisp, sharp lines that stay upright without flopping over when the camper furnace cycles on and circulates warm air.
| Material | Camp Performance |
|---|---|
| Standard Printer Paper | Sags quickly from morning moisture that gathers on glass panes. |
| Recycled Cereal Box Cardboard | Holds rigid roof points, cuts easily with craft blades, and resists curling. |
| Heavy Black Foam Board | Sturdy and 100% light-blocking, but bulkier to store when packing up. |
- Trace simple gable peaks, shuttered dormers, and gnarled branches onto the unprinted side of flattened food packaging boxes.
- Cut along your outlines with an exacto blade, cutting small squares for glowing house windows.
- Fasten the bottom edge securely to the window frame with small squares of blue painters tape.
Backlight the cutout with a low-output battery puck light set on the windowsill to cast long rooftop shadows against the ceiling.
9. Warm Amber Tea Lights Inside Clear Mason Jars on the Slide-Out Ledge
Small glass canning jars lined with battery-powered tea lights create a welcoming row of lanterns along the deep wooden sill of your dinette slide-out. Amber LED flickers mimic real flames while keeping your enclosed camper interior completely safe from fire hazards.
Wrapping the outside of each jar with a strip of black lace or orange tissue paper turns standard kitchen jars into glowing campsite lanterns.
Never burn open-flame wax candles near camper blinds or curtains. Compact camper layouts have high airflow and sensitive propane smoke detectors that trigger instantly.
- Place three wide-mouth, half-pint jars evenly across the window sill.
- Drop a warm LED flicker candle into each jar base.
- Anchor the jar bottoms to the sill with a small coin of museum putty so they stay upright if someone bumps the table.
When packing up for a travel day, stow the jars inside your kitchen dish crate or wrap them in hand towels so they do not clatter against each other.
10. Spooky Vinyl Decal Faces Applied Directly to Outside Glass
Applying expressive monster faces or smiling jack-o’-lantern grins to the exterior face of your camper windows makes an impression across the whole campground loop. Exterior placement prevents interior glare, ensuring the designs show clearly even under bright afternoon sun.
Removable outdoor-grade craft vinyl adheres smoothly to clean automotive glass and handles unexpected rain or morning dew without peeling away.
⚠️ Temperature Watch Out
Only stick or peel vinyl decals when the outside glass is between 50°F and 80°F. If the glass is freezing cold, the decal backing gets brittle; if the glass is baking in direct summer sun, the adhesive can leave tacky residue on the window.
- Wipe the outside window surface clean with rubbing alcohol on a microfiber towel to remove road dust.
- Peel the decal backing slowly, applying the vinyl from top to bottom with steady thumb pressure.
- Rub the graphic down firmly to ensure the edges seal against rain run-off from the camper roof gutters.
When it is time to remove them, warm the vinyl slightly with a travel hair dryer or wait until midday sun softens the film, then lift the edge with your fingernail.
11. Hanging Spider Webs Stretched Across Wire Plant Baskets in the Screen Track
Stretching spider web material directly across open RV window screens can catch annoying fibers in the fine mesh. Hanging small half-round wire planter baskets right along the upper window frame gives you a sturdy, contained anchor point for wispy cobwebs without touching the fragile screen cloth.
These baskets create real three-dimensional depth between your glass and your interior shades, giving plastic spiders a realistic habitat that looks spooky under evening cabin lights.
- Hang a wire basket from the top valance corner using a removable clear suction cup.
- Tease out a small handful of synthetic web material until it looks almost transparent.
- Clip lightweight plastic spider rings into the wire grid so they hang securely over the glass.
When packing down the trailer, snip the webs with scissors and pack the flat wire frames right into your pantry basket bin.
12. Autumn Leaf and Paper Ghost Garland Draped Over the Egress Blind
The emergency exit window in your bedroom or rear slide often looks cold and utilitarian. Dressing the top frame with a garland of pressed paper leaves and small floating tissue ghosts turns a plain safety window into a warm seasonal focal point.
Paper and dried leaves weigh virtually nothing, so you can drape the whole line over the upper blind hardware without using any heavy hooks or nails.
Quick Pack Supply Kit
- Tie the ghost heads onto the twine line every six inches using black thread.
- Draw tiny oval eyes on each tissue ghost with a fine black gel pen.
- Drape the garland across the window, keeping the exit latch handle completely clear of cords.
Because tissue and cotton compress down completely, the entire garland folds flat inside a small manila folder tucked beneath your camper mattress.
13. Glow-in-the-Dark Skeleton Cutouts Hanging by Invisible Illusion Cord
Suspended skeleton figures floating between the window glass and interior day shades produce a fun, eerie presence after dark. Using clear nylon illusion cord makes the bones appear as if they are hovering freely in mid-air.
During the day, daylight charges the phosphorescent plastic bones. When you turn off the camper ceiling lights for the night, the skeletons glow with an eerie neon green outline visible from outside the campsite loop.
Pale, subtle white figures that stay tidy and let natural fall sunshine stream straight onto your dinette table.
Bright, self-powered green glow hovering against dark campsite trees without needing extension cords or generator power.
- Knot clear six-pound fishing line through the skull loops of jointed plastic skeleton toys.
- Anchor the line to the top plastic window trim with a tiny square of removable mounting putty.
- Let the limbs dangle loose so they sway gently when your camper steps creak as you walk inside.
Before sliding your walls in on travel day, unstick the putty tabs, lay the skeletons flat inside a shallow drawer, and you are ready to roll.
Setting up seasonal rv halloween window decor does not require overloading your camper storage bins or risking damage to your interior finishes. By choosing lightweight materials like static film, cardstock cutouts, battery-powered wire lights, and tension mounts, you can transform your rig into a cozy, glowing stop along the campground loop in just an afternoon. Every piece packs away flat, leaving your camper clean and road-ready for the next weekend adventure.
Save this list to your RV decor Pinterest board so you have these camper-safe ideas handy for your next fall road trip.

