
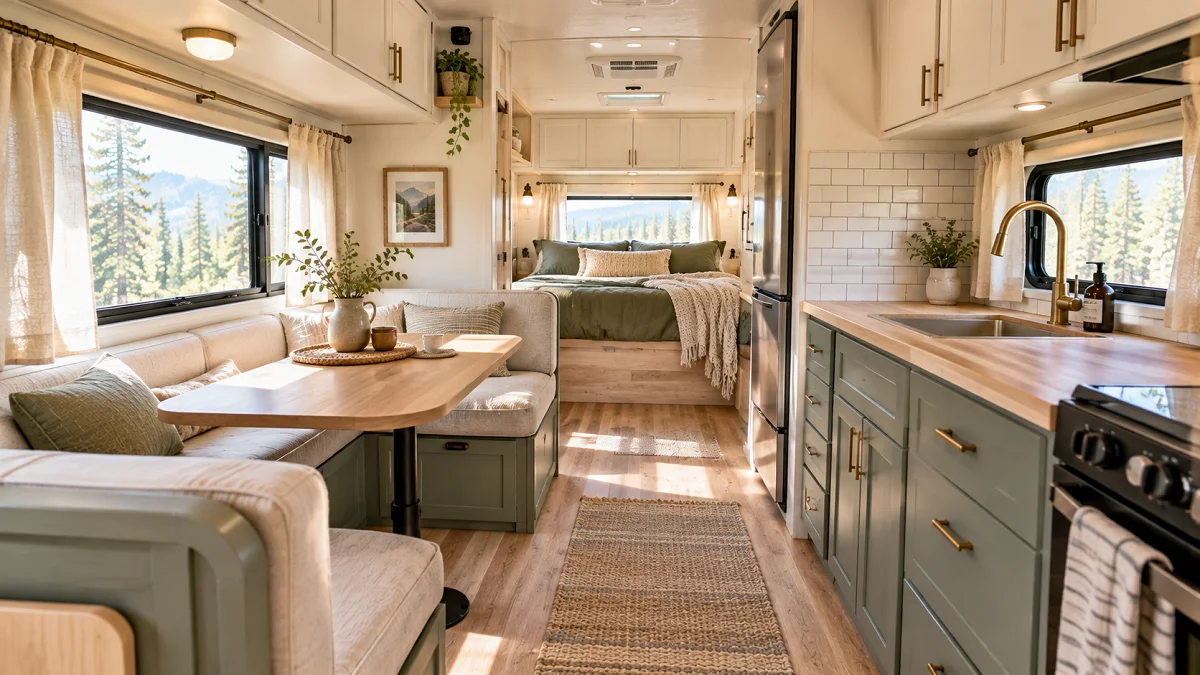
Factory small campers often feel like dark, cramped tunnels wrapped in brown vinyl and heavy upholstery. Most rigs waste critical floor space on bulky furniture built to fit everyone, yet practical for almost no one. The secret to fixing that closed-in feeling is not buying tiny trinkets or filling up cute organizers. It comes down to opening sightlines, letting natural daylight bounce around, and taking back floor room.
These practical small camper interior ideas focus on smart structural tweaks and clean styling adjustments that make every square foot work twice as hard. Whether you want to refresh an older travel trailer or personalize a brand new rig, small adjustments make a noticeable difference in daily comfort.
1. Trade the Heavy Dinette for a Slim Lagun Table Mount
Factory camper booths swallow half the living floor space. The thick foam cushions, dark vinyl, and heavy particleboard bases make the entire cabin feel cut in half. Replacing that bulky setup opens up the floor immediately.
A swivel arm table mounts directly to a bench base or an interior wall stud. You can swing the wood top out of the way when preparing food, pivot it toward the sofa for dinner, or spin it flat against the wall when carrying gear inside.
- Clear floor space: Gaining open floor area makes the entire hallway look double its actual width.
- Dual functionality: Use the same solid wood surface for your morning laptop desk and evening meal prep.
- Fast removal: Unthread the hand bolt to stow the tabletop away when packing up for travel day.
Bulky box dinette leaves zero knee room and blocks the main walkway.
Slim swivel mount pivots 360 degrees and lifts off the wall in seconds.
2. Run Lightweight Peel-and-Stick White Subway Tile Behind the Galley
Most factory RV kitchens feature dark, faux-wood paneling or muted floral borders that absorb light. Adding a reflective, light-toned backsplash over the galley brightens the area during meal prep and makes the kitchen wall visually recede.
Peel-and-stick composite sheets work best because they weigh almost nothing and flex with the camper frame during travel. Normal ceramic tile adds too much road weight and cracks along the grout lines after a few highway bumps.
💡 Quick Tip
Clean the slick camper wall with isopropyl alcohol first, then apply a thin spray coat of high-tack adhesive so summer heat does not curl the tile edges.
Before you peel the backing off the tile sheets:
- Wipe away every trace of grease near the stove burner using water and degreaser.
- Trace your outlet box cutouts onto the tile paper backing with a sharp utility knife.
- Smooth each sheet down firmly with a hard rubber roller to seat the adhesive bond.
3. Swap Dark Factory Window Valances for Tension Rod Linen Curtains
Standard RV valances are bulky, fabric-wrapped plywood boxes that block two to three inches of daylight on every single window. Tearing them off costs nothing and instantly opens the glass view.
Hang lightweight linen or cotton drop-cloth curtains on small tension rods directly inside the window frame. Natural textures let daytime light filter through while keeping neighbors from seeing inside at night.
Use lightweight, breathable cotton or linen fabrics that slide easily.
Secure bottom hems with small velcro dots so curtains do not flap while driving.
Leave heavy, dust-collecting factory padded valance boxes in place.
Choose floor-length drapes that drag across dirty camper entryway mats.
Keep your fabric lengths flush with the window sill. Anything dangling past the sill collects dust from sliding screen doors and gets stepped on when tucking in corner bed sheets.
4. Mount Wire Fruit Baskets Under Upper Cabinets to Clear Counter Space
Small camper galleys often give you less than eighteen inches of usable counter space between the sink cover and the two-burner cooktop. Small items like produce, cutting boards, and coffee mugs quickly clutter the entire work surface.
Installing slim, under-mount wire racks pulls loose food items upward into unused dead space. Hanging baskets keeps food off damp counter mats and stops fruits from rolling onto the floor when your trailer hits a bump.
What to grab first
Double check your under-cabinet depth before drilling pilot holes. Most camper overheads use quarter-inch bottom panels, so backing up the screw with a wood scrap inside the cabinet keeps everything solid.
5. Paint Overhead Cabinets Warm White While Keeping Base Cabinets Earthy
Solid dark brown laminate cabinets make small camper interiors feel like a dark cave. Painting every surface white can feel a bit sterile and shows dirty scuffs along footpaths.
A two-tone paint treatment gives you the best of both worlds. Bright cream or warm off-white on the upper doors reflects ceiling light, while olive green, warm taupe, or soft charcoal on lower cabinets conceals boot marks and pet scuffs.
Take time to prep the slick photo-paper cabinet finish properly before laying down paint:
- Clean: Wash the cabinet fronts thoroughly using TSP substitute to remove hand oils and cooking residue.
- Scuff: Rub all surfaces with 220-grit sandpaper to give the smooth plastic film some tooth.
- Prime: Roll on a dedicated shellac or high-adhesion bonding primer so the topcoat never chips during winter storage.
6. Install a Recessed Wall Niche Between the Bedroom Wall Studs
Camper bedroom layouts often pack a queen or RV short bed wall-to-wall. That layout leaves zero room for a traditional bedside table, leaving your phone, glasses, and water bottle bouncing across the bed sheets.
Cut out a section of interior paneling between two framing studs to create a built-in recessed shelf. Because it tucks inside the existing wall cavity, you get functional nightstand storage without losing an inch of walkway.
Locate two vertical studs using a magnetic stud finder to avoid hidden 12V wiring harnesses.
Cut the thin luan wallboard cleanly using an oscillating multi-tool set to a shallow depth.
Build a simple wood cubby box, slide it into the cavity, and secure it with side brad nails.
Line the bottom of the niche with a peel-and-stick felt pad. This keeps metal charging cables and glasses from clattering against the wall while the air conditioner runs.
7. Anchor Floor Runners with Low-Profile Double-Sided Carpet Tape
Standard camper vinyl flooring looks flat and institutional. Rolling down a textured, narrow runner rug draws the eye from front to back, giving your eyes a long line that makes the hallway feel stretched out.
A good runner also insulates bare feet against cold subfloors during early morning coffee brews and traps campground gravel before it scatters across your bed.
- Pick a runner that leaves two to three inches of bare floor visible on both sides.
- Avoid thick shag piles that prevent interior bathroom doors from swinging open.
- Stick four corner silicone tape pads underneath so the rug stays planted when dogs jump inside.
8. Replace Harsh Puck Lights with 3000K Warm LED Dimmers
Most camper manufacturers install cheap 5000K daylight LED pucks in the ceiling. The harsh, bluish glare highlights every single wall seam, washes out your interior decor, and makes evening relaxation feel clinical.
Swapping out the factory circuit boards for warm-white 3000K LED fixtures completely changes the atmosphere. Warm lighting softens shadows and makes tiny quarters feel cozy rather than confined.
| Light Attribute | Factory 5000K LEDs | Warm 3000K LEDs |
|---|---|---|
| Color Tone | Cool blue-white | Soft golden-warm |
| Evening Mood | Harsh overhead glare | Relaxing ambient glow |
| Dimming Range | Single brightness | Smooth 10% to 100% control |
Wiring in a simple 12V rotary pulse-width dimmer lets you step down the power draw on quiet evenings. Dimming your main ceiling loop cuts battery consumption when you spend nights off-grid.
9. Hang Pegboard Panels on Dead Wall Space Beside the Entry Door
The short exterior wall section right inside the camper door is often left completely empty. Mounting a painted sheet of wood or metal pegboard turns that blank wall into an organized launchpad for daily gear.
Hanging your dog leashes, flashlights, headlamps, and camp hats keeps surfaces clear. When every loose item has an assigned peg, you spend less time digging through crowded under-seat totes.
Use locking rubber peg clips or threaded screw-in hooks so road vibration never shakes your hanging accessories onto the floor.
Set up your pegboard layout to match your travel day routine:
- Reserve the top two rows for lightweight jackets and ball caps that stick out into the doorway.
- Keep the middle tier organized with small wire bins for keys, sunscreen, and bug spray.
- Fasten the bottom rows with elastic shock cords to pin rolled rain shells flat against the wall.
10. Build a Hinged Countertop Extension Using Heavy-Duty Folding Brackets
When cooking meals inside a small camper, setting down a single cutting board can take over your entire prep area. A drop-leaf countertop extension mounted to the side of the lower kitchen cabinet gives you instant working room without eating up permanent floor space.
When you finish dinner dishes, simply push the release tabs to drop the wooden leaf flush against the cabinet edge.
⚠️ Watch Out
Check clearance around your slide-out seals and entry screen door. Ensure the folded leaf leaves at least two inches of space so nothing binds when opening doors or closing slides.
Build your leaf out of a lightweight butcher block offcut or bamboo cutting board:
- Measure the cabinet side panel to find the widest board that will not stick past the doorway frame.
- Bolt two spring-assisted locking triangle brackets into the internal solid corner framing of the cabinet.
- Sand the wood smooth and seal all edges with food-safe mineral oil to prevent moisture warping.
11. Tuck Acrylic Spice Racks Inside Cabinet Doors Instead of on the Wall
Leaving condiment jars and spice bottles on open kitchen ledges looks charming in photos, but they turn into flying projectiles during sudden highway braking. Mounting clear acrylic bins to the inside faces of cabinet doors keeps them secure and out of sight.
This small upgrade frees up a complete shelf inside the pantry while keeping everyday seasonings right at your fingertips during dinner prep.
Jars clutter the counter edges or fall over in deep cabinets during travel.
Spices stay quiet, organized, and upright inside unused cabinet door cavities.
- Attach the trays with heavy-duty outdoor acrylic mounting tape rather than wood screws that risk poking through the outer door face.
- Space the bins so they sit cleanly between the internal cabinet shelves when the door shuts.
- Drop a thin strip of rubber shelf liner inside each bin to stop glass jars from rattling together on rough washboard roads.
12. Choose Armless Barrel Chairs Over Fold-Out Factory Sofas
Factory pull-out camper jackknife sofas are notoriously heavy and uncomfortable for both sitting and sleeping. Their thick armrests and high steel frames take up an enormous amount of floor real estate in a compact rig.
Pulling out that single steel-frame sofa and replacing it with two compact, armless barrel or club chairs instantly opens the main living space. You can easily spin them toward the window view or turn them inward for conversation.
Selection Checklist
Look for accent chairs with raised wooden legs rather than solid box bases. Seeing open flooring underneath furniture tricks your eyes into registering the room as wider and more airy.
13. Layer Earthy Linen Bedding and a Chunky Knit Throw to Soften Corners
Factory RV beds typically come with slippery polyester floral quilts that feel synthetic and shift out of place constantly. Because the bed often dominates a small camper, standard bedding makes the entire room feel dated.
Dress the mattress in breathable, washed linen sheets in soft neutral tones like sage green, oatmeal, or muted clay. Adding a chunky knit cotton throw blanket across the foot of the bed adds warmth and softens the camper’s hard fiberglass and plywood edges.
Tuck bed corners tightly using elastic sheet straps under the mattress.
Use washed cotton or linen that breathes easily and hides camp dirt.
Keep stiff synthetic factory comforters that slide off in the night.
Pile on twenty decorative throw pillows that end up stacked on the floor.
Keep your pillow styling minimal. Two standard sleeping pillows and a single textured lumbar cushion give you all the comfort you need without taking over the whole bed.
14. Mount Floating Corner Shelves with Bungee Cords for Plant Cuttings and Books
The interior corners above dinette booths and bed frames are rarely used in small camper layouts. Adding small, triangular floating wood shelves puts those empty vertical spaces to work for small plants, books, or a bluetooth speaker.
Running a threaded marine shock cord across the front lip of each shelf creates a flexible, stylish safety railing. Your items stay secured in place without requiring you to pack them away every time you hitch up.
Cut lightweight cedar or pine craft boards into small 8-inch triangles.
Drill two small holes on each outer edge to lace through a 1/8-inch elastic cord.
Fasten the shelf into the wall corner framing using small right-angle metal brackets.
- Anchor potted succulents in shatterproof silicone or melamine pots instead of heavy ceramic.
- Secure the bases of your decor pots with reusable museum gel to prevent highway slide.
- Keep the total weight on small corner shelves under five pounds to protect thin camper framing.
Remodeling a tiny rig does not require gutting everything down to the frame. By opening up sightlines, brightening surfaces with natural light, and keeping floor paths clear, these small camper interior ideas give you a practical, welcoming space for every trip ahead. Pick one or two small projects to tackle this weekend, and feel the difference on your next getaway.
Save this list to your camper inspiration board on Pinterest so you have these practical remodeling tips handy when you are ready to update your space.

