
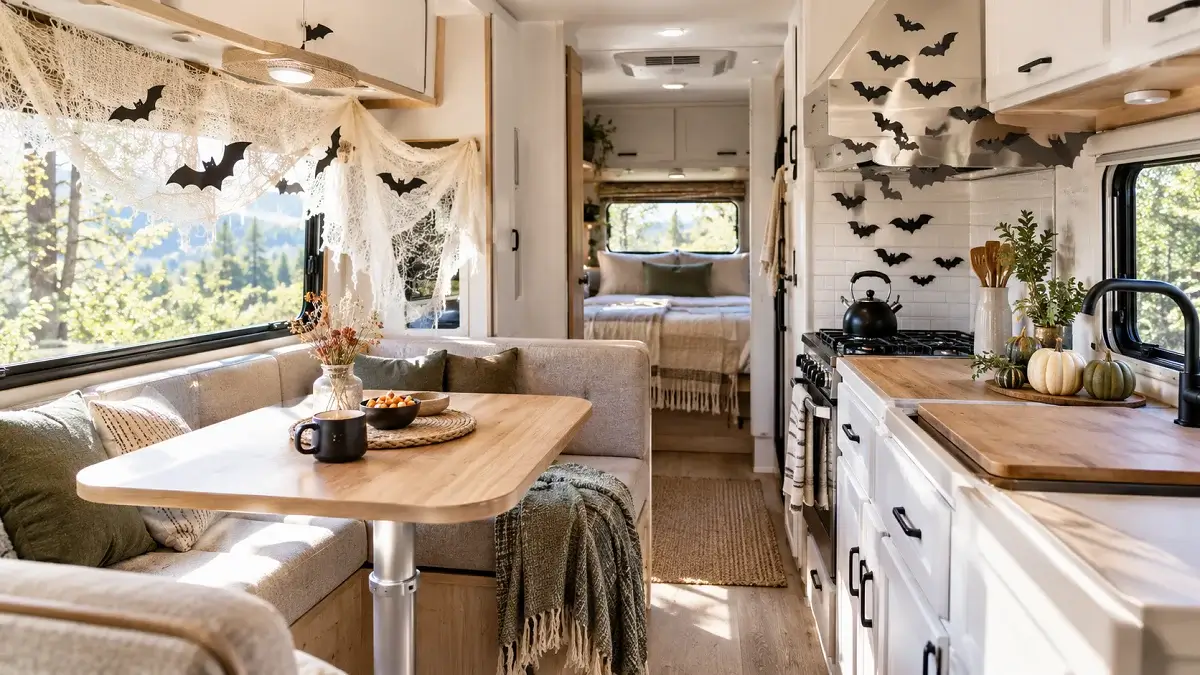
Decorating an RV for Halloween sounds simple until you realize standard residential decor just does not fit. Bulky ceramic pumpkins eat up your limited kitchen counter space, heavy outdoor yard inflatables blow straight across the campground in a light breeze, and brittle props shatter the moment you pack them into a pass-through storage bay.
Most holiday decorating guides assume you have high ceilings and an attic for off-season storage. In a camper, every single piece you display has to be lightweight, easy to store flat, and safe for thin veneer walls.
You do not need to spend a fortune at specialty shops to get your rig into the spooky spirit. With a few affordable staples from the local discount store and clever placement tricks, you can create a festive, eerie atmosphere without sacrificing living room or towing weight. Here is how to pull off clever, budget rv halloween decor that packs away flat when travel day comes.
1. Hang Cheesecloth Ghost Drapes Across the Dinette Window

Standard camper valances can look stiff, but draping shredded black or off-white cheesecloth gives your dinette immediate haunted-house texture.
Grab two packages of unbleached cheesecloth from the grocery baking aisle. Use kitchen shears to cut vertical slits along the bottom third, pulling the threads apart with your fingers so it looks naturally frayed.
Tuck the top edge right behind your existing window valance or clip it with small wooden clothespins onto your blind string. When the evening sunset hits the window, the ragged fabric creates deep, moody shadows without blocking your airflow.
- Cut uneven jagged slits rather than straight lines to mimic aged cloth
- Pull outward horizontally to loosen the weave before hanging
- Use painter tape on the upper blind frame to hold corners without leaving adhesive residue
Standard brown factory valances that look flat and block out the seasonal theme.
Torn cheesecloth catches campground evening light, creating eerie layered shadows.
2. Fill the Entry Steps With Dollar-Store Jack-O’-Lantern Buckets

Those classic bright orange plastic trick-or-treat buckets cost barely a dollar each and double as festive stair lighting for your campsite.
Stack one bucket on each fold-out metal step leading into your rig. Instead of leaving them empty where campground wind can blow them around, add a fist-sized river rock to the bottom of each bucket to anchor them down.
Drop a battery-operated amber tea light inside each one. You get instant outdoor Halloween flair that illuminates the metal stairs so your family does not trip in the dark.
💡 Quick Step Tip
Drill two small 1/4 inch holes in the bottom rim of each bucket. If an autumn rainstorm rolls in overnight, water drains right out instead of pooling around your battery lights.
3. Cut Black Bat Silhouettes to Swarm Up the Range Hood

RV kitchens are notoriously compact, leaving zero room for tabletop figurines. The smooth metal surface of your stove exhaust hood offers prime real estate for vertical decor.
Cut simple bat shapes out of black construction paper or removable matte vinyl sheets. Fold each bat down the center to pop the wings outward at a 45 degree angle for a realistic three-dimensional flight effect.
Arrange them starting in a tight cluster near the stovetop splash panel and fan them out toward the ceiling cabinets.
| Detail | Specification |
| Material | Black cardstock or removable vinyl |
| Attachment | Painter tape or adhesive putty |
| Removal Time | Under 2 minutes |
| Storage Need | Slips flat inside a manila folder |
4. Wrap Cabinet Handles in Thick Jute Twine and Faux Cobwebs

Factory RV cabinet hardware is often plain brushed nickel or generic plastic. You can dress them up without taking a screwdriver to your woodwork.
Take natural jute twine and loop it tightly around the center of each handle pull, knotting it securely on the back edge. Tease out a thumbnail sized pinch of stretchable synthetic cobweb and pull it wide until it is sheer, catching the fibers across the rough twine.
This gives your galley cabinets a rustic, abandoned cabin look that holds firm even while bumping down the highway.
Wrap natural jute twine 8 to 10 times around the middle grip of each handle pull.
Pull synthetic cobwebbing until it is whisper thin so it looks authentic rather than clumpy.
Snag the web edges directly onto the coarse twine wraps to lock it in place without glue.
5. String Orange Solar Fairy Lights Along the Awning Track

Relying on standard RV patio LED strips can wash out your campsite in harsh white light. Copper wire fairy lights bring a subtle, spooky glow to your outdoor awning zone.
Slide plastic awning utility hooks into the open roller tube channel and drape solar-powered micro fairy lights across them. Position the tiny solar stake directly on top of your RV tongue jack or battery box where it catches full midday sun.
When night falls, you get warm orange sparkle that sets the mood without draining your rig’s house batteries or blinding your campground neighbors.
- Unroll the copper wire spool slowly along the patio mat to avoid kinks
- Slide four to six utility awning clips evenly along the roller tube track
- Loop the light strand through the clip rings without pulling the wire taut
- Angle the mini solar panel toward the southern sky for maximum charge
6. Drape Black Gauze Over the Refrigerator Front
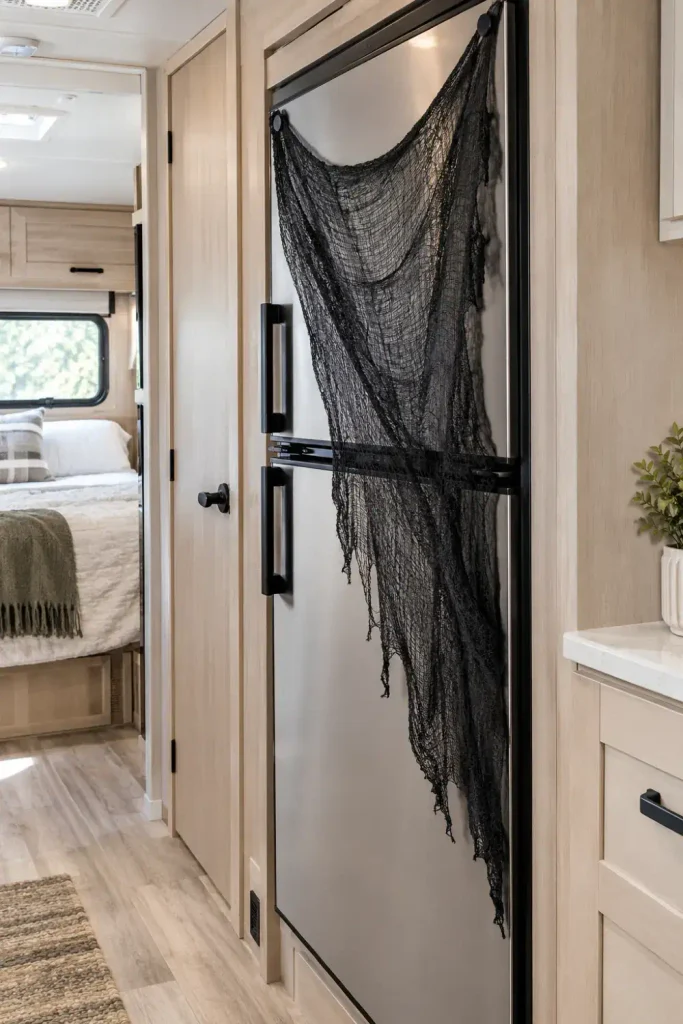
Your RV refrigerator takes up a massive visual wall inside the camper, making it an ideal focal point for Halloween styling.
Drape a large sheet of loose open-weave black gauze over the top and let it hang naturally down the refrigerator doors. Secure the cloth at the top corners with strong neodymium magnetic hooks so you avoid sticky tapes that damage laminate finishes.
The dark textured fabric disguises the utilitarian appliance panel while leaving both door handles clear for everyday cooking.
Quick Fridge Kit
7. Turn Empty Glass Jars Into Bunk Window Mummy Lanterns

Save your empty pasta sauce or salsa jars instead of tossing them into the campground recycling bin.
Wrap white medical gauze or strips of torn cotton fabric around each jar, crisscrossing the layers irregularly. Dot two drops of craft glue to secure a pair of plastic googly eyes peeking out from beneath the wrapping.
Set these lanterns on your bunk window ledges or bedside cubbies with a battery-operated LED votive inside. They cast a cozy glow for bedtime reading without introducing fire danger into tight sleeping quarters.
Use cool-touch LED flameless tea lights with auto shutoff timers.
Place lanterns on rubber drawer liner so they never slide during movement.
Never burn real wax candles inside an RV due to oxygen draw and flame risk.
Avoid placing glass jars loose on shelves on travel travel mornings.
8. Swap Everyday Kitchen Towels for Dark Gingham and Spooky Prints

One of the easiest small-space design secrets is replacing items you already use every day rather than adding new physical objects to your counters.
Trade out your plain kitchen hand towels for dark buffalo check, charcoal waffle weave, or subtle skeleton-printed dish towels. Hang one from your oven bar handle and another over your sink faucet neck.
You get immediate seasonal personality that costs almost nothing, takes up zero extra counter space, and simply rolls up into your laundry bag when dirty.
| Decor Style | Usable Counter Space | Pack-Away Effort |
| Ceramic Figurines | Consumes 30% of prep space | Requires bubble wrap and sturdy totes |
| Festive Towel Swap | 100% kitchen counter preserved | Folds flat right into existing linen drawers |
| Everyday Setup | Halloween Textile Swap |
|---|---|
| Plain beige microfiber towels | Charcoal and burnt orange vintage plaid |
| Neutral silicone hot pads | Black spiderweb pot holders hung on galley hooks |
9. Stake Giant Posable Spiders Directly Onto the Camper Screen Door

Your RV entry door is the centerpiece of your campsite setup, and posable wire-leg spiders give it huge visual impact with practically zero weight.
Buy an oversized faux fur spider with bendable wire legs from a discount store. Straighten the legs slightly and hook the bent ends directly into the mesh frame of your exterior screen door.
The spider stays perched on the door exterior without tape, nails, or permanent brackets, greeting visitors every time they walk up the camp path.
- Bend front legs inward to loop through screen guard bars
- Position body away from the door latch mechanism to prevent jams
- Keep the legs clear of the main entry door weatherstripping seal
Always verify the spider clears your outer door frame so you can close the solid door tightly when leaving camp.
10. Stack Painted Mini Pumpkins in the Sink Cover Recess

Real carving pumpkins are far too heavy and rot fast in changing camper temperatures, but small foam craft pumpkins are virtually weightless.
Nestle three or four painted mini gourds directly into the round recess of your RV kitchen sink cover board. Spray them with matte chalk paint in shades of olive green, creamy linen, and charcoal to match a modern earthy interior palette.
When you need to wash camp dishes, simply pick up the sink cover with the pumpkins resting on it and set the whole assembly on the dinette bench in two seconds.
📌 Good To Know
Stick a small piece of reusable mounting putty under each mini foam gourd. They stay locked in place even when someone bumps the counter while cooking dinner.
11. Line the Rig’s Hitch Jack With Creepy Gauze and Purple Glow Sticks

The A-frame tongue jack on a travel trailer or the pin box on a fifth wheel is an industrial eyesore that sits right in the middle of your site.
Wrap the metal column loosely with dark outdoor mesh cloth. Tuck a couple of large industrial purple or green glow sticks inside the fabric netting before heading to the campsite bonfire.
It masks the greasy mechanical jack during the day and turns the front of your rig into an illuminated beacon that keeps people from bumping their shins on the hitch post after dark.
Greasy metal jack post and chains exposed in plain view at your camp site.
Soft purple luminescence that hides mechanical gear and marks the hitch perimeter.
12. Clip Printable Spell-Book Covers Over Hanging Pocket Organizers

Hanging fabric shoe organizers are an RV storage staple on doors and bunk walls, but they can look cluttered and visually messy.
Print out vintage gothic spell-book titles or apothecary labels on heavy kraft paper. Use brass binder clips to fasten the card fronts directly over the outside pockets of your storage organizer.
Your everyday items like sunscreen, bug spray, and flashlights remain hidden inside the pockets while the exterior looks like an antique wizard library wall.
Print vintage apothecary labels onto textured brown parcel paper using a home printer.
Tuck the paper sheets into clear protective document sleeves to prevent water splashes.
Secure the top rim of each sleeve with a vintage black binder clip straight to the pocket fabric.
13. Scatter Velvet Foam Skulls Across the Dashboard Console

Motorhome owners and motorized rig drivers have an expansive vinyl dashboard shelf that remains unused while parked at a campground.
Arrange three lightweight hollow foam skulls wrapped in dark flocked velvet across the passenger side dash. Pair them with a few dried pinecones gathered from around your campsite for an easy, organic texture mix.
Because foam decor weighs almost nothing, it will not scratch your dash plastics or slide around if you need to adjust your leveling jacks.
| Feature | Value |
| Material | Lightweight flocked EPS foam |
| Sun Tolerance | Holds shape under windshield heat |
| Storage Footprint | Stacks inside a cloth grocery tote |
| Total Weight | Under 4 ounces each |
14. Float Witch Hats From the Ceiling Vents With Clear Monofilament
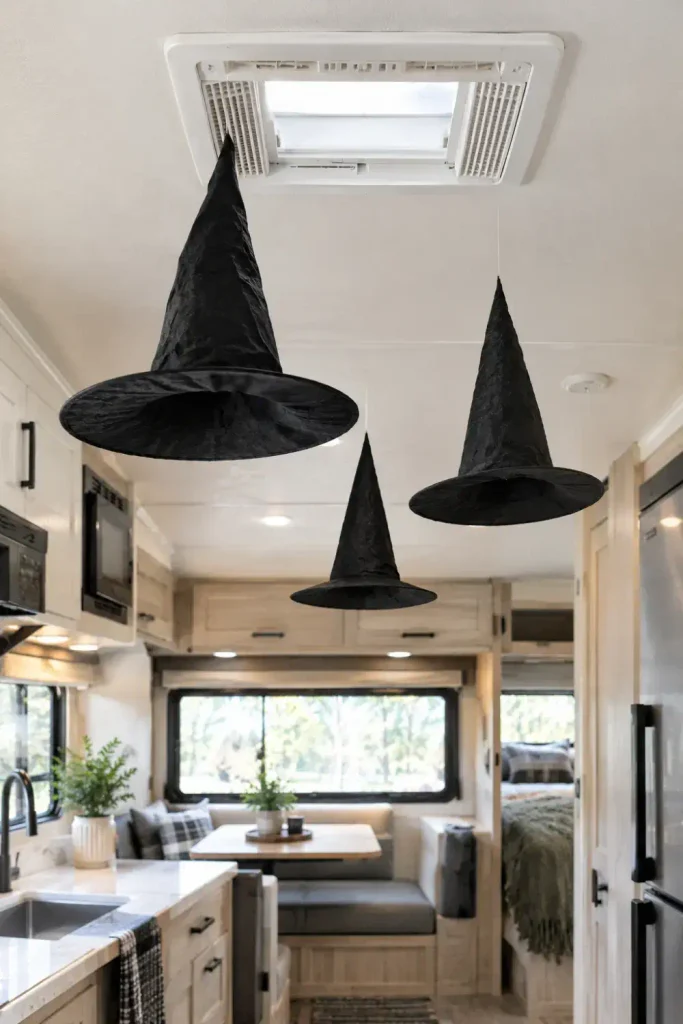
When floor space is at a premium, look up. RV ceilings feature vent trim rings, bunk frame corners, and A/C intake grills that make natural hanging points.
Take three inexpensive fabric witch hats and run a strand of clear fishing monofilament through the pointed crown with a sewing needle. Tie the line to the plastic frame of your roof vent or slide a thin paperclip into the vent screen lip.
The hats hover in midair at different heights, gently turning whenever your roof fan or heating furnace kicks on.
- ▸Air Conditioner Grills: Clip hooks gently onto the plastic louver slats without drilling.
- ▸Ceiling Fan Trim: Slide small wire loops under the interior vent flange screws.
- ▸Slide-Out Fascia Trim: Rest lightweight monofilament loops over the top interior header trim.
15. Tape Silhouetted Gel Clings to the Frosted Shower Door
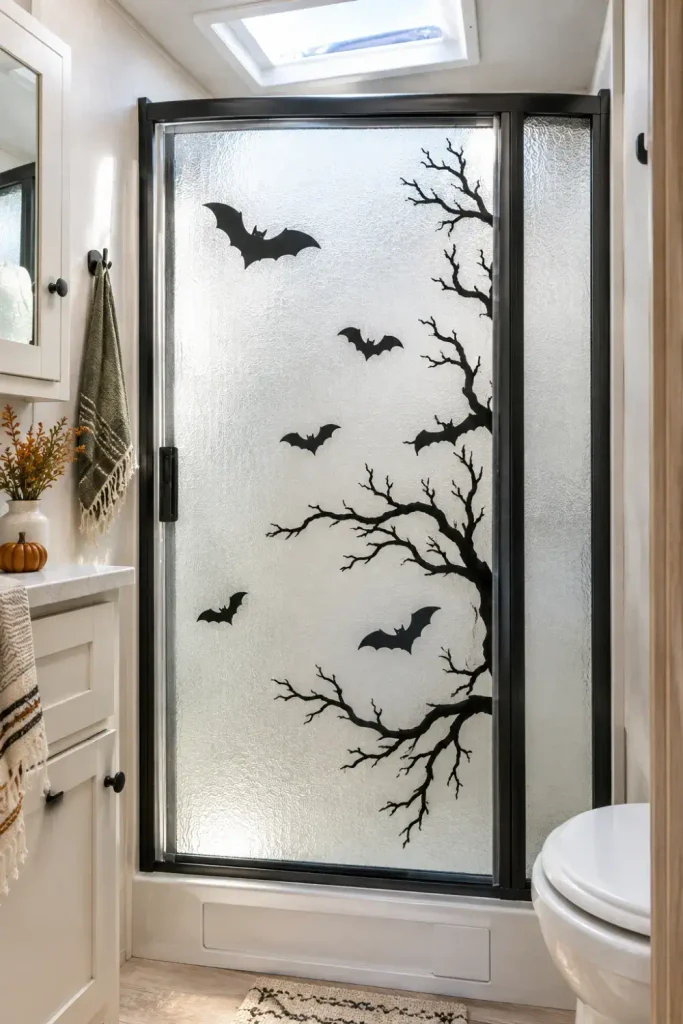
RV bathrooms are notoriously tight and beige, leaving virtually zero surfaces for freestanding decorative accents. The textured frosted glass or plastic shower enclosure provides an easy display canvas.
Press black vinyl window silhouettes or silicone gel clings against the clean, dry shower door. Choose classic shapes like flying bats, howling wolves, or gothic candelabras.
When the bathroom vanity light turns on, the textured door acts like a frosted lightbox that highlights the silhouette from the camper hallway.
- Wipe the shower door with a quick spritz of rubbing alcohol to remove body oil or moisture
- Peel each gel cling slowly from its backing sheet to keep the thin edges intact
- Press firmly from the center outward to push out any trapped air bubbles
- Peel off and rinse with warm tap water when ready to pack away for the next trip
Setting up seasonal camp charm does not mean overloading your storage compartments or risking damage to delicate RV surfaces. Focus on versatile hanging textiles, lightweight accents, and strategic lighting that highlight the cozy cabin feel of your camper. With a few thoughtful touches, you can celebrate the autumn season on the open road while keeping travel days quick and effortless.
Save this list to your RV Pinterest board so you have these practical decor ideas ready for your next fall camping trip.