
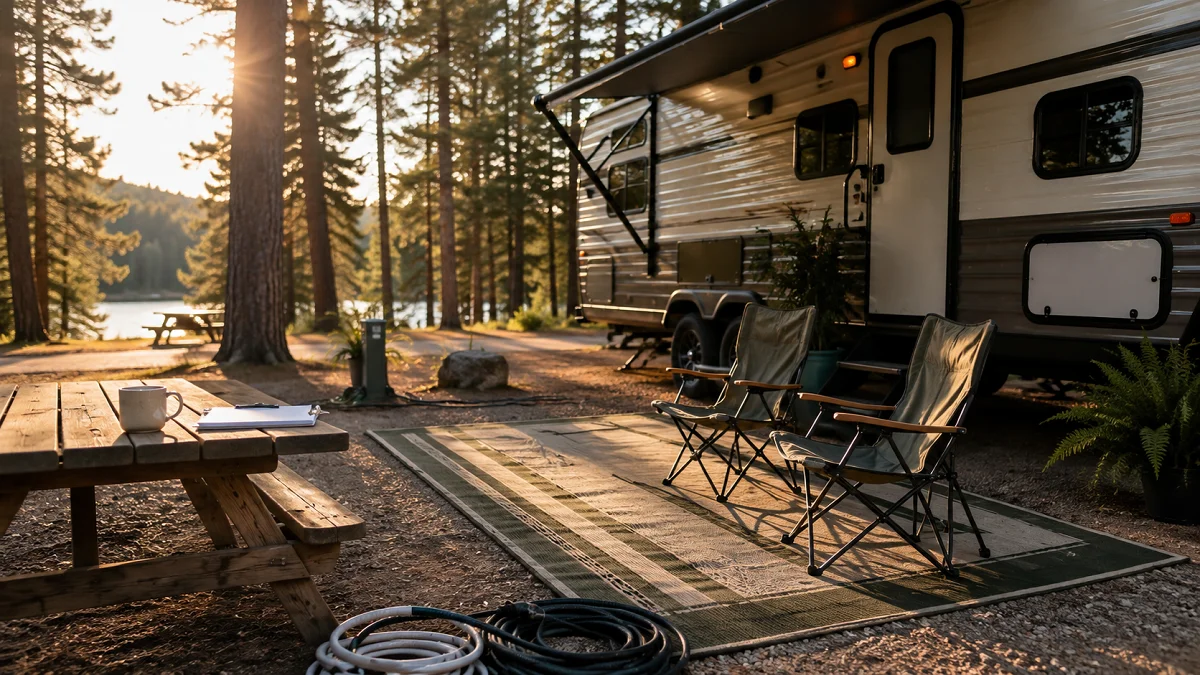
Nothing prepares you for the sheer panic of driving an oversized rig until a low-clearance bridge appears on your horizon or a campground host directs you to back into a narrow, tree-lined site while five people sit in lawn chairs watching.
Most first-time RV trips feel overwhelming because there are simply too many moving parts at once. You are managing a vehicle, a plumbing system, an electrical grid, and a home on wheels without having built the muscle memory for any of it yet.
A successful first getaway does not require years of cross-country touring under your belt. It simply comes down to understanding a few core routines, avoiding common setup mistakes, and giving yourself enough time to settle in.
Mastering rv living for beginners is about building reliable routines before rolling down the highway, turning potential roadside headaches into confident travel memories.
1. Practice Reversing in an Empty Parking Lot Before You Pack a Single Bag
Backing up a travel trailer or motorhome feels completely counterintuitive during your first few attempts. The small steering adjustments you use in a passenger car do not produce the same reaction when you have thirty feet of rig tracking behind your rear axle.
Find an empty shopping mall or school parking lot on a Sunday afternoon. Use painted parking lines as targets to understand your turning pivot point and how far your front end swings out during sharp corners.
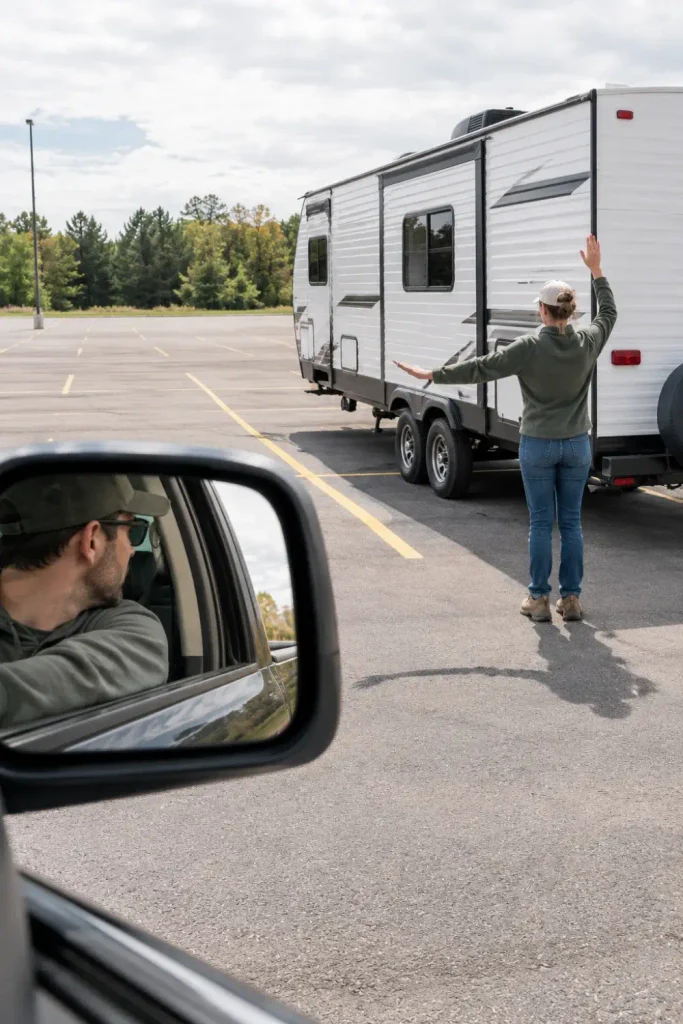
Always agree on clear hand signals with your travel partner before putting the vehicle in reverse. Shouting out of passenger windows creates confusion and stress, while clear hand gestures in your driver mirror keep everyone calm.
- Agree on line of sight: If you cannot see your spotter’s face in your side mirror, stop moving immediately.
- Hand at the bottom: Place your hand at the six o’clock position on your steering wheel; moving your hand left steers the trailer left.
- Small inputs: Turn the wheel a quarter turn, wait for the trailer to react, and straighten out early to avoid jackknifing.
The 3-Step Driver and Spotter Drill
Get out together and walk the space to look for low-hanging branches, electrical pedestals, and hidden ground stumps.
Position the spotter at the driver-side rear bumper where their eyes are clearly visible in your side mirror at all times.
Roll backward at idle speed without touching the accelerator, tapping the brake instantly if the spotter disappears from view.
Give yourself permission to pull forward and straighten out as many times as necessary. Seasoned RVers do this constantly; getting it right matters far more than getting it done on the first push.
2. Write Your Height and Clearance Numbers on a Sticky Note by the Dash
Standard smartphone navigation apps route you like a sedan, which means they do not account for low parkway bridges, arched railway crossings, or dangling utility cables.
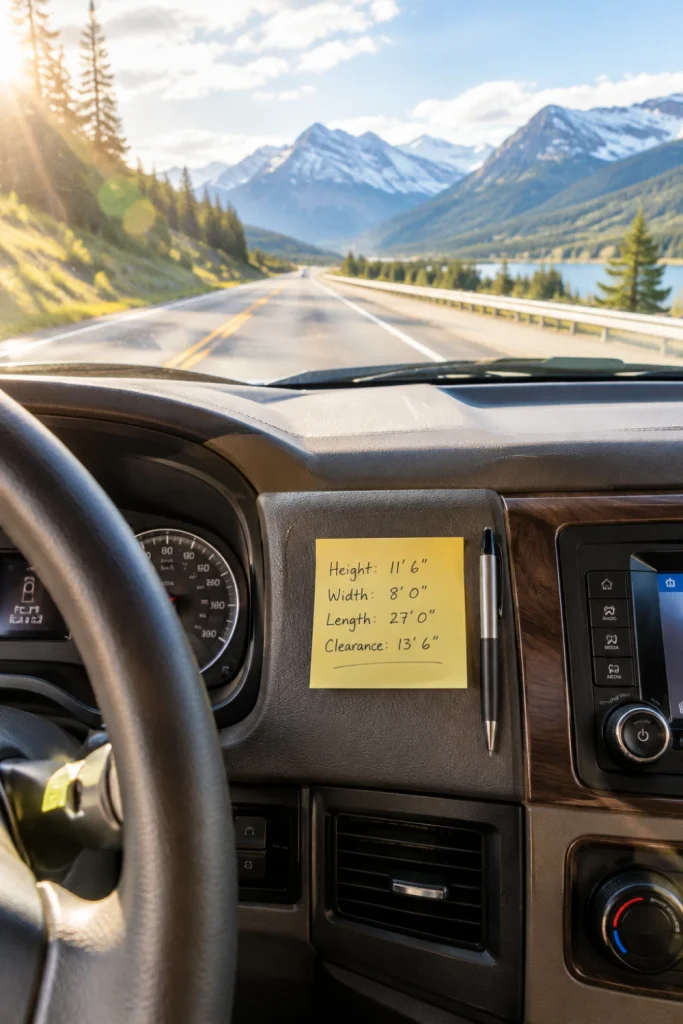
Measure your rig from the ground to the very highest point on your roofline, which is almost always the rooftop air conditioner cowl or omnidirectional television antenna. Add six inches to this figure to provide an absolute safety margin for asphalt dips and road repaving layers.
Place this measurement right on the dashboard directly within your line of sight. When you encounter a bridge sign flash yellow on an unfamiliar country bypass, you will not have to scramble through paperwork or guess.
Consider investing in an RV-specific GPS unit or an app designed for commercial vehicles. These tools let you input your exact rig dimensions and propane tank quantities to steer you clear of non-commercial parkways and narrow underpasses.
3. Build a Two-Bin Sewer Hookup Station to Keep Contamination Away from Storage
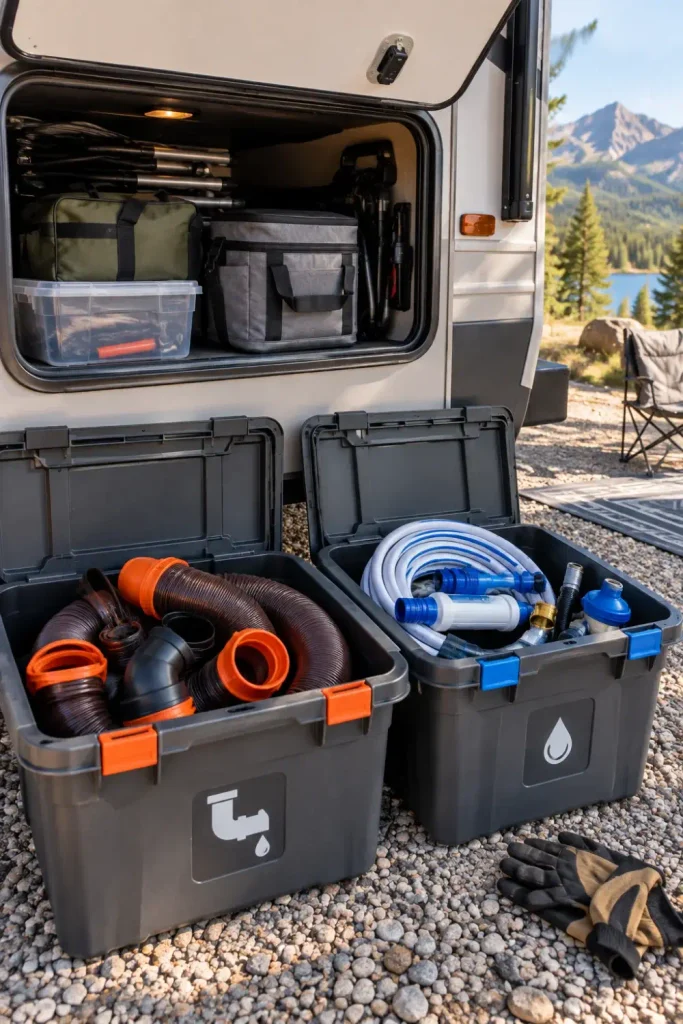
Emptying holding tanks is the single task new RVers worry about most, but a structured kit removes the stress. The secret to keeping it clean is strict separation between fresh water and waste lines.
Buy two distinctly colored storage bins with secure latching lids. Keep your sewer hose, clear elbow adapter, sewer wrench, and black-tank flush hose in one bin, while storing drinking water hoses and inline filters in an entirely separate compartment.
Never allow fresh water fittings to cross paths with your sewer bay. Storing these items in distinct parts of your pass-through storage prevents contamination and makes pack-up straightforward.
Wear dedicated disposable nitrile gloves for waste line setup and pack-down.
Use a transparent elbow connector to confirm the waste line runs clear before packing.
Never connect your white drinking water hose to the campground black tank flush port.
Never store sewer adapters inside the same tub that holds drinking water splitters.
Run a dedicated black rinse hose labeled with bright electrical tape so it is never mistaken for drinking water equipment. Simple visual cues prevent tired mistakes after a long drive.
4. Use a Dedicated Water Pressure Regulator on Every City Spigot
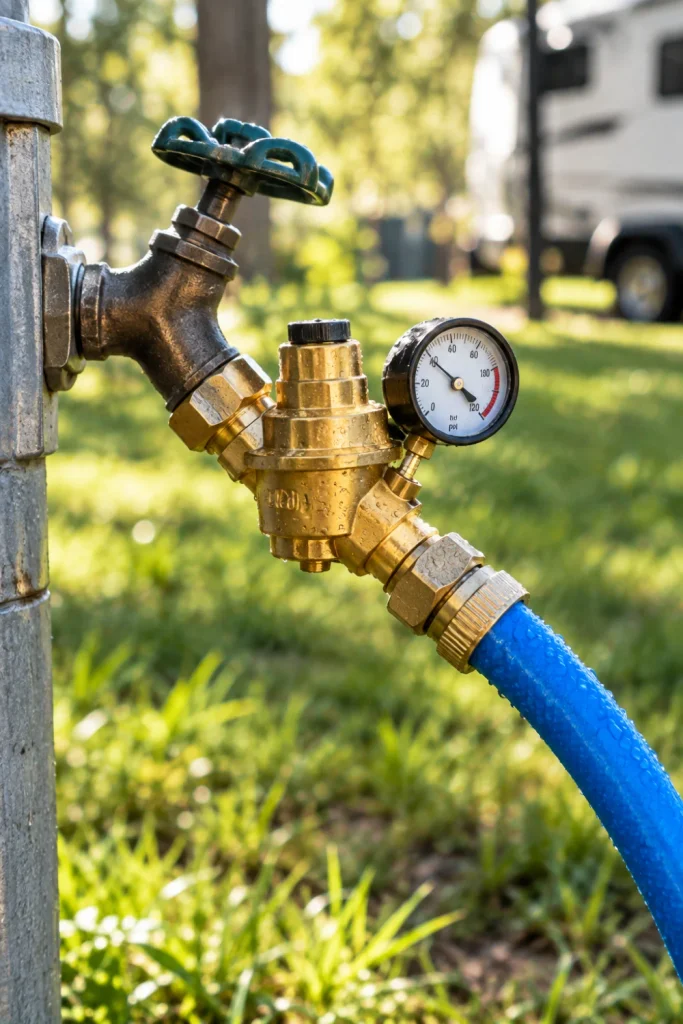
Campground water systems often run on high-pressure commercial well pumps or shared municipal lines. It is common for spigots to supply water at over 90 pounds per square inch (PSI) to service large resort loops.
RV interior plumbing uses thin PEX tubing and plastic friction fittings rated for roughly 40 to 50 PSI. Connecting directly to an unregulated spigot can burst a hidden water pipe behind your shower stall or under a slide-out, creating an immediate flood.
Always thread a brass pressure regulator onto the campsite spigot before your hose attaches. Putting the regulator directly on the post protects your hose from bursting under midday sun pressure as well.
💡 Hookup Sequence Tip
Spigot first, regulator second, inline filter third, hose fourth. Attaching the regulator directly to the metal spigot guards every piece of your gear from sudden campground pressure surges.
- Standard Preset Regulators: Factory set to maintain 40–45 PSI; affordable, durable, and completely hands-off.
- Adjustable Gauge Models: Feature a clear dial to monitor incoming pressure and adjust flow upward to 55 PSI for improved shower pressure.
5. Follow the 3-3-3 Rule on Driving Days to Prevent Burnout

Long-distance highway driving in an RV demands far more mental focus than driving an ordinary passenger car. You are constantly balancing crosswinds, keeping distance buffers, and scanning for uneven pavement.
Fatigue sneaks up quickly and leads to preventable mistakes, especially when setting up camp after sunset. The 3-3-3 travel guideline creates a sensible pace that keeps travel days relaxing instead of exhausting.
Arriving by mid-afternoon gives you plenty of daylight to level your rig, hook up utilities, and explore the grounds without rushing. Traveling slower also saves money on fuel, as driving efficiency drops significantly above 60 miles per hour.
6. Label Your Breaker Box Switches with Actual Appliances, Not Numbers
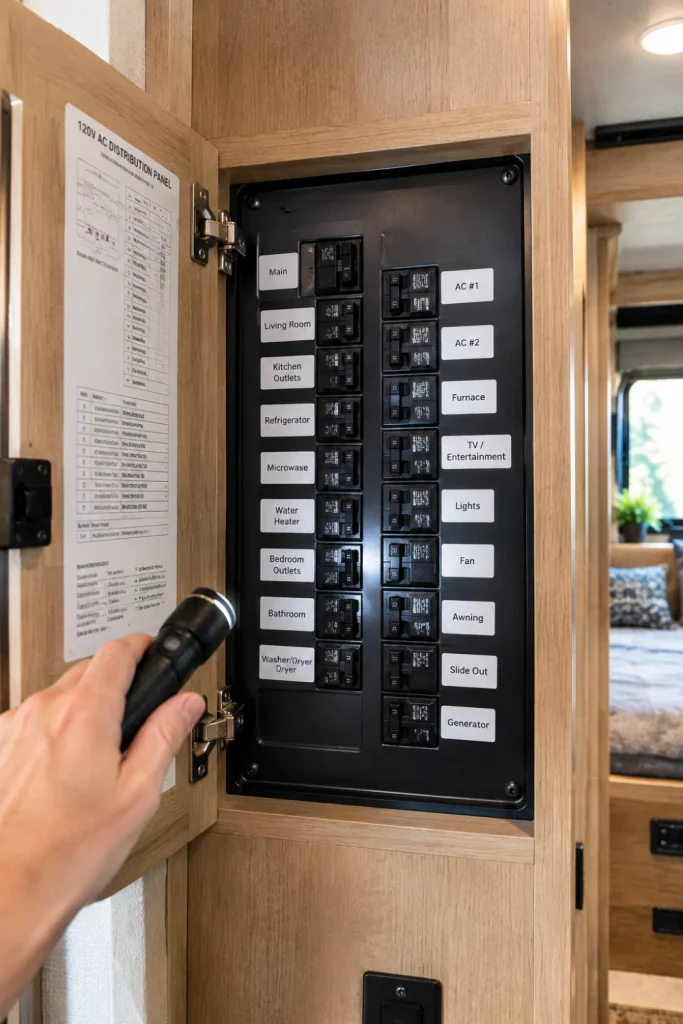
Standard factory RV distribution panels are usually labeled with hasty shorthand or vague numbers that do not match the real circuit layout.
When you trip a breaker while running a coffee maker and space heater at the same time, finding the tripped circuit in a dim cabinet can be frustrating. Take twenty minutes in your driveway to test each breaker individually.
Map out which interior wall plugs are wired to which circuit switch, and label them clearly with a handheld label maker or bright masking tape.
High-Draw Appliances to Never Run Simultaneously on 30A Service
Running on 30-amp service provides a total budget of 3,600 watts across the entire coach. Flipping the water heater switch to propane mode frees up significant electrical headroom for cooking and climate control without tripping breakers.
7. Set Up Clear Latching Bins in Upper Cabinets to Kill Rattle and Shift
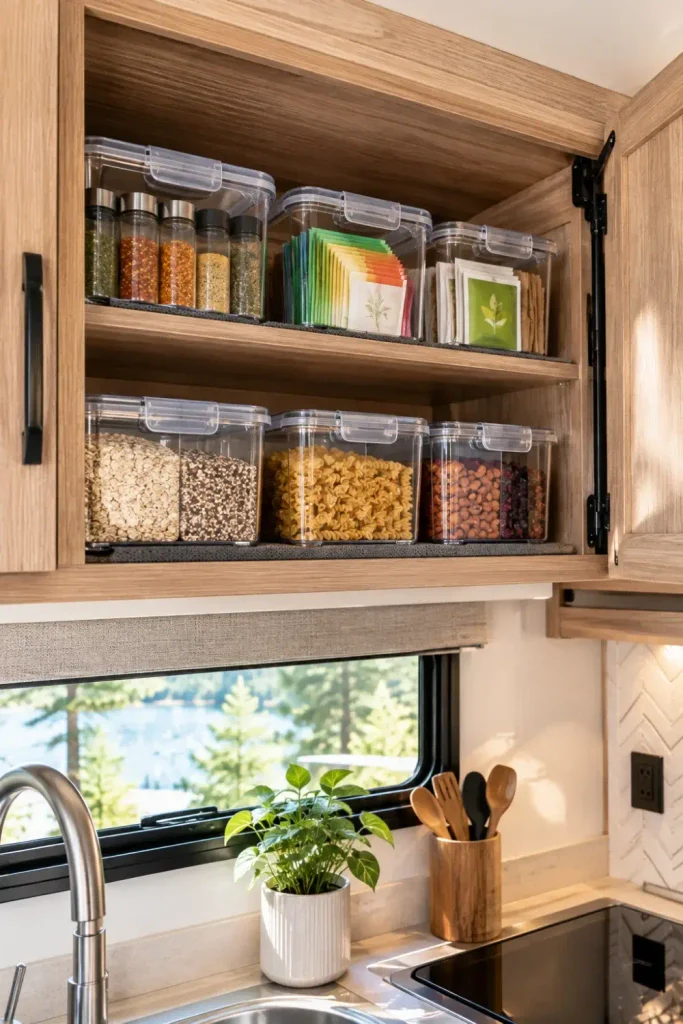
Travel trailers and motorhomes experience what is essentially a sustained minor earthquake every mile they travel down the interstate. Items placed neatly on pantry shelves will shift, slide, and stack themselves against cabinet doors during transit.
Opening a cabinet door at the end of a driving day can send glass jars or cans tumbling onto solid laminate countertops or foot surfaces.
Secure everything inside clear, latching plastic tubs fitted with adhesive rubber non-slip drawer liners underneath.
Spices slide around, glass jars clatter against doors, and canned goods fall out as soon as the door latch opens.
Clear bins isolate loose items, dampening driving rattles while keeping pantry supplies organized and secure.
Use tension curtain rods placed horizontally inside shallow cabinets to create a physical guardrail behind the doors. This small addition keeps boxes securely in place even along bumpy mountain roads.
8. Level Your Rig Side-to-Side First, Then Front-to-Back
New RVers often unhitch their tow vehicle and drop the front tongue jack before leveling the trailer side-to-side, only to realize they have to hook everything back up to adjust.
Stabilizer jacks located at the coach corners are designed solely to prevent the rig from rocking when you walk inside. They are not structural jacks and will bend or crack the frame if used to lift the vehicle off the ground.
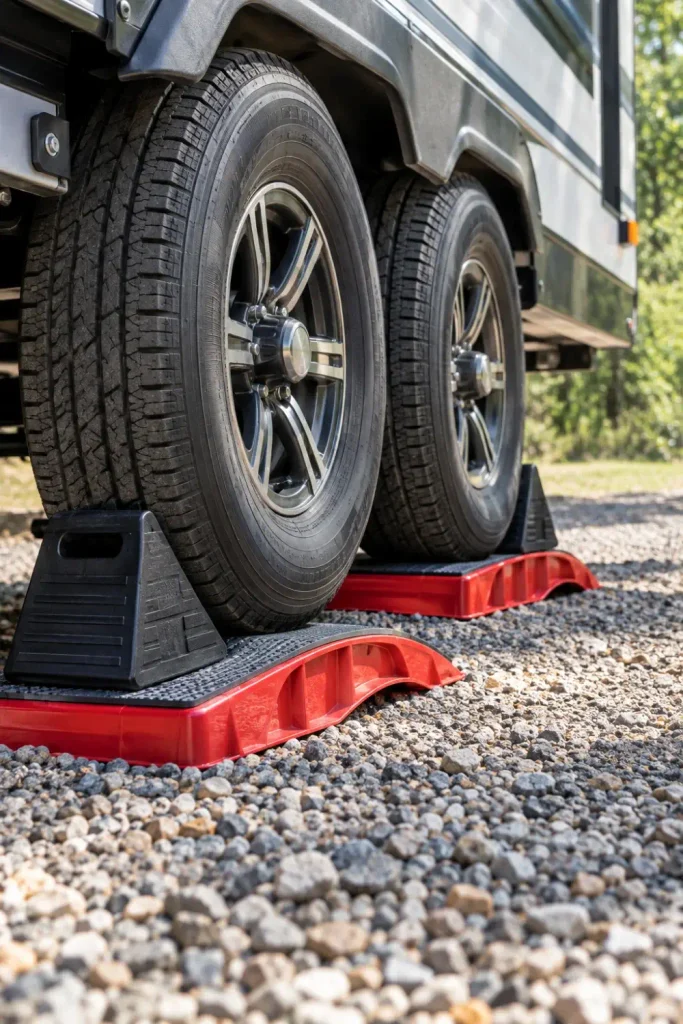
Pull onto leveling blocks to raise the low side wheels before unhitching. Once the side-to-side bubble level reads center, detach the hitch and use the front tongue jack to set front-to-back trim.
| Leveling Method | Primary Advantage | Best Application |
|---|---|---|
| Curved Drive-On Ramps | Infinite height increments from 0.5 to 4 inches | Single and tandem axle travel trailers |
| Stackable Interlocking Pads | Doubles as wide footings for jack feet on soft soil | Heavy motorhomes, tongue jacks, and stabilizers |
Keep your leveling blocks clean by rinsing off sand and mud before packing them away. Storing them in a ventilated mesh tote bag keeps road grit out of your main cargo hold.
9. Pack a Dedicated Toolkit with RV Essentials Most Cars Never Need
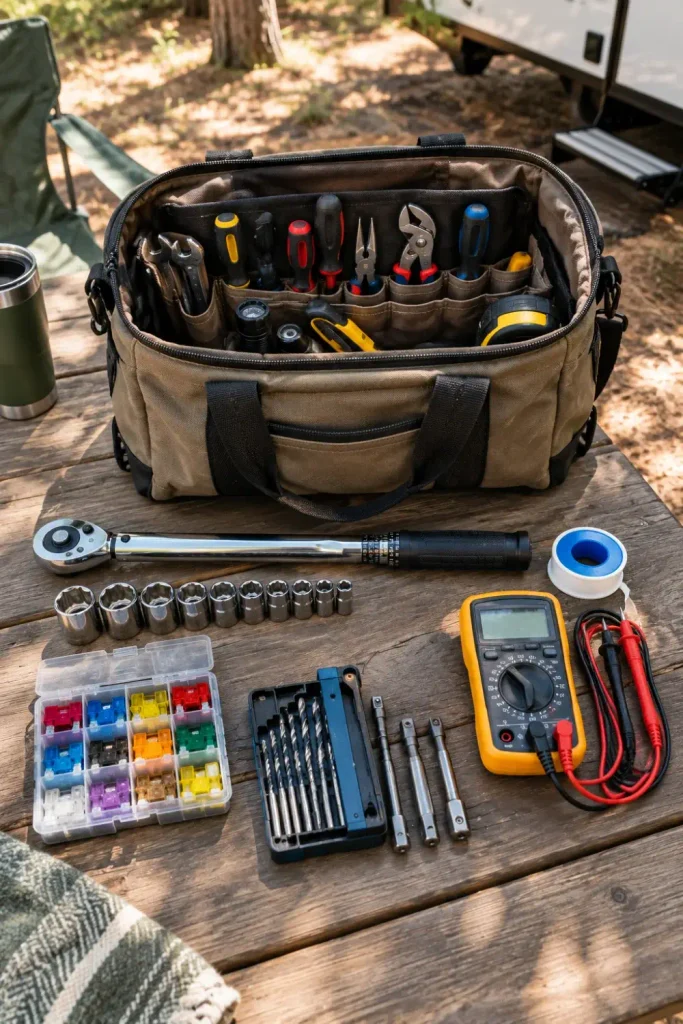
A standard household screwdriver set and adjustable wrench will not cover typical RV issues. Road vibration naturally loosens hardware, plumbing fittings, and chassis connections over time.
Having an RV-specific tool pack saves you from making emergency trips to local hardware stores when simple fixes arise at your campsite.
- Lug nut torque wrench: Ensure wheels match manufacturer foot-pound torque specs before every departure.
- Roll of self-fusing silicone tape: Seals unexpected low-pressure plumbing leaks or garden hose splits without leaving sticky residue.
- Digital multimeter: Diagnoses pedestal polarity issues, dead coach batteries, and blown 12-volt automotive blade fuses.
- Spare 12V blade fuses: Keep replacements on hand in 15A, 20A, and 30A ratings to maintain lighting and water pump operation.
- Square drive bits (Robertson #2): Nearly all interior cabinet trim and exterior shell panel fasteners use square-head screws.
Core Hardware Kit Checklist
Keep your tools in an exterior compartment rather than under an interior bed storage box. That way, you can grab them easily during a travel day without having to slide out coach rooms or track mud through the cabin.
10. Run a Full Systems Shakedown in Your Own Driveway Overnight

Never head directly on a week-long cross-country tour the day you bring an RV home. New and used rigs alike often sit dormant for months, which can lead to sticking valves, dry seals, or overlooked battery issues.
Spend an entire night parked in your own driveway or at a local state park ten miles from home. Camp as if you were hundreds of miles away: make dinner, sleep in the bed, use the shower, and run every onboard system.
This dry run lets you discover missing kitchen essentials, plumbing leaks, or bedding needs while you are still minutes away from your home or a local store.
Sleep in the rig, run the furnace, fill the fresh tank, and cycle the pump. Finding a minor manufacturer defect in your driveway is a simple weekend adjustment; finding it deep in the woods stops your vacation.
Test your furnace and air conditioner at the same time during the shakedown. New furnaces often burn off a harmless manufacturing oil coating during their first twenty minutes of operation, which can set off smoke detectors and cause an initial odor.
11. Drain Your Black Tank Only When It Reaches Two-Thirds Full
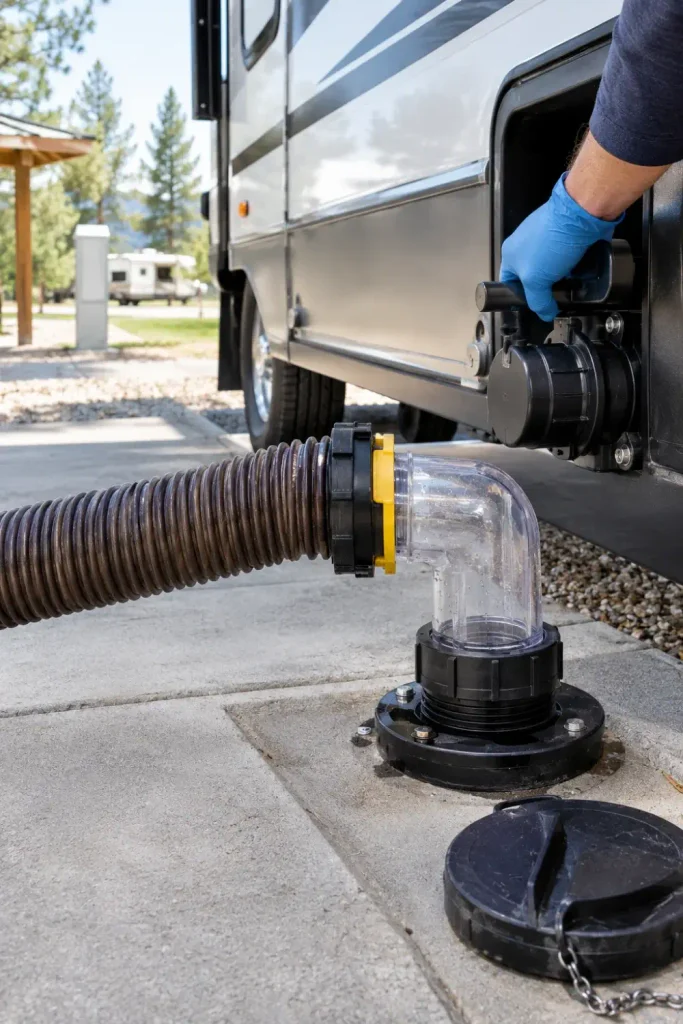
A frequent beginner mistake is leaving the black tank drain valve open whenever hooked up to a full-hookup campsite sewer inlet.
When you leave the black valve open, fluids drain out immediately while solid waste settles beneath the toilet pipe. Over time, this solid waste dries out into an immovable blockage inside the tank.
Keep the black tank valve closed until the tank is at least two-thirds full so gravity can sweep all solids away at once. If you need to dump before leaving and the tank is mostly empty, use the fresh water flush or fill the toilet bowl several times to add volume first.
The Gravity Dump Sequence
Check your hose bay fittings and open the black waste valve completely, letting the tank empty entirely.
Close the black valve, then connect your black tank rinse hose to flush internal residue off the tank walls for 3 minutes.
Open the gray water valve last; this soapy sink and shower water scrubs residual waste out of the flexible sewer line.
Always charge the empty tank with two gallons of water and an enzyme treatment pack immediately after dumping. Starting with water on the floor of the tank keeps new waste dissolved and prevents odors inside your living area.
12. Check Lug Nuts and Tire Pressures Cold Every Single Morning You Move
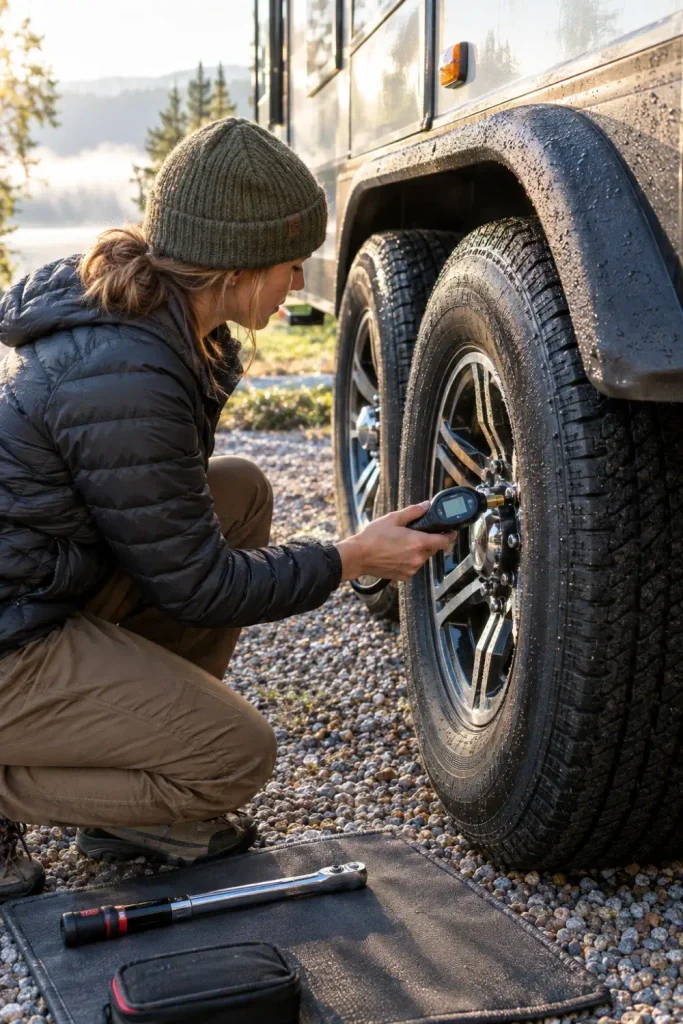
RV trailer tires often operate close to their maximum load thresholds. An underinflated trailer tire builds up heat rapidly at highway speeds, which can lead to sudden tread separation and side-skirt body damage.
Check your tire pressures in the morning before the sun hits the sidewalls and before the wheels roll down the pavement. Ambient heat and road friction increase internal pressure readings, masking an underinflated tire.
Trailer wheel lug nuts also loosen during early travel miles due to initial rim settling and frame flex. Use a dedicated torque wrench to confirm lug tightness based on your axle manufacturer’s specifications.
- Install a Wireless TPMS: Screw-on valve-stem tire pressure sensors provide live tire pressure and temperature data right to a monitor on your dashboard.
- Inspect the Spare: Check your underside-mounted spare tire pressure monthly; an uninspected spare tire is often flat when an emergency happens.
13. Keep Your Refrigerator Level to Avoid Costly Cooling Unit Burnout
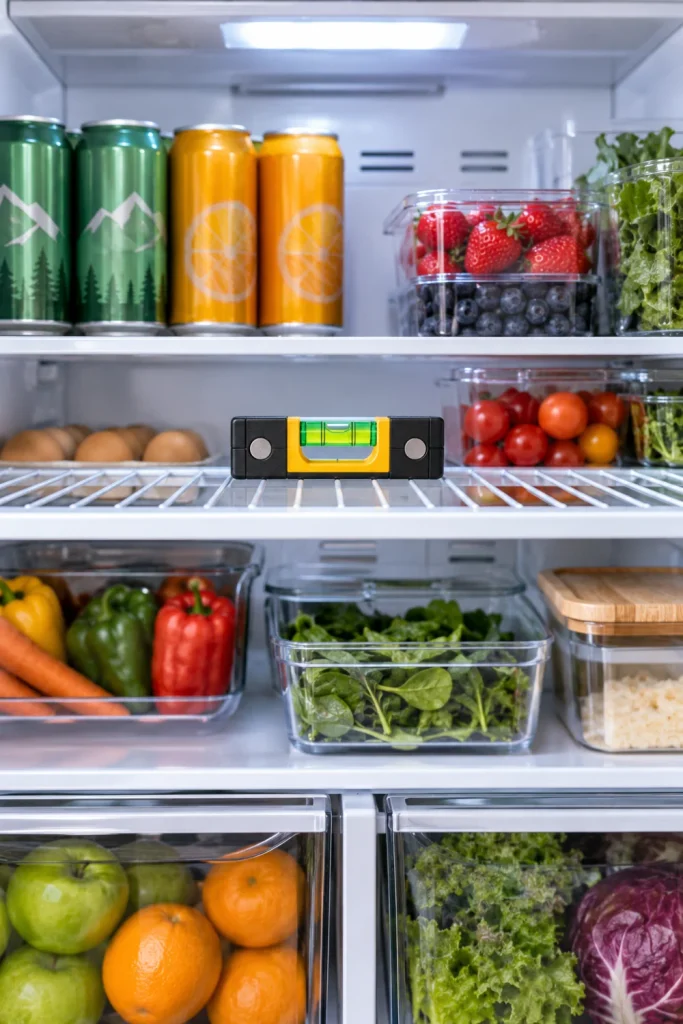
Standard RV absorption refrigerators operate on an ammonia, hydrogen, and water mixture without mechanical compressors. They rely strictly on gravity to circulate cooling fluid through the coils.
Operating an absorption refrigerator while parked off-level traps ammonia liquid within the upper condenser loops. Deprived of fluid flow, the cooling unit can overheat rapidly, crystalize the sodium chromate rust inhibitor, and ruin the entire cooling unit.
Park your rig within half a bubble on your level indicator whenever running the refrigerator on propane or electric shore power.
💡 Absorption Fridge Operating Limits
Absorption units require the rig to sit within 3 degrees of level side-to-side and 6 degrees front-to-back. If walking inside your coach feels slightly off-kilter, your refrigerator is working under excessive strain.
Modern 12-volt compressor models do not rely on gravity flow and can operate at steeper inclines. Check your owner’s manual so you know whether you have a classic absorption model or a compressor unit.
14. Buy a Surge Protector That Tests Shore Pedestal Wiring Before You Plug In
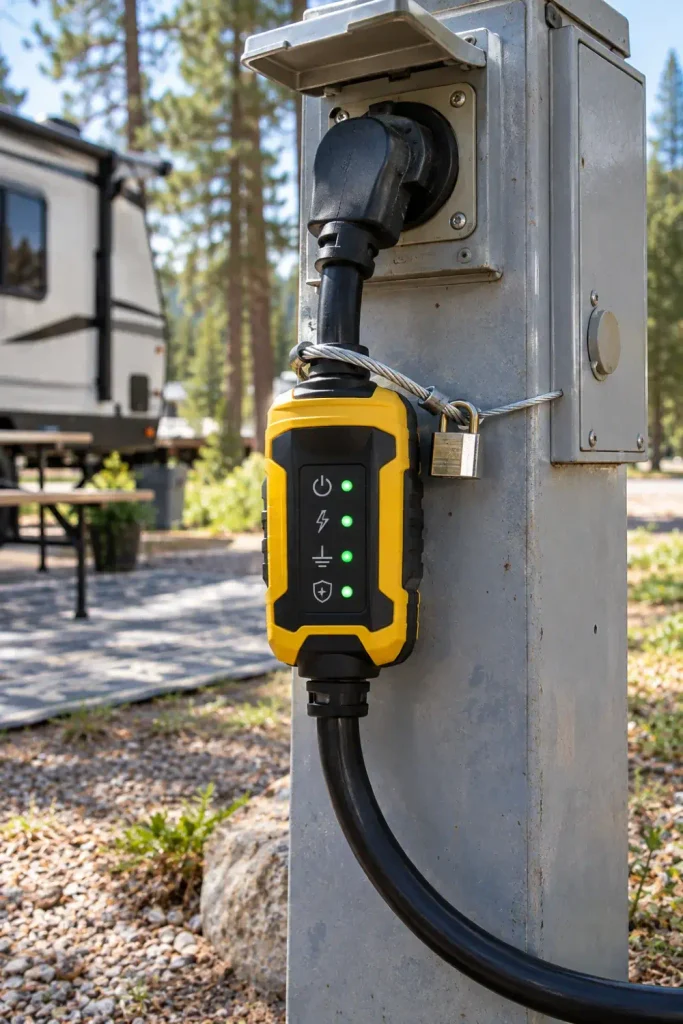
Campground electrical pedestals endure heavy wear, weather exposure, and frequent use throughout long camping seasons. Damaged sockets, loose neutral wires, and reverse-polarity connections are common issues at older hookups.
Plugging an RV directly into a malfunctioning pedestal can send 240 volts through a 120-volt system, destroying converter chargers, televisions, and air conditioner control boards in an instant.
Use an external surge protector with an integrated circuit analyzer. Plug it into the campsite pedestal first with the breaker turned off, then switch the breaker on to check for safe, balanced power before plugging in your rig’s power cord.
Dual green indicator lights verifying correct ground and neutral polarity.
Operating voltage holding steady between 108V and 132V under AC air-conditioning load.
Open Neutral warnings that can push destructive high voltage into 120V circuits.
Low voltage warnings below 104V during hot afternoons, which can overheat AC compressor motors.
Use a durable cable lock through the mounting bracket on your surge protector to secure it to the pedestal post. These units are high-value accessories that are best kept secured while you are away from camp.
15. Establish a Two-Person Walkaround Routine Before Pulling Out of Any Site
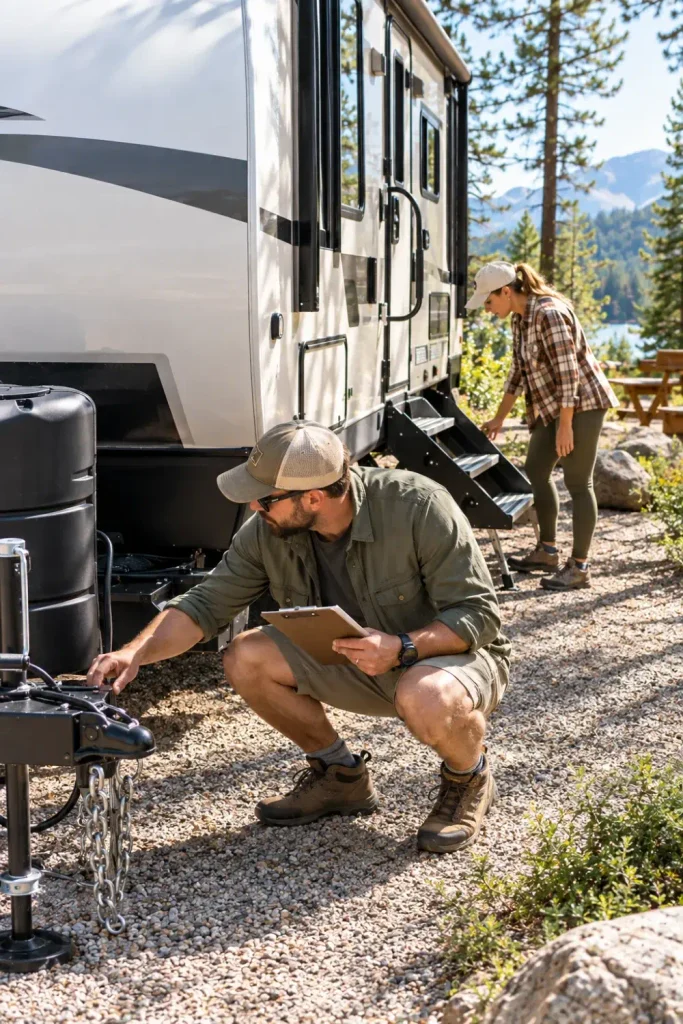
Departing a campsite without a structured final check is how entry steps stay extended, rooftop antennas hit branches, and slide-out locks get overlooked.
Create a printed laminated departure card. One traveler conducts a complete exterior loop touching every critical point, while the second traveler follows behind to independently double-check each item.
Do not allow distractions, neighbors, or phone calls to interrupt this departure loop. If interrupted, start the walkaround over from the first checkpoint.
Final Departure Perimeter Check
Look up into the tree canopy above your roofline as your final step before climbing into the cab. Checking overhead clearance saves solar panels and roof membranes from low-hanging branches as you pull forward.
16. Use Quick-Dissolving RV Toilet Paper and Plenty of Water with Every Flush
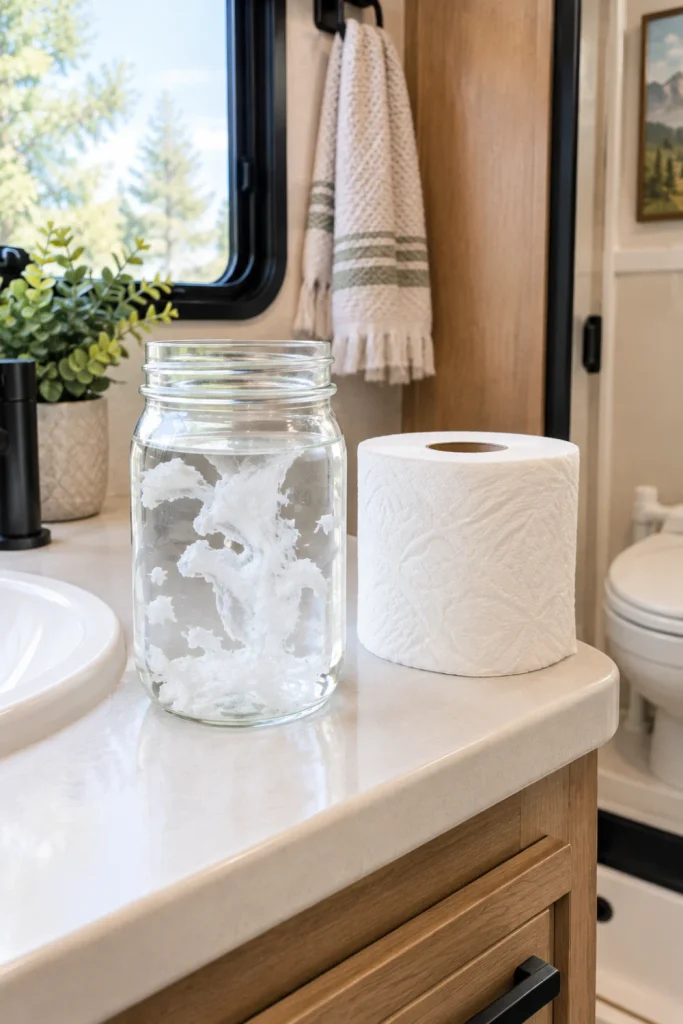
Household ultra-soft quilted toilet paper is made with strong wood fibers and binders that do not dissolve easily inside holding tanks. It forms a dense paper mass that can foul tank sensor probes and clog the drain pipe.
Use rapid-dissolving septic-safe or dedicated RV toilet paper designed to break down in standing water within thirty seconds.
Water is your best friend when using an RV gravity-flush toilet. Step down partially on the foot pedal to fill the bowl with water before using the toilet, and hold the flush open for several extra seconds afterward to keep the drain pipe clean.
Flushing without standing water leaves paper stranded inside the drain chute, causing clogs and false sensor readings.
Filling the bowl first ensures waste carries completely into the tank, preventing build-up on the drain valve.
- The Glass Jar Dissolve Test: Place two sheets of toilet paper into a sealed jar of water and shake it for ten seconds; it should dissolve into fine shreds immediately.
- Keep Wipes Out: Never flush baby wipes, hygiene products, or paper towels down an RV toilet, even if the label claims they are flushable.
17. Arrive at Campgrounds at Least Two Hours Before Sundown
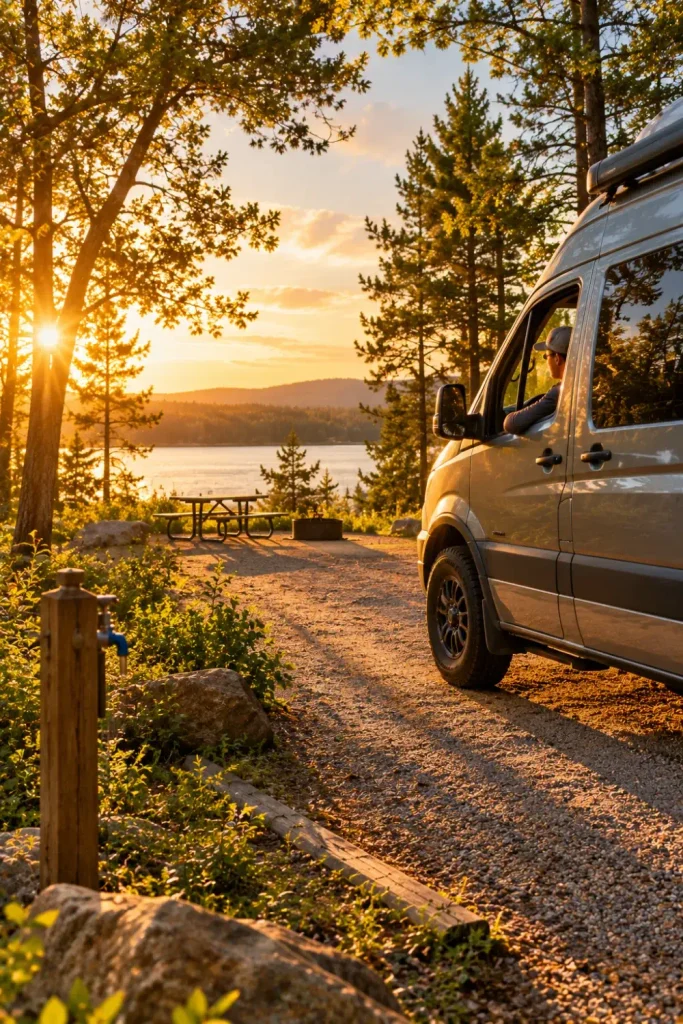
Navigating an unfamiliar campground in the dark makes parking and setup unnecessarily stressful. Campsite markers, low-lying landscape rocks, water spigots, and overhanging tree limbs become much harder to see once night falls.
Arriving while the sun is still up allows you to spot obstacles, inspect low-hanging branches, and position your hookups near utility connections with ease.
Setting up in daylight also makes it much easier to level your rig, unfurl slide rooms, and inspect connections without juggling flashlights or disturbing neighboring campers.
Backing between trees in the dark turns simple parking into high-stress guesswork. Arrive early to hook up calmly, unpack your gear, and unwind with dinner while the sun is still out.
If traffic or bad weather delays your trip past sunset, pull into a designated staging pull-through spot or well-lit highway rest area for the night. Resuming your drive in the morning makes arrival much safer and more pleasant.
Getting comfortable with RV travel takes a little time and patience. Every experienced RVer has scraped a curb, blown a campsite breaker, or wrestled with a tricky sewer fitting at some point along the way.
Focus on building simple routines, give yourself plenty of time on driving days, and keep your departure checklists close at hand. Taking things step-by-step turns what feels like a complicated setup into easy muscle memory.
Save this list to your travel board so you have these beginner tips handy when you pack up for your next adventure.

