
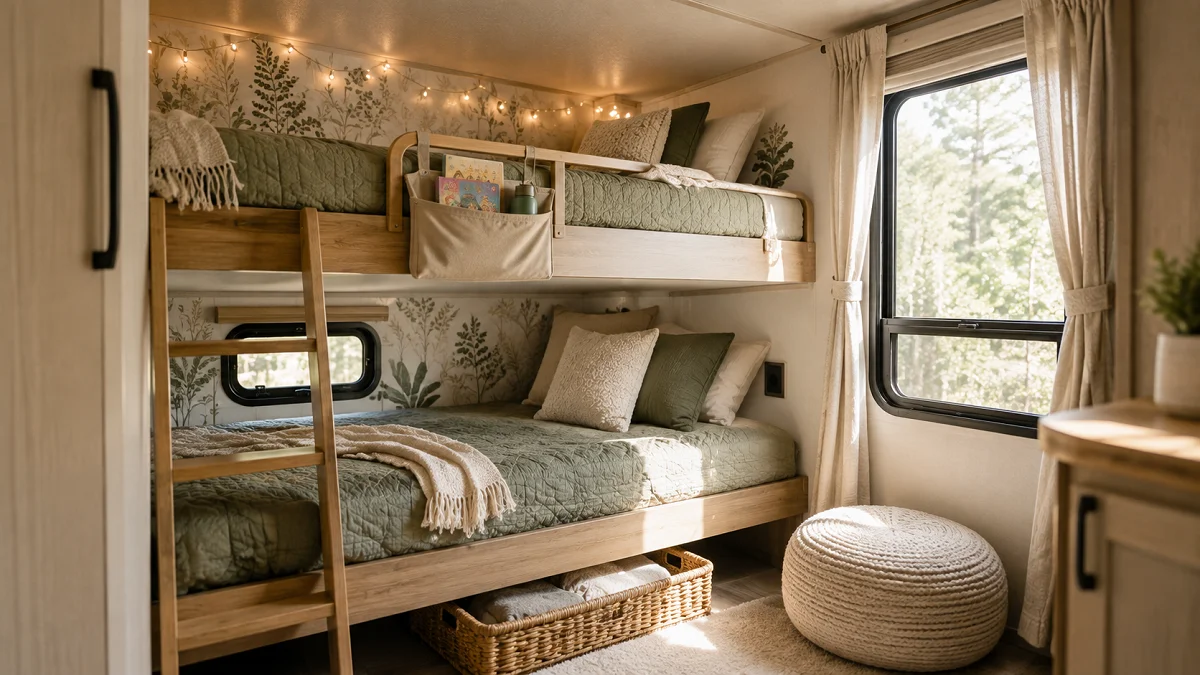
Most factory camper bunkhouses feel like an afterthought. You get paper-thin mattresses on raw plywood, dark wood paneling, and zero spots for your kids to stash a flashlight, water bottle, or favorite stuffed animal.
When you pack kids into a small footprint, clutter piles up quickly. Clothes end up in footwells, bedding tangles around awkward mattress corners, and bedtime can turn into an overtired wrestling match.
A few deliberate changes turn a sterile, cramped bunk nook into a cozy retreat your children actually look forward to sleeping in. These practical rv kids bedroom ideas focus on real organization, comfortable sleeping surfaces, and smart storage hacks that hold up through highway bumps and rainy campground afternoons.
1. Hang Fabric Pocket Organizers Across Bunk Rails
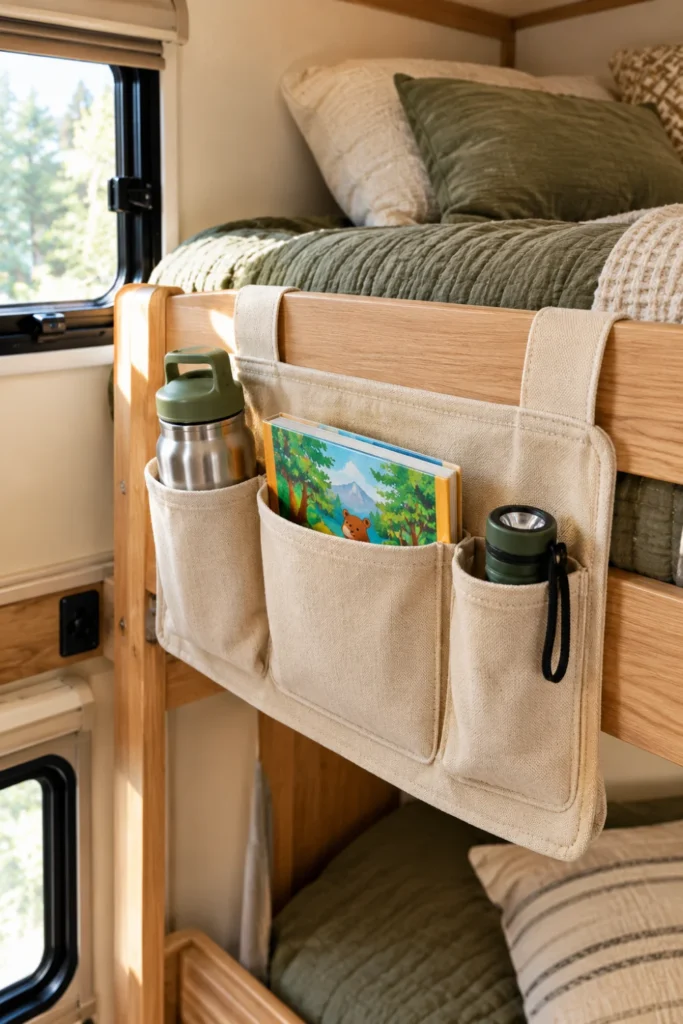
Bunk beds rarely have room for a traditional nightstand. Bedside clutter usually rolls straight onto the floor or gets wedged behind the mattress during travel days.
A sturdy canvas bedside caddy loops directly over the safety rail or tucks under the mattress edge to create an instant organizer.
- Top pockets: Great for a water bottle, reading glasses, and a mini flashlight.
- Middle slots: Hold bedtime storybooks, sketchpads, and colored pencils.
- Lower drop: Secures headphones and charging cords without tangling.
Look for heavy canvas or thick felt styles with reinforced stitching so the pockets do not sag when filled with heavy water bottles.
2. Swap Out Factory Mattresses for Custom Cut High Density Foam
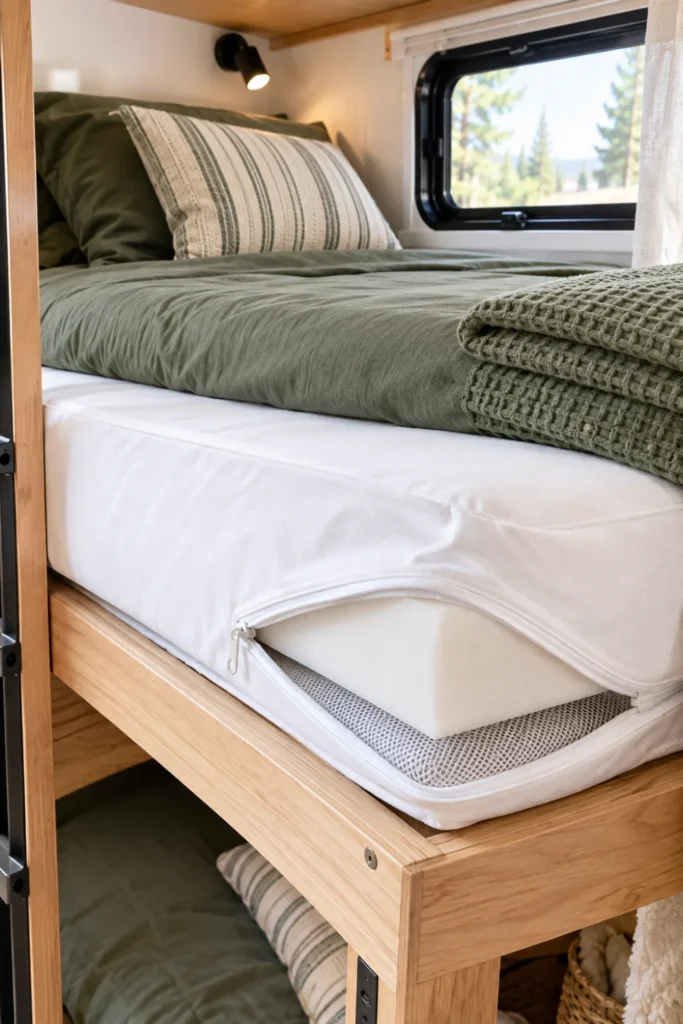
Standard RV bunk mattresses are notoriously thin and stiff. They bottom out against solid plywood, leaving kids sore and restless after long travel days.
Upgrading to a 4-inch or 5-inch high-density foam mattress provides better support without adding extra tongue weight to your camper.
- Measure exact bunk dimensions: Camper bunks often have curved corners or non-standard lengths.
- Cut with an electric carving knife: An electric kitchen knife slices through raw foam cleanly without jagged edges.
- Cover in zippered waterproof encasements: This shields the core foam from spills, sand, and accidental leaks.
💡 Pro Tip: Prevent Moisture Build-Up
Place a condensation-prevention mat or breathable mesh under the foam mattress to promote continuous airflow and stop mildew beneath the unvented plywood base.
If replacement foam is outside your current budget, a 2-inch gel memory foam topper trimmed to fit over the factory pad provides a noticeably softer sleep surface.
3. Mount Low-Voltage Puck Reading Lights with Tap Controls
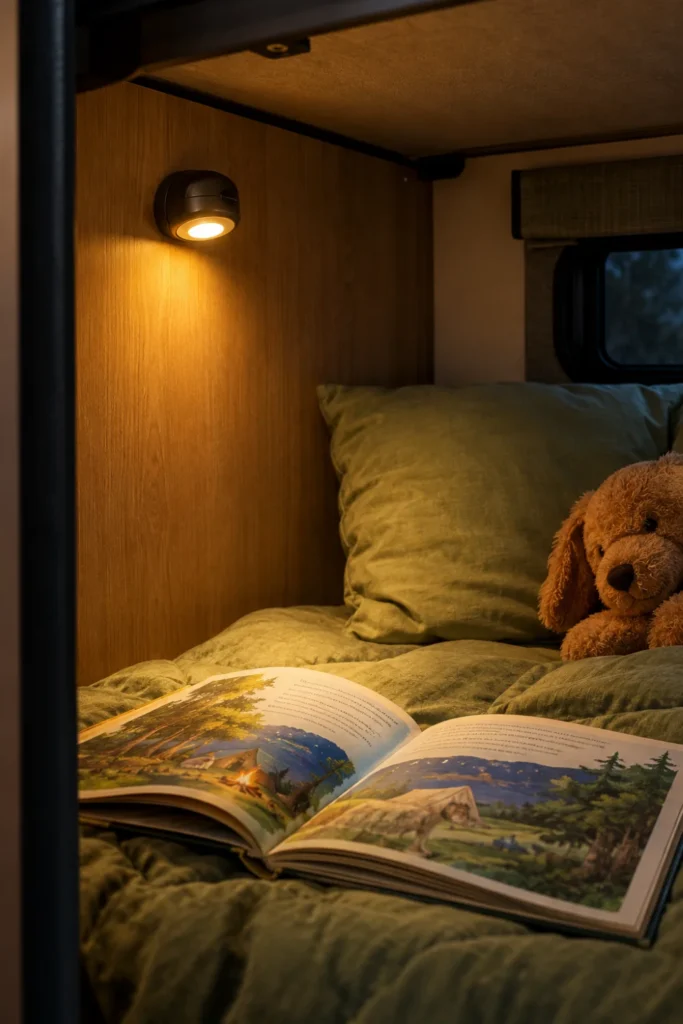
Factory bunkhouse ceiling fixtures are often bright and harsh. Turning one on lights up the entire room, making it difficult for one child to sleep while another reads.
Individual 12V or rechargeable tap lights let kids control their own small reading zone without waking siblings.
| Feature | Standard Ceiling Dome | Tap-Controlled Puck Light |
| Light Quality | Blinding overhead flood | Warm, focused direct beam |
| Bedtime Control | Master wall switch | Child-friendly individual tap |
| Battery Drain | Uses main RV battery bank | Internal USB charge or low-watt 12V |
Harsh, bright ceiling lighting keeps both bunks awake and requires getting out of bed to flip wall switches.
Soft, dimmable reading lights give each child independent control without lighting up the whole camper.
Stick with warm white bulbs in the 2700K to 3000K range. Cool blue lights can suppress natural melatonin production right before bedtime.
4. Install Tension Rods and Blackout Privacy Curtains for Each Bunk
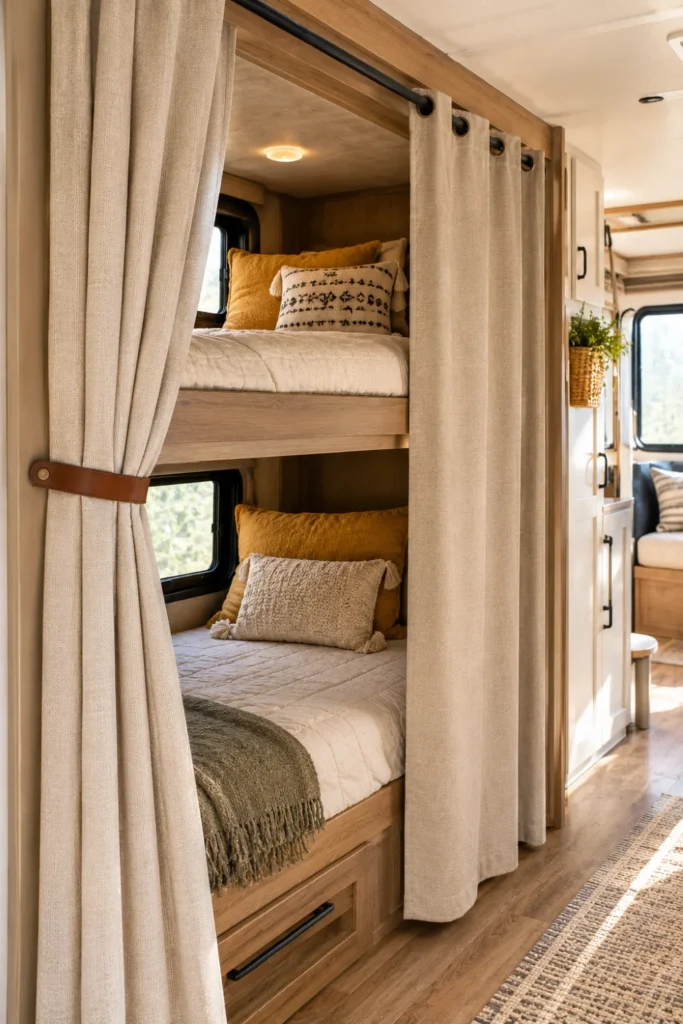
Camper bunks rarely provide personal space. Adding individual curtains gives each child a private nook where they can decompress, nap, or read quietly.
Heavy blackout fabric also blocks out early morning campground sun and late-night campfire glow.
- Spring-loaded heavy tension rod
- Two blackout curtain panels cut to bunk length
- Curtain ring clips with quiet plastic glides
- Stick-on hook and loop tabs to secure sides while driving
Bunk Curtain Installation Checklist
Hem the bottom of the panels so they sit two inches above the bunk rail. This prevents the fabric from catching in moving slide-out mechanisms or getting trampled underfoot.
5. Secure Wall-Mounted Canvas Book Slings Near Bedside Corners
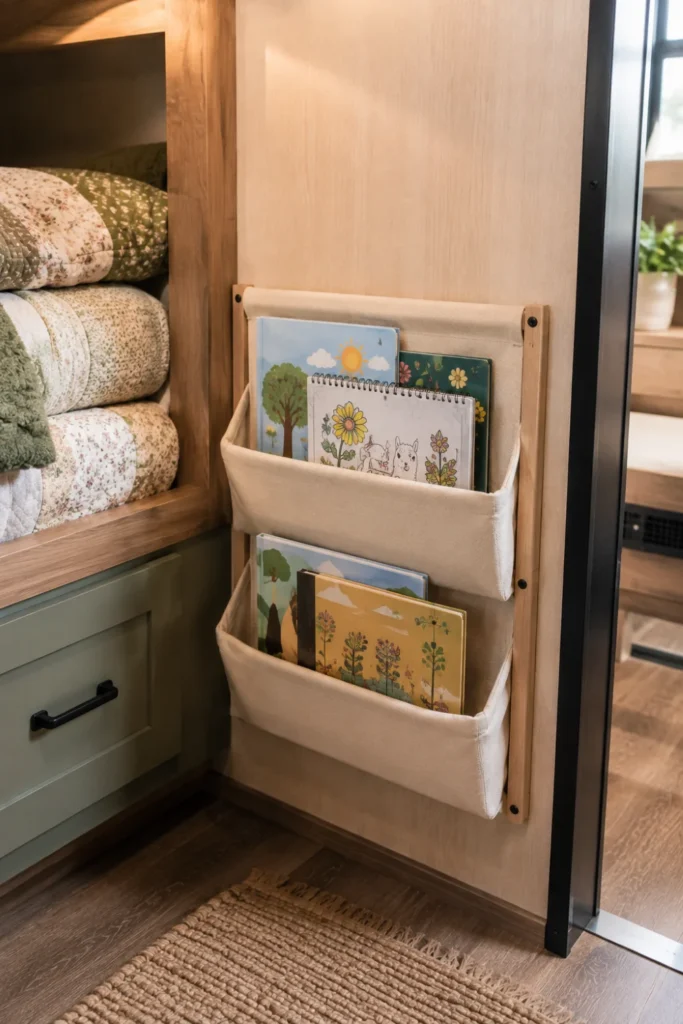
Wooden shelves add unnecessary weight and have hard corners that create head-bump hazards in tight camper bunks.
Soft canvas book slings hold reading material flat against the wall, keeping walkways clear and heads safe.
- Pick an unused wall space near the foot of the bunk.
- Fasten with heavy-duty adhesive wall strips or short wood screws driven into solid wall framing.
- Load with thin paperback books, activity pads, and coloring sheets.
Use soft fabric slings that sit flat against the wall.
Store lightweight paperbacks and coloring pads near the foot of the bed.
Do not mount heavy wood shelves with sharp, protruding corners.
Avoid stacking loose hardcovers that slide off during transit.
Stick to soft-cover books in these slings. They flex with the canvas, take up minimal space, and will not cause injury if pulled down in the dark.
6. Create Under-Bunk Rolling Toy Trays Using Shallow Storage Bins
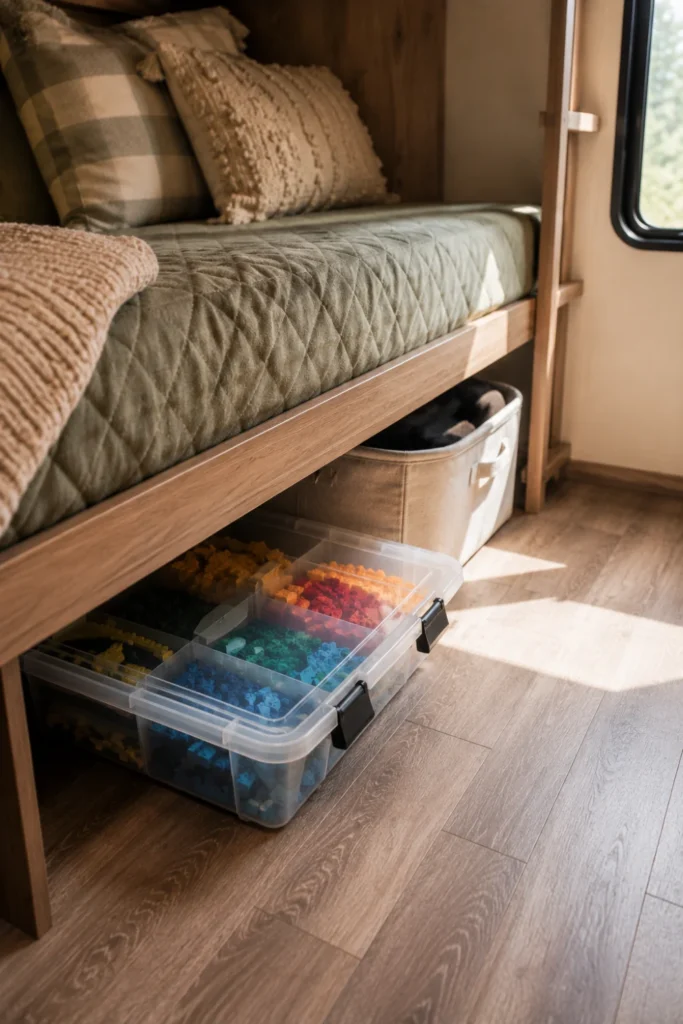
The void beneath a lower bunk or dinette bench often turns into a messy pile of forgotten gear.
Low-profile storage bins keep toys categorized and slide out smoothly when kids want to play on the camper floor.
| Container Style | Best Contents | Road Travel Benefit |
| Clear Latching Plastic | Legos, building blocks, craft supplies | Lids stay locked during sharp turns |
| Fabric Zip Totes | Stuffed animals, dress-up costumes | Compresses easily into tight gaps |
| Divided Caddies | Card games, markers, road trip puzzles | Portable handle for outdoor picnic tables |
| Latching Plastic Trays | Fabric Storage Bins |
|---|---|
| Snap lids lock small toys inside securely. | Soft sides squeeze into irregular wall cavities. |
| Wipes clean from mud, dirt, and damp floors. | Folds flat when empty to save cabin space. |
Stick small felt pads or adhesive caster wheels to the bin base so they slide across vinyl camper flooring without scuffing the finish.
7. Apply Removable Peel-and-Stick Wallpaper to Bunk Nooks
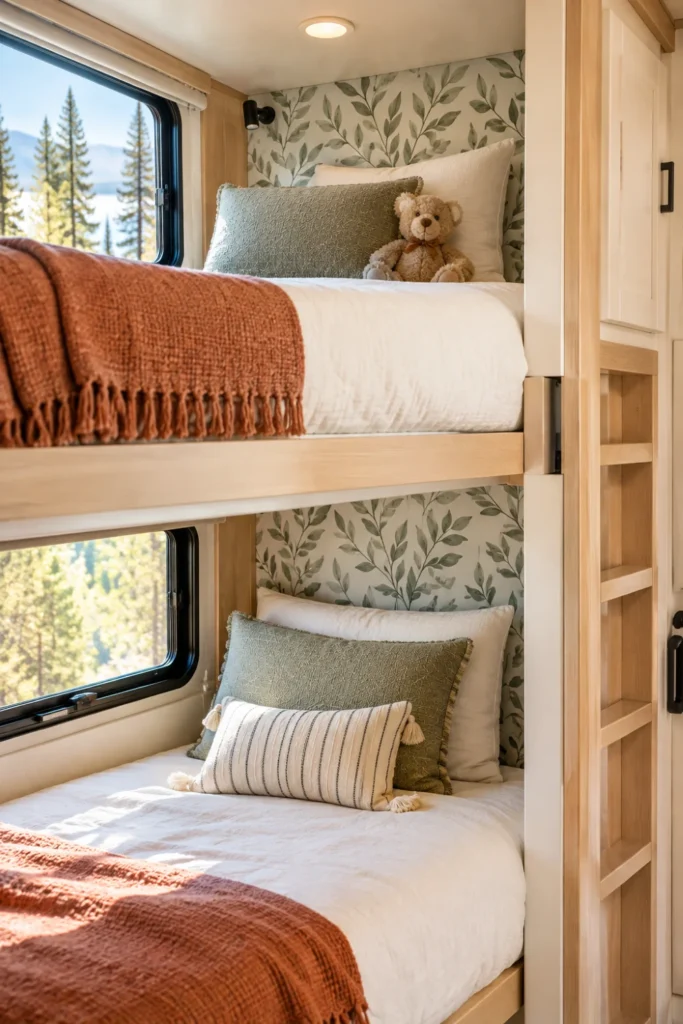
Factory RV wall paneling is durable, but the generic beige or dark faux-wood finish makes small bunks feel cave-like.
Removable wallpaper adds character to individual sleeping nooks without damaging thin camper wallboard when removed.
- Prep the surface: Wipe walls thoroughly with isopropyl alcohol to lift grease, dust, and road film.
- Allow expansion gaps: Leave a 1/8-inch margin along corner trims to prevent bubbling during seasonal temperature shifts.
- Use a felt-edged squeegee: Smooth panels downward from center to edges to push out trapped air pockets.
Choose light-toned patterns like subtle sage leaves, soft stars, or neutral geometric grids to bounce natural daylight into dark bunk corners.
8. Add Soft Adhesive Wall Bumpers Along Cold Aluminum Window Frames
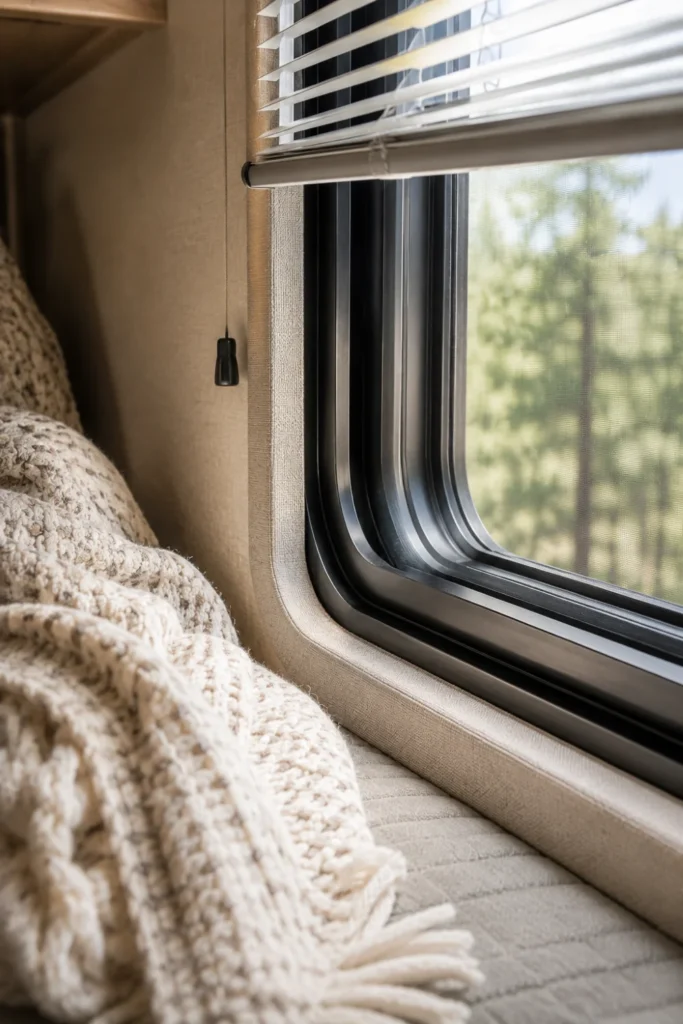
Bunk windows feature bare aluminum frames that radiate outside cold in spring and fall, causing uncomfortable drafts right against sleeping shoulders.
Adhesive foam edge guards create a soft buffer between your child and cold metal trim.
- Measure the exposed metal edging beside the bunk mattress.
- Cut high-density foam edge trim to length with household scissors.
- Press the pre-taped adhesive firmly against the inner window frame lip.
⚠️ Watch Out: Window Drainage
Never block the small weep holes at the bottom of the window track. Keep your foam bumper on the interior frame so condensation escapes outside freely.
The soft foam prevents bumped elbows at night while serving as a secondary draft block on chilly shoulder-season camping trips.
9. Hang Sturdy Macrame Toy Hammocks in Unused Ceiling Corners
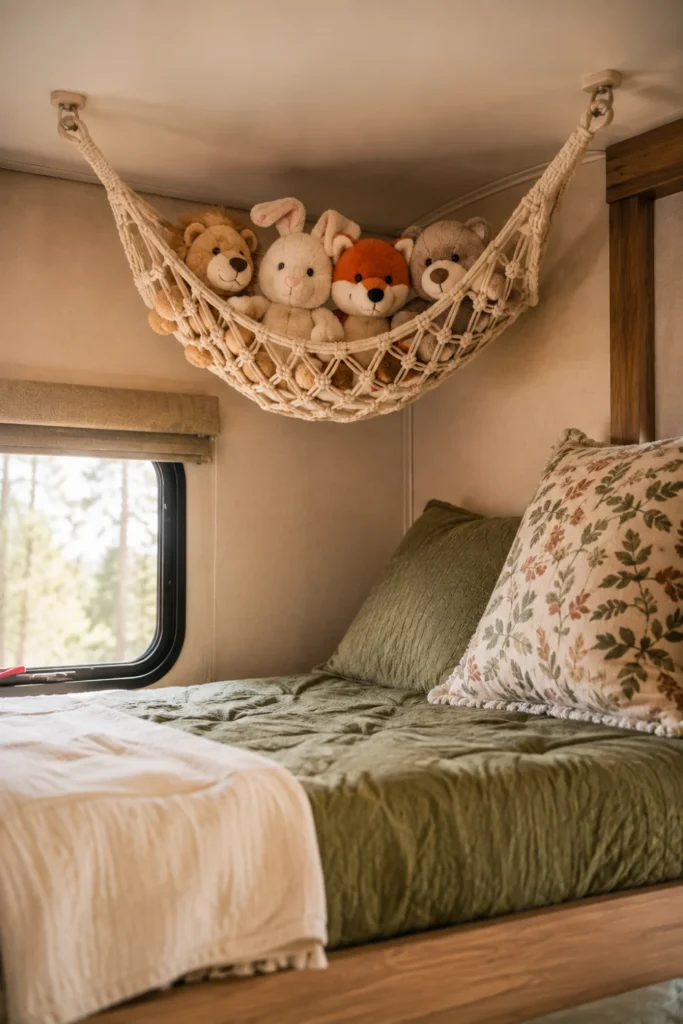
Floor space in an RV bedroom is limited, but the upper corners near the ceiling are almost always empty.
A corner mesh hammock or woven macrame net gets plush toys off sleeping areas without taking up closet shelves.
- Keeps plushies clean, dry, and visible
- Utilizes dead vertical space near ceiling lines
- Secures light toys so they do not tumble during travel
Always screw mounting hooks into solid aluminum ceiling framing or reinforced wooden backing, not thin decorative ceiling luan.
Reserve hammocks strictly for lightweight items like stuffed animals and spare knit blankets. Heavy toys can strain camper ceiling panels over bumpy roads.
10. Use Color-Coded Fitted Sheets to Keep Bedding Simple
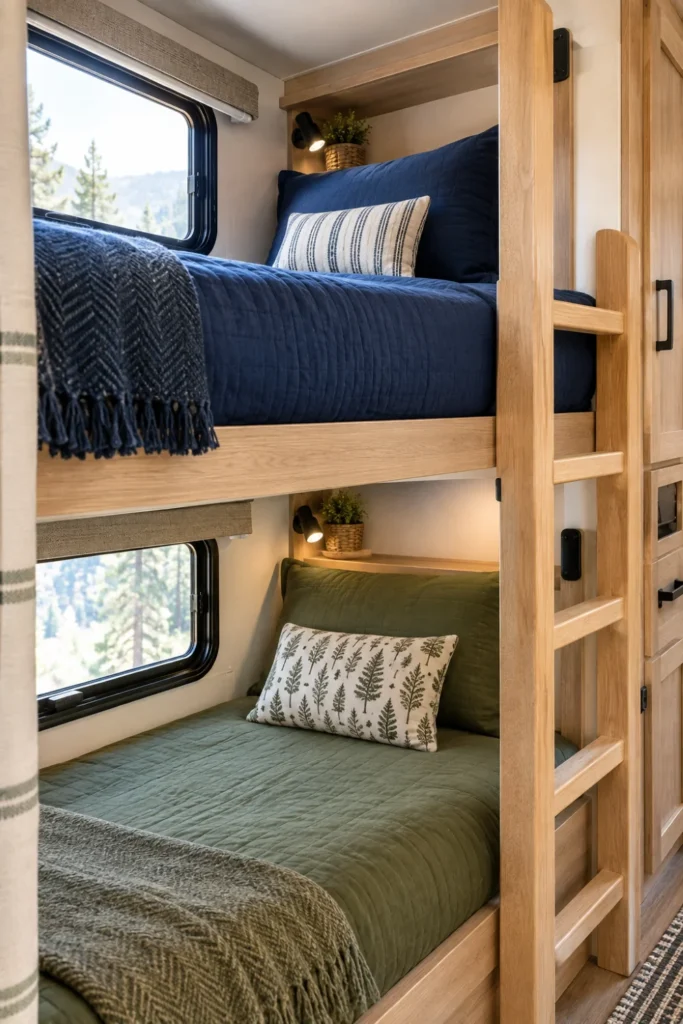
Making an RV bunk bed is an awkward chore. Mattresses fit tightly inside three solid walls, turning sheet changes into a frustrating wrestling match.
Assigning distinct sheet colors or zippered bedding systems simplifies laundry rotation and makes daily morning tidy-up manageable for kids.
- Select a dedicated color for each bunk: Assign navy to the top bunk and olive to the lower bunk so sheets never mix.
- Use deep corner mattress straps: Elastic corner clips lock fitted sheets onto odd-sized RV mattresses so they do not pop off overnight.
- Opt for all-in-one sleeping bags or zippered bedding: Kids make their bed in seconds with a single side zip.
Lift the outer edge of the mattress and hook the two rear corners first.
Snap elastic corner tension clips across the mattress underside to lock the base in place.
Slide the mattress back into its nook and secure the accessible front corners.
Jersey knit cotton sheets work well for RV bunks because the fabric stretches easily over non-standard mattress thicknesses.
11. Mount Heavy-Duty Magnetic Strips for Metal Toys and Matchbox Cars
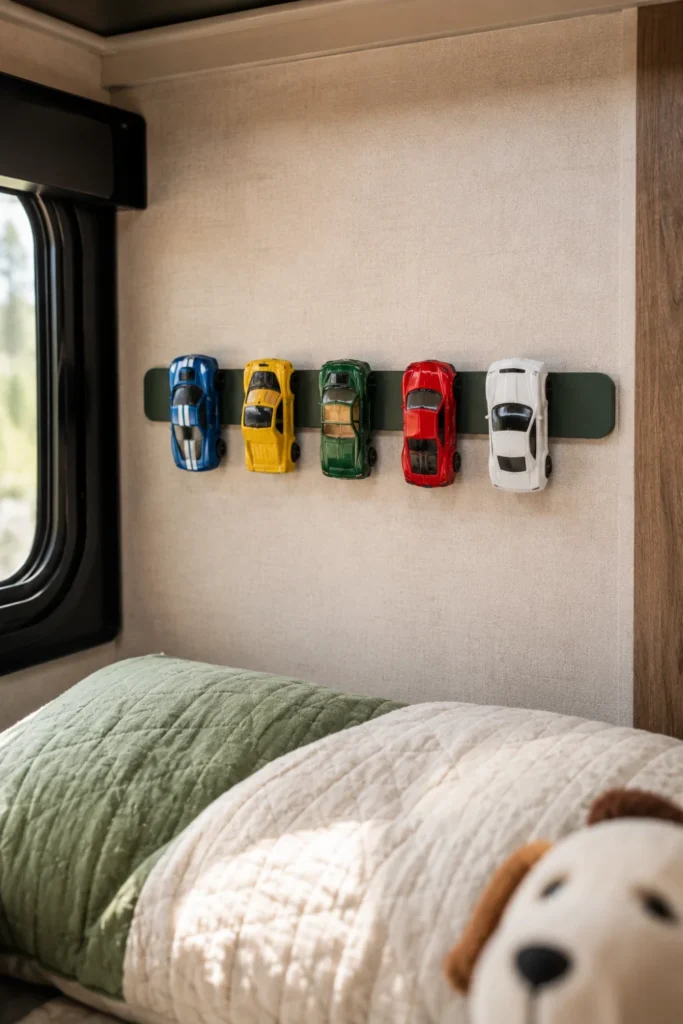
Loose toy cars and metal figurines roll off shelves the moment your rig hits the highway.
Fastening a silicone-coated magnetic knife strip against the bunk wall gives kids an interactive display board that keeps small toys securely anchored.
- Display function: Kids can line up their favorite toy vehicles within arm’s reach.
- Travel security: Strong rare-earth magnets hold items firmly during highway vibrations.
- Zero floor clutter: Clears floor space by moving everyday play items onto empty walls.
Use rubber or silicone-coated magnetic strips to prevent scratching toys.
Anchor with short mounting screws into solid wall framing studs.
Do not leave loose metal toys on open shelving units.
Avoid weak adhesive tape that can fail in high summer humidity.
Mount the strip down near the foot of the bed so sleeping feet do not knock parked cars loose in the middle of the night.
12. Set Up a Fold-Down Wall Desk for Roadschooling and Crafts
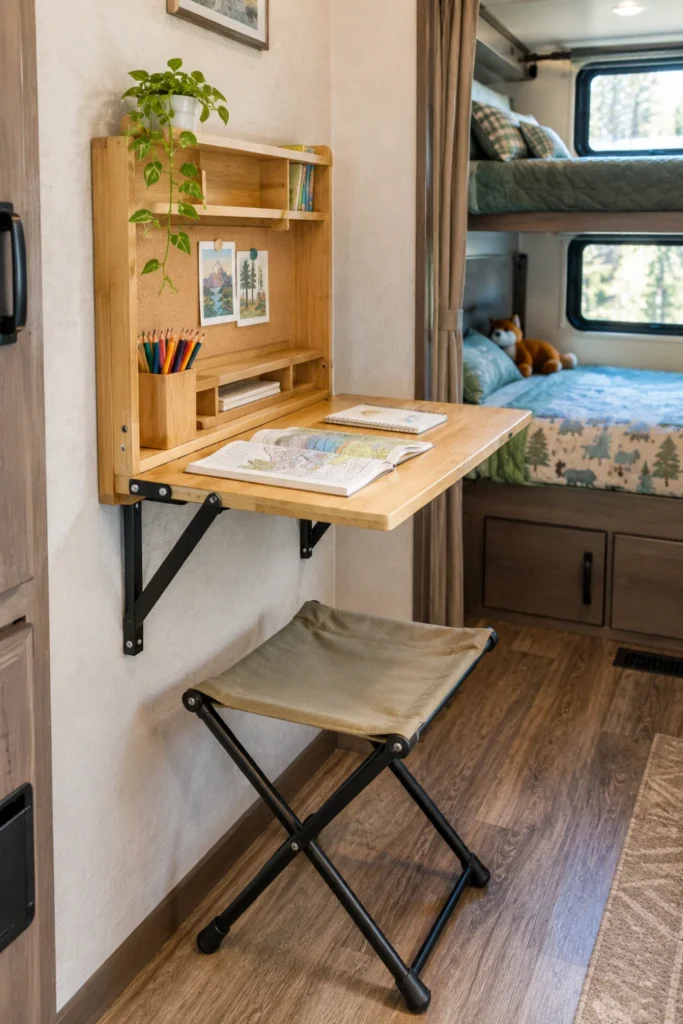
When rainy days keep kids indoors, the main dinette table gets crowded quickly.
A wall-mounted drop-leaf table creates a dedicated corner for homework, coloring, or tablet games, then folds flat against the wall when playtime is done.
- Locate solid wall studs in the bunkhouse walkway or outer wall.
- Fasten heavy-duty folding triangle brackets with locking release levers.
- Attach a lightweight bamboo or pine craft board as the desktop surface.
Pair this drop-down surface with a collapsible canvas stool that folds up and slides beneath the lower bunk mattress when not in use.
13. Install Safety Bunk Netting with Sturdy Quick-Release Clips
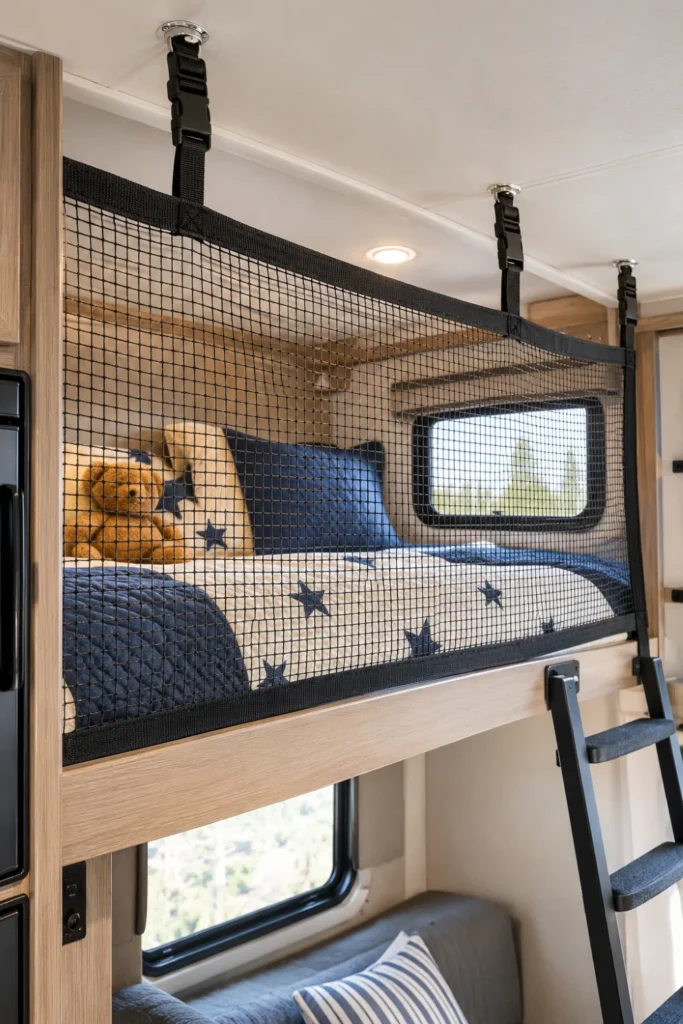
Top bunks in campers rarely come with substantial guardrails, which can worry parents of restless sleepers.
Marine-grade cargo netting or custom bunk nets provide full-height fall protection without adding heavy framing or blocking airflow.
- Secures top bunk sleepers without making the space feel enclosed
- Unclips in seconds for quick daytime bed making
- Rolls up neatly against the ceiling when not needed
💡 Pro Tip: Quick-Release Hardware
Use side-release buckle clips at the top anchor points. This lets kids unfasten their own net easily in the morning while keeping it securely locked in place through the night.
Fasten the bottom of the netting beneath the mattress frame and hook the top straps into eyelet anchors driven into ceiling rafters.
14. Use Lightweight Velvet Hangers in Compact Wardrobes
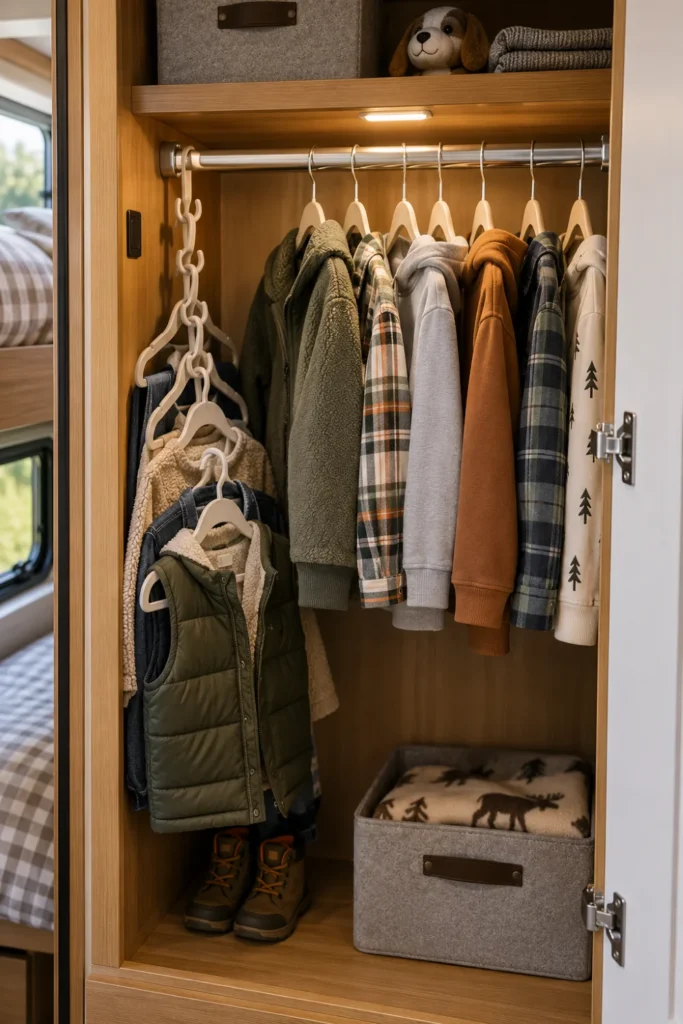
Factory RV bunk closets are narrow and shallow, making standard plastic hangers twist awkwardly and take up double the necessary bar space.
Ultra-slim velvet hangers keep small clothes organized and prevent shirts and jackets from sliding off onto the closet floor while traveling.
| Hanger Style | Closet Space Used | Road Transit Grip |
| Bulky Plastic Hangers | 10 to 12 shirts per closet rod | Slick surface lets clothes slide off |
| Slim Velvet Hangers | 20 to 25 shirts per closet rod | Non-slip coating holds shirts firmly |
| Tiered Cascade Hangers | Up to 30 shirts per closet rod | Vertical drop maximizes vertical hanging space |
Bulky plastic hangers bounce around and drop clothes into a messy heap at the bottom of the wardrobe during travel days.
Slim velvet hangers double usable hanging space and keep jackets, shirts, and hoodies firmly anchored in transit.
Add cascading connector hooks to hang matching outfits together, saving morning prep time before setting off on daily campground adventures.
15. Place Battery-Operated Motion Sensor Nightlights Near Floor Level
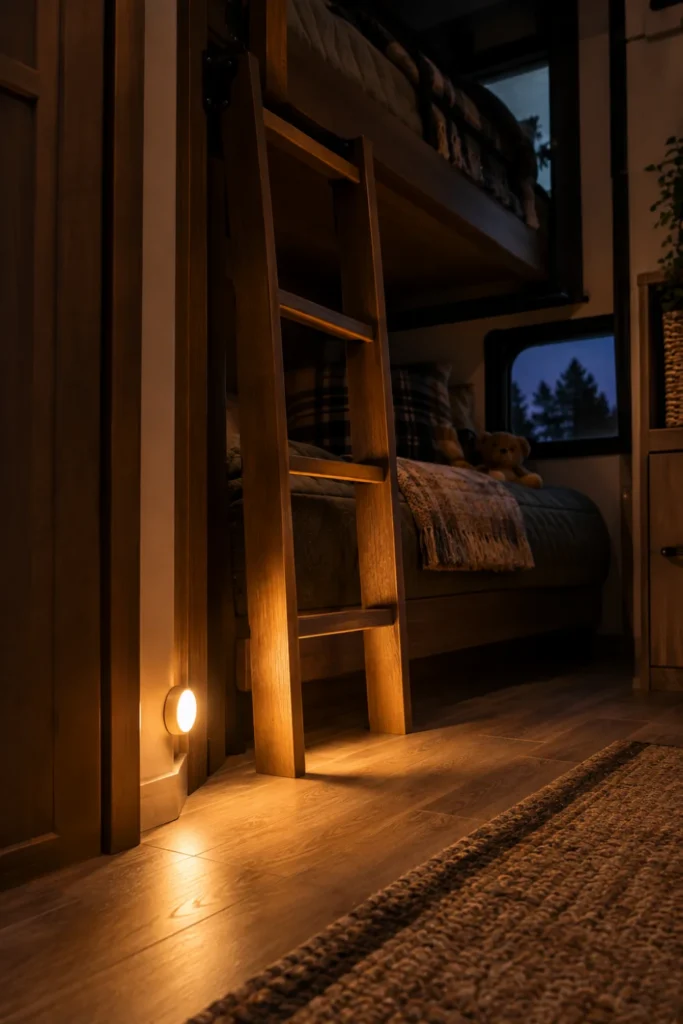
Navigating a dark camper hallway for midnight bathroom trips often leads to stubbed toes or bumped heads against ladder rungs.
Small motion-activated puck lights placed near floor level provide gentle downward illumination that keeps walkways clear and safe.
- Select low-lumen warm white LED lights with dusk-to-dawn sensors.
- Attach them along baseboards or the lower bunk ladder steps using adhesive strips.
- Angle the beam downward so the light does not shine directly into sleeping eyes.
Nighttime Bunk Safety Kit
Choose rechargeable units with magnetic backing so you can quickly pull them down to recharge with a standard USB power bank.
16. Tuck Soft Floor Poufs in Open Spaces for Flexible Seating
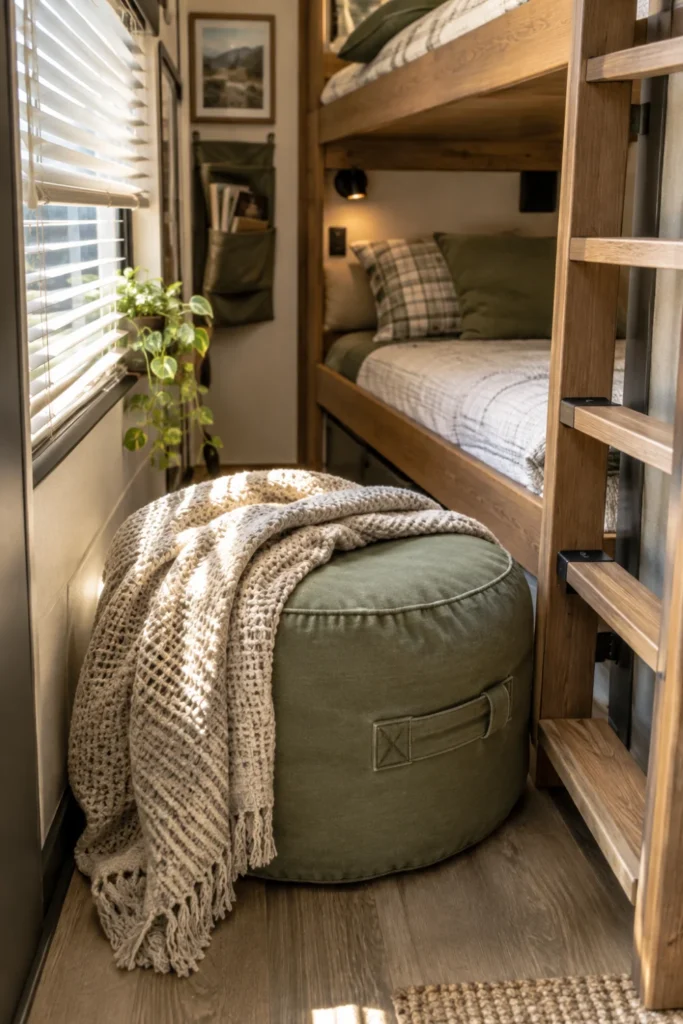
Hard camper furniture does not leave much room for comfortable lounging during movie nights or rainy campground mornings.
Soft beanbag chairs or storage poufs give kids a dedicated place to relax on the floor without permanently blocking narrow camper walkways.
- Moveable comfort: Lightweight enough for children to drag between bunks and the main living area.
- Dual-purpose storage: Stuffed animal storage poufs hold extra plushies or off-season blankets inside.
- Easy pack-up: Tucks neatly onto the lower bunk or inside a footwell on travel days.
Look for removable, machine-washable canvas covers that unzip easily when dirt, campfire ash, or snack crumbs inevitably make their way inside.
17. Attach Felt Pinboards to Inner Cabinet Doors for Kids Artwork
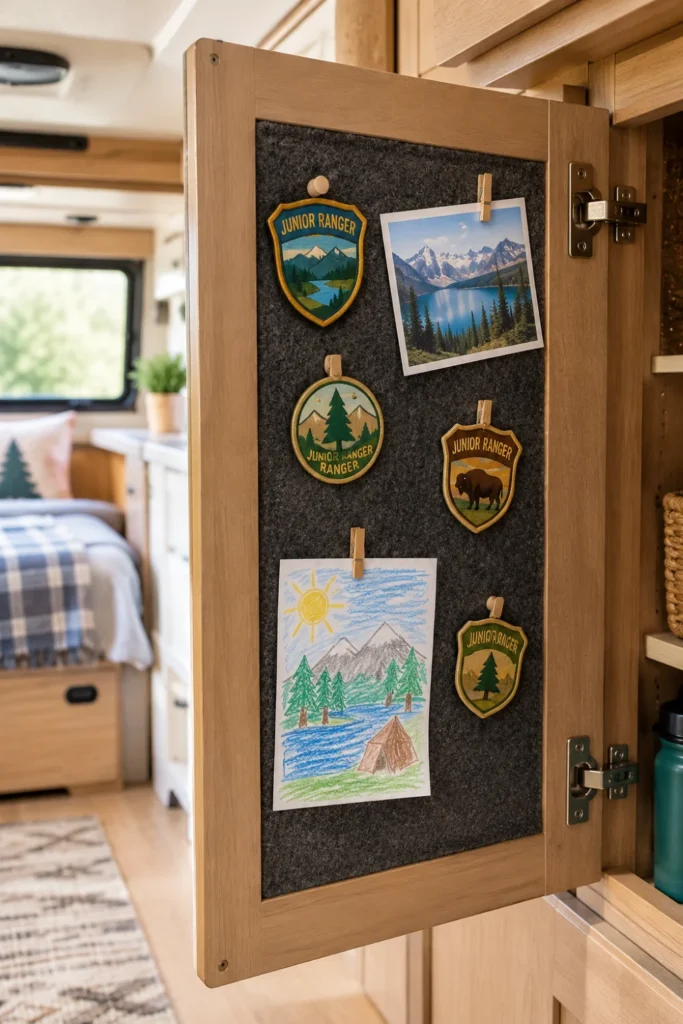
Kids love collecting junior ranger badges, postcard souvenirs, and campground maps, but taping them to camper walls can pull the decorative finish right off the wallpaper.
Self-adhesive felt tiles on the inside of wardrobe doors create a personal gallery space where kids can pin up their favorite memories without damaging camper surfaces.
- Wipe down the inner cabinet door panel with mild soap and water.
- Trim peel-and-stick felt corkboard squares to fit the recessed door frame.
- Use mini push pins or wooden clips to pin up artwork, ticket stubs, and stickers.
- ▸Junior Ranger Badges: Safe pin placement away from walkway walls.
- ▸Campground Maps: Quick reference display for daily trail walks and bike paths.
- ▸Rotating Drawings: Simple push-pin swaps that avoid wall tape damage entirely.
Keeping the board inside cabinet doors keeps the visual noise hidden during travel while giving kids ownership over their own special corner.
18. Add Warm LED Fairy Lights with USB Timers for Bedtime Ambience
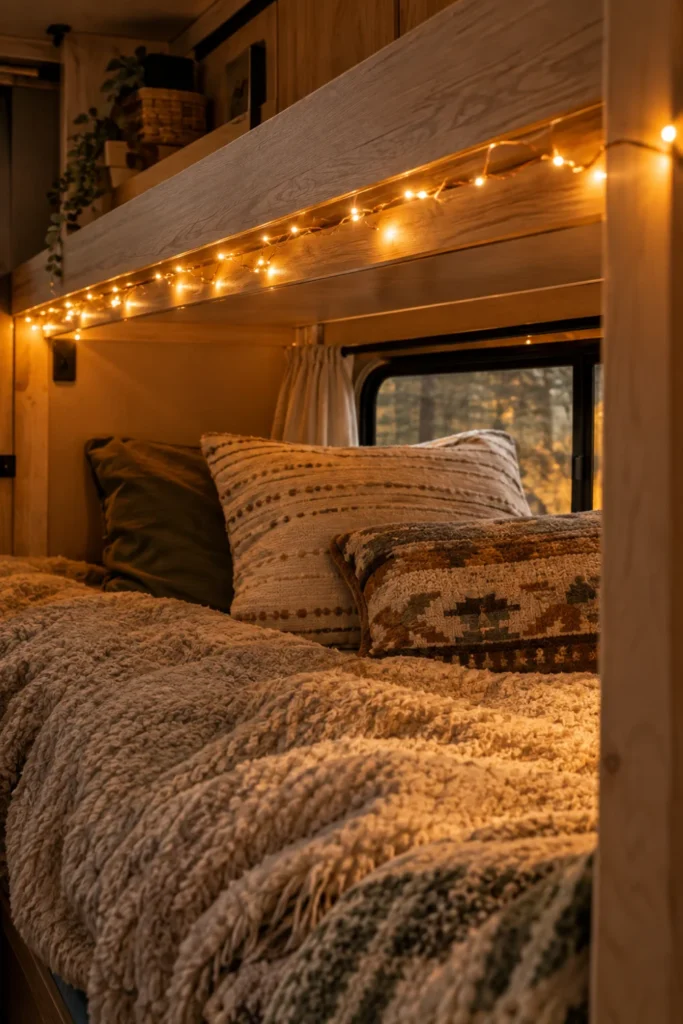
Standard RV dome lights can feel stark and industrial, which does not help energetic kids wind down after busy days outdoors.
Stringing delicate, insulated copper-wire fairy lights around the perimeter of the bunk frame creates a calming, warm glow that doubles as a soothing sleep aid.
- Consumes minimal 5V USB power via power bank or bunk outlet
- Stays completely cool to the touch throughout the night
- Built-in timer functions shut the lights off automatically after two to six hours
Choose fairy lights with an integrated 6-hour auto-shutoff timer so you never accidentally drain your camper battery bank overnight.
Fasten the copper strand along the bunk ceiling trim using small clear adhesive cord clips placed every twelve inches to keep lines taut.
19. Build a Bedside Tech Charging Caddy with Cord Organizers
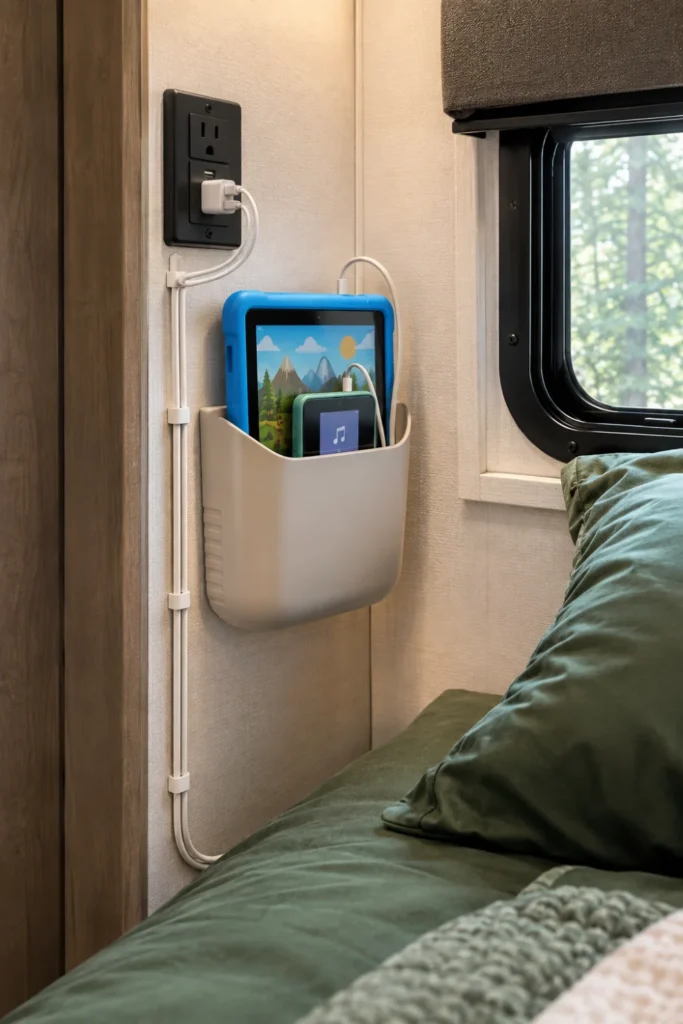
Tablets, e-readers, and kid-safe audio players often turn into a tangled knot of charging cables across the bunk floor.
A compact, wall-mounted charging dock keeps gadgets off sleeping surfaces and safely charging overnight while avoiding tripped cords.
- Mount an open-topped silicone or fabric media caddy near a dedicated 12V USB outlet.
- Use adhesive silicone cable drops to guide cords straight down the trim seam.
- Label each charging lead with colored tape so siblings keep their devices organized.
Stick a silicone wall caddy within arm’s reach of the bunk USB outlet.
Run charging cords along wall corners using low-profile self-adhesive wire clips.
Stash devices upright overnight so screens stay off the bed and protected from accidental drops.
This simple setup keeps delicate screens safe from rolling bodies and gives everything a designated spot before everyone turns in for the night.
Setting up a functional camper bunkhouse does not require a full gut remodel. By adding practical storage bins, softer bedding, and cozy personal touches, you can turn tight camper corners into spaces your kids love retreating to after a full day outside. Pick one or two of these simple rv kids bedroom ideas to start with on your next weekend trip, and adjust the layout as your family finds its rhythm on the road.
Save this list to your RV organization board on Pinterest so you have these practical bunk hacks ready when planning your next camper upgrade.

