
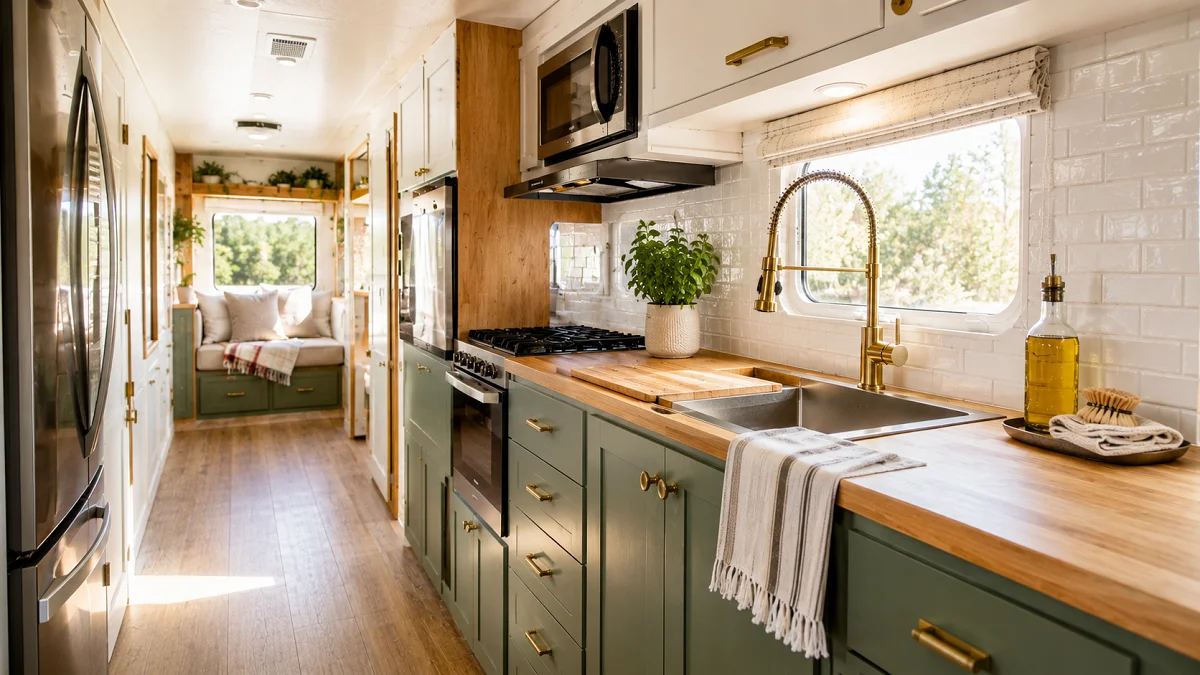
Most stock camper kitchens share the same dreary story: heavy dark wood-grain vinyl, yellowed faux wallpaper, and tiny plastic sinks that barely fit a dinner plate. Cooking in a tight, uninspiring space turns road meal prep into a daily frustration. You do not have to settle for the dark cave feeling that came from the factory.
A thoughtful refresh can completely change how your rig feels on the road. Bringing light, smart organization, and durable residential textures into your camper creates a functional setup you actually want to cook in.
With the right rv kitchen remodel ideas, you can make high-impact upgrades that withstand road vibration without adding unnecessary towing weight. Here is how to turn your small camper kitchen into a bright, hard-working culinary hub.
1. Swap Brown Flat Cabinets for Shaker Paint and Matte Brass Pulls
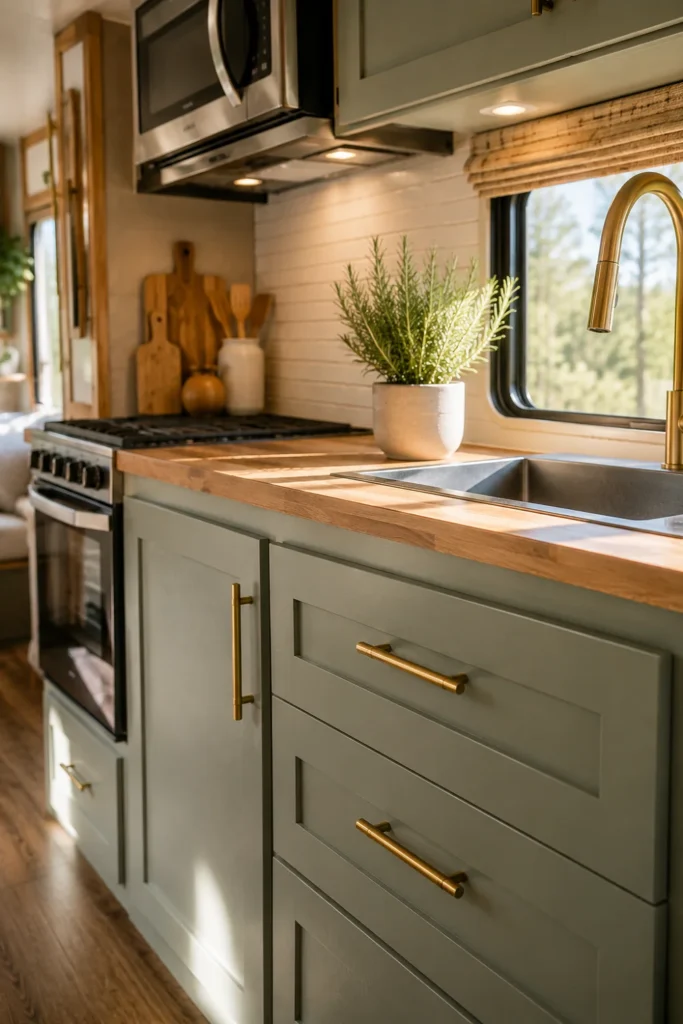
Factory camper cabinets are usually wrapped in dark, faux-wood paper that peels over time. Scuff-sanding the surface and applying a quality bonding primer lets you lay down a crisp, durable coat of paint. Muted greens and warm off-whites bounce natural light across the entire kitchen.
Heavy dark brown vinyl wrap that darkens the walkway and shows every scratch.
Satin finish cabinetry with solid brass bar pulls that create an open, airy galley.
Adding trim around flat doors creates an authentic shaker profile without requiring new wood panels. Finish the project by swapping the flimsy plastic factory catches for heavy-duty brass bar handles with positive-lock latches.
- Recommended Paint: Cabinet-grade urethane enamel that resists chipping.
- Surface Prep: Clean with TSP substitute and scuff with 150-grit sandpaper.
- Hardware Tip: Measure hole spacing carefully so you do not have to drill new holes into hollow-core doors.
2. Install Lightweight Peel-and-Stick Smart Tiles with Edge Caulk
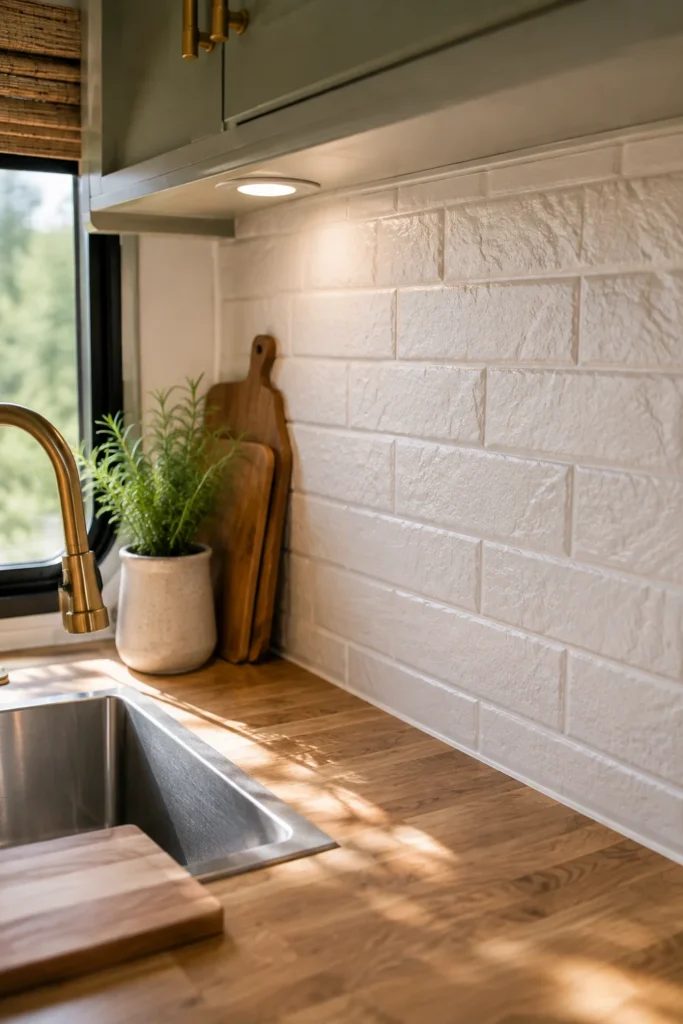
Real ceramic tile is too heavy for slide-outs and often cracks under the stress of highway potholes. Gel-based peel-and-stick composite tiles give you the look of textured subway tile or zellige ceramic at a fraction of the weight.
⚠️ Watch Out
Always wipe down RV wallboards with rubbing alcohol before sticking tiles, and seal the top and bottom edges with clear 100% silicone caulk to block water leaks behind the sink.
The secret to long-lasting stick tiles in a mobile environment is proper edge sealing. Temperature swings inside an RV cause wall panels to expand and contract, which can loosen the tile borders if they are left exposed.
- Clean the wall thoroughly to strip old cooking grease and dust.
- Align the sheets from the center outward, trimming edges with a sharp utility blade.
- Run a thin bead of flexible silicone caulk along the counter seam to lock out moisture.
3. Replace the Stock RV Faucet with a High-Arc Pull-Down Brass Mixer
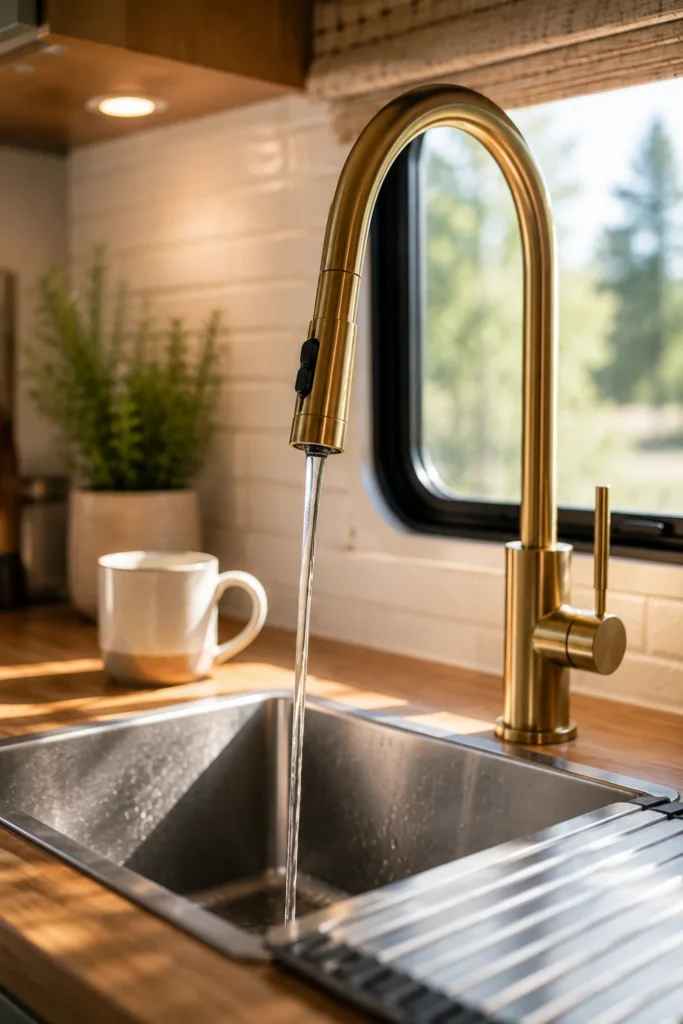
Stock camper faucets are usually made of lightweight chrome-coated plastic with low spouts that make filling a water kettle awkward. A residential high-arc metal faucet provides the clearance you need to wash wide skillet pans and deep pots.
Look for faucets with a weighted pull-down hose and a toggle between spray and aerated stream. The extra reach helps direct pressurized water into sink corners without splashing water across your limited countertop space.
- Compatibility: Standard residential single-hole faucets fit most RV sinks using a 3-hole base deck plate.
- Connections: Grab two 1/2-inch female to 3/8-inch male PEX conversion adapters before starting.
- Security: Use thread locker on the under-sink mounting nut so travel vibrations do not loosen the base.
4. Build a Drop-Leaf Countertop Extension on Folding Heavy-Duty Brackets
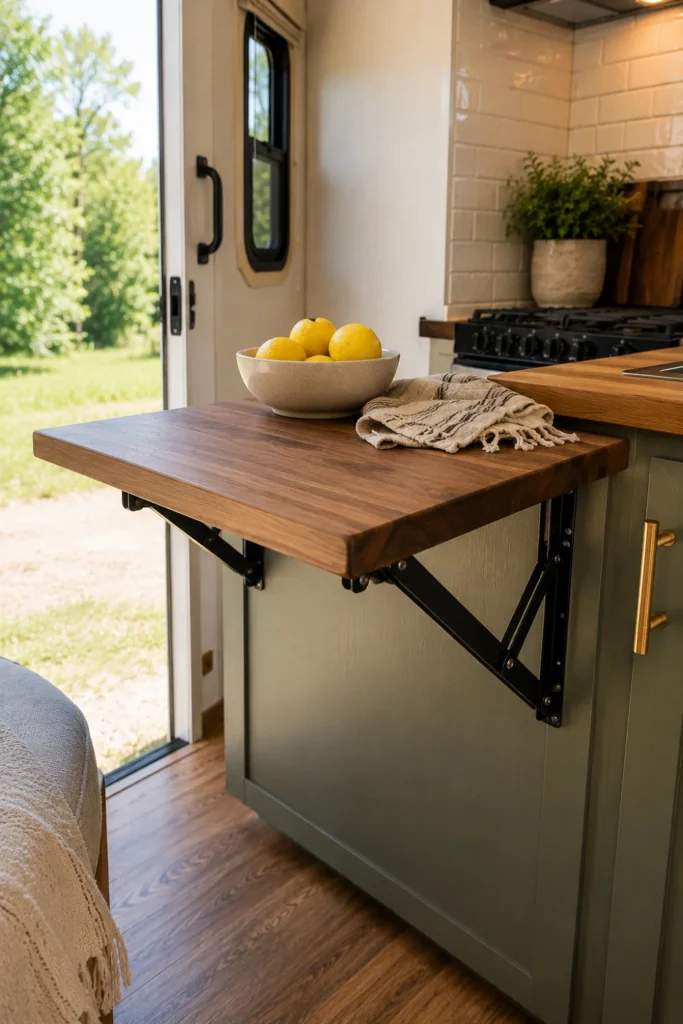
Countertop space is the main bottleneck in almost every camper kitchen layout. Installing a folding butcher block extension at the end of the cabinet run gives you an instant food-prep station when parked, then drops flat against the wall for easy travel.
Assembly Checklist
Use a lightweight acacia or bamboo board rather than heavy maple to keep excess weight off the cabinet face. The spring-loaded locking brackets stay rigid when extended and release with a quick press of the bottom tabs.
- Placement: Position the shelf height exactly flush with the primary countertop surface.
- Anchoring: Never screw solely into thin veneer wall skins; always anchor into the interior cabinet stiles.
- Maintenance: Rub with pure mineral oil twice a year to keep the wood from drying out in desert climates.
5. Cover Dark Dinette Booth Cushions in Stain-Resistant Textured Linen
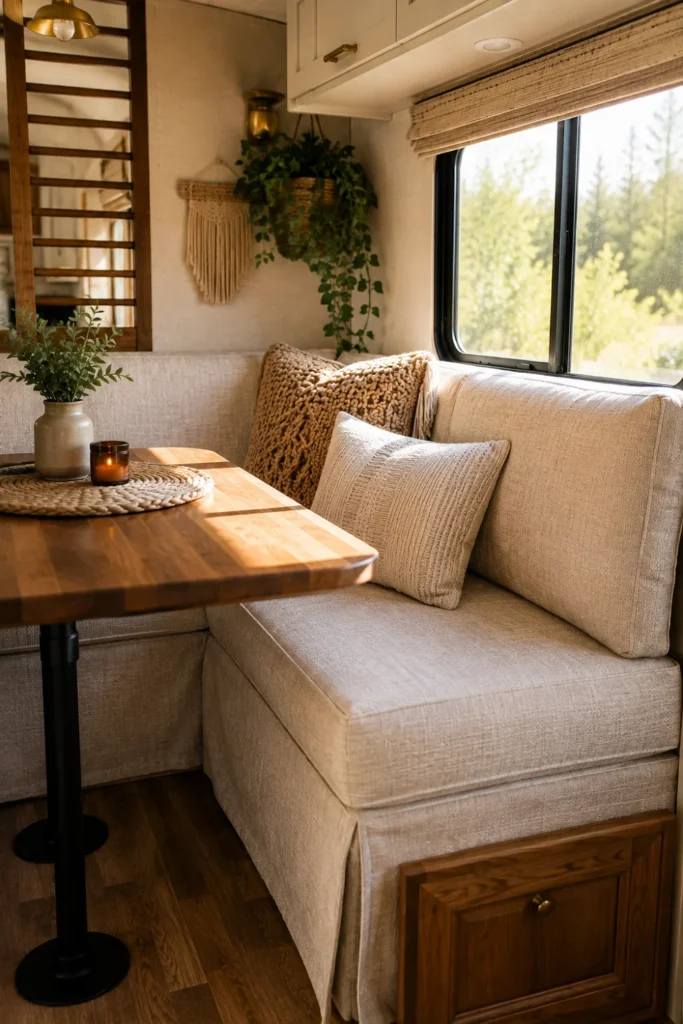
Factory dinette vinyl tends to stick in the summer and crack in freezing temperatures. Reupholstering the bench seating in a heavy woven performance fabric or neutral linen changes the tone of the kitchen area.
Use zippered, machine-washable slipcovers made from heavy performance fabric.
Wrap high-density foam in batting for a snug, custom fit.
Stapling cheap upholstery fabric directly to the backer plywood.
Reusing old, crumbling polyurethane foam that has lost its bounce.
If sewing custom cushion covers is not an option, wrap the cushions tightly in upholstery fabric and secure them to the plywood seat boards with an industrial staple gun. Spraying the fabric with a water-repellent finish keeps camp grease and spills from soaking into the foam.
| Fabric Type | Durability | Cleaning Method | Best Use |
| Performance Linen | High | Machine wash cold | Daily dining & lounge use |
| Marine-Grade Vinyl | Very High | Wipe with damp cloth | High-traffic camp cooking |
| Standard Cotton Blend | Low | Spot clean only | Light weekend trips |
6. Mount Under-Cabinet Magnetic Knife Bars and Spice Tins
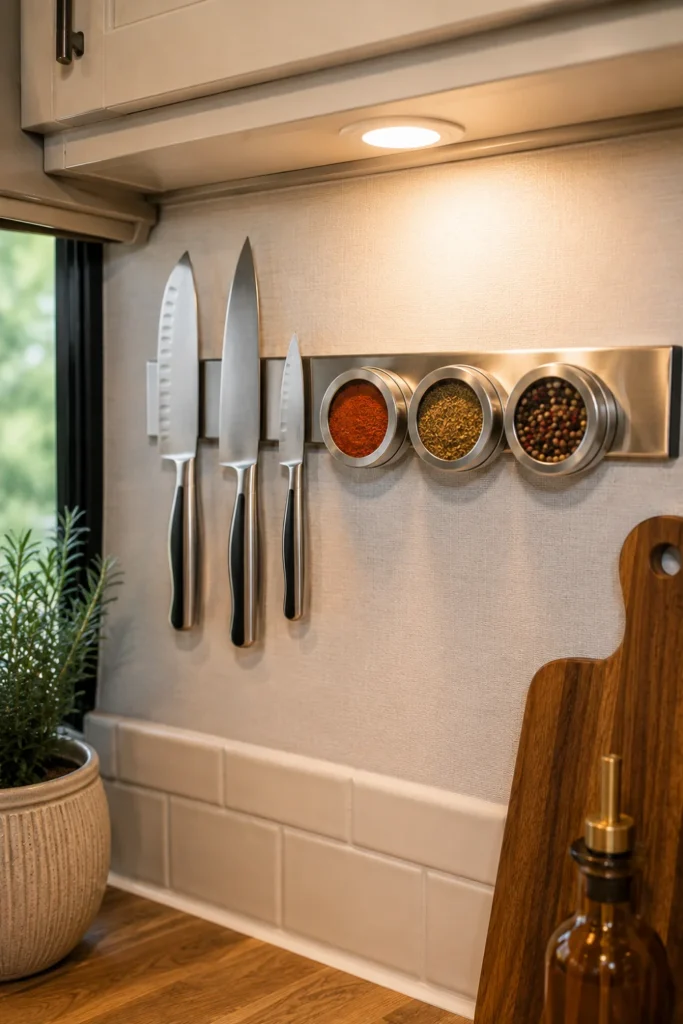
Drawers in campers are shallow and limited in number. Storing bulky knife blocks or loose spice jars inside drawer cavities wastes usable storage space and creates rattles while driving.
Mount a neodymium magnetic strip directly underneath the upper cabinet overhang using short, secure wood screws.
Transfer your most-used cooking spices into clear-top magnetic aluminum tins with labeled base rims.
Snap the tins and small cooking knives into place, keeping heavy chef cleavers inside secure bottom drawers during travel.
The vertical wall cavity below overhead cabinets is often underused. Utilizing strong magnets keeps knives dry, accessible, and completely immobilized without using an inch of counter surface.
- Safety Tip: Mount the magnetic bar away from the outer edge to prevent accidental bumps when passing through the hallway.
- Tin Sizes: Choose 3-ounce to 4-ounce metal containers for spices you reach for on every meal.
- Cleaning: Wipe the steel surface regularly to keep airborne cooking grease from building up.
7. Switch Out Overhead Puck Lights for 3000K Warm Dimmable Flush Mounts
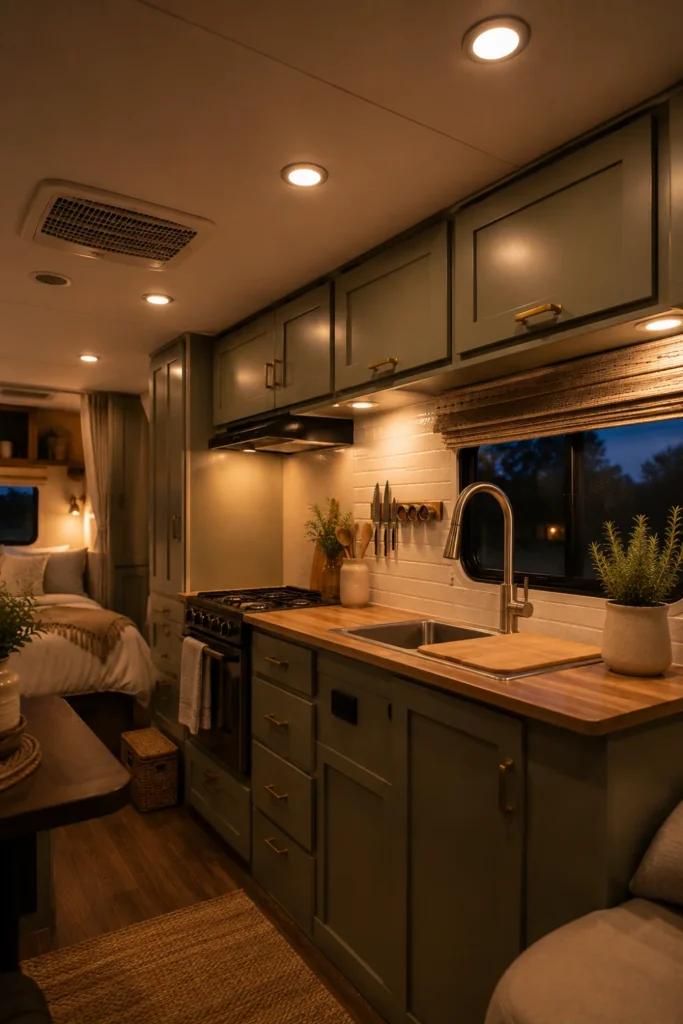
Stock RV interior lighting is notorious for its sterile, clinical blue-white hue. Replacing original 5000K diodes with 3000K warm LED fixtures makes small quarters feel warm, comfortable, and welcoming after sundown.
Always verify the operating voltage before wiring fixtures; stick to 12V DC-rated RV LEDs to avoid frying the camper power converter.
Modern thin-profile LED fixtures wire directly into standard 12-volt systems with simple wire nuts. Adding a rotary pulse-width dimmer switch lets you shift between bright task lighting for slicing ingredients and soft ambient lighting for evening dinners.
- Disconnect house battery power at the main breaker panel before handling wires.
- Remove the old plastic housing cover and unscrew the mount screws.
- Connect the 12V positive and negative leads using crimped marine-grade spade connectors.
- Snap the slim metal rim flush against the ceiling panel to seal old screw holes.
8. Lay Interlocking Click-Lock Vinyl Plank Over Old Linoleum
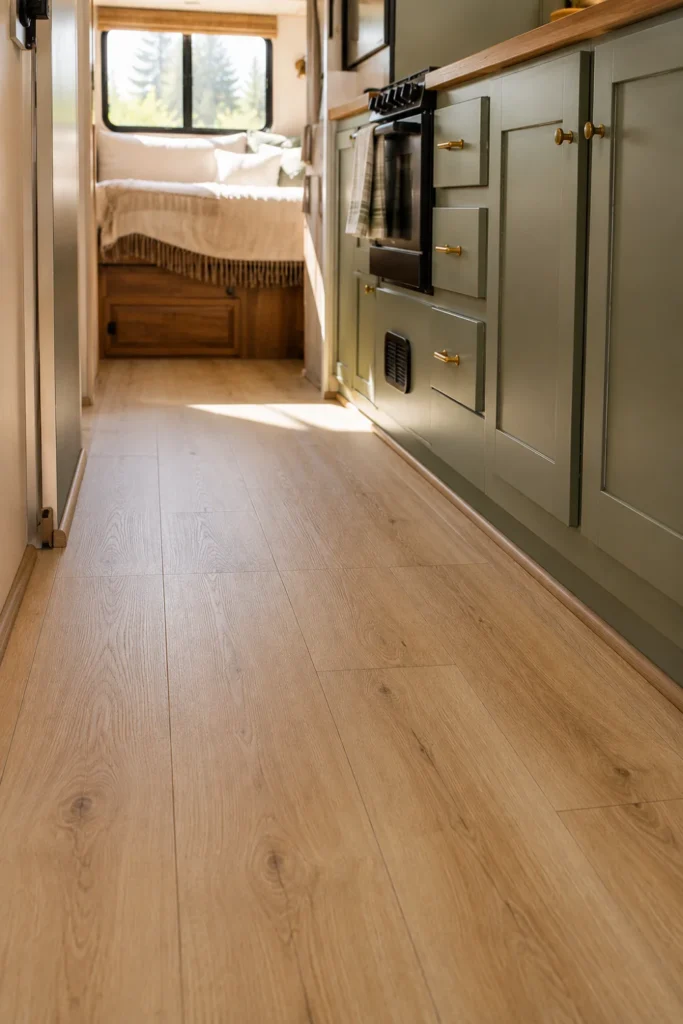
Old camper flooring is often basic sheet linoleum with stained edges around the stove and slide seals. Luxury vinyl plank (LVP) provides a water-resistant, scratch-proof floor that stands up to camp mud and dogs.
| Feature | Floating Click-Lock LVP | Stick-Down Vinyl Tile |
|---|---|---|
| Cold Expansion | Floats smoothly with 1/4-inch expansion gaps | Glue tends to release in winter freezes |
| Water Barrier | 100% waterproof interlocking tongue seams | Seams can curl if water sits on the floor |
Lay the planks directly over the clean original linoleum to save installation time and protect the subfloor. Always leave a quarter-inch expansion gap around every cabinet edge, concealing the border with lightweight quarter-round molding.
- Subfloor Prep: Fill any low divots with flexible wood filler before laying planks.
- Slide Clearance: Confirm the slide-out mechanism has enough clearance so it does not drag across the new floor.
- Blade Choice: Cut plank ends using a guillotine flooring shear to keep dust down inside the camper.
9. Add Heavy-Duty Soft-Close Drawer Slides with Push-to-Open Latches
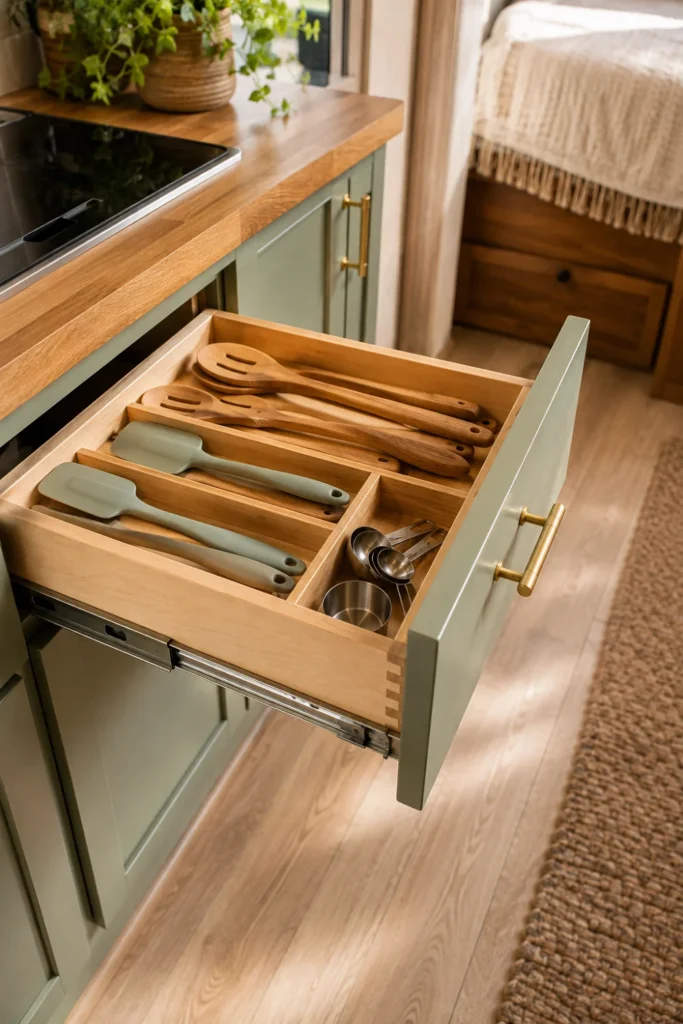
Camper drawers take serious stress when you drive over expansion joints and winding mountain passes. Replacing factory plastic guide rails with full-extension ball-bearing slides gives you smooth access to the entire depth of the box.
Pairing these slides with mechanical push-to-open latch catches keeps drawers from sliding open into the aisle during sudden stops. This simple hardware upgrade makes the entire galley feel more solid and well-built.
- Slide Rating: Select 50-pound rated slides to support heavy cast iron pans and canned goods.
- Clearance: Double-check drawer front alignment to make sure the face sits flush against the frame.
- Maintenance: Spray the metal ball bearings once a year with dry silicone lubricant.
10. Line Deep Overhead Cabinets with Acrylic Tiered Risers and Non-Slip Mats
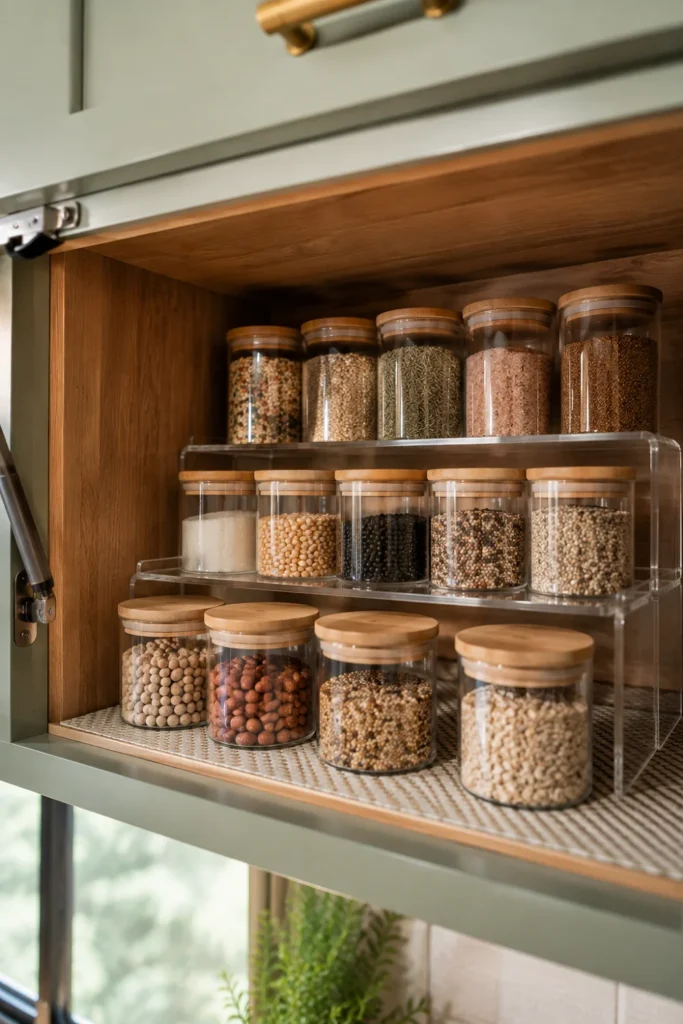
Overhead RV cabinets are unusually deep, which often leads to stacked cans and jars sliding around into a jumbled mess while driving. Tiered clear acrylic stadium risers elevate the back row so you can see every label immediately.
📌 Good To Know
Place grip-textured silicone drawer liner on each tier step before setting down glass jars to keep them from sliding or clinking during highway travel.
Clear bins with integrated carry handles make it easy to slide out an entire category of goods at once, like breakfast supplies or baking staples. This setup keeps you from having to dig through dark cabinet corners when cooking dinner.
- Measure cabinet interior depth and shelf height clearances.
- Cut heavy-grip silicone shelf liner to size and lay it along the wood bottom.
- Position acrylic tiered organizers against the back wall, grouping items by package size.
11. Recess a Drop-In Workstation Sink with Custom Cutting Board Lids
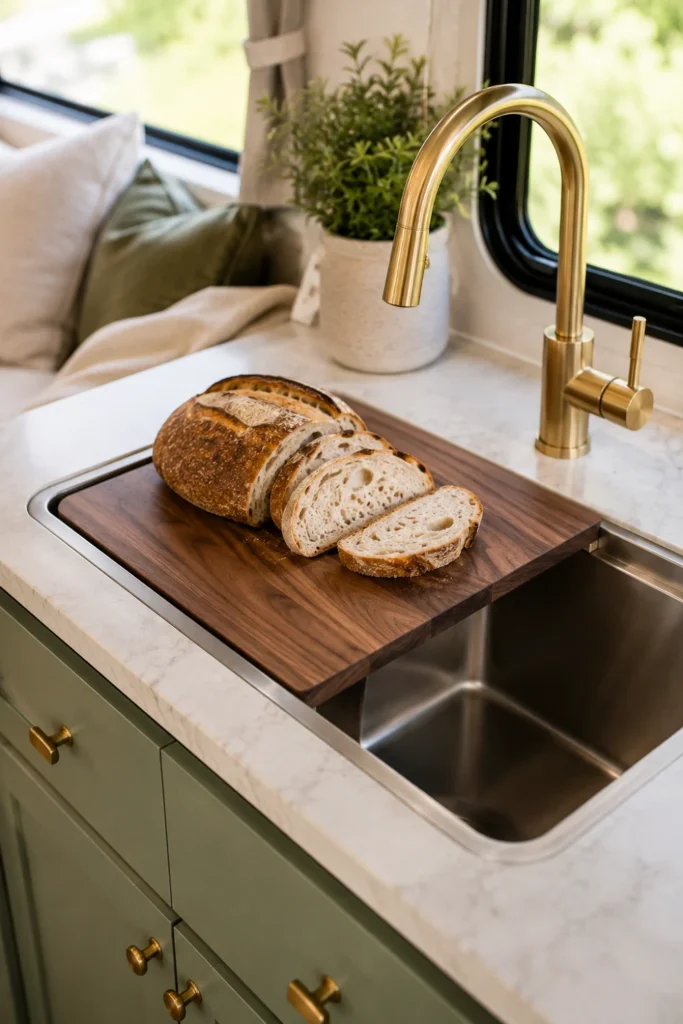
Standard double-bowl camper sinks have divider walls that make it tough to submerge a full-sized skillet. A deep, single-basin stainless steel workstation sink with built-in rim tracks gives you a larger wash area and preserves counter space.
Shallow plastic double-basin sink where large pan handles hit the counter and splash water everywhere.
Single-basin workstation sink with custom cutting board and drying rack inserts that sit flush with the counter.
The integrated ledger lip along the top rim supports modular accessories, including solid hardwood cutting boards and roll-up drying racks. When you are done prepping, slide the cutting board across the sink opening to instantly restore your counter work area.
- Gauge Selection: Look for 16-gauge or 18-gauge 304 stainless steel with sound-dampening undercoating.
- Drain Location: An offset rear drain frees up usable storage room underneath the sink plumbing trap.
- Fastening: Seal the top rim with a thick bead of neutral-cure silicone and secure it with undermount sink clips.
12. Apply Wood Slat Paneling to the Island Base for Warm Texture
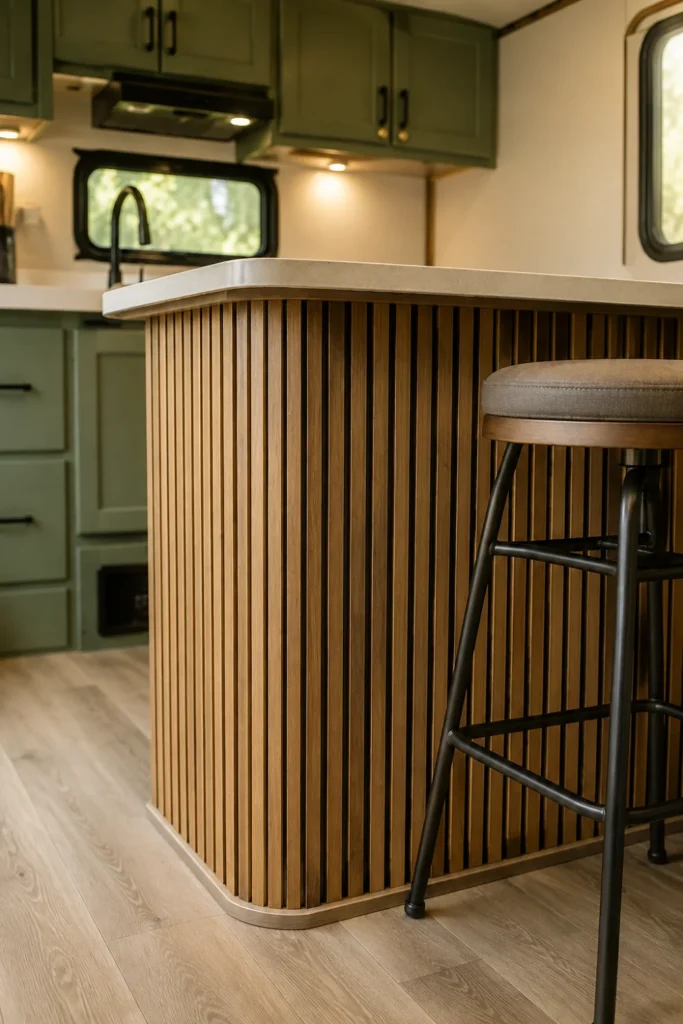
Camp interiors often feature flat, laminate-covered vertical panels that feel cold and utilitarian. Adding lightweight pine or acoustic felt-backed wood slats to the kitchen island base brings natural warmth and modern texture into the space.
- ▸Weight Conscious: Use 1/4-inch thin slat profiles or lightweight pine battens rather than heavy solid oak.
- ▸Kick Protection: The wood slats shield the island wall from scuff marks left by shoes at the breakfast bar.
- ▸Easy Install: Mount the slats with strong polyurethane construction adhesive and small 18-gauge brad pins.
A warm wood accent breaks up painted cabinetry and makes the camper kitchen feel like a custom residential home. Coat the slats with a satin poly finish to guard against water splashes and dirt around foot-level areas.
- Cut slat panels to height using a fine-tooth miter saw.
- Apply flexible adhesive to the back of each slat to absorb road vibration.
- Pin into place using short 5/8-inch brad nails driven into the island corner stiles.
13. Install a Slide-Out Vertical Pantry Rack in Empty Side Cavities
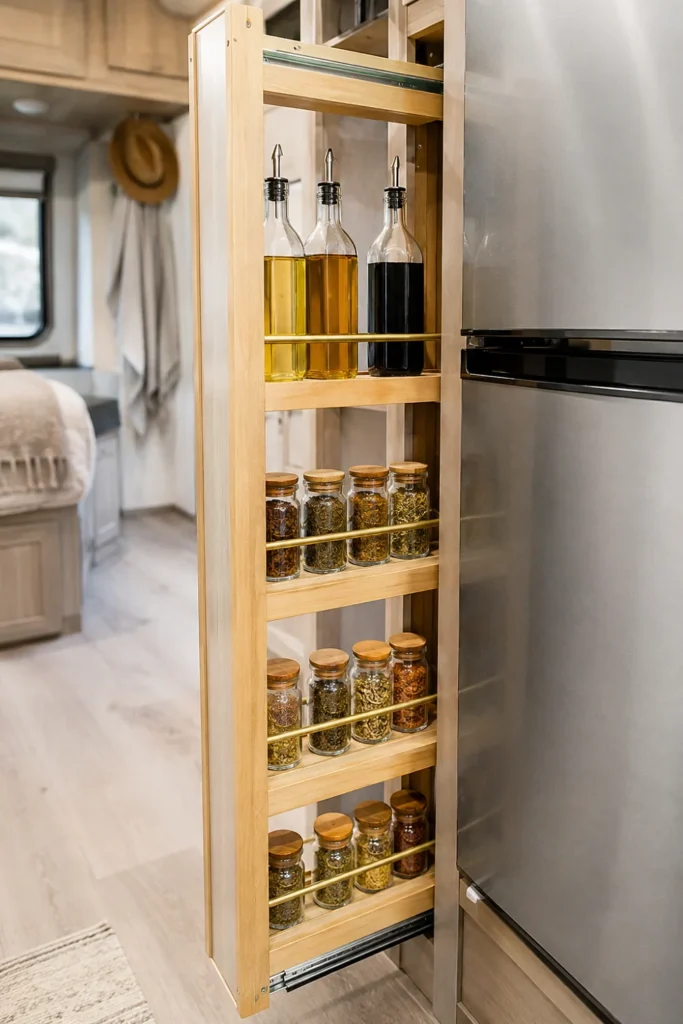
Most RV kitchen layouts have narrow gaps between the refrigerator enclosure and the exterior wall. A slim, vertical roll-out spice and pantry tower makes good use of these awkward 6-to-8-inch spaces.
Mount heavy-duty base-mount ball-bearing slides to support tall bottles of oil, vinegar, and sauces without tipping. Adding metal guard rails along each shelf keeps glass jars from tumbling out when you pull the rack forward.
- Shelf Railing: Install 1/4-inch brass rods or wooden dowels along each shelf edge.
- Cabinet Face: Attach a matching cabinet front to the rack so it sits flush when closed.
- Travel Lock: Use an interior magnetic push-latch with a firm retention rating to keep it closed on the road.
14. Replace Bulky RV Blinds with Slim Roll-Up Fabric Roller Shades
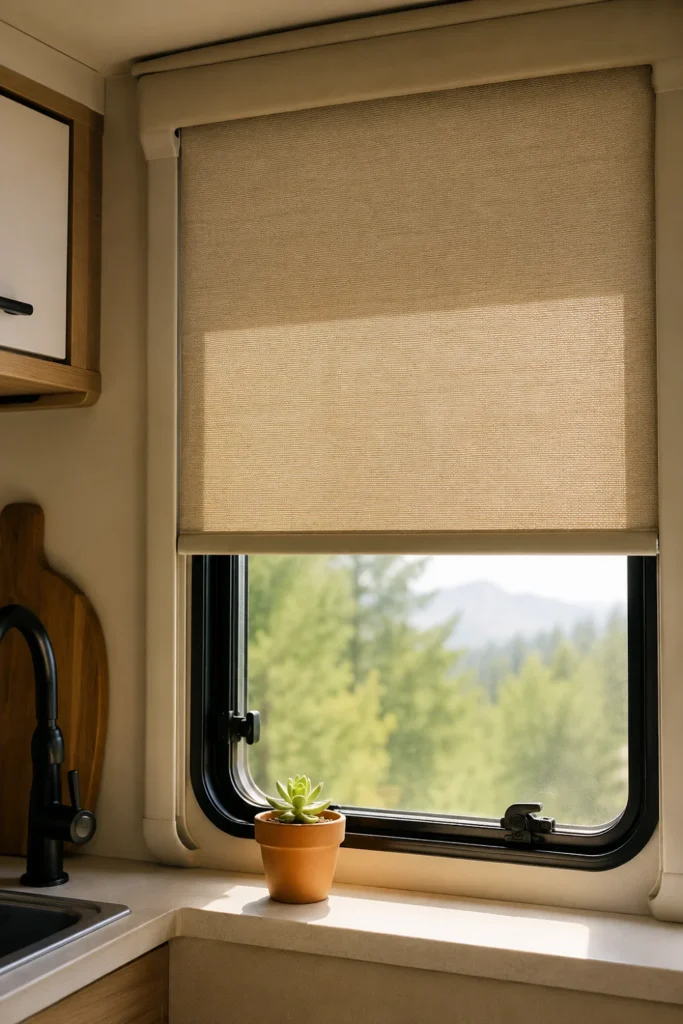
The pleated day-night string blinds installed by RV manufacturers are notorious for fraying, snapping strings, and holding cooking odors. Swapping them out for custom cordless fabric roller shades creates clean lines around your kitchen window.
Window Upgrade Checklist
Woven fabric roller shades take up minimal depth inside the window frame, which helps keep them clear of splashes while you wash dishes. Choose a material with a wipe-clean protective coating so grease wipes off with a damp cloth.
| Shade Style | Cleaning Ease | Light Control | Road Stability |
| Cordless Roller Shade | High | Semi-sheer or Blackout | Stays secure with bottom clip |
| Pleated String Blind | Low | Moderate | Prone to broken cords |
| Aluminum Mini Blinds | Low | High | Rattles and bends easily |
15. Wrap Worn Laminate Tops with Food-Grade Epoxy or Architectural Film
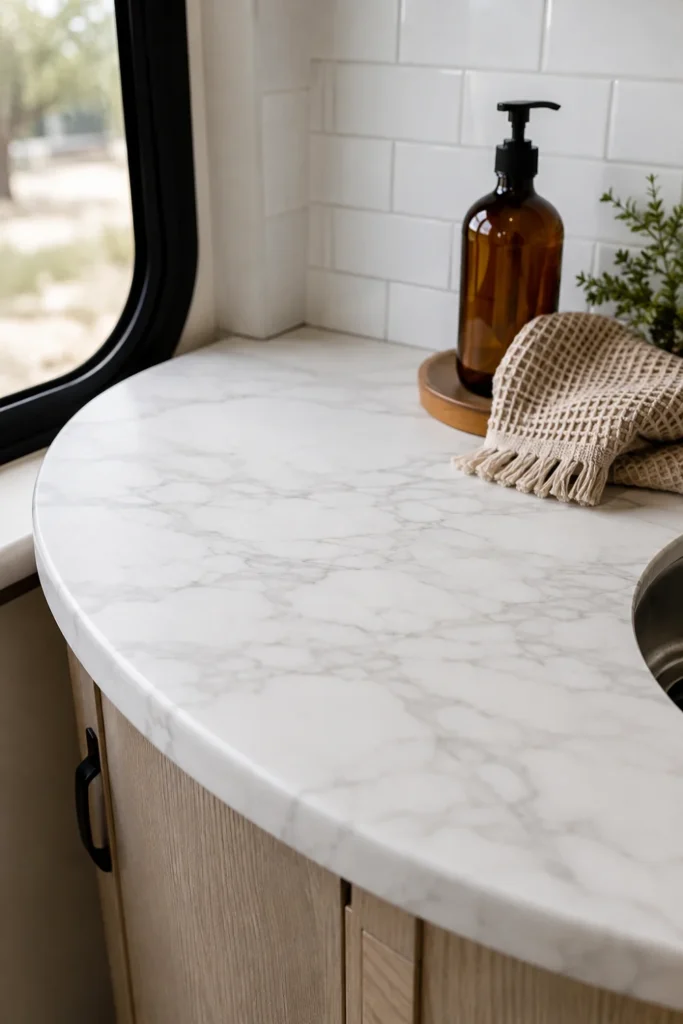
Removing and replacing factory laminate countertops requires cutting into plumbing, disconnecting sink traps, and wrestling with stubborn structural silicone. Wrapping the existing surfaces in high-durability architectural film or casting a food-safe epoxy coat gives you the look of solid marble or poured concrete without tearing out the counter.
Fill seam chips with epoxy putty and sand the substrate flat before wrapping.
Use a heat gun around bullnose edges to stretch vinyl wrap without creases.
Applying film over uncleaned, greasy laminate surfaces.
Placing hot camp cookware directly onto wrapped or epoxied surfaces.
Architectural vinyl films feature air-release channels that help prevent air bubbles during installation. The film is flexible enough to handle the natural twists and shifts of an RV frame without cracking.
- Sand the laminate surface with 220-grit paper to knock down high spots and degloss the top.
- Wipe with isopropyl alcohol to strip away all surface residue.
- Apply the vinyl from one side, smoothing it with a felt-edge squeegee.
- Trim excess material along the wall edge and seal the joint with silicone.
16. Mount a Fold-Flat Metal Wall Grid for Hanging Everyday Utensils
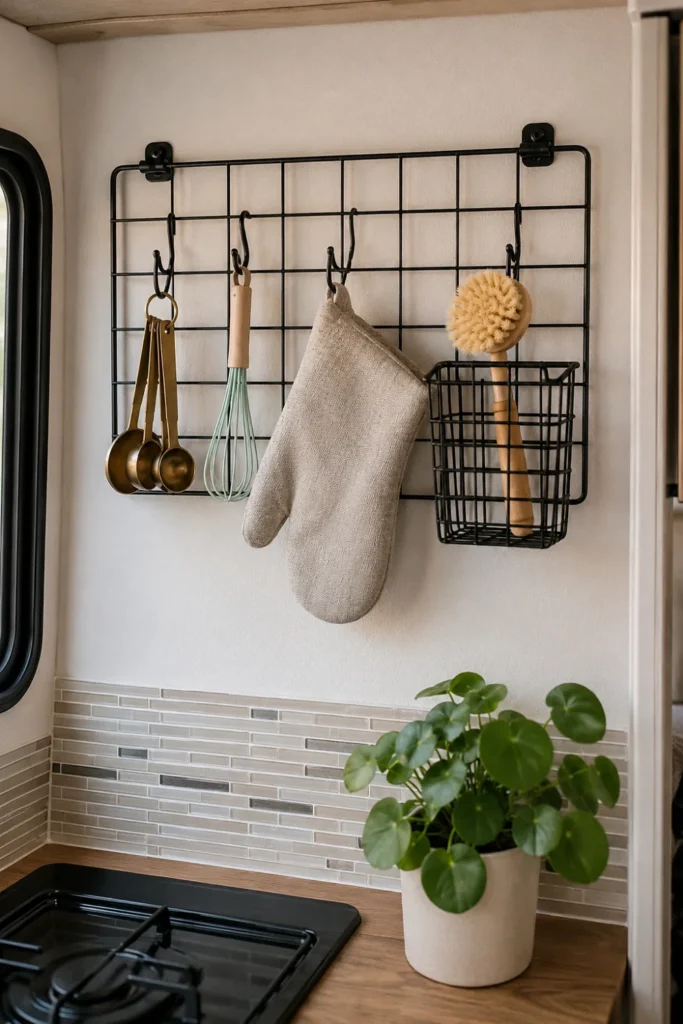
Camper kitchen walls often sit empty because standard screws struggle to hold in thin interior wallboards. Installing a lightweight wire grid rail using hollow-wall anchor toggles gives you a sturdy place to hang spatulas, measuring cups, and oven mitts.
Locate the aluminum or wood internal wall studs using an electronic stud finder, or use expanding hollow-core anchors.
Mount a powder-coated steel wire mesh grid 2 inches above the kitchen counter backsplash line.
Hang utensils from locking S-hooks with silicone tips that prevent rattling while you drive.
Hanging your daily cooking tools frees up entire drawers for bulkier pantry items. The open wire design lets you see your equipment at a glance without having to dig through messy storage bins.
- Hook Style: Choose S-hooks with rubber retaining clips that lock onto the wire frame.
- Weight Limit: Keep total wall grid hanging weight under 10 pounds to protect the wall panels.
- Accessory Baskets: Clip shallow wire mesh cups onto the grid to hold scrub brushes and dish soap.
17. Frame the Microwave Cavity with Finished Trim for a Built-In Look
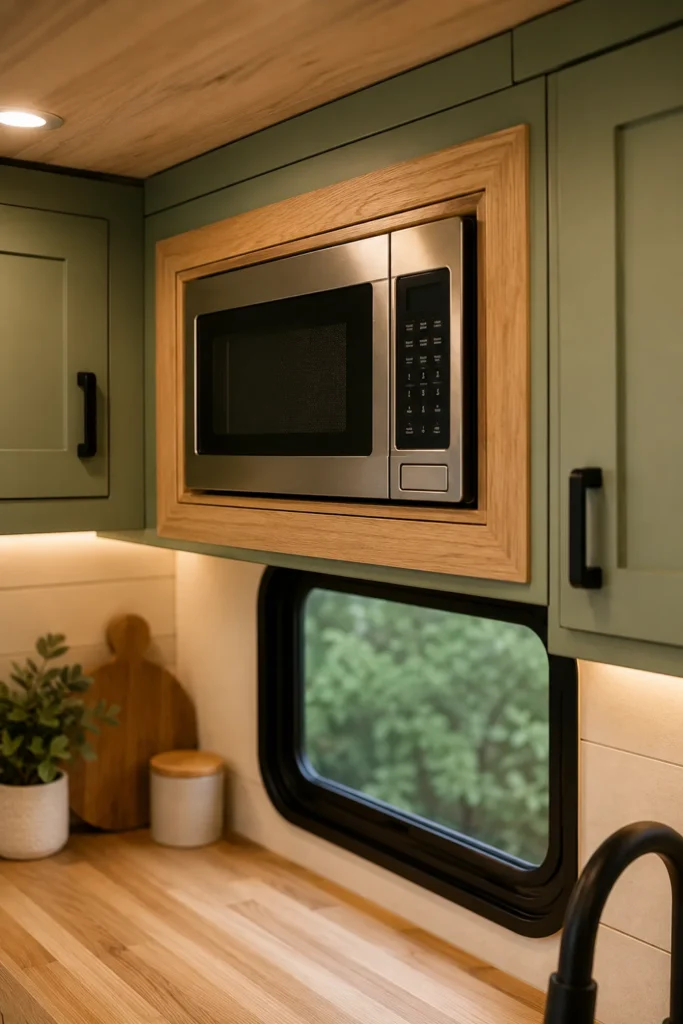
Most factory RV microwave installations leave wide, uneven gaps around the appliance cabinet opening. Framing this cutout with custom stained wood trim or painted face molding gives the galley a clean, built-in residential look.
Ensure the trim allows adequate airflow around the microwave chassis so heat can vent properly during cooking. A finished casing conceals rough plywood cutout edges and turns an awkward utility space into an intentional design feature.
- Airflow Needs: Check the manufacturer’s clearance guide to maintain proper exhaust ventilation.
- Fastening: Attach trim pieces to the cabinet face frame with countersunk trim screws, filling the holes with matching wood wax.
- Finish: Stain the trim to match your butcher block counter or paint it in the same tone as the main cabinetry.
Bringing Your New RV Galley Together
A successful camper kitchen upgrade is all about balancing lightweight materials with durable, functional finishes. Focusing on high-impact projects like brighter cabinet paint, modular sink workstations, and smart storage hardware lets you transform your space without exceeding your rig’s gross vehicle weight rating.
Take on these rv kitchen remodel ideas one weekend at a time to build a space that makes cooking on the road feel comfortable and effortless. Save this post to your camper renovation board on Pinterest so you have these practical dimensions, tips, and step-by-step guides handy when you are ready to build.

