
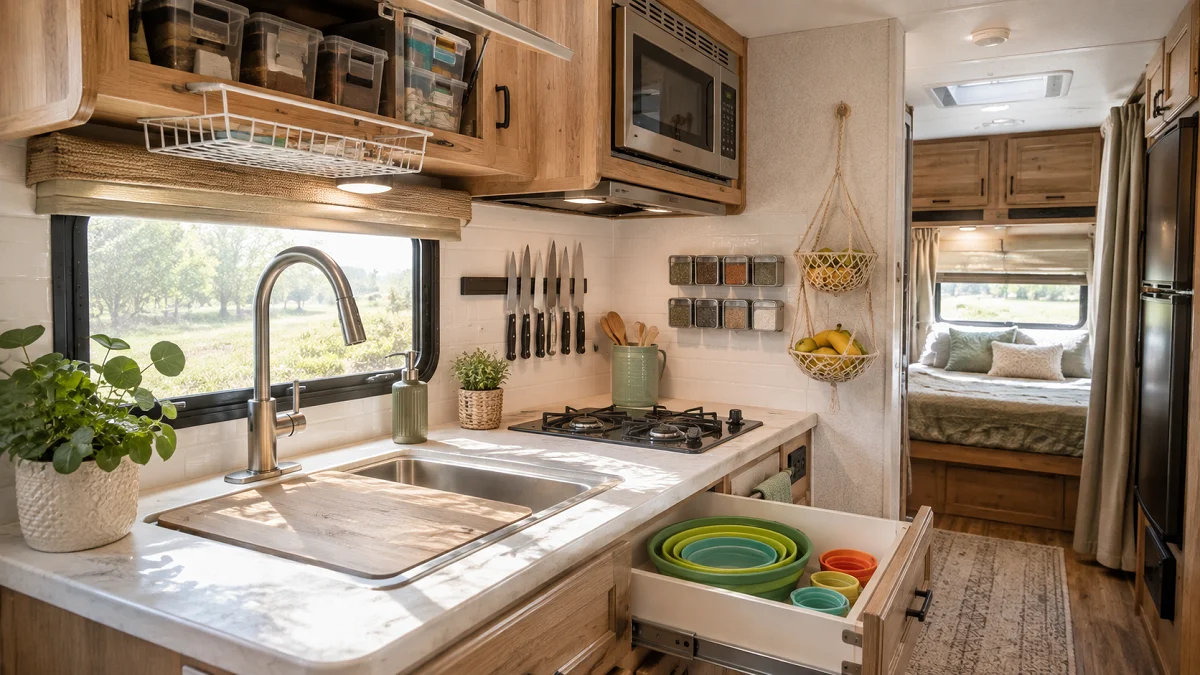
Cooking inside a camper often feels like a balancing act between a cutting board and a tiny sink. Most factory campers come with deep, awkwardly shaped cupboards that swallow small items, paired with barely two feet of usable counter space. When every turn means bumping an elbow or moving three pans just to reach one lid, preparing a simple meal quickly becomes a chore.
The secret to a calm, functional camp kitchen is not buying every plastic bin on the shelf. It comes down to claiming the dead vertical air, securing loose goods for bumpy travel days, and giving every utensil a clear, dedicated home.
These practical rv kitchen organization ideas focus on low-effort, high-impact changes. You can set them up in an afternoon without tearing out cabinets or adding heavy weight to your rig.
1. Hang Under-Shelf Wire Baskets to Claim Dead Air in Tall Cabinets
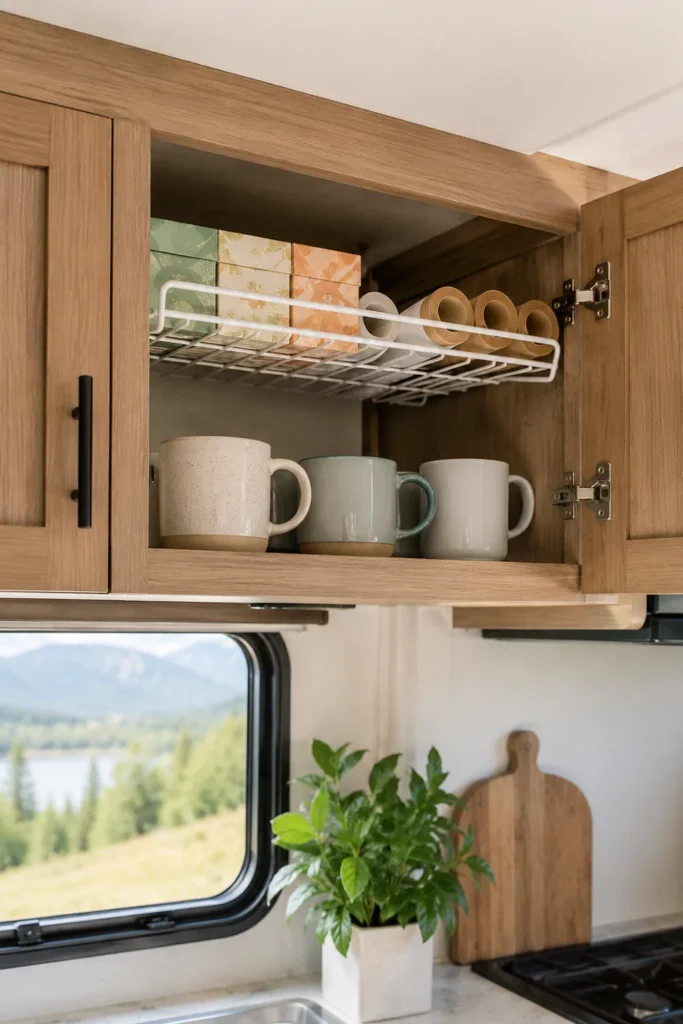
Factory RV upper cabinets are notoriously tall and rarely include adjustable shelving. You end up with a single layer of coffee mugs on the bottom and ten inches of wasted, empty air hovering right above them.
Slide an epoxy-coated wire basket directly onto the existing shelf frame. It creates an instant second tier without requiring any drilling or permanent screws.
- Use the top basket for lightweight items like wraps, foil boxes, and tea bags.
- Keep heavier ceramics and mugs on the solid lower wood shelf.
- Measure the shelf lip first to ensure cabinet doors close flush.
2. Mount Square Magnetic Spice Tins to the Range Hood or Side Wall
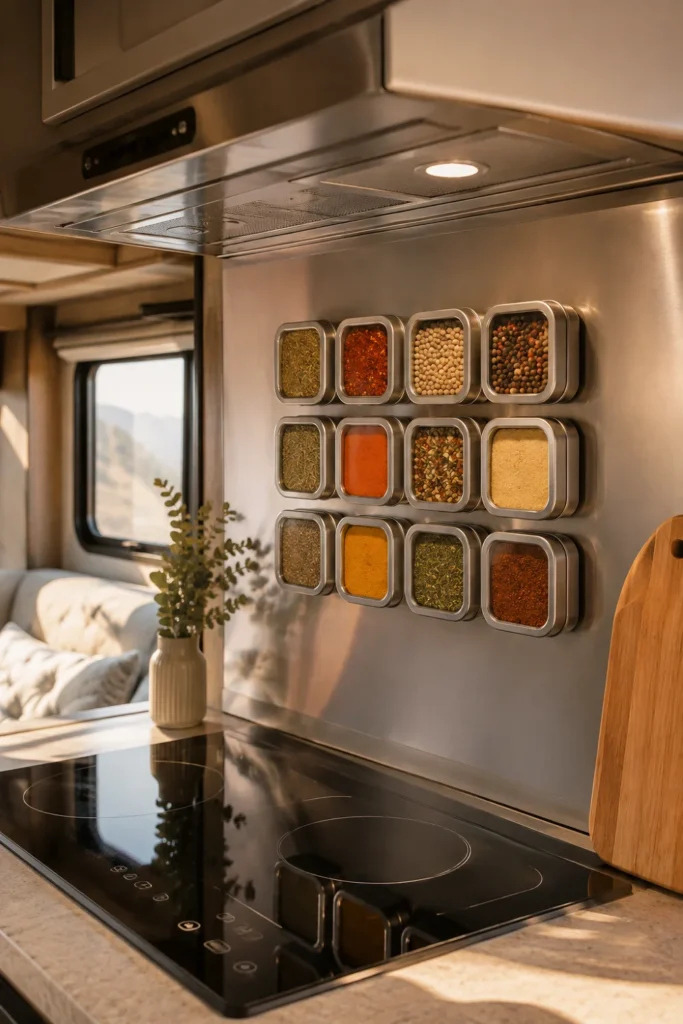
Bulky round spice jars eat up prime drawer real estate and rattle violently on travel days. Transferring your everyday seasonings into uniform magnetic tins turns dead wall space into an efficient seasoning hub.
Square tins are superior to round versions because they sit flush against each other without spinning loose while driving down rough backroads.
💡 Road Test Tip
If mounting on an interior wood wall rather than a steel range hood, install a brushed stainless steel sheet using heavy-duty command strips to avoid drilling into thin paneling.
- Fill them only with the core spices you use each week.
- Add clear vinyl labels to the side facing your prep zone.
- Stick them away from direct stove steam to prevent clumping.
3. Swap Round Food Storage for Modular Rectangular Containers
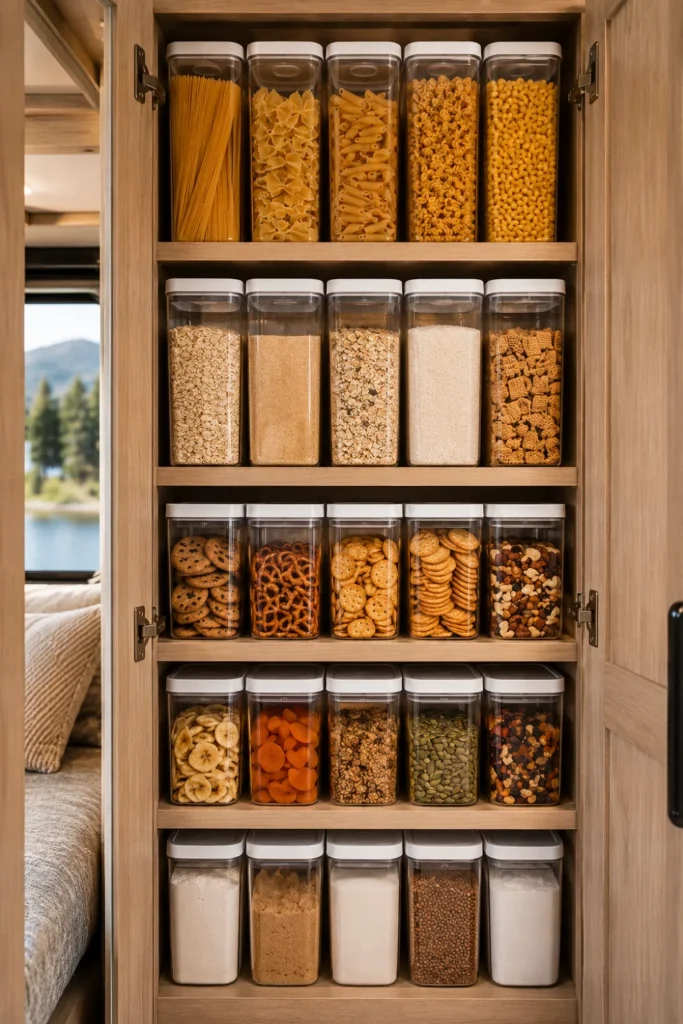
Round food containers leave substantial gaps between them, wasting up to 30 percent of shelf volume in small camper pantries. Modular rectangular tubs fit together like brickwork, eliminating empty dead zones.
Clear, airtight containers also protect dry goods from humidity shifts and unwanted pests when your rig is stored between camping trips.
Wasted gaps between containers, rolling jars during transit, and constantly unstacking towers to reach back items.
Interlocking vertical stacks, zero dead air space, and stable brick-style packing that stays put on mountain curves.
- Standardize on two base footprint sizes with varying heights.
- Store bulk staples like rice, oats, and pasta in the largest bases.
- Keep snacks and baking basics in the shallow top bins for quick access.
4. Fit an Over-the-Sink Cutting Board to Double Counter Prep Space
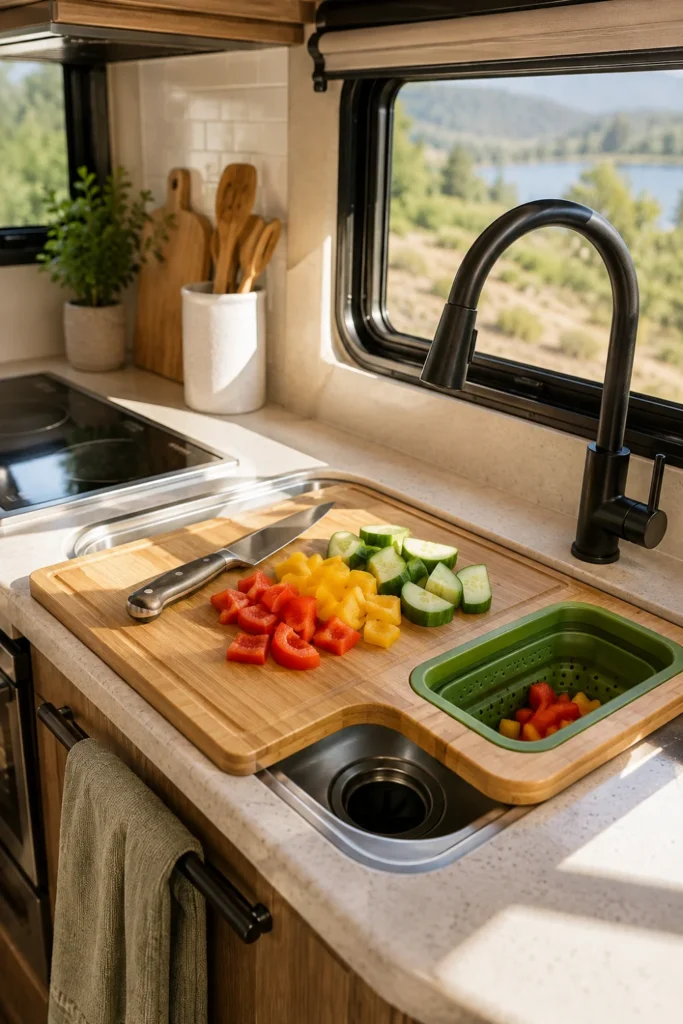
Prepping dinner in a camper often means choosing between having a clean cutting surface or access to the sink. A fitted over-the-sink cutting board spans the basin, instantly doubling your usable work area.
Look for models with non-slip silicone feet on the underside so the board does not shift while you chop vegetables.
Sink Fitment Checklist
- Pick a model with a built-in collapsible silicone colander for easy rinsing.
- Store the board directly over the sink while traveling to save shelf room.
- Wipe clean immediately to avoid moisture buildup in small sink basins.
5. Install Adhesive Metal Hooks Inside Cabinet Doors for Lids and Towels
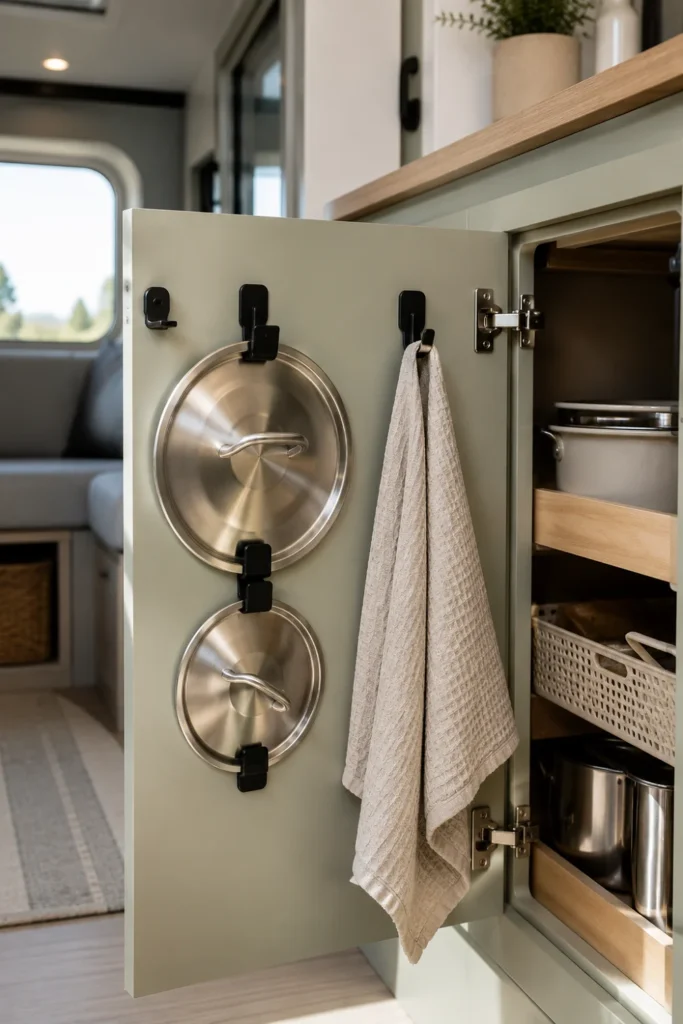
Cabinet door interiors are valuable vertical surfaces that often go completely unused. Small adhesive hooks hold pot lids, dish towels, measuring spoons, and oven mitts right where you need them.
Always clean the factory cabinet backing thoroughly before applying adhesive strips, as manufacturing oils prevent proper bonding.
Clean door frame with 70% isopropyl alcohol and let dry completely.
Angle two hooks diagonally to cradle round pot lid rims securely.
Sticking tape directly over raw veneer without prep work.
Hanging cast iron pans or heavy items exceeding adhesive weight ratings.
- Hang measuring spoons inside the baking cabinet door.
- Keep micro-fiber drying towels inside the lower sink cabinet.
- Leave two inches of clearance from internal shelf edges so doors shut tight.
6. Line Overhead Cupboards with Non-Slip Grip Liner
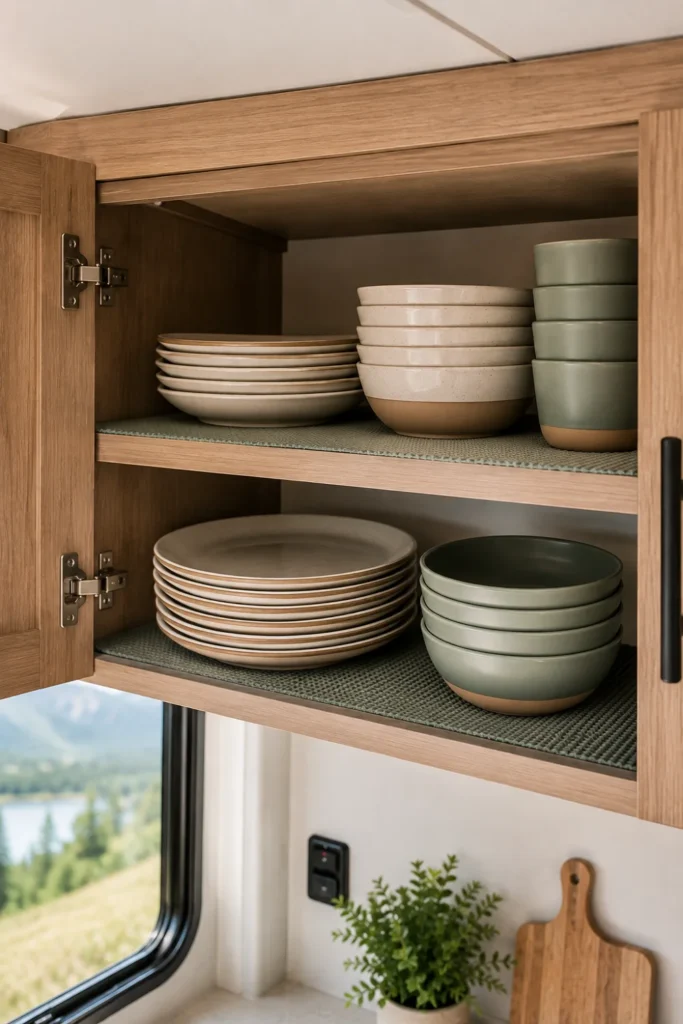
Every turn on the road shifts dishes, mugs, and pantry goods. Without proper base friction, opening an upper cupboard at camp often leads to items tumbling straight out onto the counter.
Rubberized grip shelf liners cushion fragile dishware, prevent irritating rattles while driving, and keep stacked items grounded on highway curves.
Wipe down factory shelf wood to remove loose dust and sawdust.
Cut non-adhesive grip roll 1/4 inch short on each side to prevent curling.
Press flat and place heavier dishes on outer edges to seat the liner.
- Avoid adhesive contact paper that bubbles or peels under heat.
- Use thicker ribbed liners for heavy cookware drawers.
- Wash the liners in warm soapy water at the end of each travel season.
7. Use Tension Rods Vertically to Store Cutting Boards and Baking Sheets
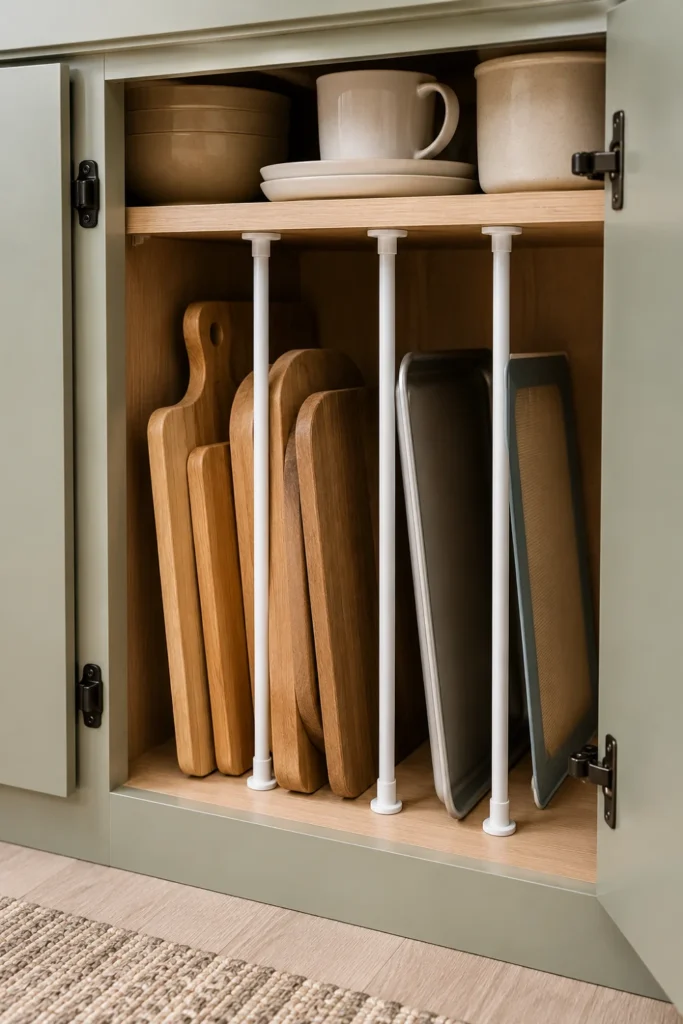
Stashing baking sheets, cutting boards, and cooling racks in horizontal stacks requires lifting three heavy items every time you need one flat tray.
Mount small spring-loaded tension rods vertically between two sturdy shelves. They create slim vertical dividers that keep flat kitchen tools standing upright and instantly accessible.
- Place rubber end caps firmly against shelf surfaces to prevent slipping.
- Space rods three to four inches apart to hold standard sheet pans.
- Slide pans in spine-first to pull them out with one hand.
8. Screw a Wooden Paper Towel Holder to the Underside of an Upper Cabinet
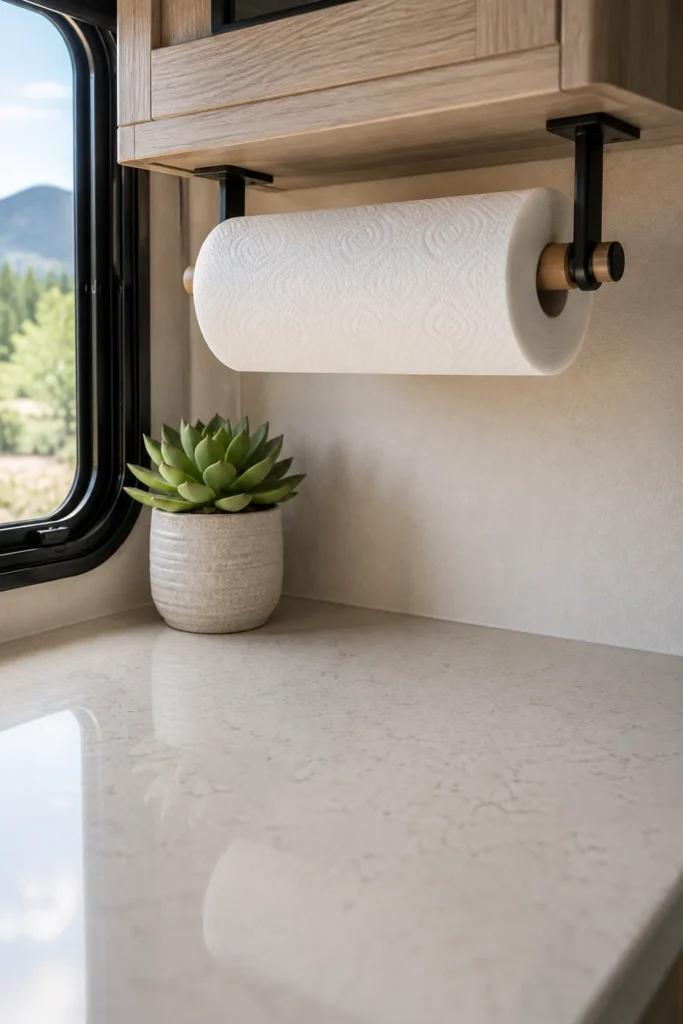
Paper towel rolls left on a camper counter get knocked into the sink or blown onto the floor whenever a window opens. Free-standing holders also consume valuable workspace next to the cooktop.
Mounting a slim holder underneath an overhead cupboard gets the paper roll completely off the counter while keeping it within arm’s reach of the stove.
⚠️ Screw Length Check
RV cabinet floors are typically only 3/8 to 1/2 inch thick. Use 1/2-inch short pan-head wood screws or heavy-duty VHB mounting tape so the hardware does not punch through into the interior cupboard shelf.
- Select a holder with tension arms that prevent the roll from unraveling during transit.
- Mount it at least eight inches away from direct open flames on the stove.
- Pair it with reusable bamboo wipes to cut down on overall paper waste.
9. Hang a Tiered Hanging Fruit Basket in an Unused Corner
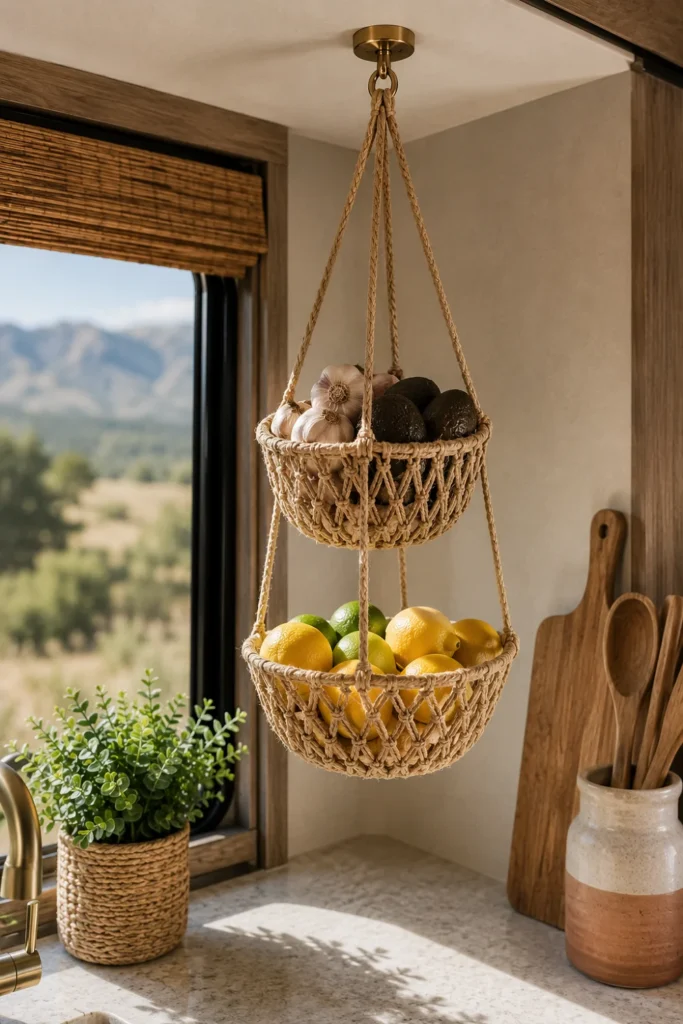
Countertop fruit bowls take up significant prep room and allow delicate produce to roll off during transit. A tiered wire or macramé hanging basket utilizes empty corner angles near windows or walls.
Produce stored with open airflow stays fresh significantly longer than fruit trapped inside humid RV cupboards.
Always unhook hanging baskets and place them inside the kitchen sink basin before towing to prevent heavy swinging against camper walls.
- Keep sturdy produce like onions and potatoes in the lowest tier.
- Use the top basket for delicate avocados, lemons, and garlic.
- Hang the assembly from an anchored ceiling screw hook rated for 15+ pounds.
10. Add Clear Acrylic Bins Inside the RV Refrigerator to Prevent Travel Avalanches
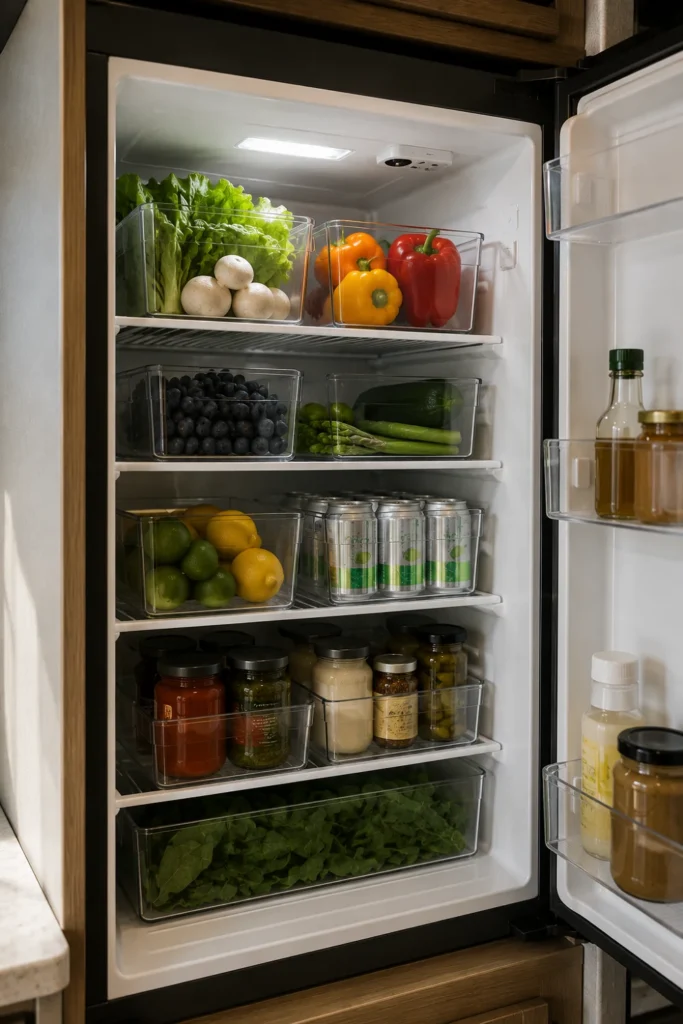
Opening a camper fridge after a five-hour drive across bumpy highways often results in condiments and jars sliding right out the door. The shallow factory wire door bars rarely hold round bottles in place.
Deep, clear acrylic bins lock groceries into secure, modular zones that stay completely upright on sharp highway turns.
| Storage Style | Travel Day Result |
|---|---|
| Loose Shelving | Items shift against the door and spill upon opening. |
| Deep Acrylic Bins | Jars stay contained in upright blocks with zero shifting. |
- Group items by routine (breakfast dairy bin, condiment bin, sandwich prep bin).
- Choose bins with built-in handles to carry the entire meal kit to the outdoor picnic table.
- Ensure back bin clearance allows the RV fridge cooling fins to circulate air freely.
11. Nest Silicone Collapsible Bowls and Measuring Cups in One Shallow Drawer
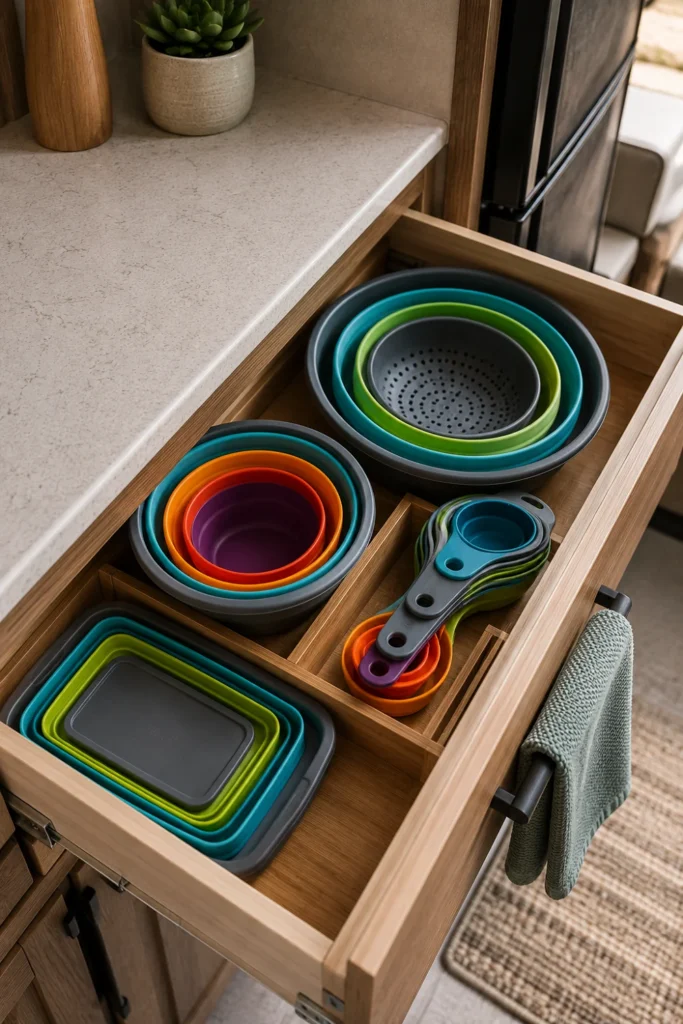
Traditional rigid mixing bowls, colanders, and salad spinners monopolize entire lower cabinets. Silicone collapsible cookware folds down completely flat, reducing storage bulk by over 70 percent.
This allows you to house a complete set of colanders, salad bowls, and measuring scoops inside a single four-inch utility drawer.
- Look for food-grade, BPA-free silicone with rigid nylon rims for steady pouring.
- Stack nested colanders together with mixing bowls in the shallowest drawer.
- Air dry fully before folding to maintain a clean silicone seal.
12. Mount a Pegboard Panel to the Entry Wall or Side of the Island
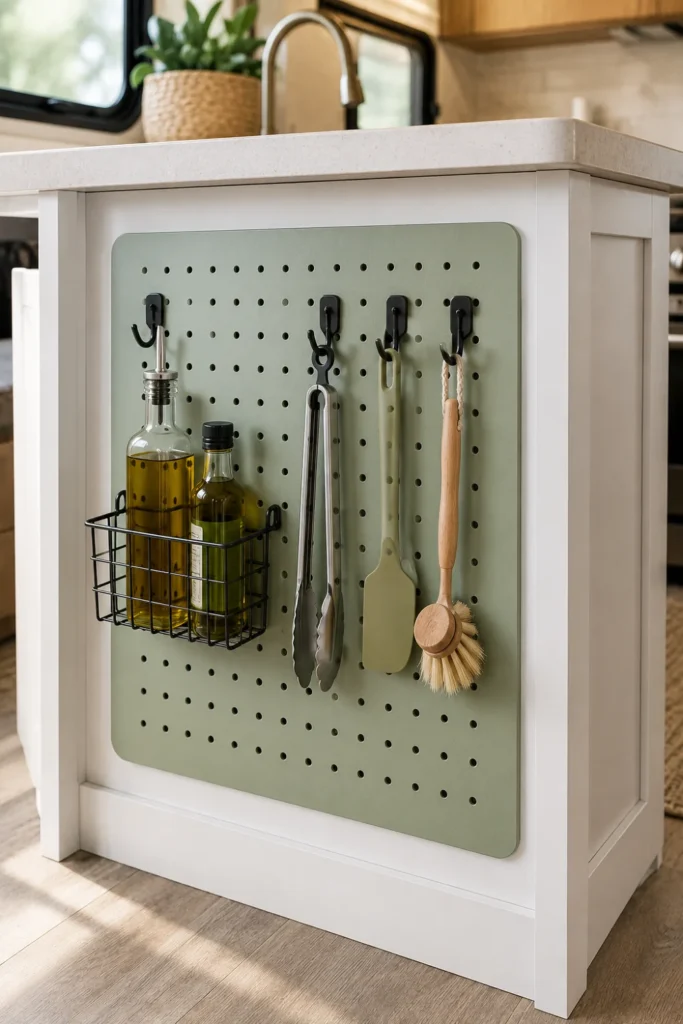
The exposed side panels of RV kitchen islands and dinette bases provide expansive flat surfaces. Installing a lightweight composite pegboard lets you customize tool placement using modular hooks and wire baskets.
Because hooks can be rearranged anytime, your storage system easily evolves as your gear changes.
Camper Wall Mounting Kit
- Paint the panel to match your camper cabinetry for an integrated look.
- Add a slim wire basket at the bottom for seasoning mills or cooking sprays.
- Keep tools spaced at least two inches apart to prevent clattering on the road.
13. Secure Heavy Cast Iron and Pots with Pull-Out Wire Drawer Glides
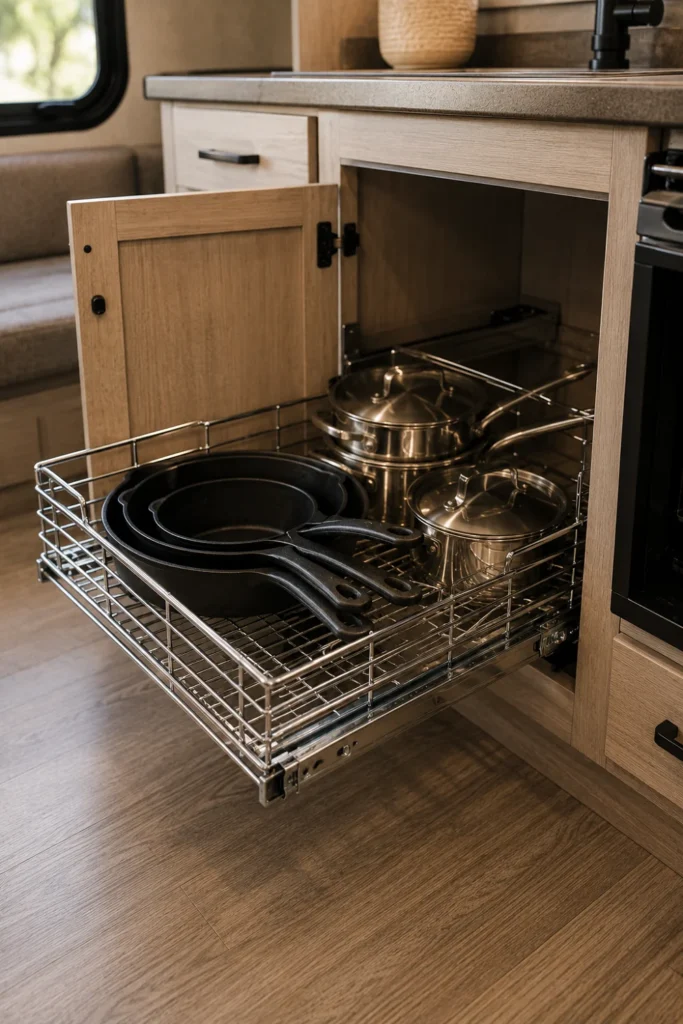
Deep lower cabinets force you onto your hands and knees to find matching pots in dark corners. Installing sliding wire basket glides brings all your cookware out into the light with a smooth pull.
Heavy iron pans remain organized in individual slots rather than scratched in messy, precarious towers.
Kneeling on the floor, unstacking heavy skillets, and losing small pans in the deep recesses of factory base cabinets.
Smooth ball-bearing glide, instant full-view access, and secure rattle-free travel slots for every skillet.
- Check cabinet door hinge clearance before screwing runner tracks into the cabinet floor.
- Pick glides with positive latching locks so heavy pots do not roll forward when braking.
- Line the glide base with felt to eliminate metal-on-cast-iron squeaks.
14. Use a Pocket Organizer on the Side of the Dinette Bench for Cooking Tools
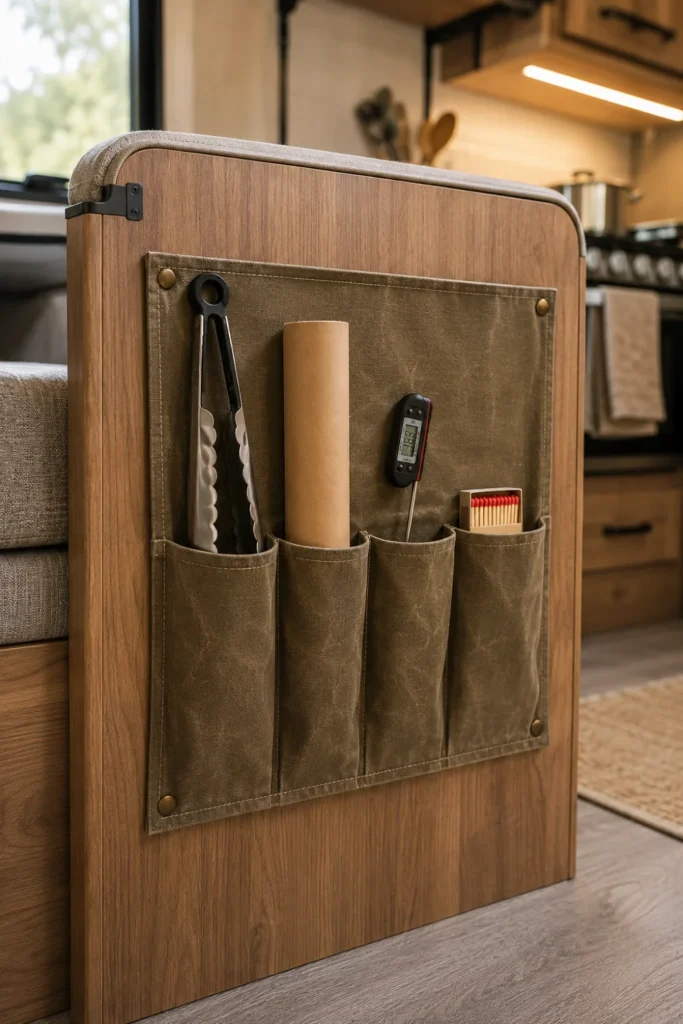
The open vertical side of an RV dinette bench is right next to the cooking area and rarely gets used. A sturdy canvas hanging organizer with multiple pocket rows holds grilling tools, matches, spatulas, and trash bags.
Fabric pockets flex with movement and keep items totally silent, eliminating the plastic clatter common in small campers.
📌 Good To Know
Opt for heavy duck canvas or waxed canvas rather than thin shoe-organizer plastic. Canvas holds its structure against rough wood and resists tearing from sharp wooden spatula edges.
- Place high-use items like meat thermometers and lighters in top pockets.
- Dedicate bottom slots to aluminum foil rolls, parchment sheets, and baggies.
- Anchor the organizer bottom with adhesive hook-and-loop strips to stop swaying.
15. Install a Heavy-Duty Magnetic Knife Bar Behind the Stove
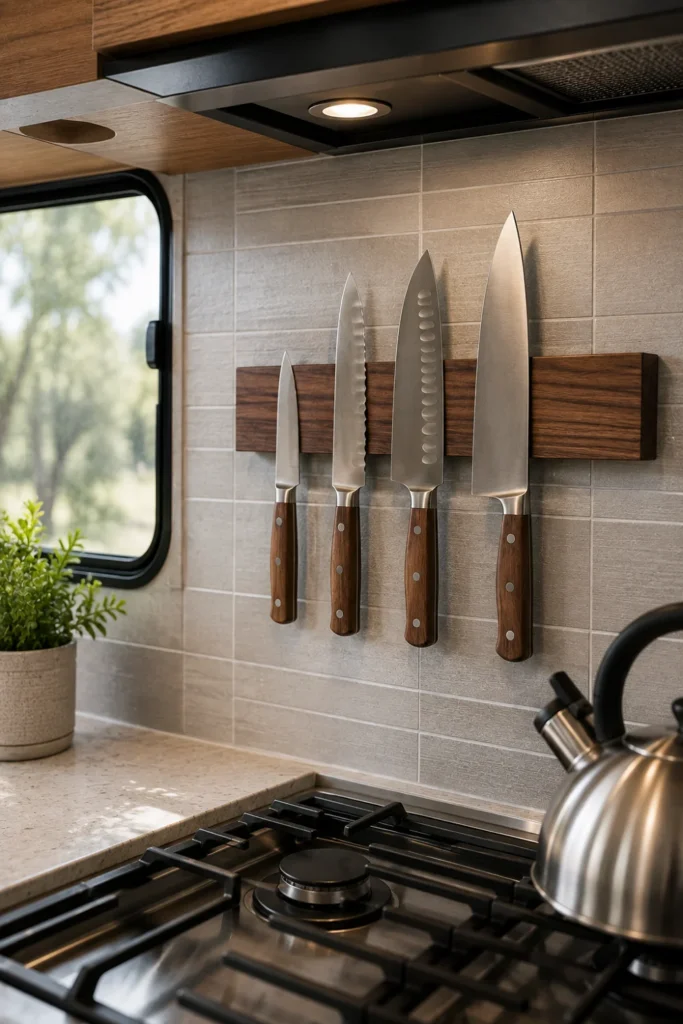
Loose kitchen knives rolling around inside a utensil drawer dull their cutting edges and present a sharp hazard when reaching inside. A magnetic strip mounted to the backsplash keeps chef knives locked down and ready to use.
Mounting the bar horizontally right against the wall keeps sharp blades completely off prime counter space.
Choose a bar with dual neodymium magnetic strips for maximum road grip.
Angle knife blades sideways to maximize surface contact with the magnet.
Using weak decorative magnetic bars not rated for vehicle motion.
Mounting heavy cleavers directly above stovetop cooking surfaces.
- Position the bar away from high-traffic sliding doors.
- Wipe knives completely dry before placing them on the strip to prevent rust spots.
- Use plastic blade guards over knives for extra peace of mind on rough forest roads.
16. Stack Lightweight Wire Risers on Open Counter Corners
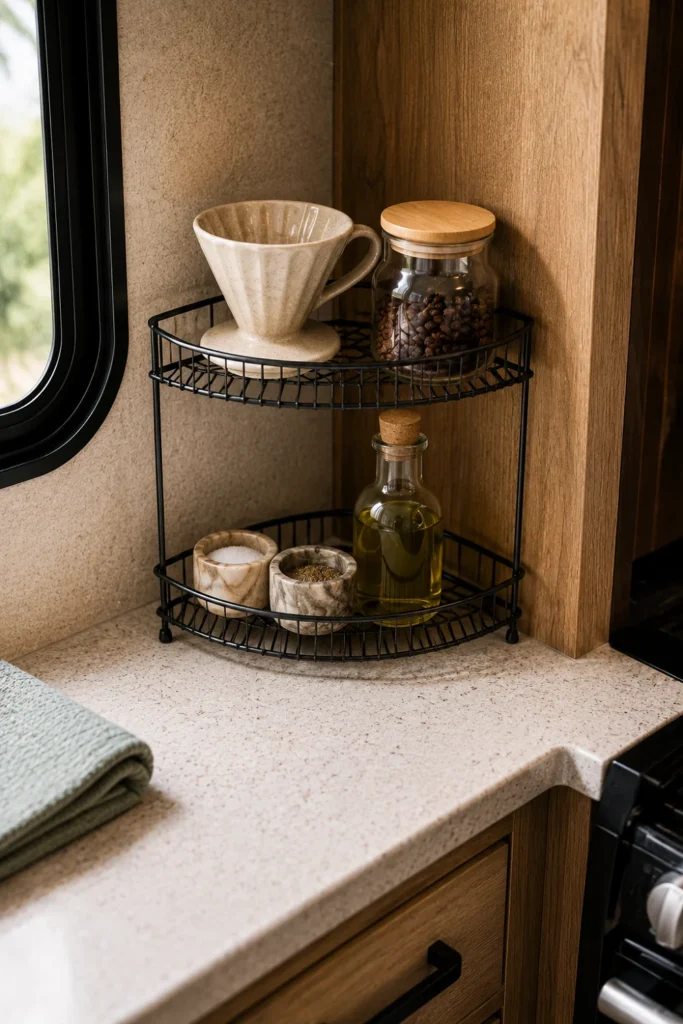
Counter corners behind the sink and next to the stove often collect random clutter like soap bottles, salt shakers, and tea tins. A mini three-tier corner riser organizes that scattered cluster into a compact vertical footprint.
Elevating everyday items keeps your counter surface clear for chopping boards and food staging.
Tuck a triangular wire shelf tight into the 90-degree backsplash corner.
Apply small museum putty dots beneath each leg to anchor the riser in place.
Place coffee gear on top and store dish soap sponges underneath.
- Pick coated wire or rust-proof aluminum that handles kitchen splash zones.
- Keep heavier ceramics on the lowest tier to maintain a stable center of gravity.
- Clear the middle tier for staging butter dishes and salt cellars while cooking.
17. Clip Pre-Packaged Snacks to a Hanging Pantry Cord
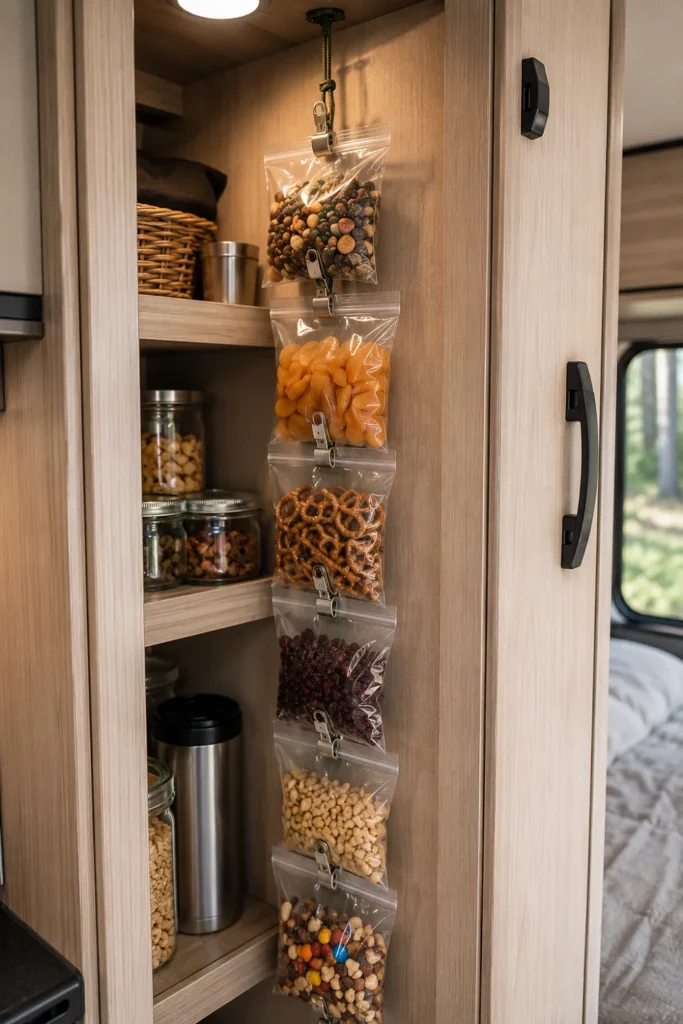
Individual snack bags of chips, dried fruit, and nuts quickly turn pantry bins into chaotic piles where small bags get crushed.
Hang a sturdy vertical nylon cord with attached stainless steel clips along an interior pantry wall. Clipping snack bags in a vertical row keeps them visible, uncrushed, and easy to grab on travel days.
- Attach the top of the cord with an adhesive anchor hook rated for five pounds.
- Keep high-protein trail bars at the top and kid snacks within reach below.
- Roll open bag tops twice before clipping to preserve freshness in humid weather.
18. Place a Lazy Susan Turntable in Deep Corner Cupboards
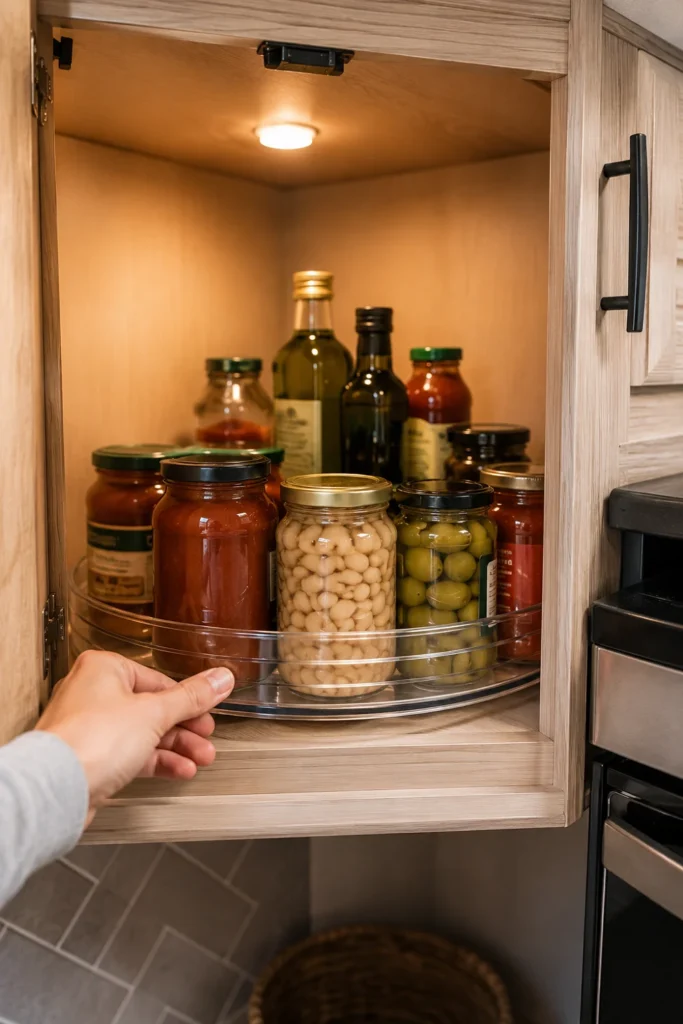
Deep corner cupboards in travel trailers are notorious for becoming black holes where canned goods and sauces disappear for entire seasons.
A rotating turntable brings back items to the front with a gentle spin, eliminating the need to empty out entire shelves just to find a jar of salsa.
| Storage Method | Daily Practicality |
|---|---|
| Deep Shelf Rows | Items in the back expire unnoticed; front jars must be removed to reach rear items. |
| Lipped Turntable | One 360-degree spin reveals all contents; high lips prevent jars from tipping off. |
- Choose a turntable with a two-inch outer lip to catch jars during transit.
- Apply non-skid rubber feet to the underside so the base stays put.
- Group cooking oils and vinegars together to contain any accidental bottle drips.
19. Anchor Cleaning Supplies Around Plumbing with an Under-Sink Tension Bar
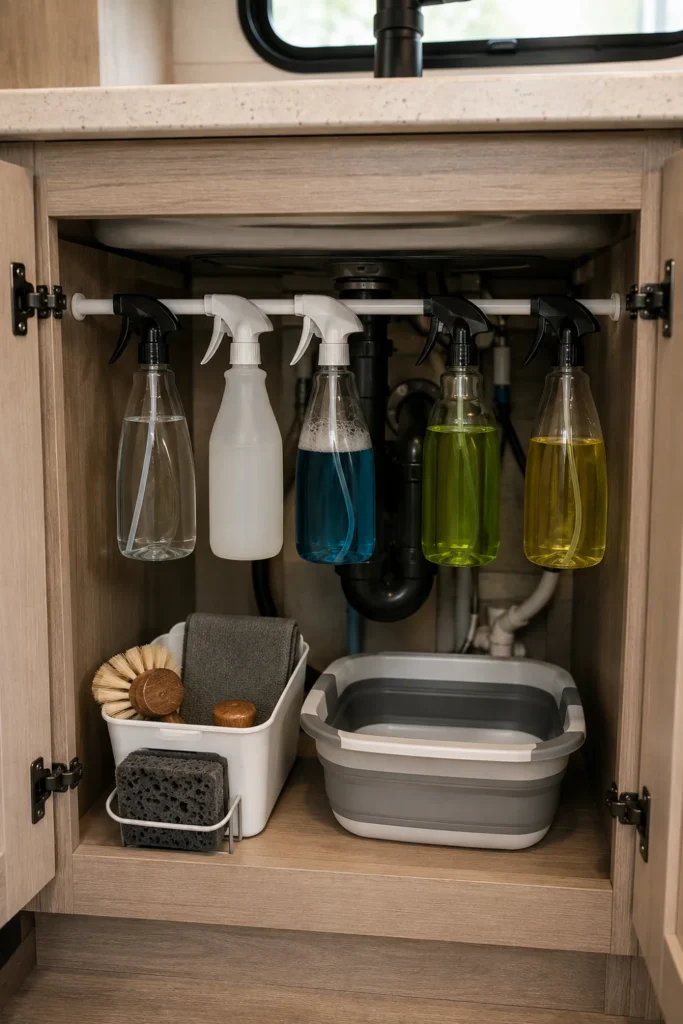
The cabinet beneath an RV kitchen sink is usually cramped with low-point drain pipes, water pump lines, and bulky filter housings. Fitting standard storage bins around this maze is nearly impossible.
Install a small spring tension rod horizontally across the upper cabinet frame. Hang spray bottles by their trigger handles on the bar, leaving the bottom floor completely open for wash basins and sponge caddies.
Position tension rods at least three inches clear of flexible PEX lines and water filter housings to prevent pressure on camper plumbing joints while driving.
- Hang surface sprays, degreasers, and dish soap bottles along the upper bar.
- Slide a shallow bin below to hold scouring pads, sink stoppers, and drain plugs.
- Check the rod tension once a month to ensure vibrations have not loosened the grip.
Setting up an efficient camper kitchen does not require an expensive remodel. By taking advantage of vertical walls, claiming unused cabinet airspace, and securing items with modular containers, your tiny galley becomes a joy to cook in. Pick two or three of these practical rv kitchen organization ideas to tackle this weekend, and enjoy a clutter-free counter on your next road trip.
Save this list to your RV organization board on Pinterest so you have these practical space-saving ideas ready for your next camper upgrade.

