
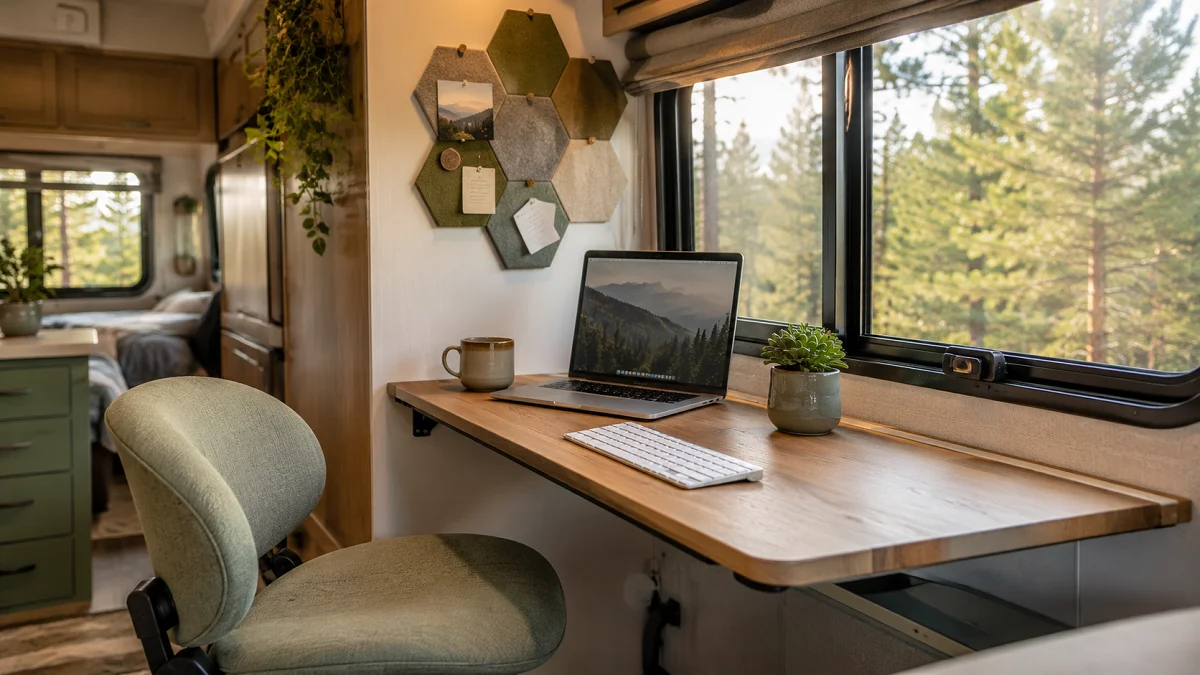
Working from an RV sounds incredible until you find yourself balancing a laptop on your knees, hunting for an outlet, and dealing with an aching lower back after thirty minutes. Standard campers simply are not built with modern remote work in mind. Most factory floor plans prioritize sleeping capacity over functional desk space, which leaves mobile professionals scrambling to create makeshift setups that feel clunky and disorganized.
You do not have to settle for an uncomfortable dinette table or work from bed every morning. Creating a dedicated, ergonomic setup inside a small rig is entirely doable once you rethink your unused corners, vertical wall space, and furniture layouts.
These practical rv office space ideas focus on real layouts, lightweight materials, and travel-safe gear that hold up whether you are parked at a full-hookup resort or boondocking off-grid.
1. Convert the Dining Booth into a Dual-Purpose Work Station
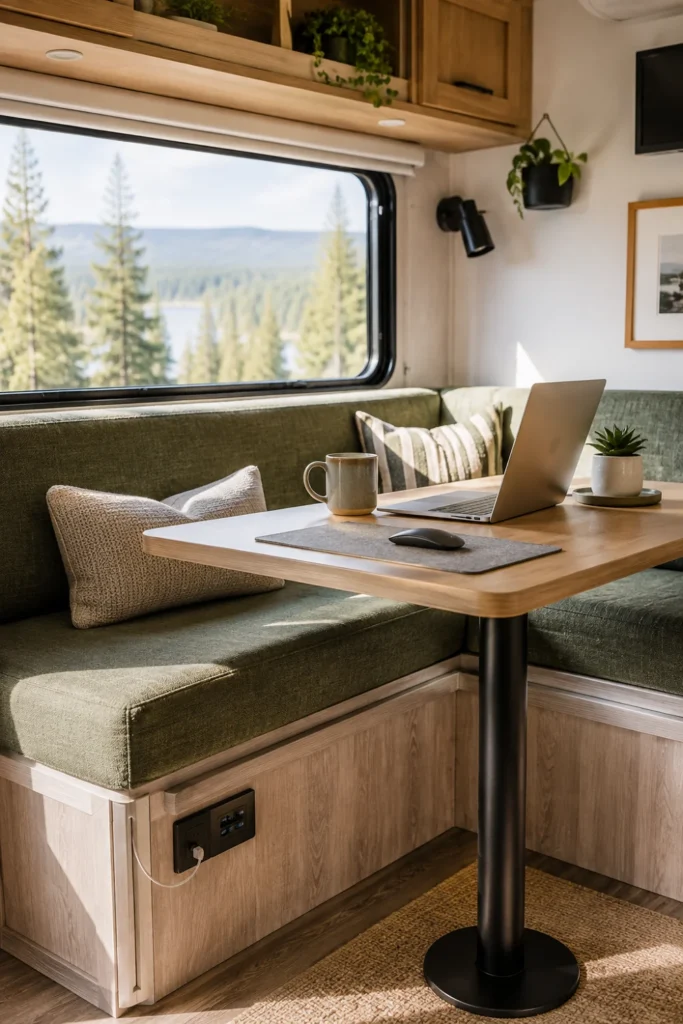
Factory RV dinettes are notoriously uncomfortable for long workdays. The foam cushions are usually too soft, the table height is awkward for typing, and the upright wooden backs offer zero lumbar support.
With a few thoughtful modifications, you can transform this dining nook into an ergonomic daily workstation without losing the ability to eat dinner there in the evening.
- Replace soft factory cushions with high-density foam wrapped in durable fabric.
- Install a marine-style pedestal base under the table to eliminate annoying leg wobble.
- Add an adjustable lumbar cushion to maintain healthy posture during long typing sessions.
Wobbly single-pole table, sinking foam cushions, and no lower back support while typing.
Rigid high-density seating, a stable locking table mount, and dedicated power ports right under the bench.
Keep your cords organized by running an adhesive cable channel along the inner wall beneath the tabletop to prevent feet from catching on dangling power bricks.
2. Mount a Heavy-Duty Drop-Leaf Table to an Open Sidewall
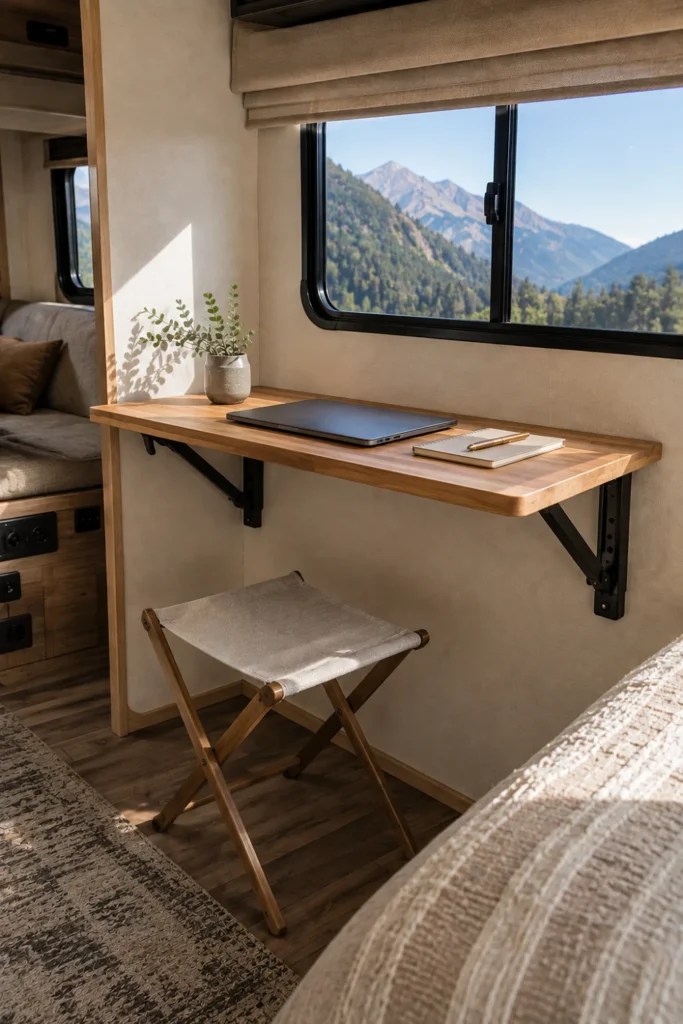
If your RV layout has an empty section of wall near a window or entry door, a wall-mounted drop-leaf table provides an instant desk that disappears when the workday ends.
Heavy-duty folding brackets can support substantial weight while folding completely flat against the wall during travel days.
| Feature | Standard RV Folding Table | Heavy-Duty Drop-Leaf Desk |
| Weight Capacity | 15–20 lbs | 50–80 lbs (in wall studs) |
| Travel Security | Requires full teardown | Folds flat against wall |
| Usable Surface | Narrow and shallow | Customizable wood slab |
Choose a lightweight butcher block or finished plywood slab roughly 30 inches wide and 16 inches deep. This gives you plenty of room for a laptop and mouse without cutting into your walking aisle.
💡 Quick Tip
Always locate the aluminum or wood wall studs with a magnetic stud finder before screwing in your folding brackets. Hollow RV wall paneling cannot support typing pressure alone.
3. Turn the Rear Bunkhouse into a Dedicated Closed-Door Studio
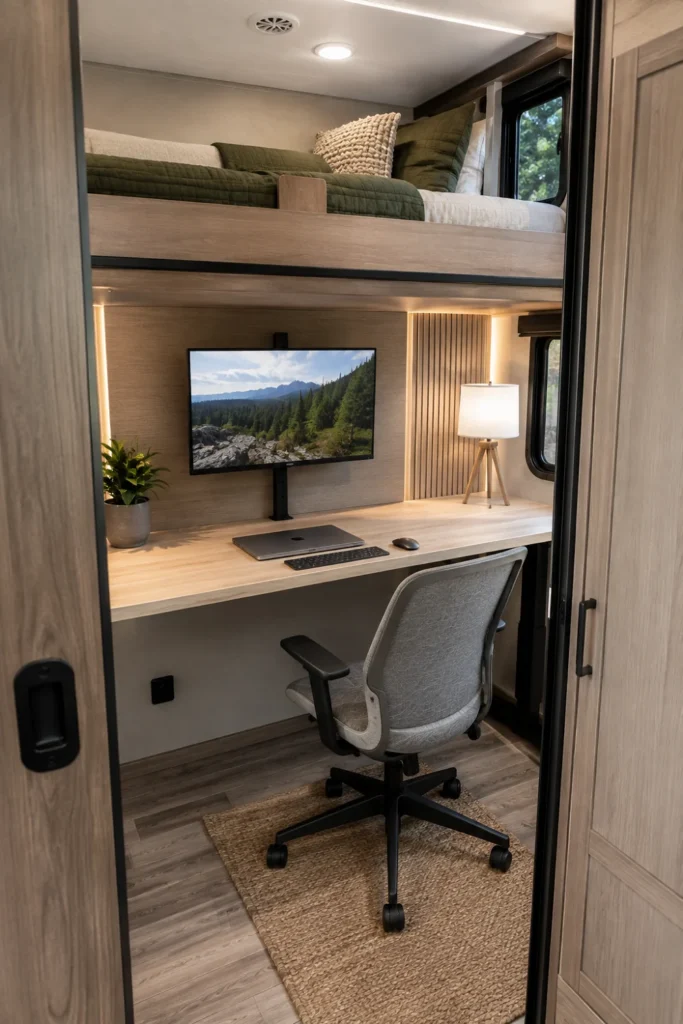
Bunkhouse models are perfect candidates for full office conversions if you travel without kids or regular guests. Removing the lower bunk opens up significant floor space for a residential-style desk setup.
You can keep the top bunk for bulky gear storage or convert it into a cozy reading lounge while utilizing the lower zone as your private workspace.
- Unscrew the lower bunk framing carefully to avoid damaging the outer walls.
- Install a free-standing, lightweight desk secured to the floor with small L-brackets.
- Mount acoustic felt panels on the bunkhouse door to block living area noise during calls.
This dedicated room setup lets you leave your monitor, keyboard, and notebooks in place at the end of the day without cluttering the main living quarters.
4. Install Swivel Laptop Mounts to the Passenger Captain’s Chair
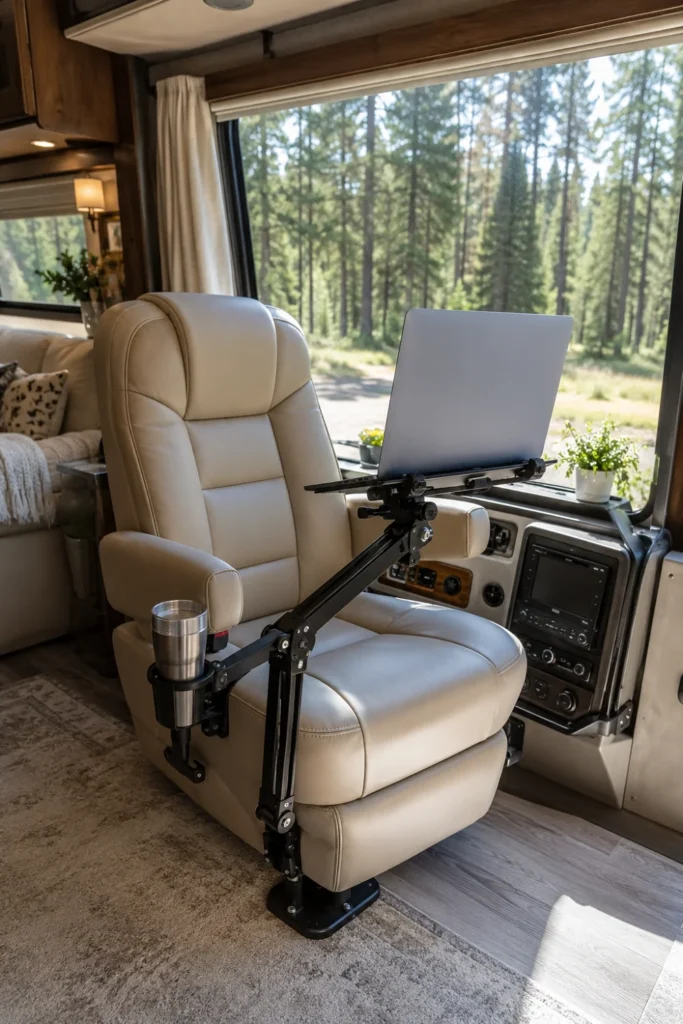
Motorhome owners often overlook the front cab area when planning an office space. The front passenger seat already swivels around toward the living area, features built-in armrests, and offers supportive cushioning.
Adding an articulated, heavy-duty laptop tray mount directly to the seat base creates a cockpit desk with zero footprint impact.
- Heavy-Duty Articulated Arm: Allows full 360-degree rotation and height adjustments.
- Vented Laptop Tray: Prevents heat buildup during intensive video rendering or multitasking.
- Locking Quick-Release Lever: Lets you quickly stow the tray behind the seat when driving.
What to grab for this build
This layout gives you front-row views through the panoramic windshield, turning every campsite into a scenic backdrop for your workday.
5. Build a Slide-Out Keyboard Tray Under Existing Cabinetry
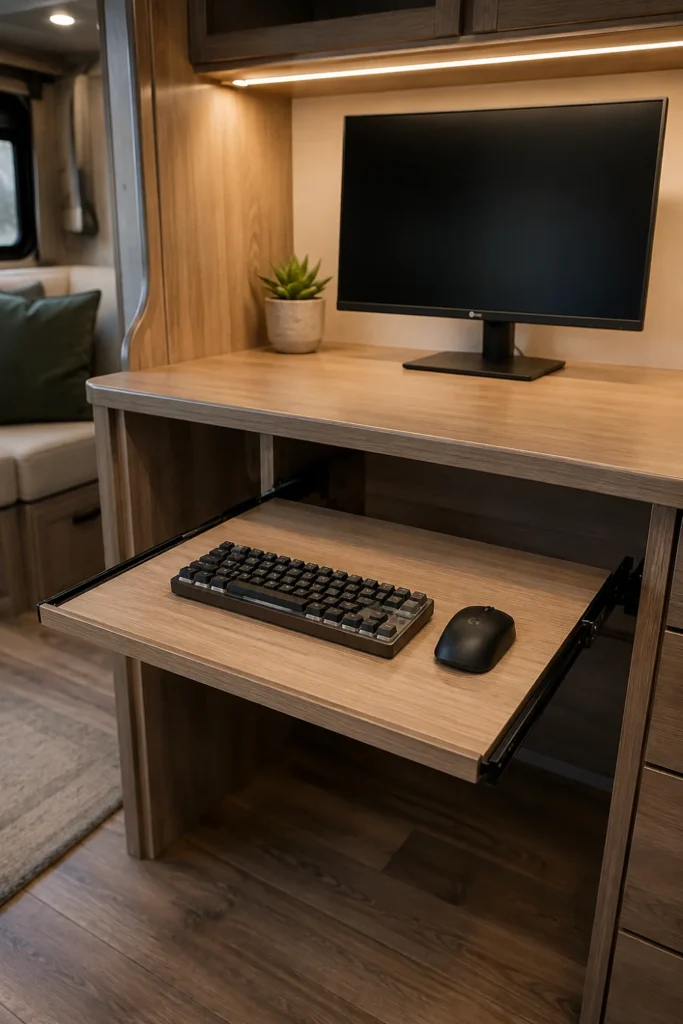
When surface area is limited on your main counter or dinette, a slide-out keyboard and mouse tray helps preserve precious desk space.
Mounting ball-bearing drawer slides under an existing shelf or cabinet allows you to position your hands at a neutral, ergonomic typing angle.
- Measure the clearance under the cabinet to ensure at least 3 inches of vertical drop.
- Cut a lightweight piece of 1/2-inch birch plywood to match your keyboard and mouse width.
- Install soft-close locking slides so the tray stays open while typing and stays shut on travel days.
This simple upgrade clears your main tabletop for secondary devices, reference materials, or a cup of morning coffee.
6. Swap the Factory RV Recliner for a Compact Ergonomic Task Chair
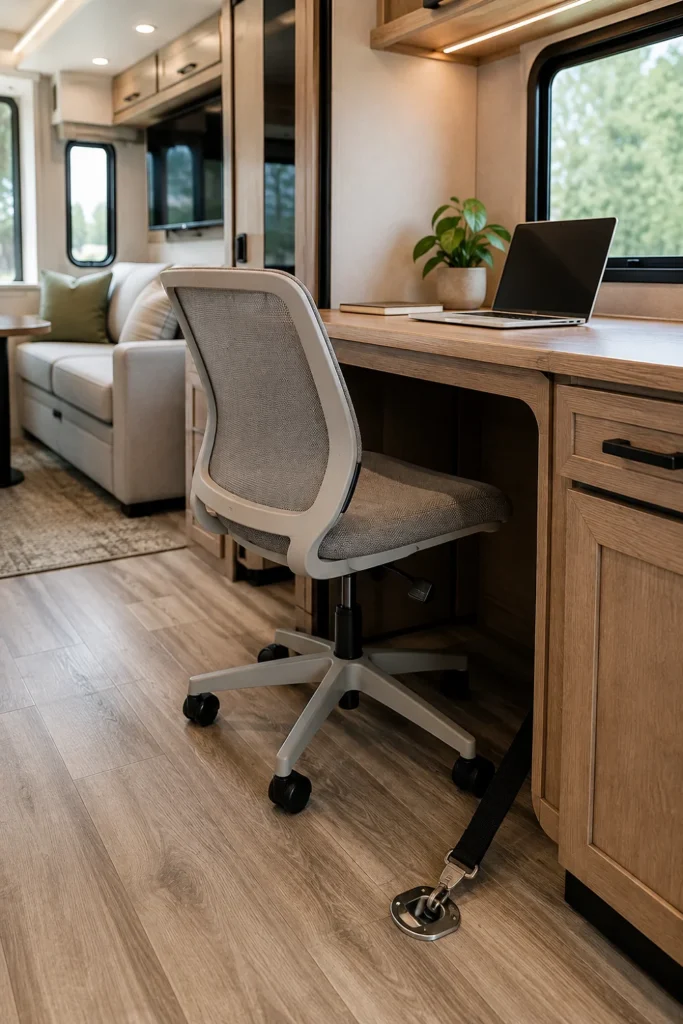
Bulky residential swivel recliners take up an enormous amount of floor space in slide-out areas. Replacing these heavy chairs with an armless, low-profile task chair provides far better posture while freeing up precious square footage.
Look for task chairs with a smaller five-star base footprint and breathable mesh to stay cool during warm weather camping.
| Feature | Bulky Factory RV Recliner | Compact Ergonomic Task Chair |
| Footprint | Large (36″ x 36″ or more) | Compact (22″ x 22″) |
| Lumbar Support | Minimal, encourages slouching | Adjustable ergonomic support |
| Travel Stability | Hard to secure cleanly | Easy to strap down or nest |
| Feature | Standard Office Chair | RV-Friendly Task Chair |
|---|---|---|
| Base Size | Wide (28-30 inches) | Narrow (20-22 inches) |
| Armrests | Fixed or bulky | Flip-up or armless |
| Weight | Heavy steel (35+ lbs) | Light composite (18-22 lbs) |
On travel days, simply tuck the chair snugly under your desk or use a ratchet strap secured to a floor D-ring to keep it from rolling across the rig.
7. Create a Collapsible Bedside Desk in the Master Bedroom
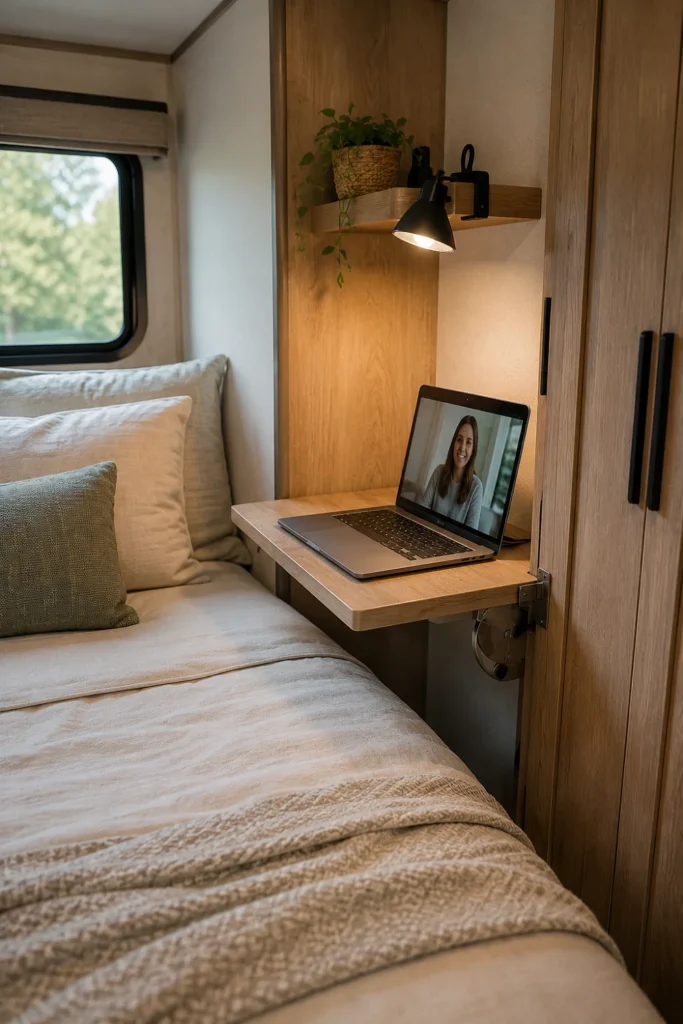
When you share an RV with a partner or family members, finding a quiet place for calls can be difficult. The primary bedroom offers built-in privacy from the main living area.
By installing a fold-down desk surface near the side or foot of the bed, you create a private satellite workstation for video conferences.
- Mount a fold-down laminate shelf to the outer side of a bedroom wardrobe closet.
- Use the edge of the mattress or an adjustable stool as temporary seating during calls.
- Install a direct-wired reading light above the desk surface for clear, warm video lighting.
Closing the bedroom door instantly cuts 15 to 20 decibels of household noise without requiring permanent structural changes.
This simple workstation folds flat against the wardrobe wall in seconds, keeping your walkway clear when getting ready for bed.
8. Secure Tech Gear with Heavy-Duty Velcro and Marine Latches for Travel Days
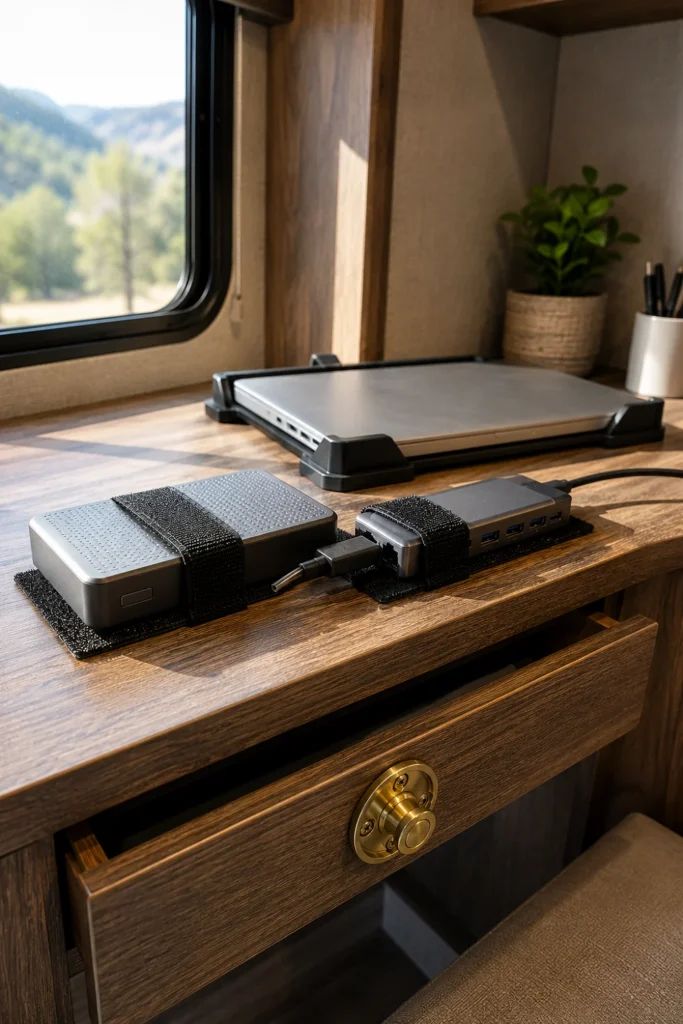
A sudden stop or bumpy stretch of highway can launch loose monitors, docks, and hard drives straight onto the floor. Securing your workspace equipment is essential for protecting expensive electronics.
Industrial hook-and-loop tape, rubberized mounting pads, and mechanical slide latches keep everything locked down without requiring daily teardowns.
- Apply industrial-strength adhesive Velcro strips to the base of your monitor and desktop docking station.
- Secure external hard drives and hub adapters under the desk surface with silicone mounting brackets.
- Install push-button marine latch hardware on all desk drawers to keep them from sliding open around turns.
⚠️ Watch Out
Standard household adhesive strips soften and lose grip when exposed to high summer heat inside a closed camper. Stick to high-temperature automotive or industrial-grade fasteners.
Taking time to secure your gear ensures you can pack up camp and hit the highway in minutes without packing every cable into a bin.
9. Set Up a Plug-and-Play 12V Power Strip with Built-In USB-C PD Ports
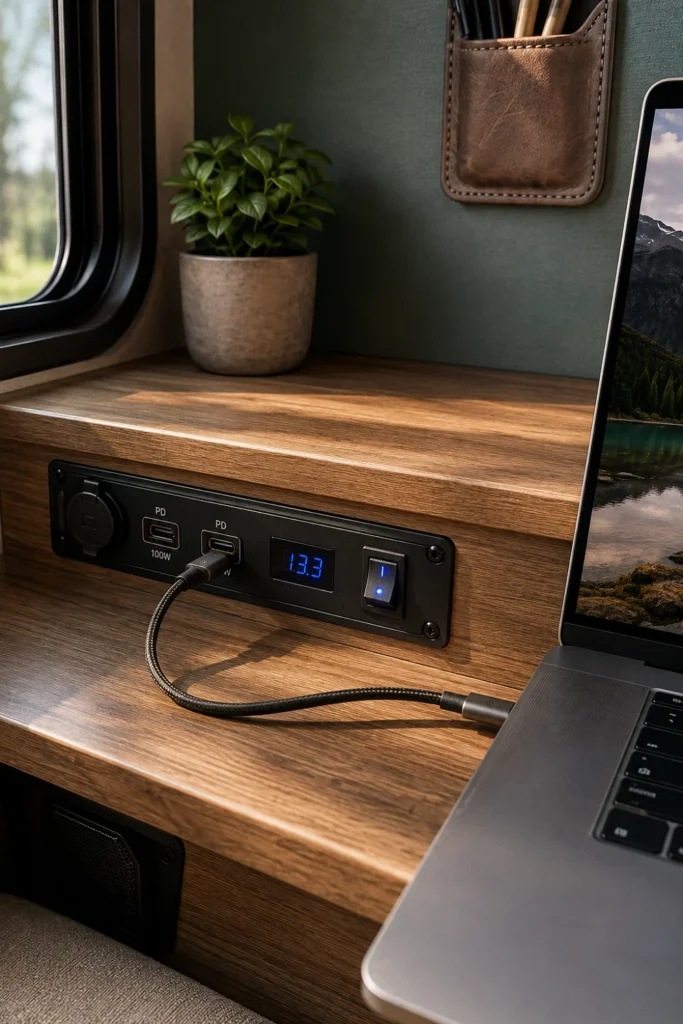
Running a large 2,000-watt AC inverter all day just to charge a laptop wastes significant battery power through standby conversion losses.
Powering your workspace directly from your RV’s 12-volt DC house battery bank keeps your setup running efficiently during off-grid stays.
- Dedicated 12V USB-C PD Outlets: Deliver up to 100 watts directly to laptops without converting DC to AC.
- Switched Fuse Block: Lets you cut phantom draw to all workspace chargers with a single master toggle.
- Inline Voltage Meter: Displays real-time battery status right from your desk chair.
Use high-wattage 12V USB-C PD car chargers hardwired directly to your 12V distribution panel.
Install an inline toggle switch to cut phantom power drain overnight.
Running a 2000W whole-coach inverter all day just to power a single 65W laptop charger.
Using unshielded thin wiring that drops voltage under continuous load.
This DC-first strategy can double your usable off-grid runtime on solar and lithium power.
10. Hang a Perforated Metal Pegboard Inside an Unused Wardrobe Closet
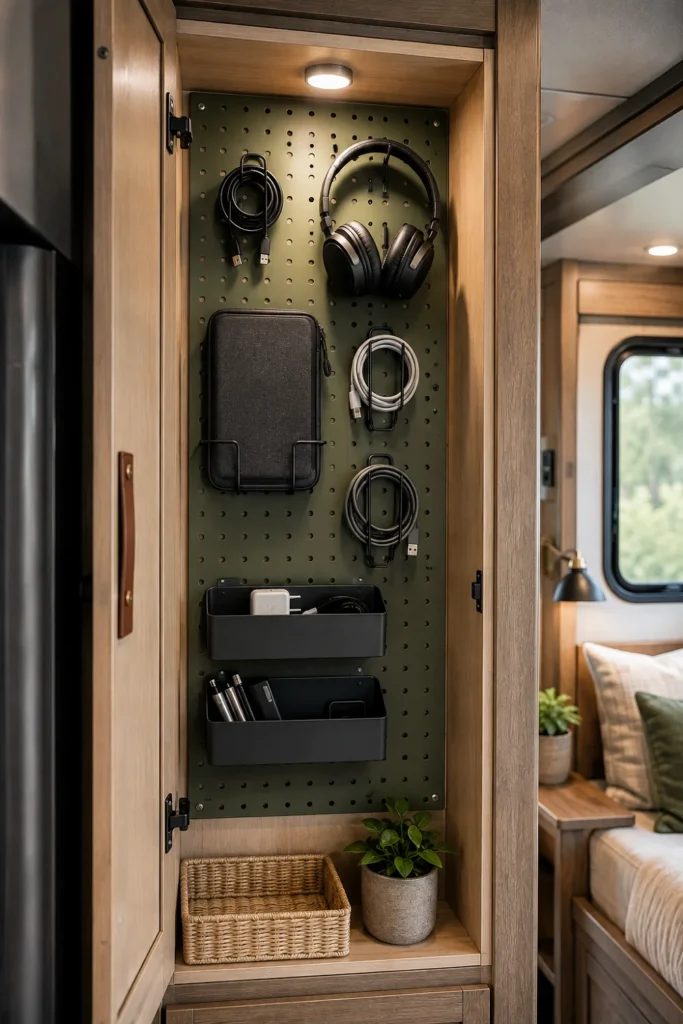
Deep wardrobe closets often end up as messy catch-alls for coats, shoes, and loose cords. Lining the back wall with a powder-coated steel pegboard transforms this dead space into an organized vertical tech wall.
Metal pegboards are far sturdier than composite particle boards and easily withstand the vibrations of cross-country driving.
Mount 1/2-inch wood furring strips directly into the closet wall framing to create standoff clearance.
Screw the metal pegboard panel to the furring strips using locking washers.
Attach locking wire hooks and small bins to hold headphones, cables, chargers, and adapters securely.
Closing the closet door instantly hides all your charging gear and cables from view when work is over for the day.
11. Use a Retractable Roller Shade as a Clean Video Call Backdrop
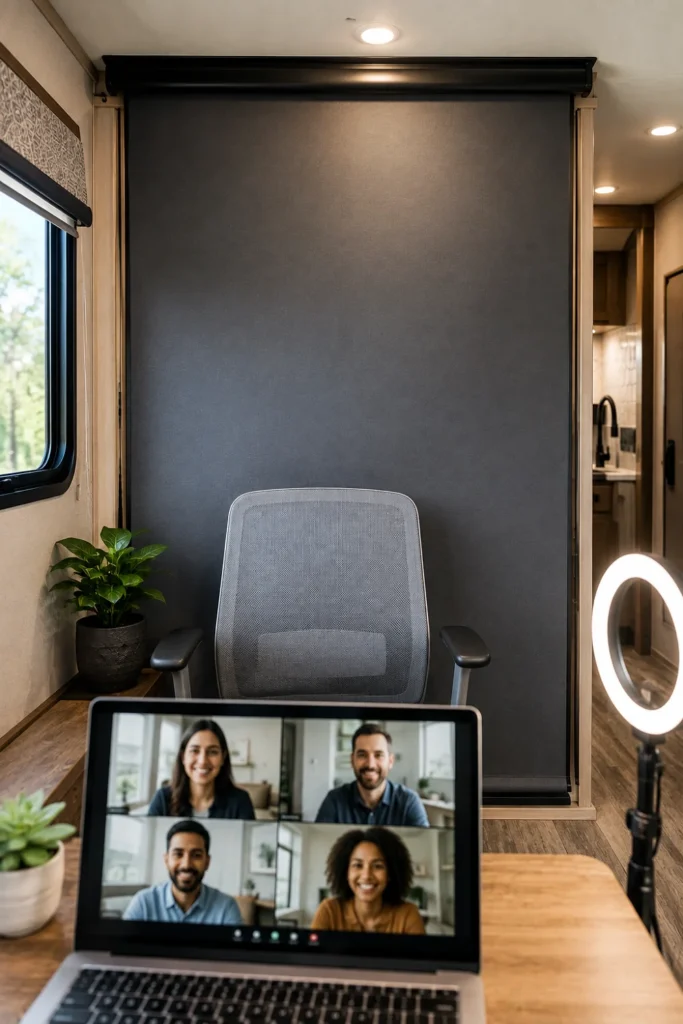
Finding a tidy, professional background for client video calls inside a compact RV can be stressful. Unmade beds, kitchen clutter, or passing family members can distract from your presentation.
A ceiling-mounted neutral roller shade pulls down behind your chair in seconds to create an instant, distraction-free backdrop.
- Choose a blackout vinyl shade in a neutral grey, navy, or soft green tone.
- Mount the roller bracket to a solid ceiling joist directly behind your main work chair.
- Retract the shade upward when the meeting finishes to open up the room again.
This setup looks sharp on camera and requires zero setup time compared to bulky green screen stands.
12. Add a Clamp-On Monitor Arm with a Mechanical Travel Lock
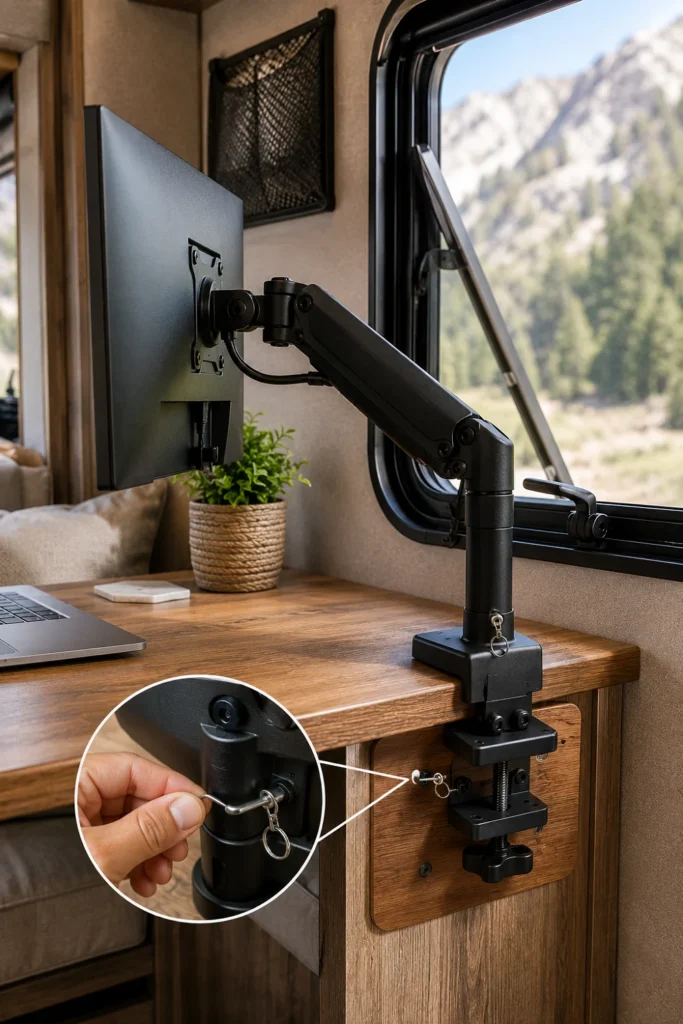
Balancing an external monitor on its factory plastic base is a recipe for disaster on rough backroads. A clamp-on desk monitor arm holds your screen at perfect eye level while keeping your desk clear.
Selecting an arm with locking tension joints ensures your display stays firmly in position while driving.
📌 Good To Know
Place a 3×3-inch block of hardwood or metal backing plate beneath the desk clamp. This distributes the pressure and prevents the steel clamp from cracking lightweight hollow-core RV tabletops.
- Full Articulation: Rotate the screen between landscape for spreadsheets and portrait for coding or reading.
- Quick-Release VESA Plate: Lets you remove the monitor in seconds if you prefer packing it safely in a padded sleeve.
- Under-Arm Cable Clips: Keep HDMI and power cords tucked tightly along the metal arm.
13. Mount a Starlink or Cell Booster Cable Pass-Through Near the Work Zone
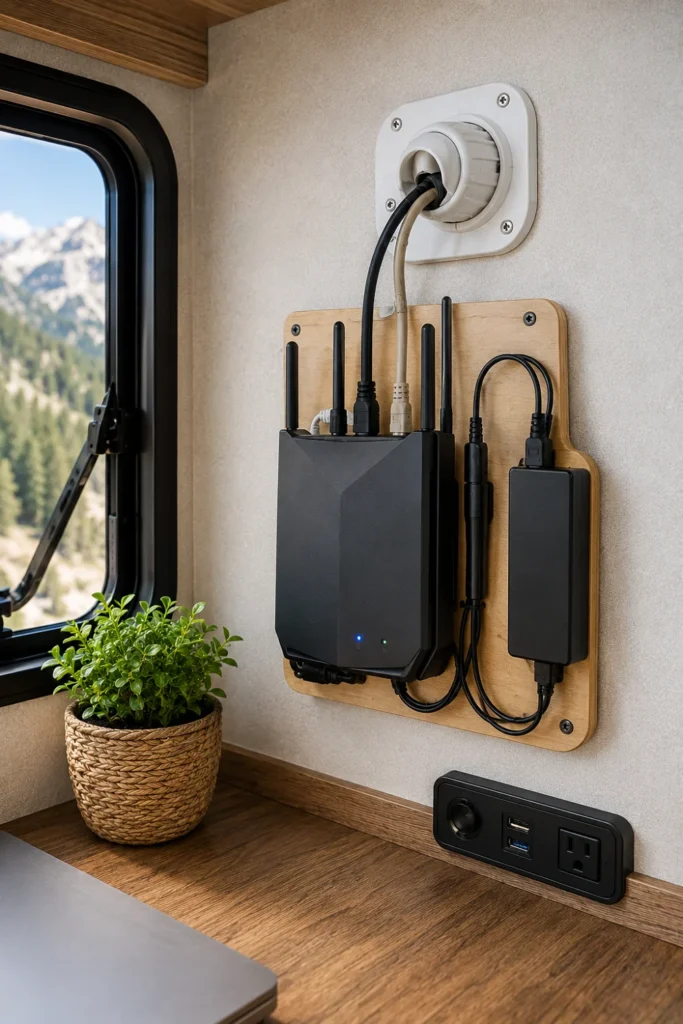
Nothing slows down a remote workday faster than a weak internet connection. Running antenna and satellite cables through cracked windows or slide-out seals damages weatherstripping and lets bugs inside.
Installing a weatherproof cable pass-through port on an exterior wall keeps your workspace cleanly wired to external boosters.
- Use a standard marine cable clam or exterior weatherproof gland on the rig sidewall.
- Route high-grade coax or Cat6 Ethernet cable through the pass-through directly to your router dock.
- Seal all exterior drill points thoroughly with UV-resistant RV lap sealant.
This setup ensures a rock-solid, hardwired data feed straight to your desk without wrestling with loose wires every time you move camp.
14. Build a Low-Profile Standing Desk Riser on the Kitchen Counter Extension
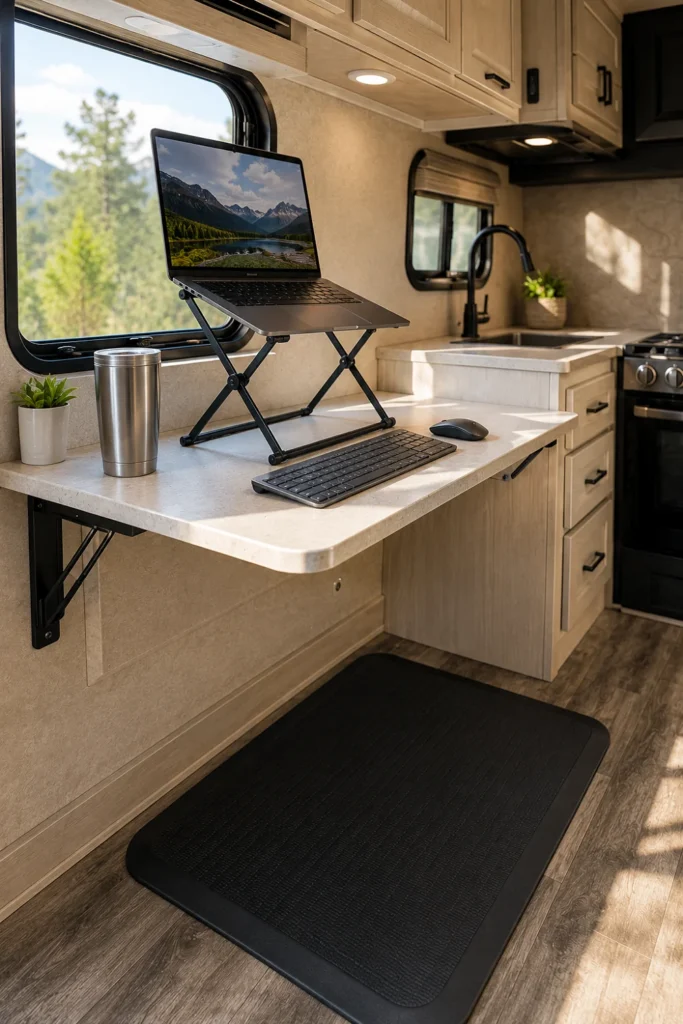
Sitting in a cramped RV for eight straight hours can leave your back and hips feeling stiff. If your rig features a flip-up solid surface kitchen counter extension, you have a ready-made standing workstation.
A lightweight, folding laptop riser placed on this extension elevates your screen to proper eye height for standing sessions.
| Feature | Countertop Riser | Electric Standing Desk |
|---|---|---|
| Space Impact | Zero added footprint | Requires full furniture removal |
| Weight | 3–5 lbs (aluminum) | 60–90 lbs (motorized frame) |
| Power Draw | None | 120V AC required for motor |
- Pair the counter extension with an aluminum scissor-style laptop stand.
- Add an anti-fatigue rubber mat on the vinyl floor to relieve foot and knee strain.
- Fold the riser down flat and slide it between the counter and the fridge when cooking dinner.
15. Line Thin RV Walls with Felt Acoustic Tiles to Block Road Echo
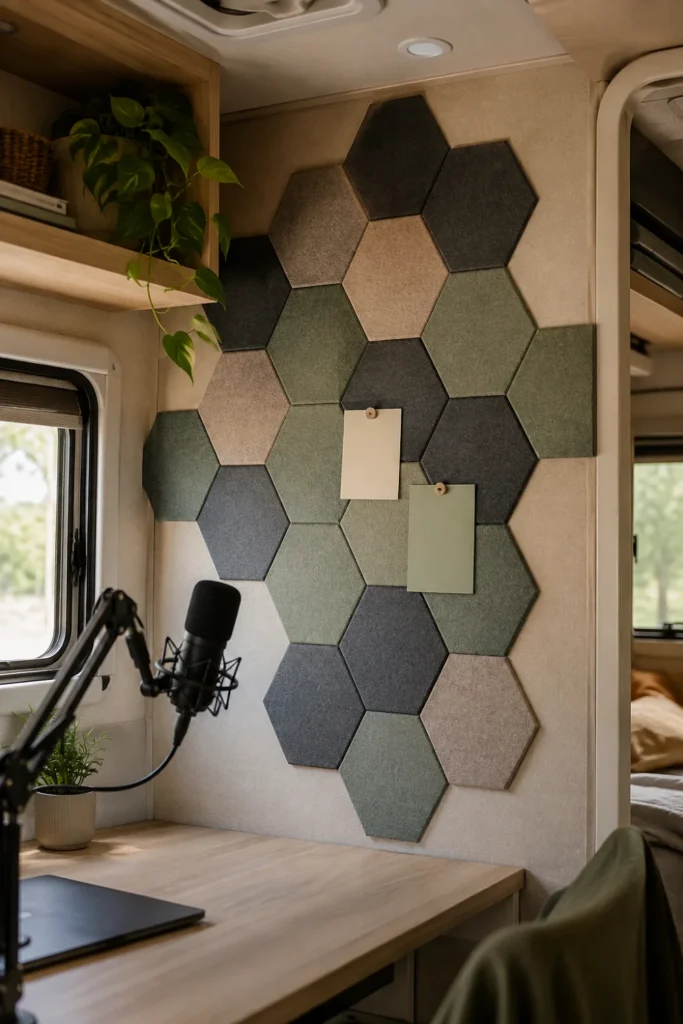
Hollow camper walls and large glass windows create noticeable echo inside an RV, making audio sound hollow during client presentations and podcast recordings.
Adhesive felt acoustic hex tiles absorb sound reflections while adding a warm, residential look to your workspace corner.
Thin, hollow RV wall paneling that bounces sound and echoes during microphone use.
Warm, sound-dampened corner with high-density felt tiles that double as a push-pin memo board.
- High-Density Polyester Felt: Absorbs high-frequency sound waves without adding heavy weight to your rig.
- Damage-Free Mounting: Use removable mounting strips instead of permanent glue to protect the wallpaper underneath.
- Functional Pinboard: Use pushpins directly on the felt tiles to pin schedules, notes, and task lists.
16. Tuck a Slim Rolling Utility Cart Between Furniture Gaps for Mobile Storage
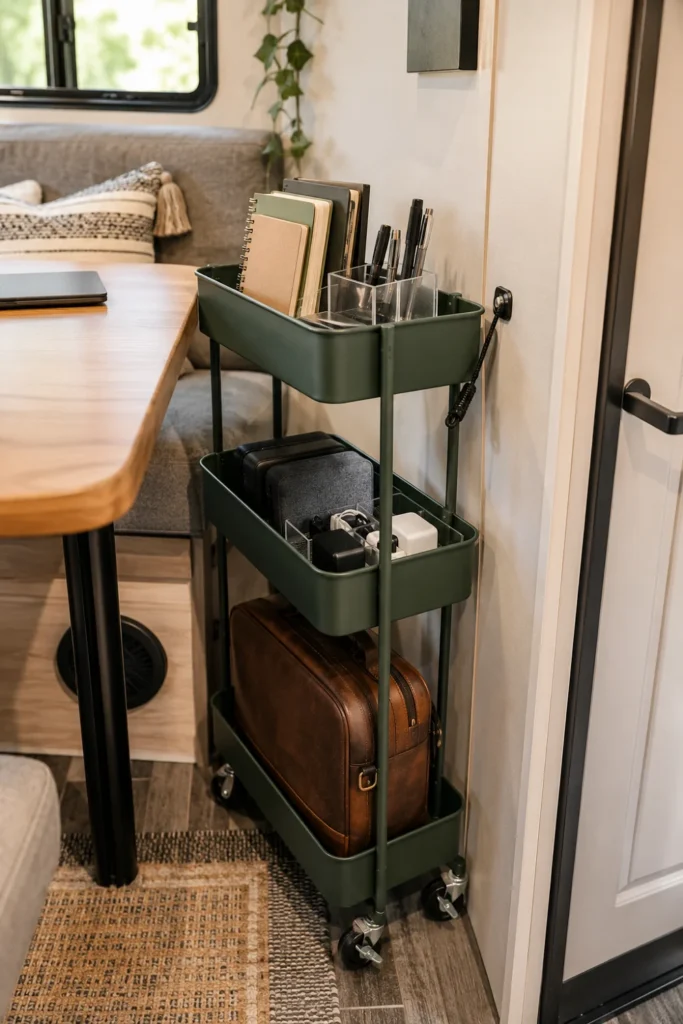
Keeping small tech accessories, notebook pads, and charging cables from spreading across the living area is tough without dedicated office drawers.
A 3-tier slim metal utility cart fits neatly into narrow gaps beside the couch or dinette and rolls out whenever you start work.
How to organize your mobile cart
- Select a cart with locking rubber casters so it stays stationary on uneven campsite parking pads.
- Secure the cart with a lightweight bungee cord around the dinette leg during travel days.
- Add magnetic side cups to the metal frame to hold stylus pens and USB drives.
17. Install Under-Desk Cable Raceway Channels to Eliminate Tangled Wires
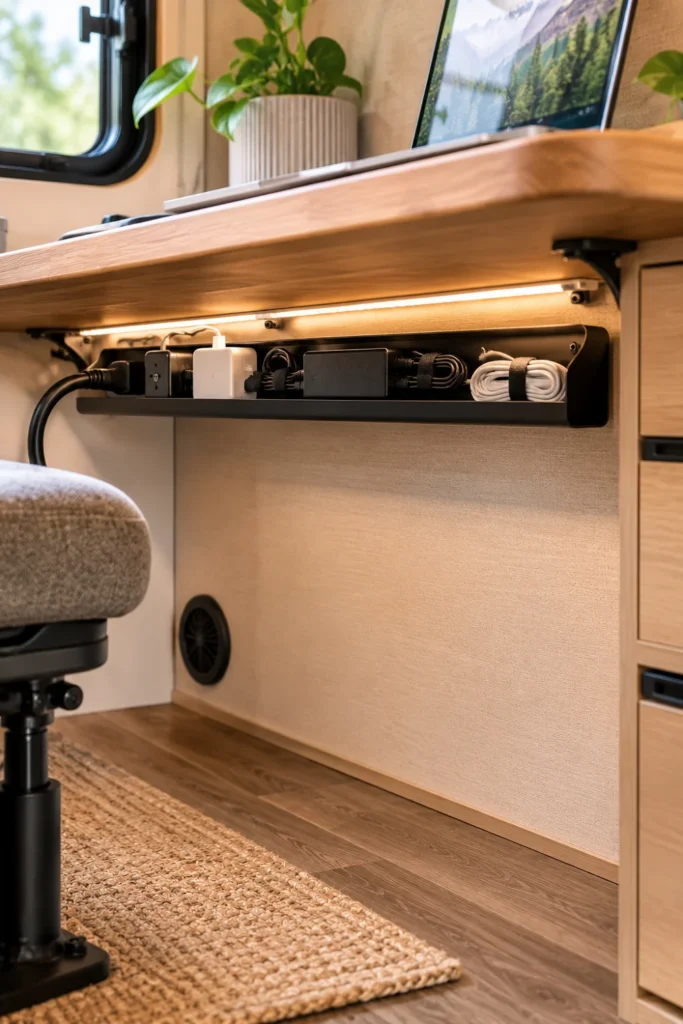
Dangling wires are more than just an eyesore inside a compact RV. Feet get caught in loose cables, pets chew on low-hanging wires, and road vibrations can pull delicate power ports loose from your laptop.
J-channel cable raceways screwed under the rear edge of your work surface keep power supplies and connection cords cleanly secured out of sight.
Screw open-top J-channels directly under the back lip of the tabletop.
Bundle power bricks tightly with reusable hook-and-loop cable ties.
Relying on weak peel-and-stick adhesive clips that fail during summer heat.
Letting heavy power bricks hang directly from wall outlets while driving.
- Open-Top Channel Design: Lets you drop in new charger cables or remove gear without taking apart the whole raceway.
- Flame-Retardant PVC: Offers heat resistance for power blocks running under heavy continuous load.
- Flush Wall Alignment: Allows your desk to sit tight against the wall without pinching cords.
18. Convert Overhead Cabinet Space into a Hidden Charging Station
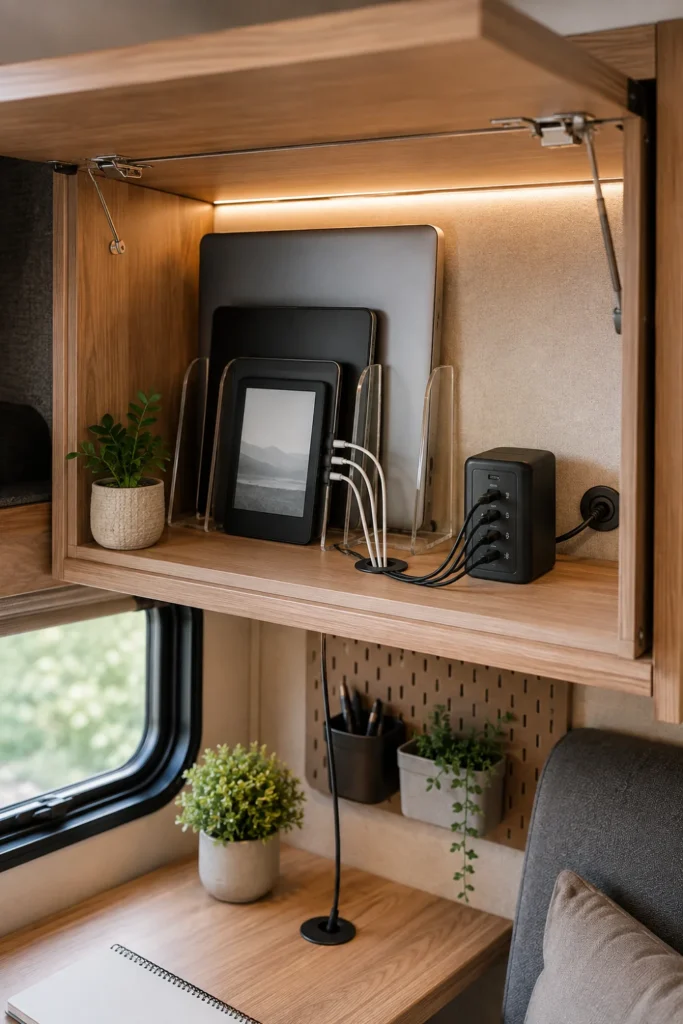
Overhead cabinets above your seating area are ideal for housing your main tech charging hub. Keeping high-draw charging gear inside a dedicated cabinet clears your primary work surface and protects valuable devices from accidental coffee spills.
Adding a vented cable grommet through the bottom shelf lets you pass power leads directly down to your desk while keeping power supplies hidden.
Drill a 2-inch hole through the bottom corner of the cabinet and insert a smooth plastic desk grommet.
Mount a multi-port USB-C GaN charging hub to the inside cabinet wall using screws or heavy-duty mounting tape.
Add acrylic vertical organizer dividers to store laptops, tablets, and e-readers safely upright while they charge.
This clean setup keeps delicate screens safe behind latched cabinet doors on moving days while ensuring your gear is fully charged for your next morning meeting.
Making Your Mobile Workspace Work for You
Creating an efficient remote setup inside a camper comes down to choosing multi-functional furniture, utilizing your vertical wall space, and making sure your gear is secured for transit. You do not need a massive luxury fifth wheel to build a comfortable and productive office.
By upgrading your daily seating, routing power cables cleanly, and taking advantage of unused wall and cabinet space, you can comfortably balance full-time remote work with life on the open road.
Save this list of rv office space ideas to your Pinterest board for your next rig upgrade or camper remodel.

