
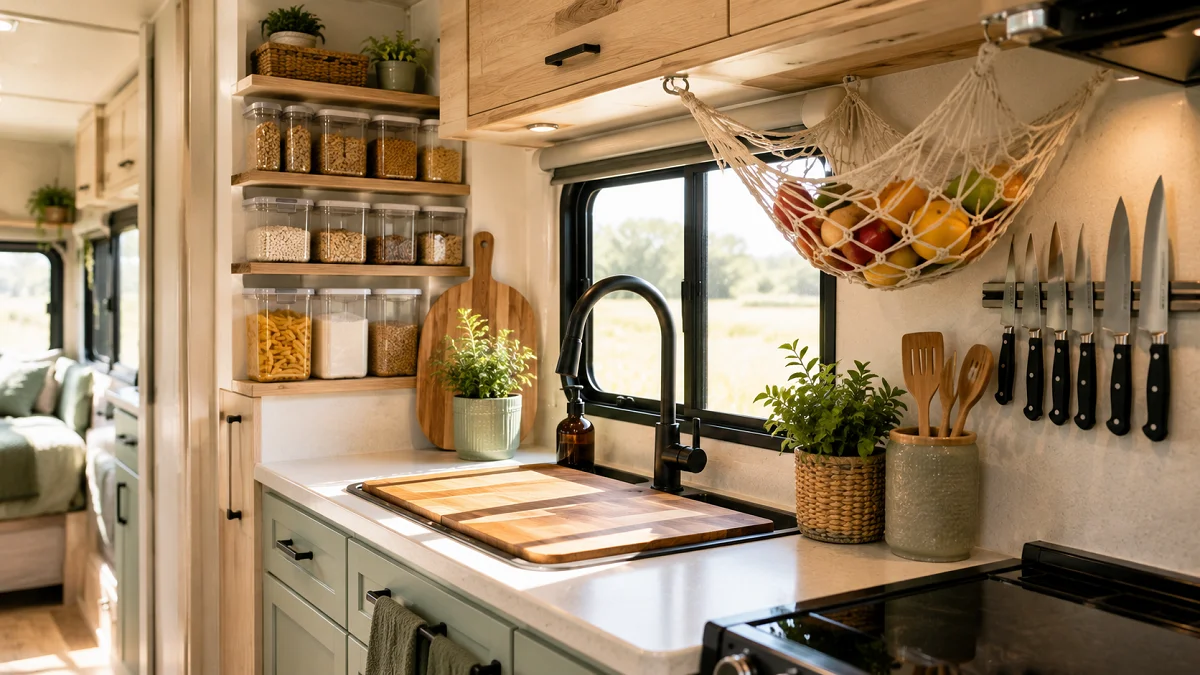
Counter space in an RV kitchen is a rare commodity, and cabinet depth never seems to fit standard food packages. When you take off down the highway, anything left unanchored on a shelf quickly turns into a noisy, sliding mess. Getting dinner together shouldn’t feel like playing a high-stakes game of Tetris every single time you need a cutting board or a spice jar.
Most standard organization tricks assume you have rigid home walls, full-size deep cabinets, and a solid, immovable foundation. In a rig, you are constantly working around thin hollow-core wood, curved outer walls, wiring pathways, and physical motion. The goal isn’t just making things look clean while you are parked at a campsite. It is about creating smart setups that stay put when you hit a stretch of rough road.
These practical rv kitchen storage ideas focus on making every square inch count without adding heavy modifications or permanent damage to your rig. From hidden vertical spots you might be overlooking to simple hardware swaps, here are real-world moves to keep your mobile kitchen functional, quiet, and completely organized.
1. Install Magnetic Strips Under Upper Cabinets
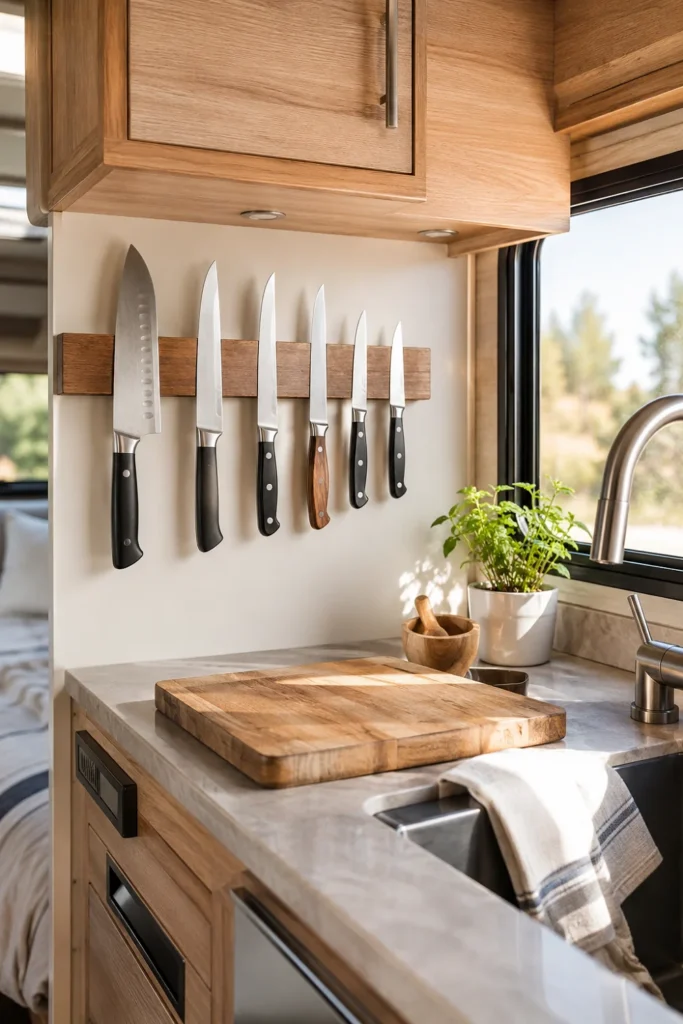
Mounting a heavy-duty magnetic tool strip directly beneath your upper cabinets frees up precious drawer space instantly. It keeps your most-used chef knives, shears, and metal spatulas within arm’s reach while cooking without taking up a single inch of valuable counter real estate.
Make sure to choose a bar with high-strength neodymium magnets so items do not drop during travel. Thin or cheap magnetic strips meant for office paperwork will not hold steel utensils securely when driving over bumpier roads or highway expansion joints.
Mount the bar parallel to the wall under the cabinet lip to conceal edges.
Store lightweight stainless steel tools, tongs, and utility knives.
Leaving heavy cast-iron or thick cleavers on the bar while driving.
Relying on weak adhesive tape instead of mounting with short wood screws.
To make sure you don’t puncture through thin cabinet floors, use short wood screws with washers. For extra peace of mind before hitting the road, slide the knives into protective fabric guards or tuck them into a soft pouch inside a drawer.
2. Swap Bulky Pots for Removable Handle Sets
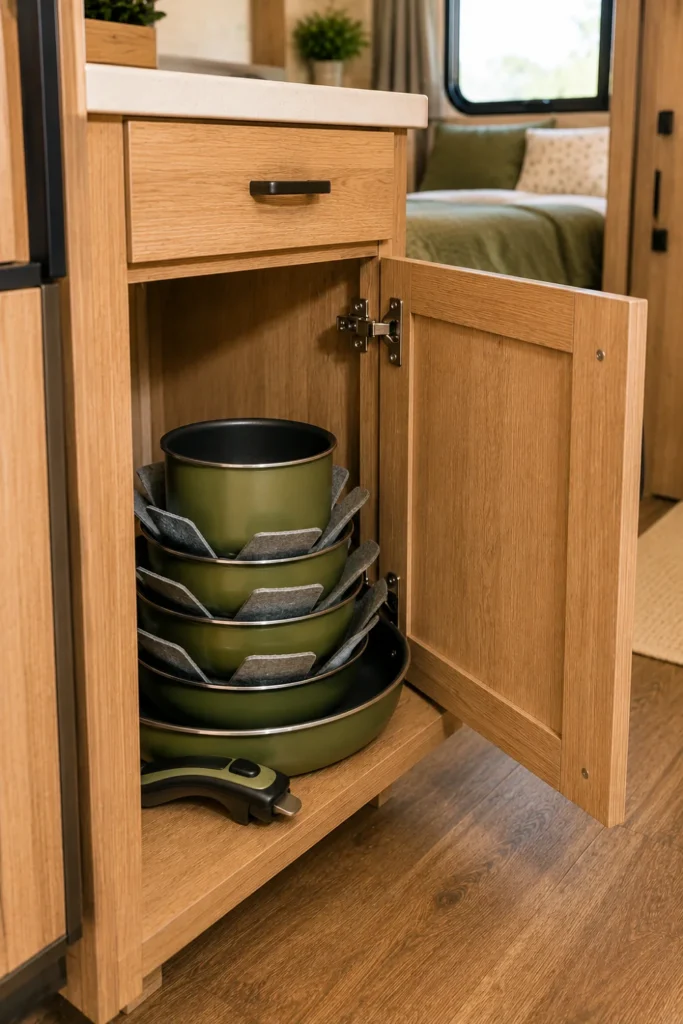
Traditional cookware with long fixed handles is one of the biggest space killers in a small RV kitchen. Those long metal or plastic handles stick out at awkward angles, forcing you to stack pans unevenly, waste half a cabinet section, or deal with loud clanking on every curve.
Switching to a modular set with detachable handles lets your pots and saucepans stack flat inside each other like nesting dolls.
| Standard Cookware | Removable Handle Sets |
|---|---|
| Long handles catch on cabinet edges and doors | Pans fit flat and snug against one another |
| Takes up an entire deep base cabinet floor | Reduces total cookware footprint by up to 60% |
| Prone to sliding and rattling during travel | Easy to cushion with felt protectors between layers |
When you are ready to cook, the locking mechanism clips securely onto the edge of any pot in the set. When it is time to pack up, store the single detachable handle inside your utensil tray. Place simple felt separators between each pan to keep the non-stick coating from getting scratched.
3. Hang Produce in Under-Cabinet Hammocks
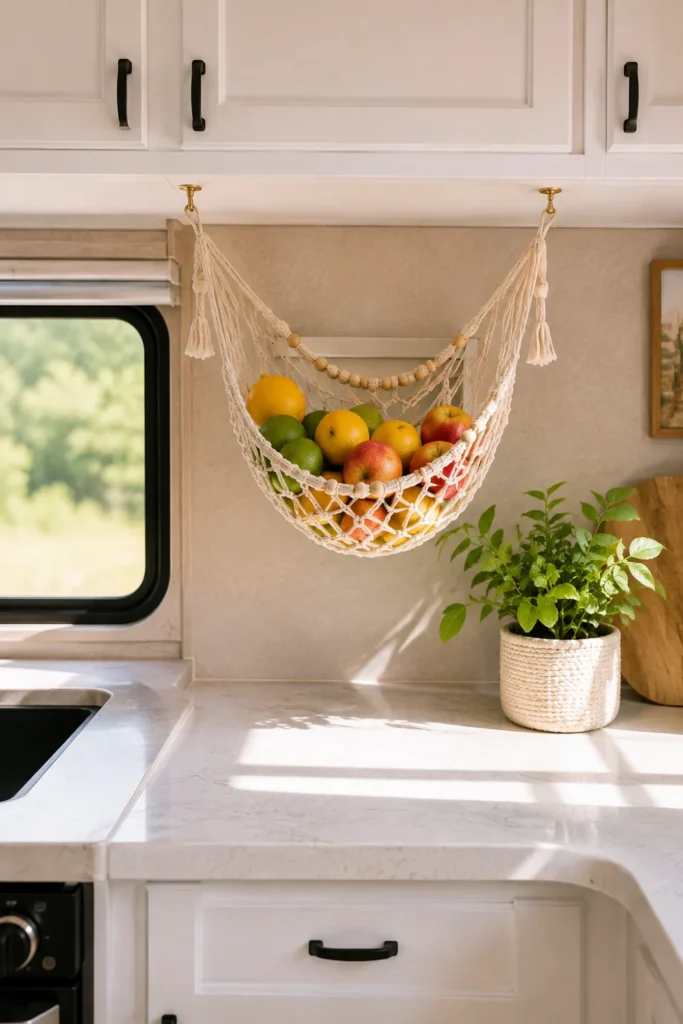
Countertop fruit bowls are entirely impractical on the road. They eat up valuable prep area and turn into loose projectile hazards if you ever have to hit the brakes suddenly. A woven macrame or canvas hammock suspended beneath a upper wall cabinet solves both issues at once.
It holds fresh onions, limes, lemons, and apples safely suspended above your workspace without taking up an inch of flat counter surface.
Produce sits in bulky bowls on the counter, rolling around, bruising easily, and cluttering the main prep surface.
Fruit floats safely in breathable mesh under cabinets, leaving counters wide open for cooking while keeping produce fresh.
Continuous airflow around suspended produce prevents moisture build-up and helps fresh food stay crisp longer in warmer weather. This simple setup cuts down on food waste and saves you frequent trips to the grocery store while boondocking.
4. Brace Fridge Items with Spring Tension Rods
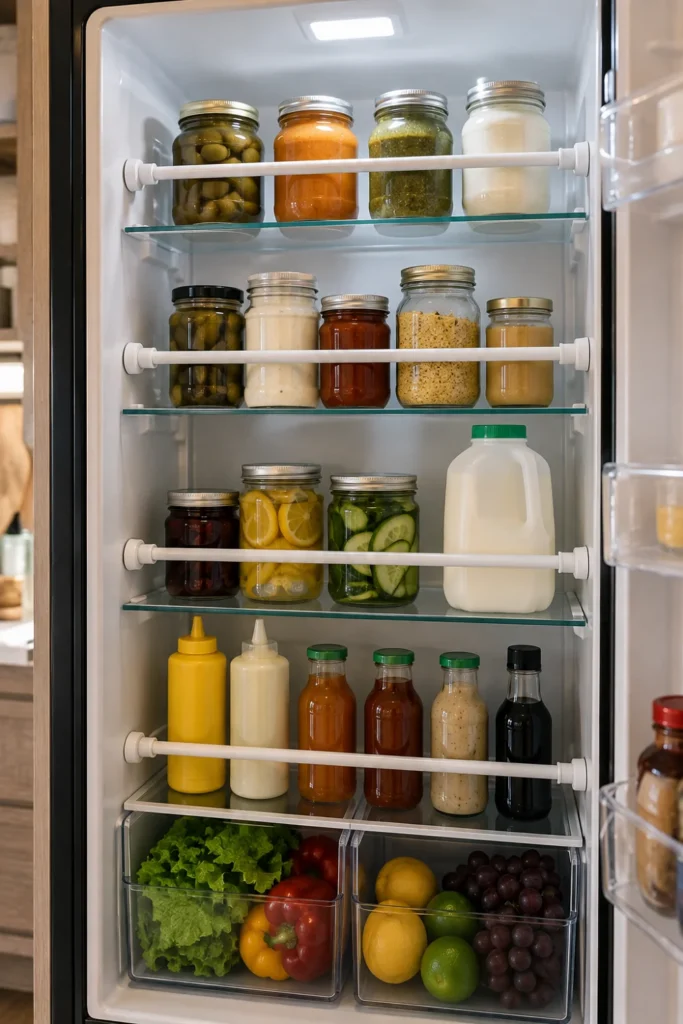
Opening your RV refrigerator after five hours on the highway can be an unpredictable mess. Jars tip over, milk cartons shift across smooth shelves, and salad dressing bottles love to fall out the moment you pop open the door latch.
Placing lightweight tension curtain rods horizontally across the front of each shelf creates a flexible, sturdy guardrail that keeps everything upright and contained.
💡 Quick Tip
Position the tension rod about two inches above the shelf surface. This prevents small condiment bottles from slipping underneath while leaving plenty of room above to slide larger items out without hassle.
You can also use double tension rods on deeper shelves to create custom partitions for glass jars and pop cans. They cost very little, take under a minute to set up, and require zero drilling or permanent modifications to your appliance walls.
5. Mount Slide-Out Drawers in Deep Base Cabinets
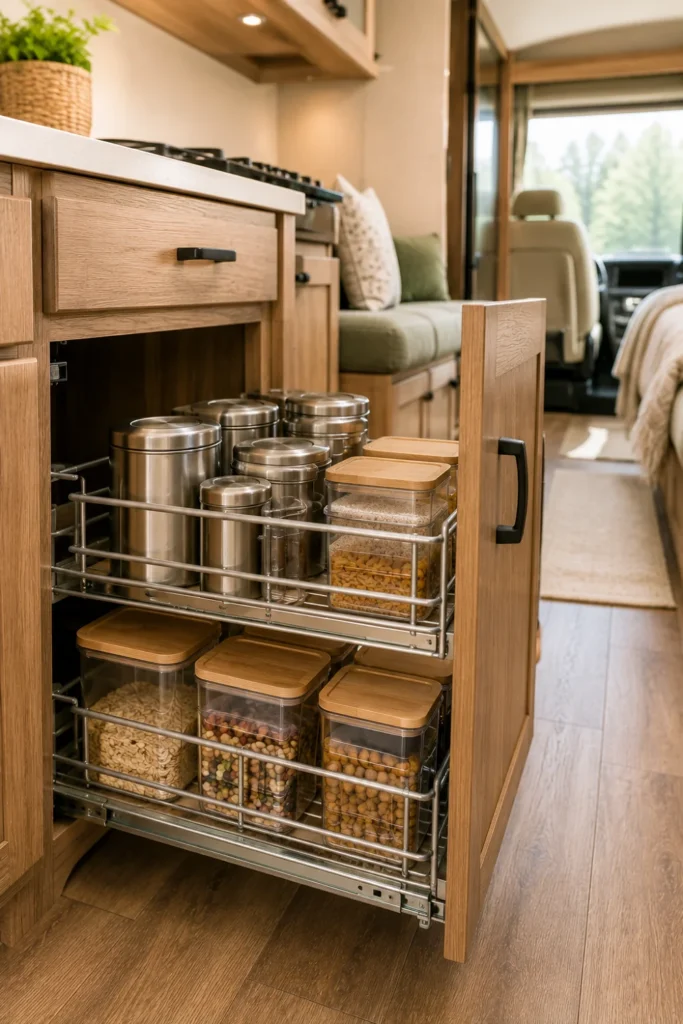
RV lower cabinets are notorious for being deep, dark caverns where items easily disappear. You end up on your hands and knees searching for a box of foil or a stray lid that slid all the way against the back panel.
Installing adhesive or screw-in metal wire pull-out bins turns those awkward voids into fully accessible, smooth-gliding storage runs.
Be sure to measure interior door clearances and plumbing pipe locations carefully before purchasing any hardware. You want to verify that the drawer tracks completely clear the cabinet face frame, hinges, and lip when extended out fully.
6. Attach Stick-On Spice Clips to Cabinet Doors
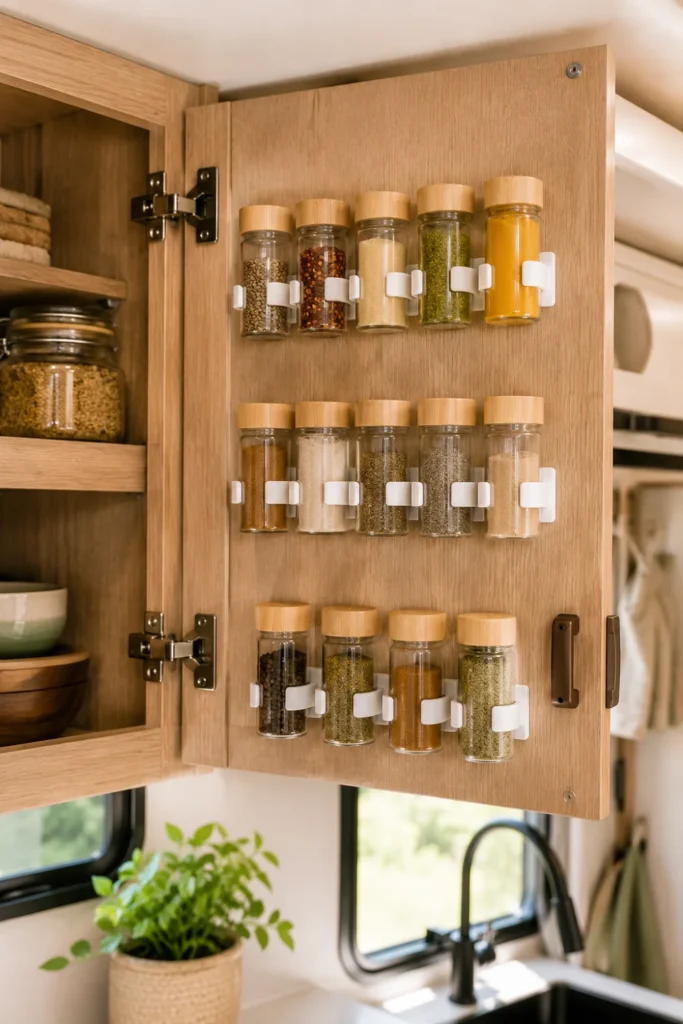
Spice bottles are notorious for taking up entire cabinet shelves or rattling around in plastic baskets while you drive. Mounting stick-on plastic or silicone spice grips directly to the inside of your cabinet doors transforms unused vertical space into a neat, visible spice rack.
This keeps all your favorite seasonings arranged in plain sight so you never have to dig through three layers of jars just to find the garlic powder while cooking.
What to check before sticking clips:
Stick-on clips accommodate standard round spice containers easily. If you buy spices in bulk or wide square tins, transfer your favorites into uniform glass or plastic jars for a tight, rattle-free fit.
7. Store Plates Vertically in Wooden Peg Racks
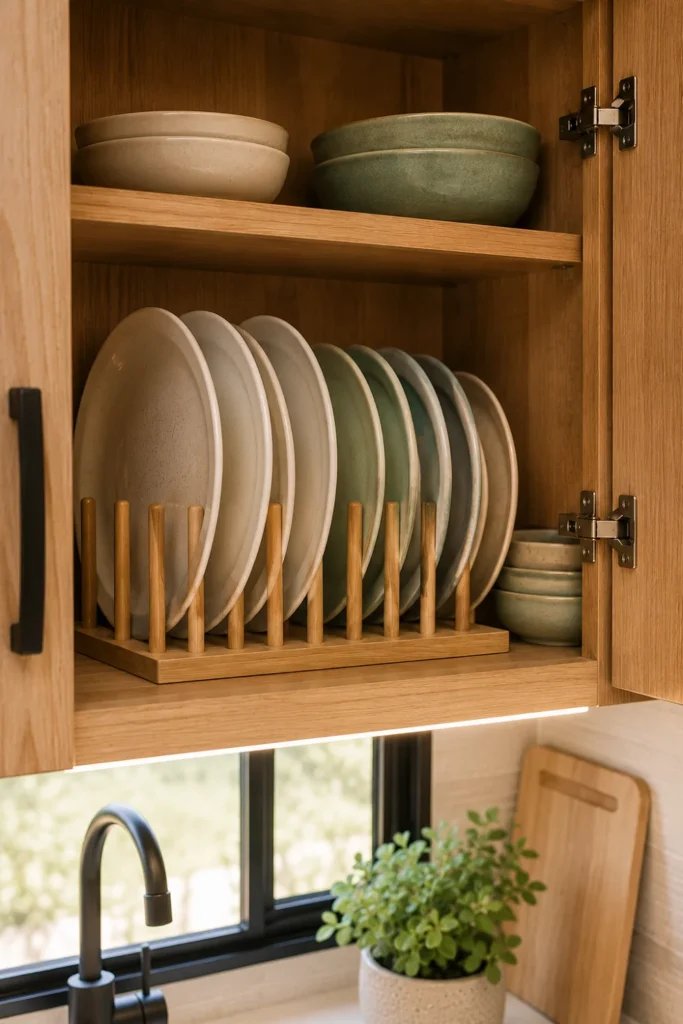
Stacking heavy ceramic or melamine plates horizontally on top of each other makes getting to the bottom dish a frustrating chore. It also concentrates weight in the middle of thin RV cabinet bases and causes annoying squeaks and clatters on every road curve.
Flipping your plate orientation by storing them vertically in fixed wooden peg organizers or vertical slots completely changes how your cabinet functions.
Vertical storage lets you grab any single dish without lifting an entire heavy stack or scratching non-stick coatings.
Vertical slot racks distribute the weight evenly across your shelf while holding each dish snug. Line the bottom of the peg rack with a non-slip liner to cushion the edges and stop dishes from shifting side-to-side during transit.
8. Utilize the Oven as a Hidden Pantry
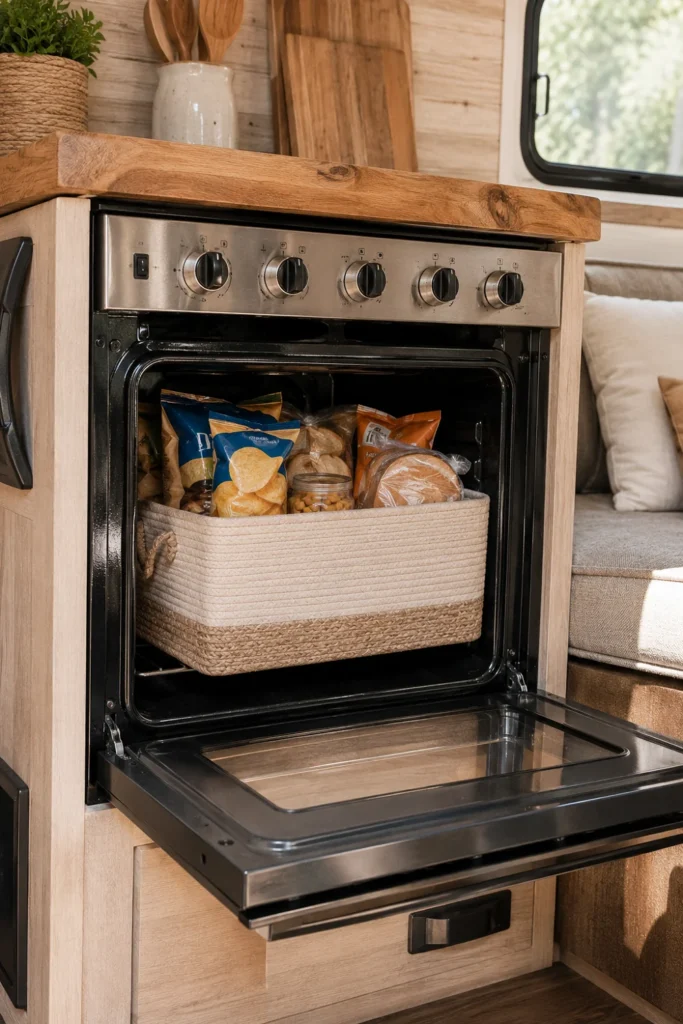
If you rarely use your RV propane oven for baking, you are sitting on several cubic feet of prime real estate. Leaving this large space completely empty while struggling to find cabinet room for lightweight dry goods is a missed opportunity.
You can convert your offline oven into a secure storage vault for bread boxes, chip bags, lightweight snack bins, or baking sheets.
⚠️ Watch Out
Always verify the oven pilot light is completely off and the burner controls are locked before storing flammable packaging inside. Remove all contents prior to lighting the appliance for cooking.
To keep items organized inside the oven, place a soft felt or canvas organizer bin directly on the center wire rack. This keeps bags from slipping down through the wire slats and makes unloading simple when you actually want to bake.
9. Mount a Fold-Down Counter Extension
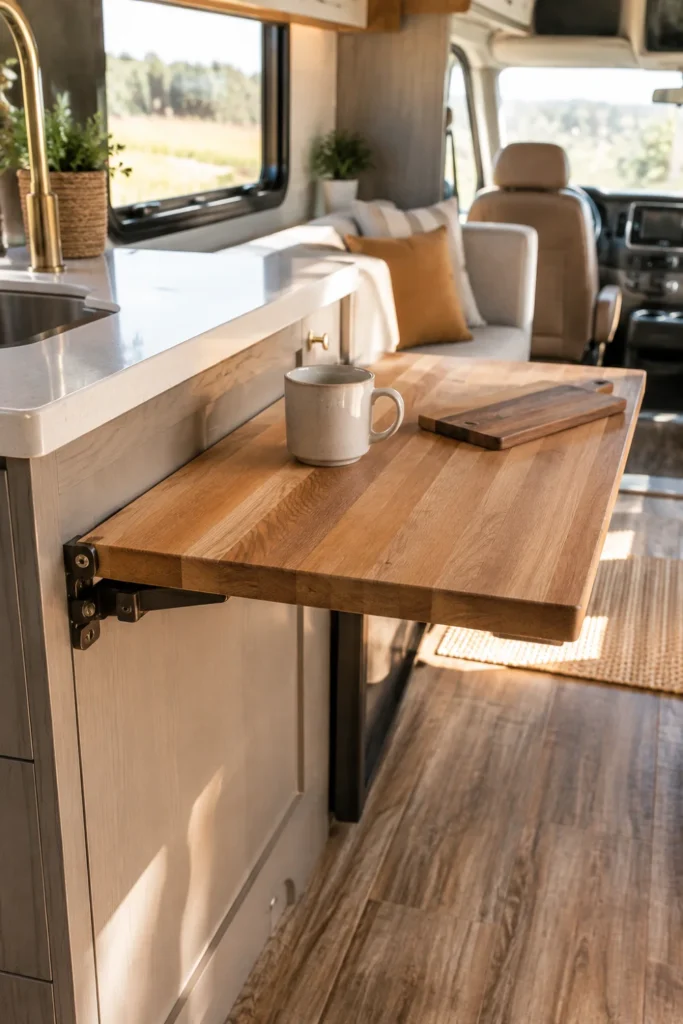
Short kitchen counters make preparing meals feel cramped and chaotic. You quickly run out of room for a cutting board, a mixing bowl, and your ingredients all at the same time.
Attaching a butcher-block or lightweight wood shelf to the side of your kitchen island using folding bracket hinges adds instant workspace that drops flush out of the way when dinner is done.
Choose locking steel support brackets rated for at least 50 pounds. This ensures the table remains sturdy when you are chopping vegetables or resting heavy pots on it, but folds completely flat against the cabinet wall during travel.
10. Hang Mugs From Under-Mount Ceiling Hooks
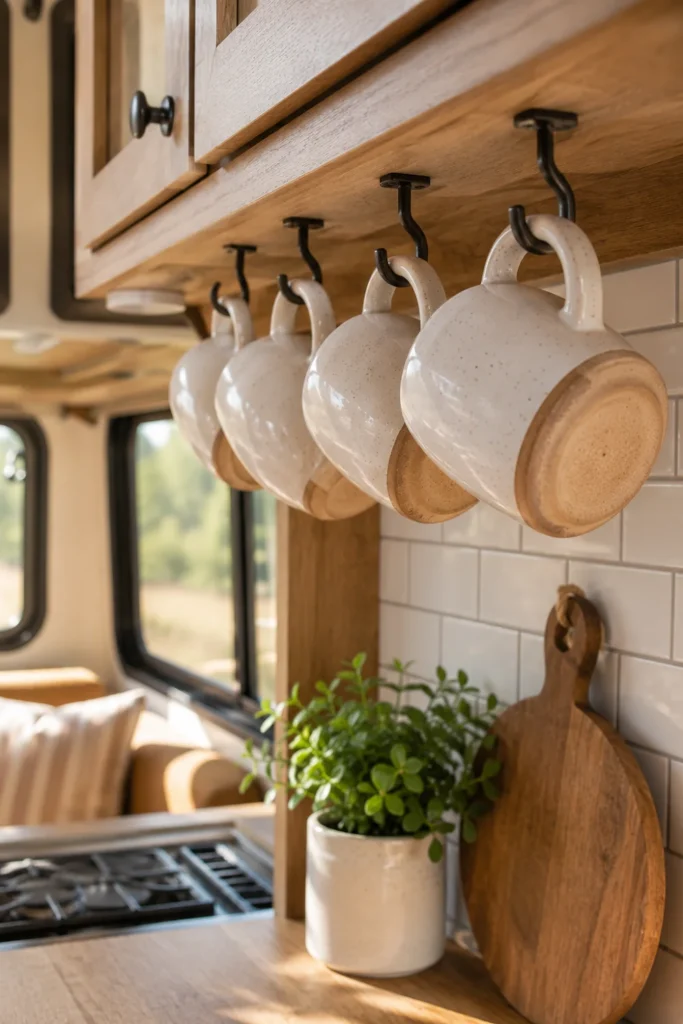
Coffee mugs are difficult to stack safely in a moving rig. Their handles take up uneven space, and ceramic cups like to chip when bumped together inside dark upper cabinets.
Installing heavy-duty rubber-coated screw hooks into the sturdy underside of your upper cabinets lets you hang your daily coffee mugs by their handles.
Mark pilot holes at least three inches away from the back wall so mugs swing freely.
Pre-drill shallow pilot holes to avoid splitting thin cabinet wood framing.
Screw in vinyl-coated hooks until flush to prevent metal-on-ceramic clattering.
The vinyl coating acts as a cushion that dampens vibrations and prevents cups from slipping off the hook while driving down the highway.
11. Switch to Square Clear Pantry Containers
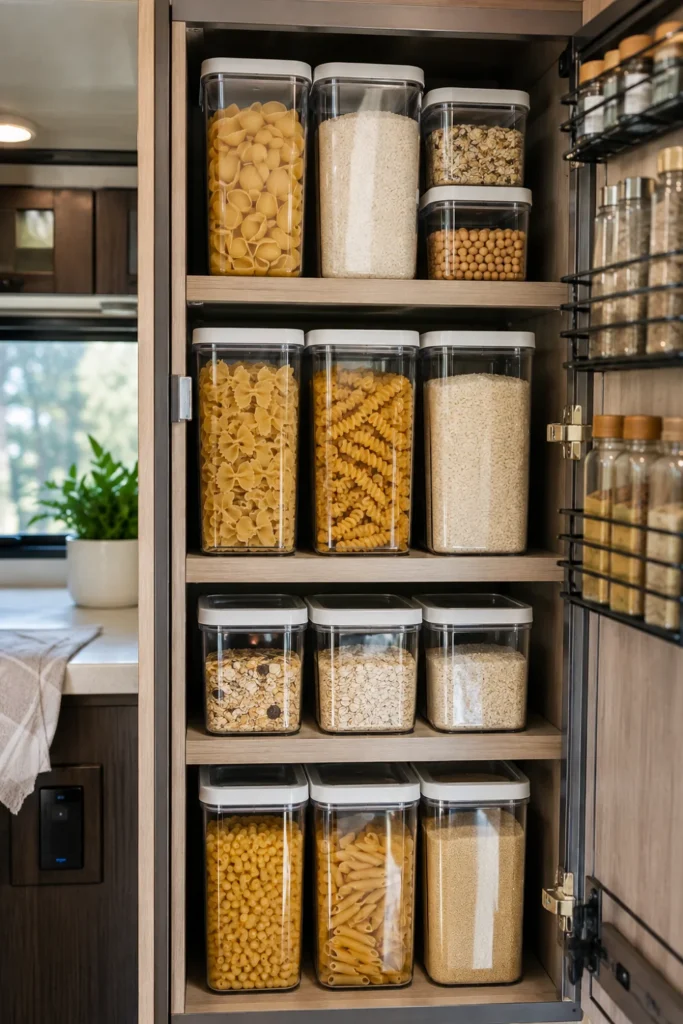
Cardboard food packaging comes in every shape and size imaginable. Round boxes, bagged cereals, and floppy bags leave awkward gaps on cabinet shelves, wasting valuable vertical height and making items hard to identify at a glance.
Ditching original store boxes and transferring dry staples into uniform, square airtight containers optimizes every cubic inch of your pantry depth.
Mismatched bags and round canisters leave air gaps, spill open during transit, and hide items in back corners.
Modular square containers stack flush wall-to-wall, sealing out moisture, bugs, and pantry pests completely.
Clear acrylic or BPA-free plastic lets you immediately see how much pasta, flour, or coffee beans you have left before planning your next grocery run.
12. Put Command Hooks on the Inside of the Trash Door
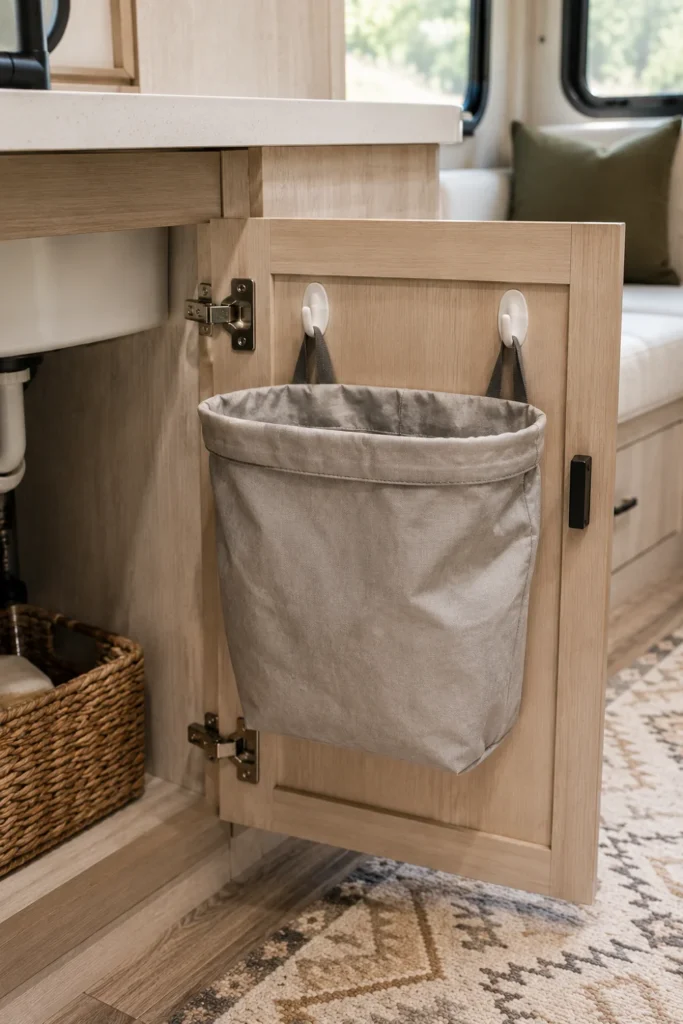
Free-standing trash cans take up floor space you simply do not have in a small kitchen footprint. Setting a bin in the middle of your walkway creates a tripping hazard while cooking and means moving it every time you extend a slide-out.
Attaching high-strength adhesive hooks to the inside panel of the under-sink door creates an instant, hidden trash station.
Quick checklist for interior door mounting:
This arrangement keeps odors contained out of sight while taking advantage of dead space right under your primary prep sink.
13. Add Over-the-Sink Cutting Board Covers
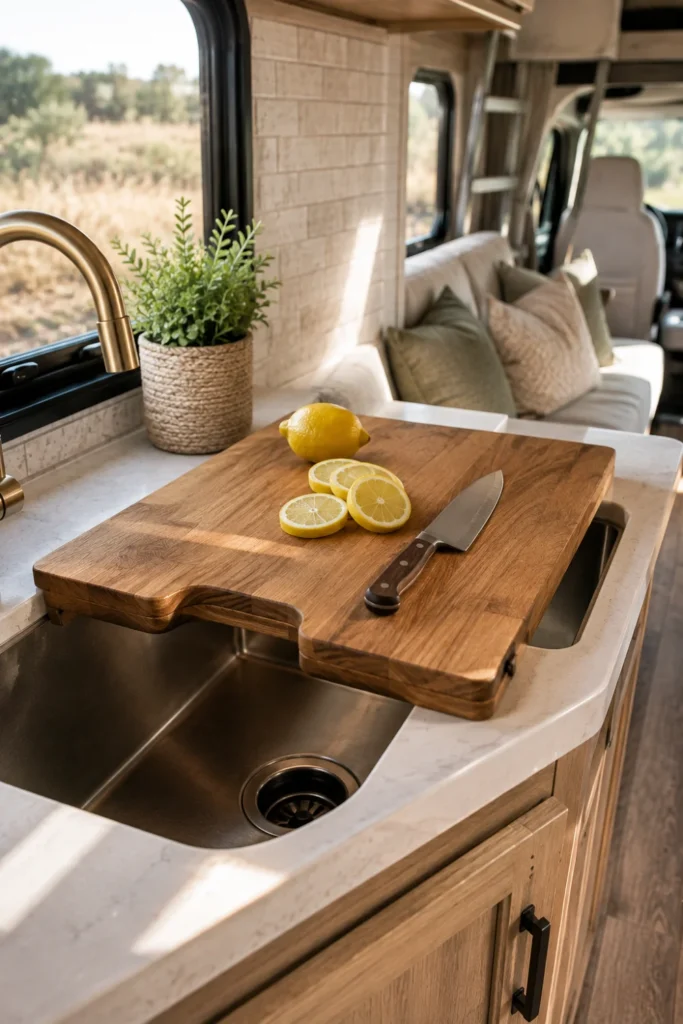
Your kitchen sink basin represents a massive gap in flat counter surface when dishes are not actively being washed. Leaving that space open while trying to chop herbs or assemble sandwiches limits what you can accomplish in a narrow galey.
Custom-fit wooden or bamboo cutting board inserts drop directly over the sink lip to turn that empty void into usable, solid workspace.
Choose a board with built-in rubber feet or non-skid corner grips underneath.
Select boards with integrated colanders to rinse veggies right into the drain.
Using thin plastic mats that slip when pressure is applied with a sharp chef knife.
Leaving heavy wooden sink covers in place while driving over rough terrain.
When you need the sink, slide the cover underneath a cabinet or stand it vertically against the backsplash using a wire tray divider.
14. Use File Organizers for Baking Sheets
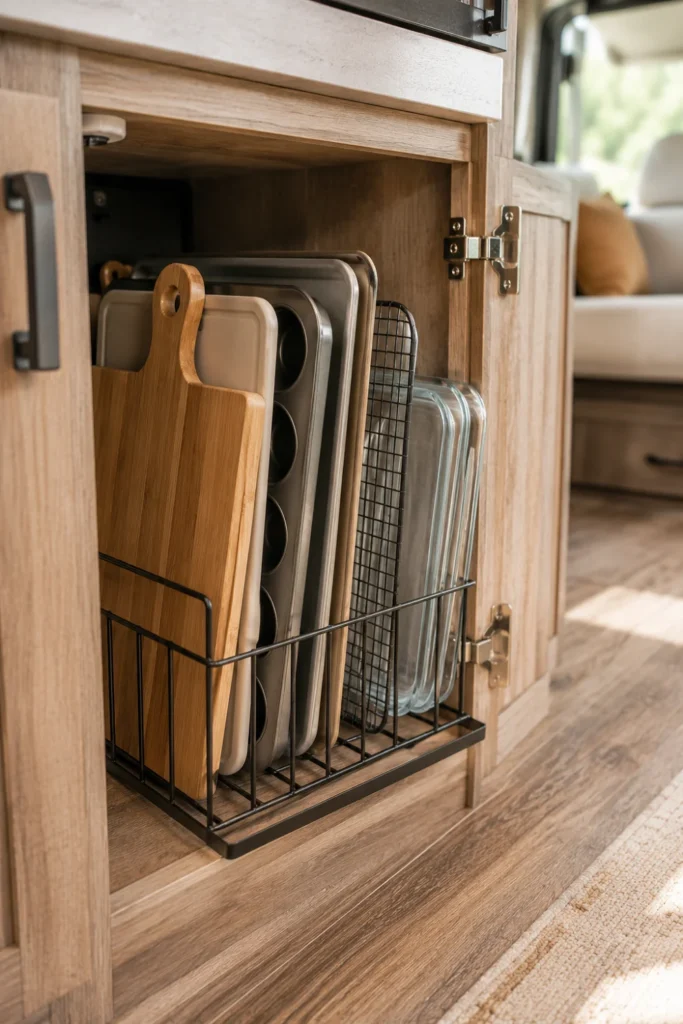
Flat baking sheets, muffin tins, cutting boards, and serving trays are notoriously difficult to store horizontally. When you stack them flat on top of each other, pulling out the bottom tray requires lifting the entire heavy pile out of the cabinet.
Repurposing metal wire office file sorters turns a messy lower cabinet into an organized vertical slotted rack.
📌 Good To Know
Heavy-duty steel mesh desk sorters work better than plastic ones because they will not bend or crack under the weight of metal baking pans when your rig shifts during travel.
Slide each sheet vertically into its own dedicated wire slot. You can grab exactly what you need with one hand without disturbing everything else on the shelf.
15. Store Silverware in Diagonal Drawer Inserts
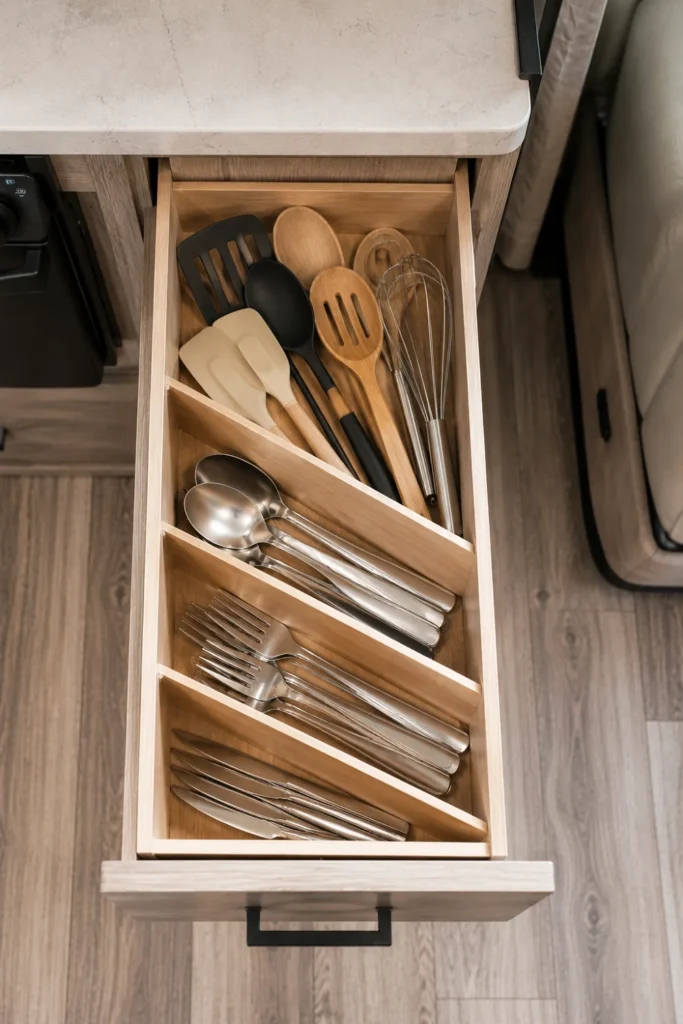
Standard rectangular cutlery trays rarely fit RV kitchen drawers correctly. Mobile kitchen drawers are often unusually narrow or short, leaving wasted dead space on the sides or forcing long cooking spoons to lie at awkward angles.
Diagonal drawer dividers reorient utensil slots at a 45-degree angle to maximize total length inside compact dimensions.
The angled slots accommodate long spatulas, whisk handles, and serving tongs that normally get jammed when closing shallow camper drawers.
16. Mount a Paper Towel Holder Inside a Lower Door
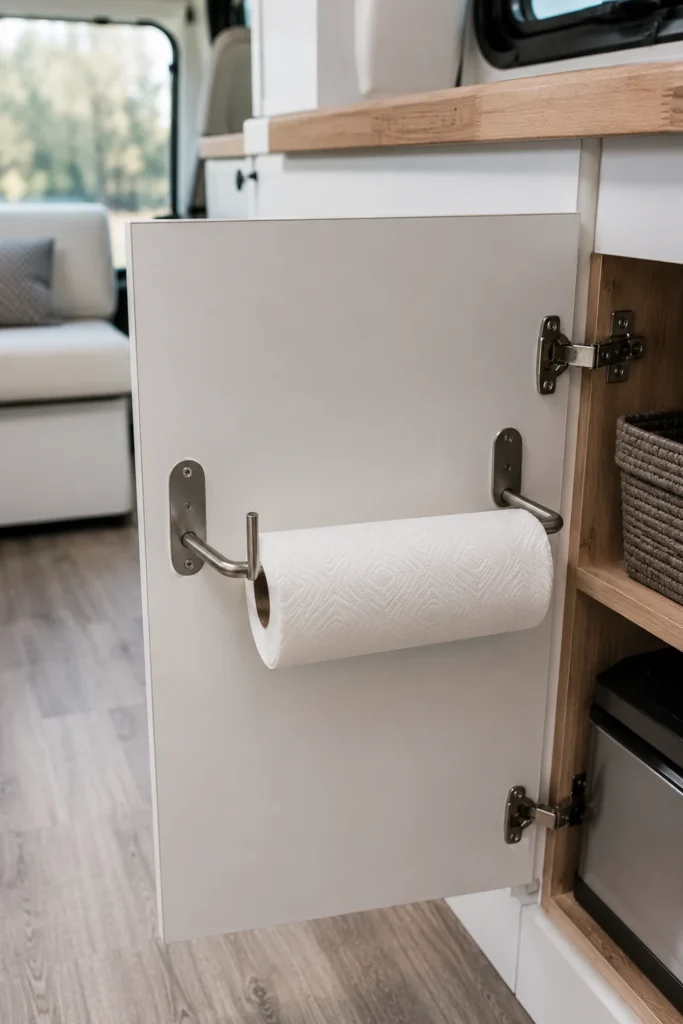
A loose paper towel roll sitting on the counter is an invitation for disasters. On windy days or during travel with windows cracked, open rolls unspool quickly across the room.
Mounting a slim paper towel holder horizontally onto the inside frame of a sink cabinet door keeps the roll completely contained and out of sight.
| Wall-Mounted Holders | Hidden Inside-Door Mounts |
|---|---|
| Exposed to cooking grease and splatter | Protected behind closed cabinet doors |
| Takes up visible wall or under-cabinet space | Uses zero visible wall real estate |
| Can unroll freely when driving | Cabinet door edge prevents unrolling in transit |
Choose a holder with a built-in tension spring so sheets tear off cleanly with one hand while you are cooking or wiping down surfaces.
17. Stick Clear Acrylic Bins to the Wall
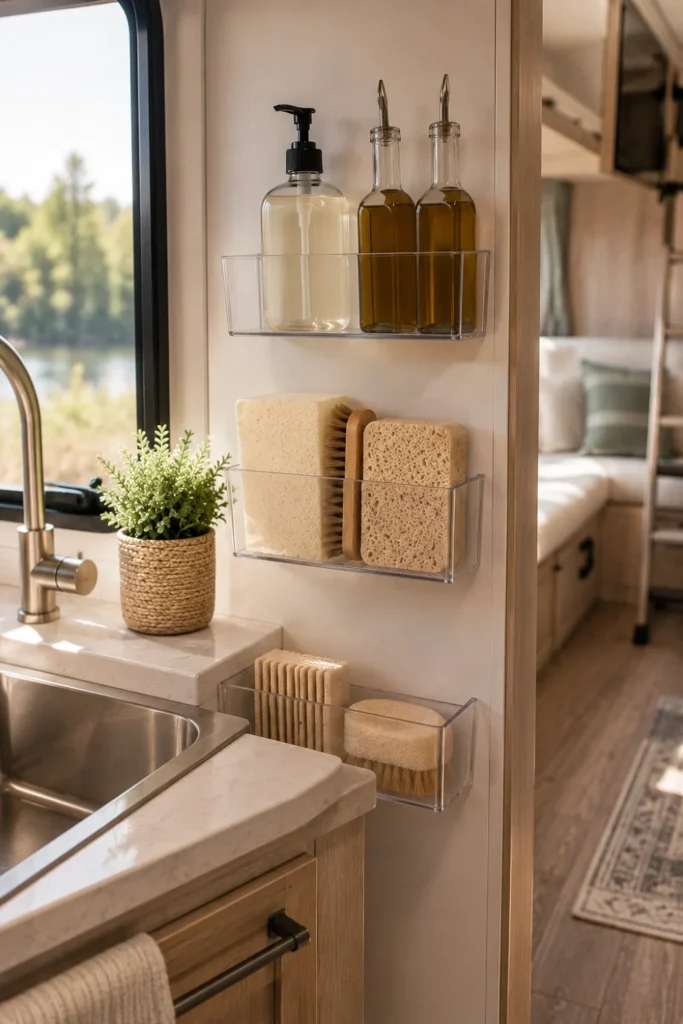
Vertical wall space along kitchen side walls or behind the stove often goes completely unused because people hesitate to drill permanent mounting holes into thin RV wallboard panels.
Heavy-duty clear acrylic organizer bins secured with damage-free adhesive strips turn empty vertical surfaces into floating condiment racks and sponge holders.
Always respect adhesive weight limits: stick to lightweight items like dish sponges, tea bags, and plastic wrap rolls.
Because the bins are clear, they preserve visual open space and keep your small mobile kitchen looking airy rather than cluttered.
Conclusion
Small kitchen spaces in a rig don’t have to feel frustrating or cluttered. By making a few intentional updates—like utilizing vertical wall space, choosing multi-functional gear, and securing items for travel day—you can transform your tiny kitchen into an efficient, joy-to-use workspace.
Implementing even two or three of these rv kitchen storage ideas will free up counter real estate, eliminate annoying road rattles, and make cooking on the road feel seamless.
Save this list to your RV Organization or Camper Living Pinterest board so you have these practical ideas ready for your next rig update or weekend trip!

