
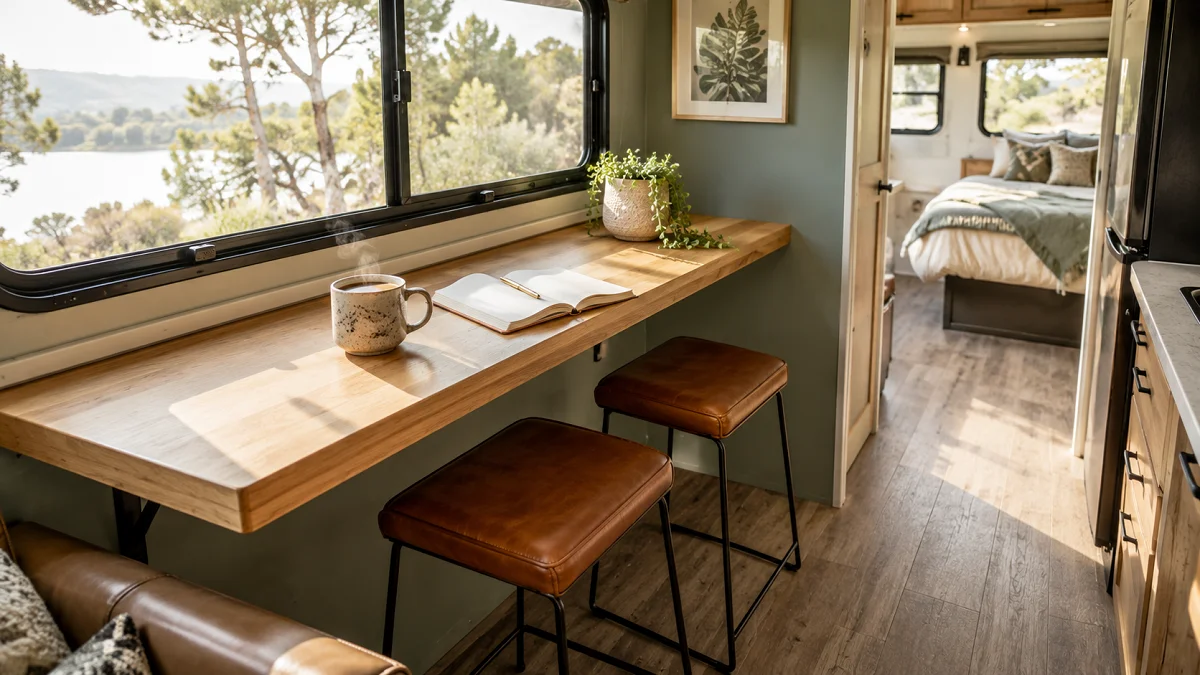
Factory RV dinettes take up a massive footprint. Most stock booths feature stiff foam cushions, awkward upright seat backs, and heavy particle board boxes that trap dirt in hard-to-reach corners. If you rarely convert your table into an uncomfortable backup bed, that bulky setup is mostly wasting valuable square footage in your rig.
Ripping out that clunky dinette opens up your floor plan immediately. Whether you need a dedicated mobile workstation, comfortable seating for movie nights, or flexible extra kitchen storage, replacing the original booth lets you tailor the space to your actual travel lifestyle.
These practical rv dinette replacement ideas give you your living room back without sacrificing everyday function.
1. Swap the Booth for a Slim Drop-Leaf Table and Folding Chairs
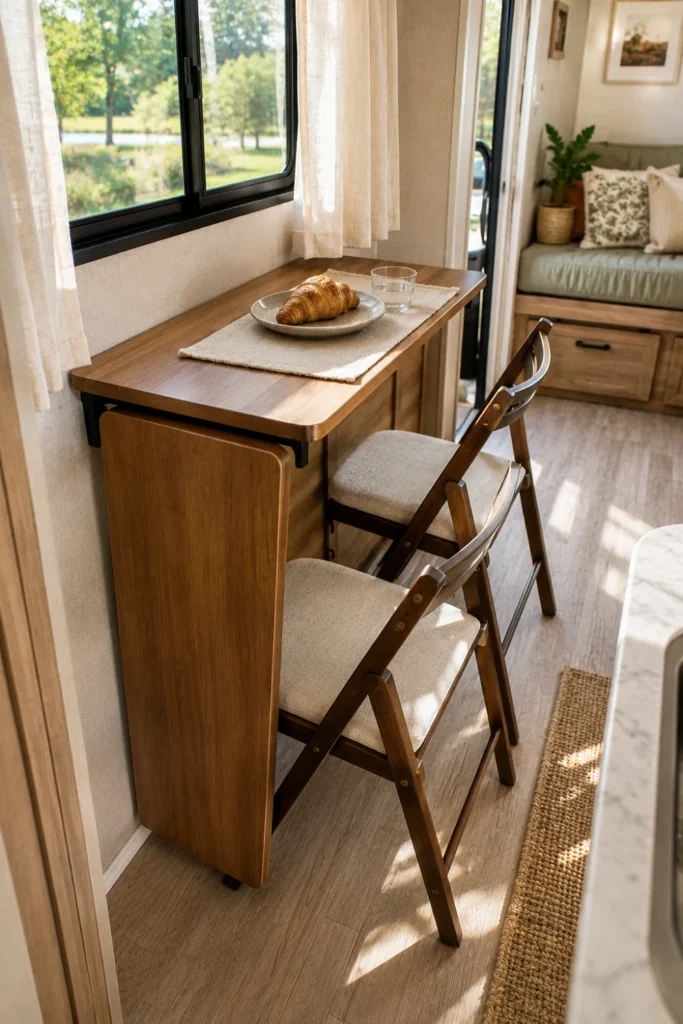
A drop-leaf table lets you choose when to take up floor space. When folded down against the wall, it leaves a wide-open walkway for easy movement around your kitchen.
When dinner or game night rolls around, simply lift the side leaf and pull out two padded folding chairs. You get full dining surface area without a permanent wood block anchoring your slideout.
A fixed 40-inch wide booth that permanently blocks the walkway and slide floor.
An 11-inch wide folded console table that expands to a 4-person dining surface on demand.
- Look for tables with built-in internal slots to store the folding chairs during transit.
- Secure the table base to the slide subfloor using short L-brackets to prevent tipping on bumpy roads.
- Choose chairs with durable vinyl upholstery so they wipe down quickly after meals.
2. Mount a Wall-Hanging Lagun Swivel Table
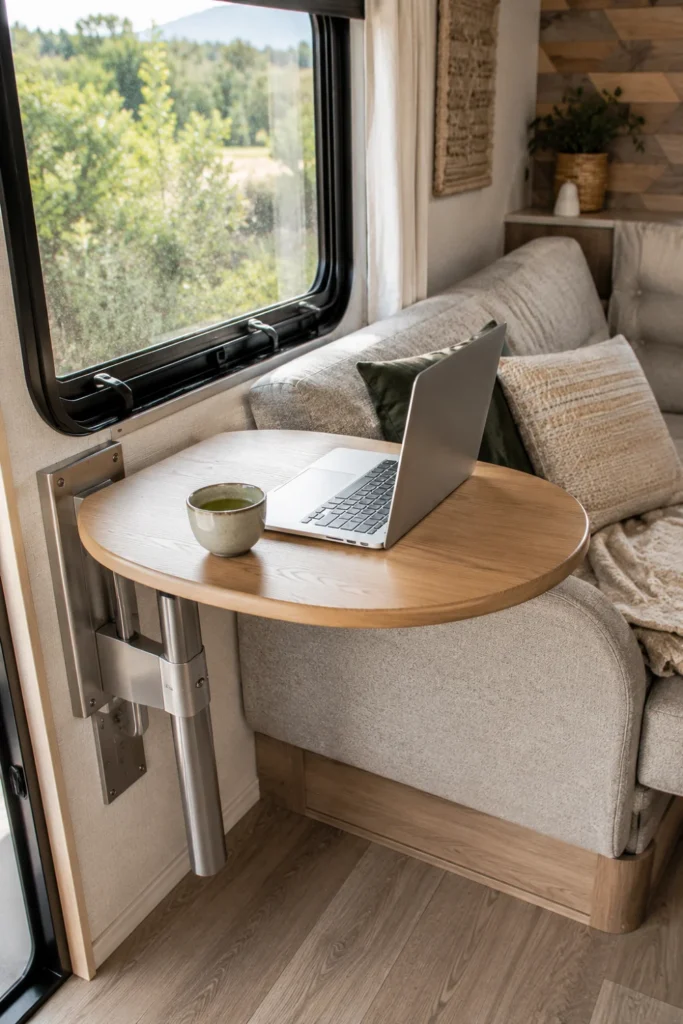
The Lagun table leg system eliminates floor-mounted pedestal poles entirely. The mount bolts directly to a solid wall, slide wall, or custom reinforced cabinet base.
Because the arm pivots 360 degrees, you can swing the tabletop directly in front of your sofa, move it into the kitchen for meal prep, or pivot it flat against the wall when you need walk-through room.
💡 Installation Tip
Never screw a Lagun mount directly into thin RV wall paneling alone. Place a 3/4-inch piece of hardwood backing plate behind the wall or stud to distribute the turning leverage evenly.
- Pick an aluminum table leg kit with an adjustable locking handle.
- Build a custom top out of lightweight acacia or bamboo butcher block.
- Loosen the arm handle to push the tabletop out of the way without moving your chair.
3. Install Two Swivel Barrel Chairs with a Shared Drink Console
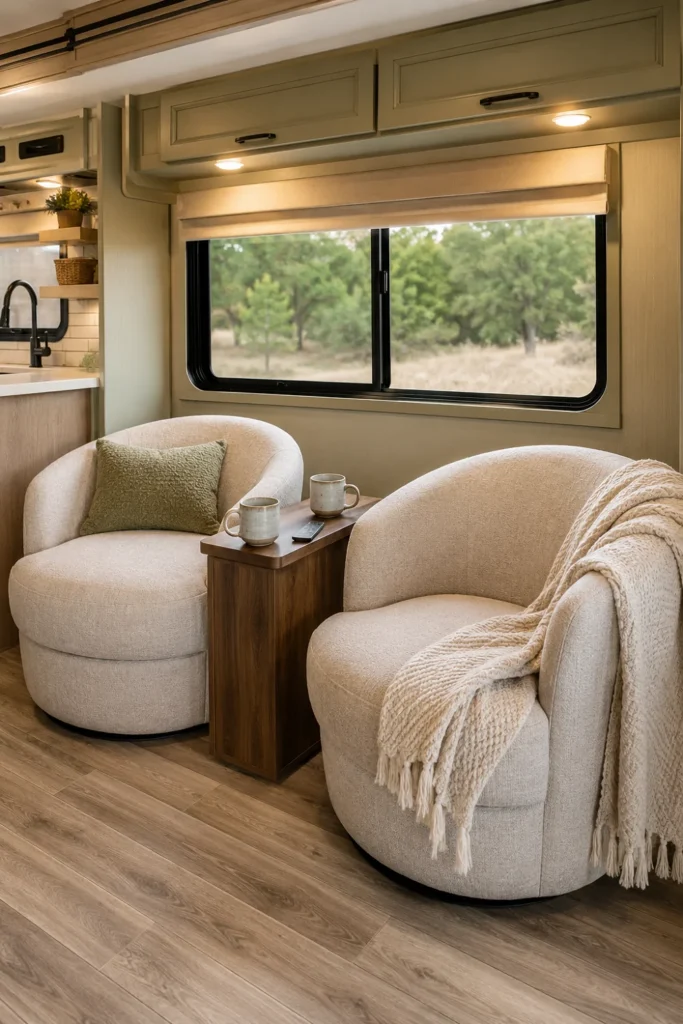
Swapping the rigid dining booth for residential barrel chairs instantly turns an empty slide into a lounge area. Swivel bases allow you to spin toward the TV screen or rotate to face the kitchen while chatting.
Place a narrow flip-top drink console between the chairs. It provides a secure place to set mugs and keeps remotes, chargers, and books organized inside.
- Pick chairs with low backs so they do not block natural light from the slide windows.
- Measure the RV doorway opening first to make sure the chair frames fit through the door.
- Use a cam-buckle cargo strap anchored to D-rings on the floor to secure the chairs on travel days.
4. Build a Counter-Height Breakfast Bar Facing the Slideout Window
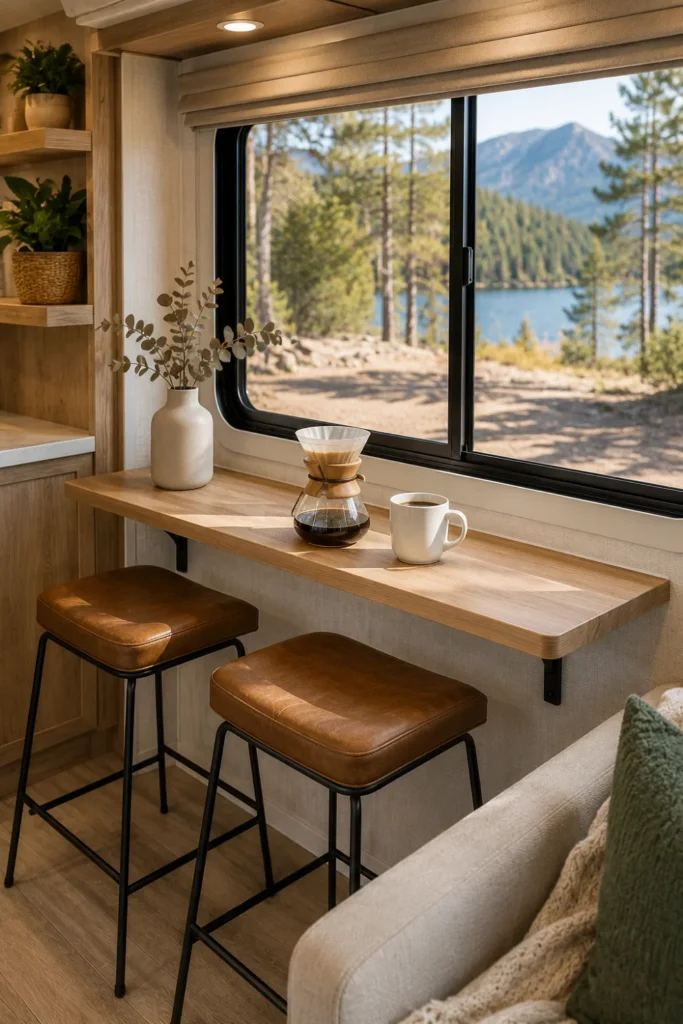
A breakfast bar takes advantage of window views while cutting your furniture footprint in half. A narrow wood ledge mounted along the outer wall gives you an ideal dining counter and coffee bar.
Tuck two backless counter stools underneath the ledge when they are not in use. This keeps the central floor completely open for walking.
Measure the window height and cut a 12-to-14-inch deep finished wood board to match your slide width.
Mount heavy-duty folding shelf brackets into the wall framing or build two simple wooden support legs.
Slide backless counter-height stools under the counter and secure them with a soft bungee cord for transit.
- Seal the top surface with waterproof polyurethane to protect the wood against food spills and condensation.
- Add an adhesive power strip with USB ports underneath the ledge to charge laptops and phones.
- Keep the bar depth under 14 inches to preserve plenty of slide walkway space.
5. Slide in a Dedicated Workstation with a Narrow Computer Desk
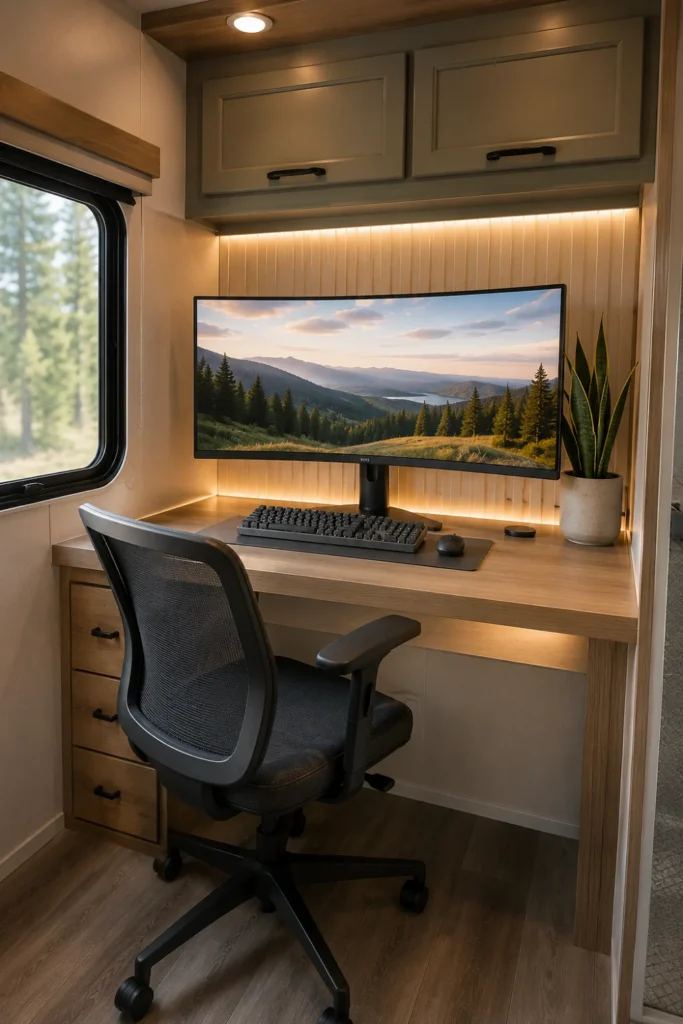
If you work remotely from your RV, the dining booth is often a painful spot for your posture. Replacing the dinette with a purpose-built desk provides the legroom, cable routing, and chair height needed for long work hours.
Choose a desk with built-in drawers or open shelving underneath. This lets you organize printers, extra monitors, and office supplies in one tidy footprint.
- Pick a desk that weighs under 45 pounds to keep your slideout within safe weight limits.
- Pair the desk with an ergonomic mesh task chair that locks its caster wheels for travel.
- Use adhesive cable clips along the back legs to keep cords off the floor.
6. Add a Storage Bench Ottoman Set with Lift-Up Lids
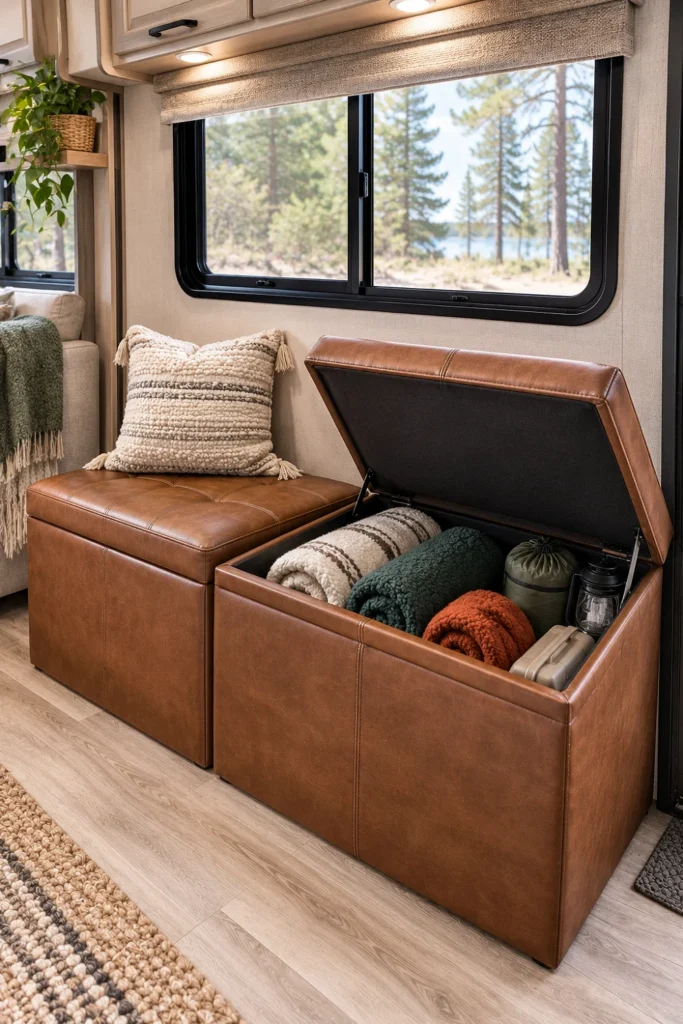
Modular storage ottomans give you padded seating, flexible footrests, and hidden deep-bin storage all in one. Because they are not bolted down, you can rearrange them into an L-shape lounge, push them together as a coffee table, or tuck them flat against the wall.
The hollow base creates generous space for bulky gear like winter coats, spare blankets, and small appliances.
Ottoman Selection Checklist
- Select rectangular units that match your slideout depth so they sit flush with the wall.
- Use individual fabric storage cubes inside the ottomans to keep loose gear organized.
- Choose models with reinforced lids rated to hold at least 250 pounds per seat.
7. Drop in a Compact Residential Loveseat or Recliner
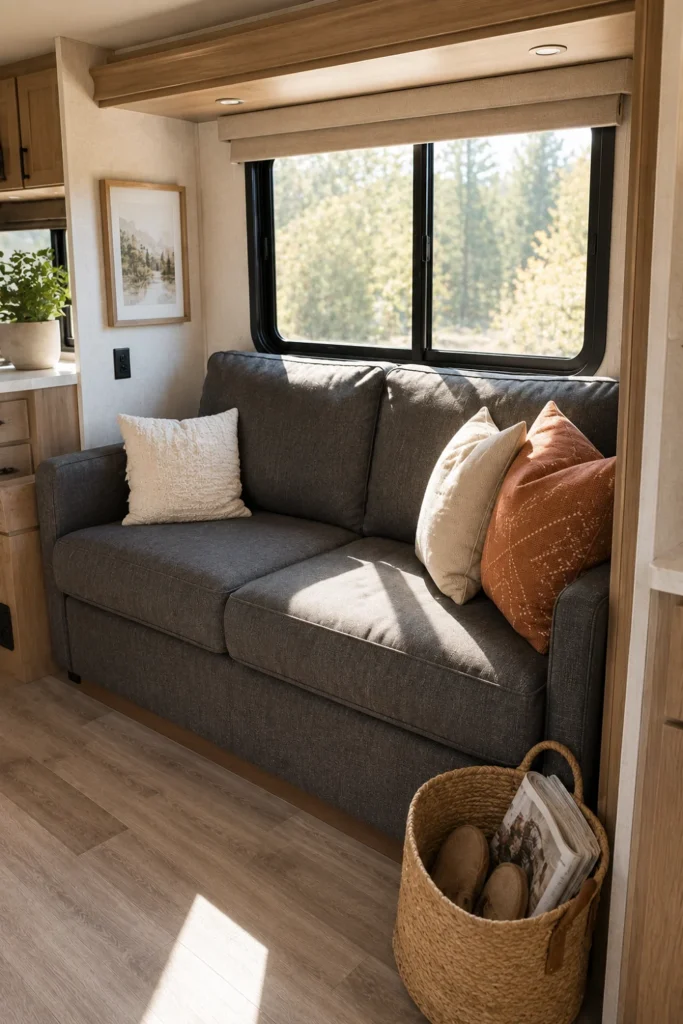
Standard RV furniture is often overly stiff and poorly padded. Replacing the dinette with a compact residential two-seater sofa turns your main living area into an inviting space for relaxing after a long travel day.
Look for apartment-sized loveseats with slim armrests to maximize your seated space without chewing up floor clearance.
Check the depth of your slideout floor before ordering.
Pick furniture with removable backs so it fits through narrow camper doors.
Overstuffed recliners with heavy steel internal pull mechanisms.
Light-colored fabrics that show road dust and camp soot easily.
- Check the weight rating of your slideout mechanism before choosing heavy dual recliners.
- Use a slim lap tray or side C-table when you want to eat a meal from the sofa.
- Secure the front couch legs to the slide base with small floor brackets to prevent movement.
8. Mount a Fold-Down Murphy Desk Directly to the Wall
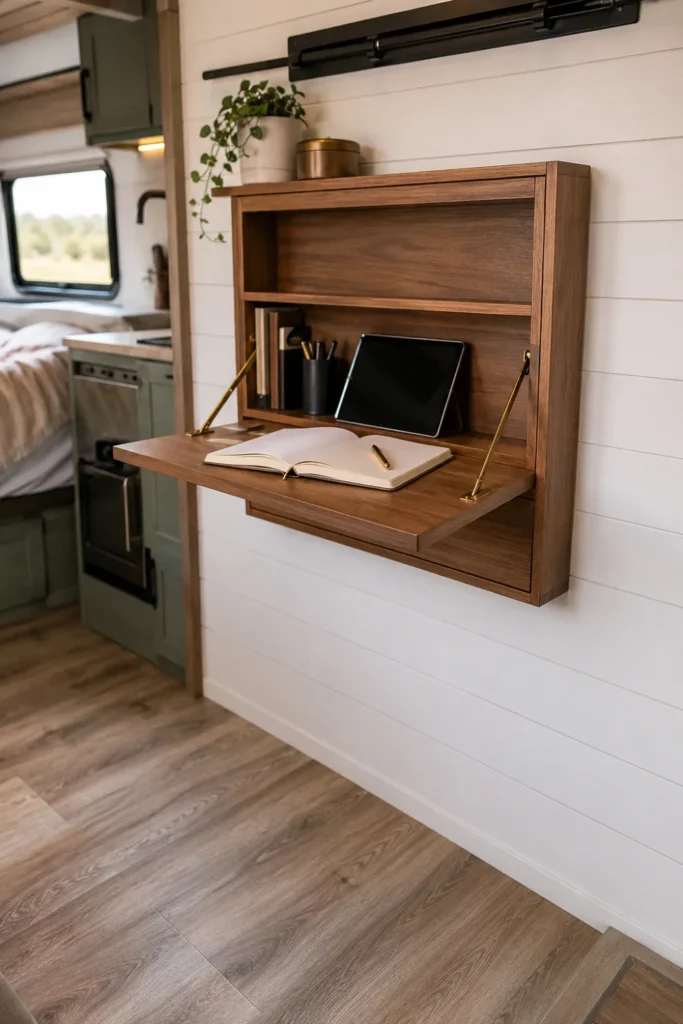
A wall-mounted fold-down desk gives you an instant work surface that folds flat against the wall when you are done. The cabinet profile projects only a few inches into the room when latched shut.
Inside, small shelves hold pens, notebooks, and small supplies so your desk stays organized without occupying any floor space.
| Standard Desk | Wall-Mounted Murphy Desk |
|---|---|
| Permanent 24-inch floor depth. | Folds flat to less than 6 inches deep. |
| Can collect permanent tabletop clutter. | Forces a clean surface before folding up. |
- Confirm that the wall brackets anchor directly into aluminum or wood wall studs.
- Add a magnetic latch to ensure the desk panel cannot drop open while driving.
- Pair it with a lightweight folding wooden chair that hangs on a wall hook nearby.
9. Build a Low-Profile Daybed for Dual Lounge and Guest Sleeping
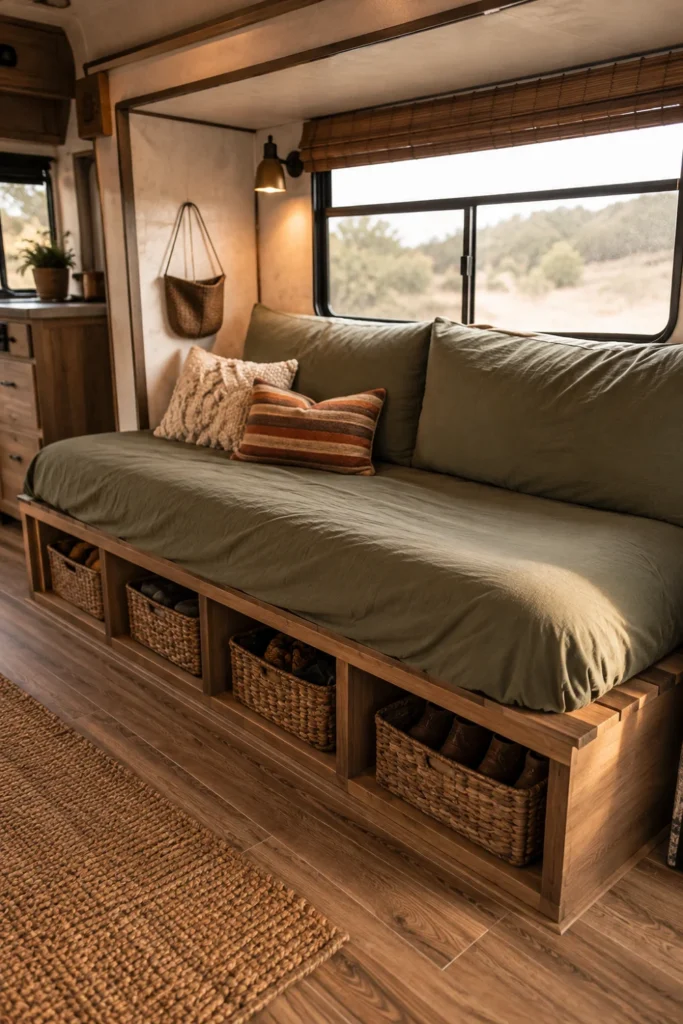
If you still need an extra bed for occasional guests, a simple wooden daybed frame provides a much better sleeping and lounging solution than a standard dinette conversion.
Dress the daybed with large back cushions and throw pillows during the day to create a deep, comfortable sofa. At night, remove the pillows for a comfortable, flat twin mattress.
Always use slatted wood bases for daybeds in an RV to allow air circulation under the mattress and prevent condensation buildup.
- Use a 6-inch high-density foam mattress topped with gel memory foam for firm support.
- Build the frame with open cubbies underneath to hold fabric storage bins.
- Choose durable, zippered cushion covers that you can remove and toss in the washing machine.
10. Install a Retractable Roll-Out Center Island
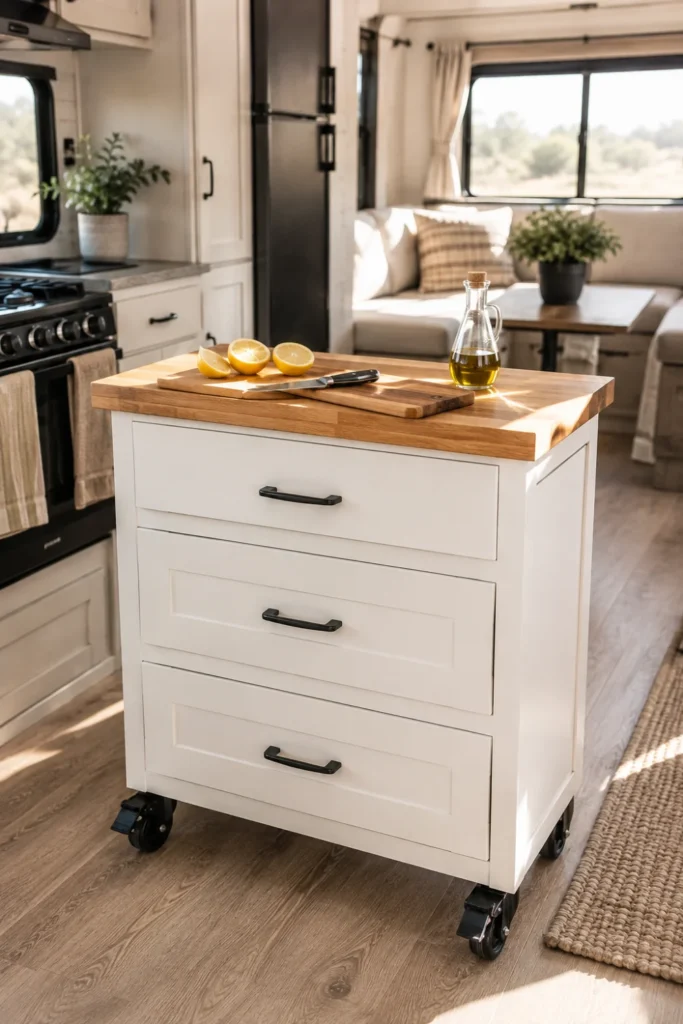
Replacing the dinette with a rolling kitchen cart or mobile prep island adds generous food preparation area and deep cabinet drawers right where you need them.
You can pull the island out to the center of the kitchen during meal prep, and wheel it flush against the wall to open up the walkway when cooking is done.
⚠️ Watch Out
Heavy-duty locking casters are mandatory. In addition to locking the wheel brakes, use an adjustable floor tension rod or ratchet strap anchored to slide brackets to secure the cart during travel.
- Choose a butcher-block cart that features built-in utensil drawers and spice racks.
- Replace standard plastic wheels with soft, non-marking rubber locking swivel casters.
- Use the open bottom shelf to store heavy Dutch ovens and countertop kitchen appliances.
11. Put in a Fixed Bistro Set with Low-Back Stools
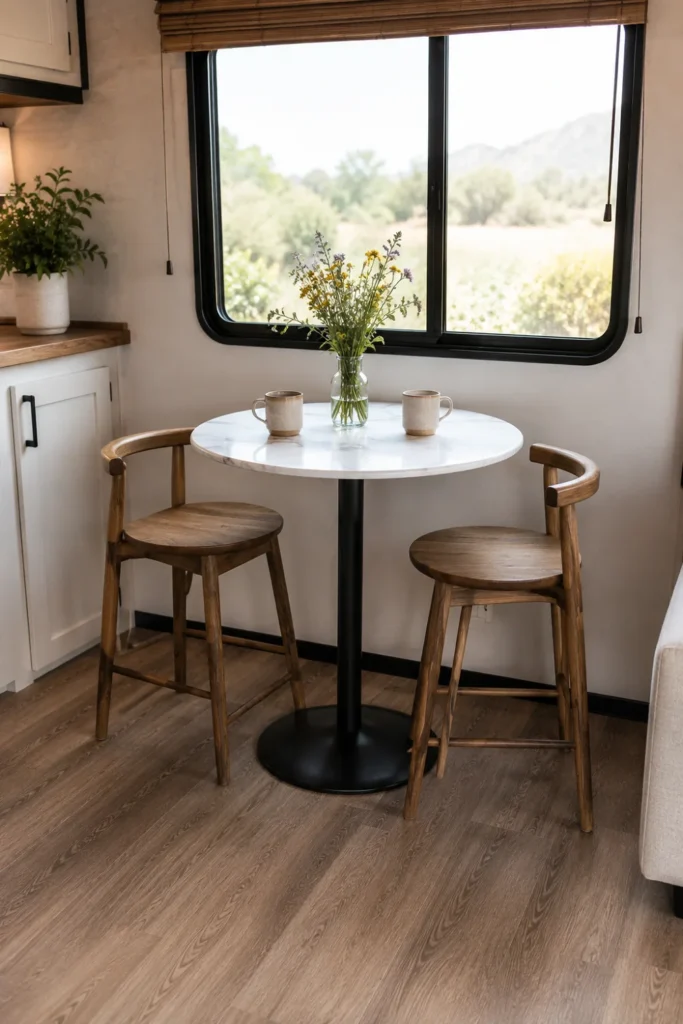
A compact round bistro table with two minimalist low-back chairs provides a dedicated dining spot without visually cluttering your living space.
Round tabletops eliminate sharp corners, making it much easier to slide in and out of the seating area without bumping into edges in a narrow camper hallway.
- Pick a tabletop diameter between 24 and 30 inches to maintain ample room in the slide.
- Select chairs with open wire or spindle backs to let natural light flow through the room.
- Place non-skid rubber feet on all table and chair legs to keep them firmly in place.
12. Set Up a Kid Play Zone with Low Soft Bins and Foam Floor Tiles
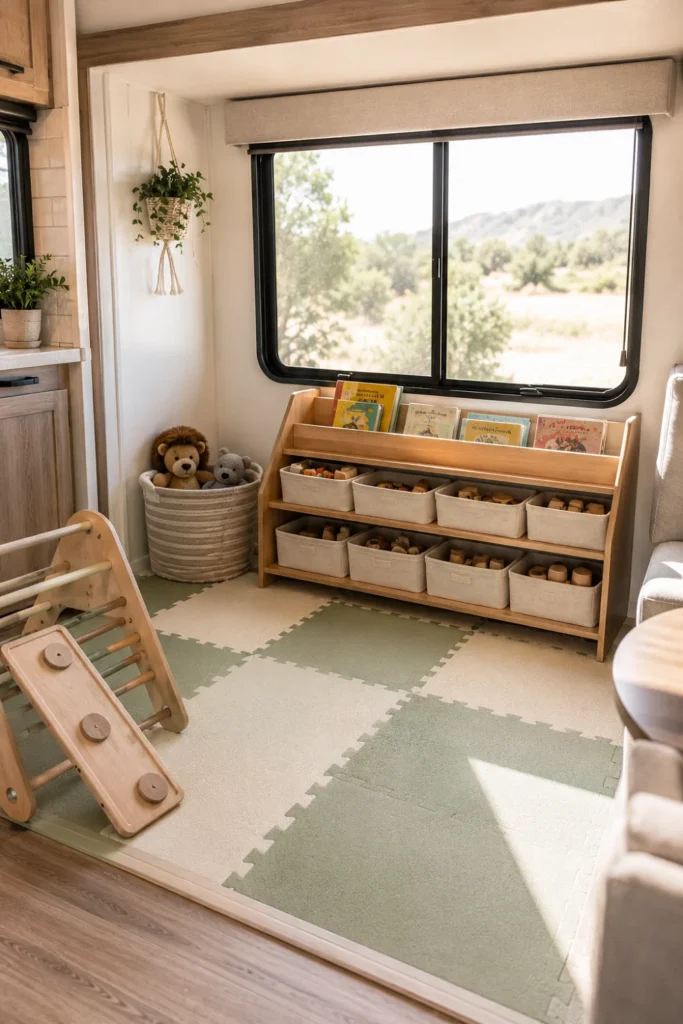
Traveling with young kids often means tripping over toys scattered along the central floor. Converting the dinette into an organized kid zone keeps toys contained in one spot.
Interlocking EVA foam floor tiles protect your slideout floor while providing a soft, insulated play surface for games and coloring.
Play Zone Safety Checklist
- Use collapsible fabric bins labeled with picture tags so kids can put toys away on their own.
- Add a low wooden activity table with rounded edges for coloring and puzzles.
- Keep heavy board games stored in lower bins to maintain a low center of gravity.
13. Build a Custom L-Shaped Corner Nook with Built-In Under-Drawers
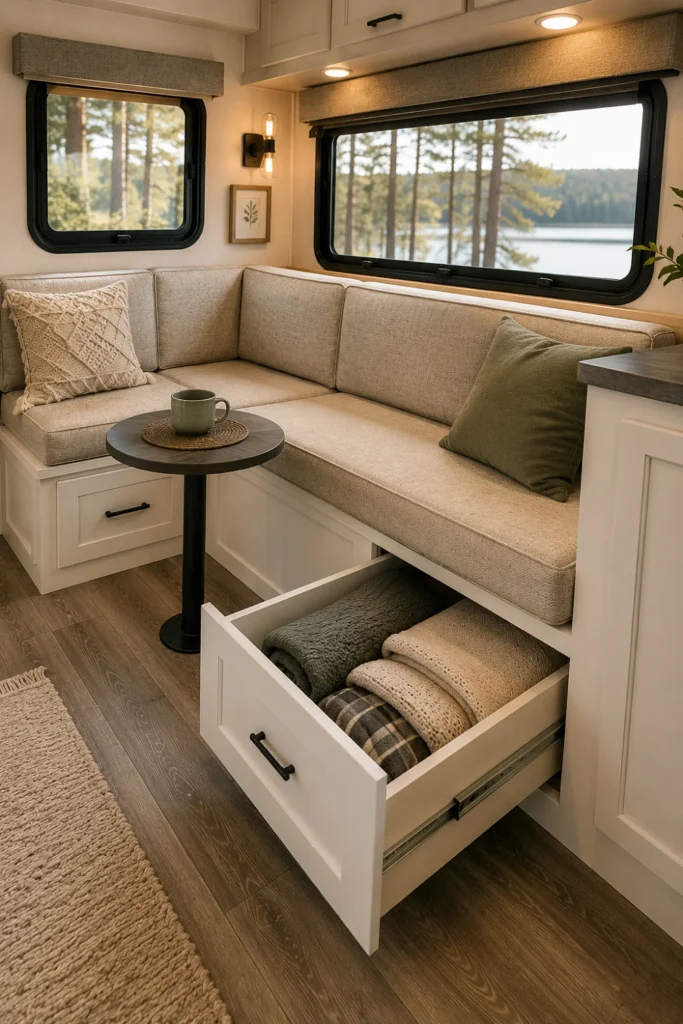
An L-shaped corner bench utilizes dead corner space that standard dinette booths leave untouched. It provides cozy, wrap-around seating while keeping the center floor clear.
Installing deep, heavy-duty drawer slides into the base gives you smooth access to stored items without having to remove seat cushions every time.
Requires pulling off heavy plywood lids and cushions to reach dark, cluttered storage pits.
Full-extension drawer slides pull straight out from the front face for effortless, organized access.
- Frame the benches out of light 1×2 and 2×2 spruce lumber to keep the build lightweight.
- Install push-to-open drawer latches to prevent drawer faces from rolling open on tight turns.
- Top the benches with custom 4-inch marine foam cushions wrapped in durable outdoor canvas.
14. Drop in a Modular C-Table and Free-Standing Armchair Combo
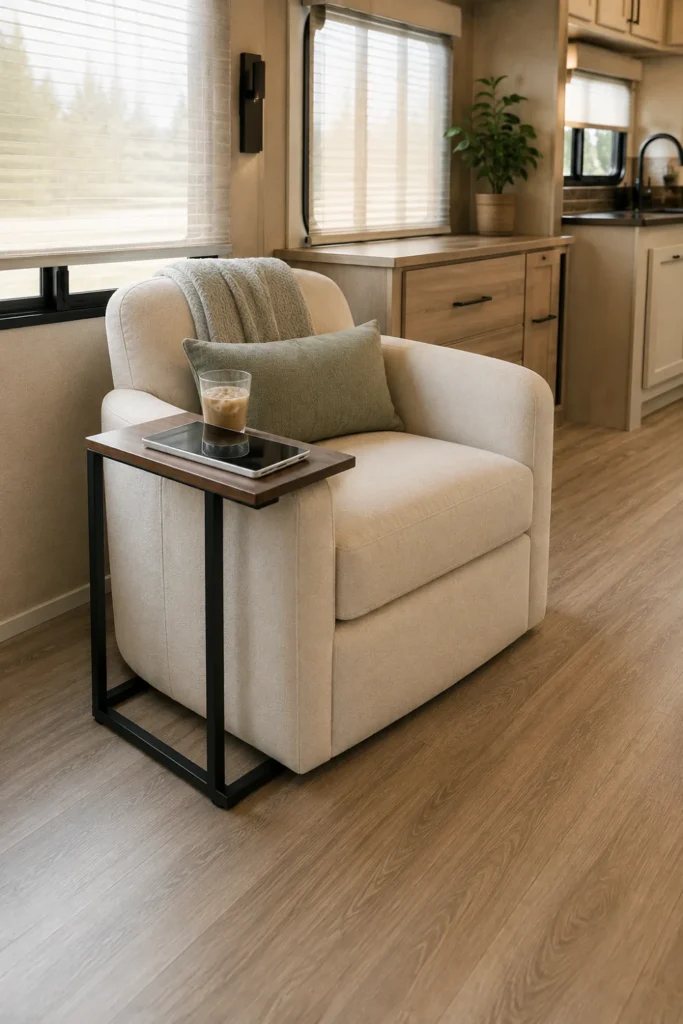
A slim C-shaped accent table slides directly over the arm of a comfortable reading chair. It gives you a steady surface for your laptop, a book, or a meal without requiring any dedicated floor space for table legs.
This setup offers maximum floor plan flexibility because you can easily move the lightweight chair and table wherever you want them.
- ▸Slide the metal base under your armchair to hold a morning mug securely.
- ▸Move the table beside the kitchen counter to hold cutting boards during dinner prep.
- ▸Tuck the entire table flush behind the driver or passenger seat on travel days.
- Pick a C-table with an integrated side pouch to keep magazines, remotes, and cables organized.
- Choose an armchair with open tapered wooden legs to make the room feel larger.
- Place a soft non-slip felt pad under the table base to protect your vinyl flooring from scuffs.
15. Convert the Space into a Dedicated Coffee and Prep Station
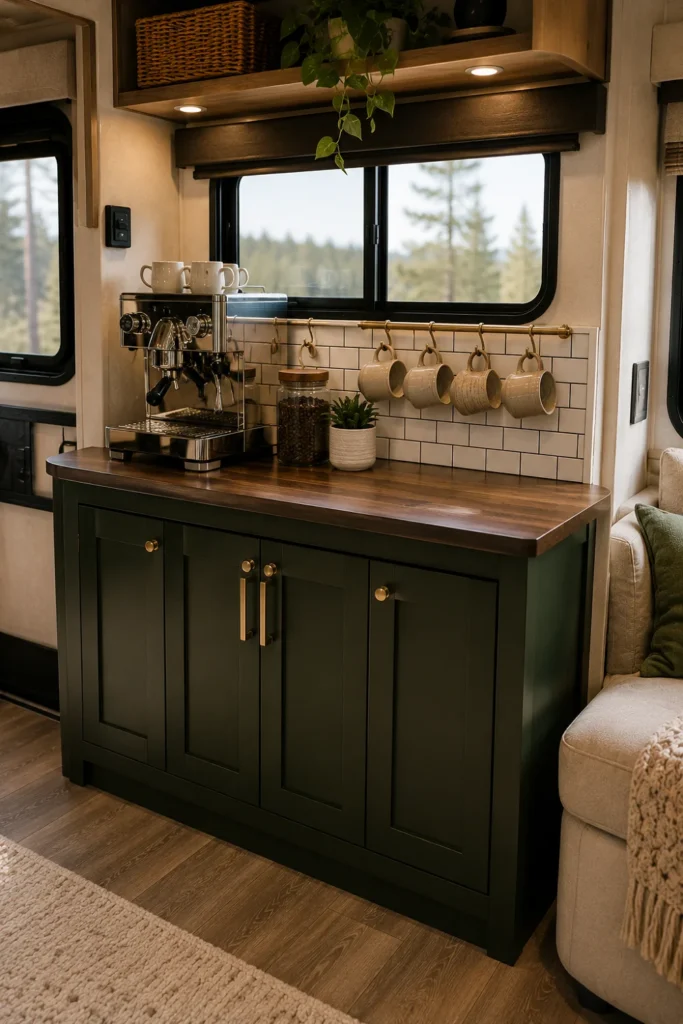
If you love your morning espresso routine or need extra kitchen counter space, replacing the dinette with a dedicated side credenza or sideboard cabinet is a practical upgrade.
You gain deep storage drawers for dry goods, a wide surface for small appliances, and a central spot to house your coffee maker, toaster, and blender.
- Mount a power strip with built-in surge protection inside the cabinet to run your coffee bar gear.
- Line the cabinet shelves with non-adhesive grip liners to stop dishes and mugs from sliding.
- Add magnetic child safety locks to keep cabinet doors closed while towing down the highway.
16. Mount a Floating Live-Edge Slab Table with Heavy-Duty Folding Brackets
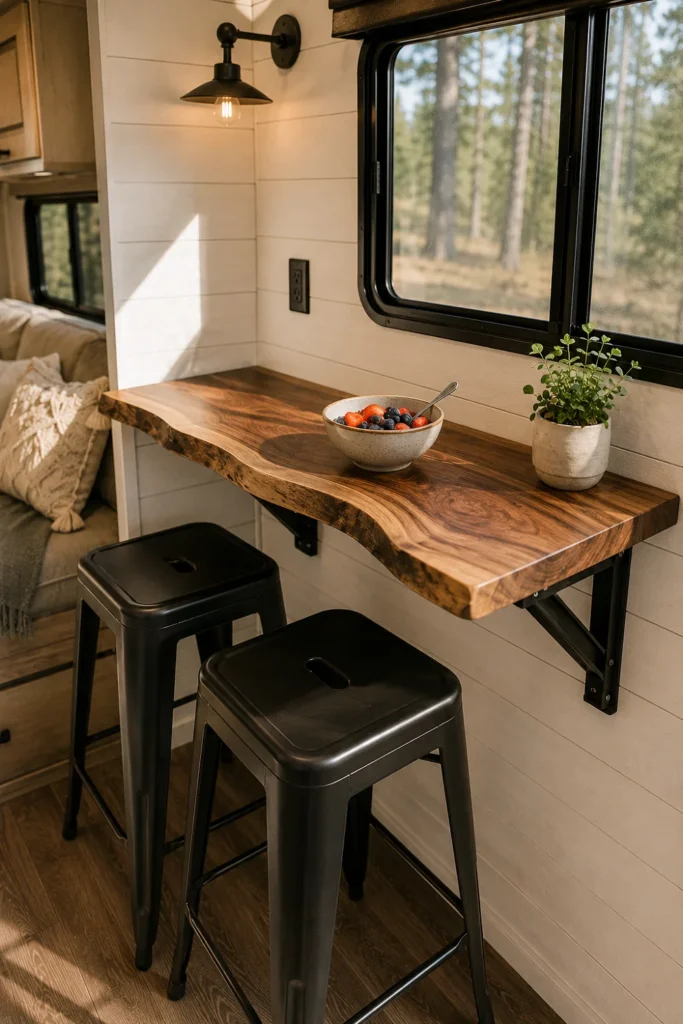
A live-edge wood slab brings natural warmth and character to an RV interior. When mounted on heavy-duty locking folding brackets, you get a gorgeous, functional dining table that folds flat against the wall with one click.
Because there are no table legs touching the floor, sweeping and mopping your slideout floor becomes fast and effortless.
Select two heavy-duty steel folding shelf brackets rated for at least 150 lbs each.
Locate wall studs using an electronic stud finder and secure the brackets with structural screws.
Attach the sealed live-edge board to the brackets and test the release levers to ensure a smooth drop.
- Sand and coat the wood with food-safe hardwax oil to enhance the natural grain.
- Round all sharp slab corners with a router or sandpaper to avoid painful bumps.
- Pair the folding slab with two stackable stools that store in your shower or closet on travel days.
17. Set Up Two Reclining Zero-Gravity Camp Chairs for Indoor-Outdoor Use
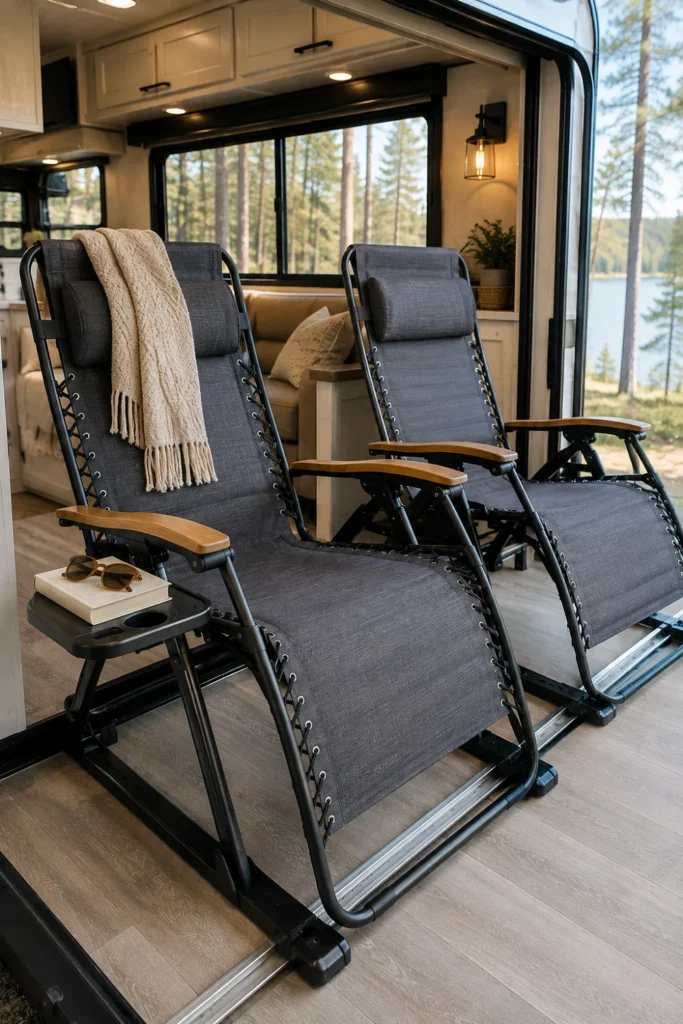
Zero-gravity camp chairs provide exceptional back support, and using them inside your RV eliminates the need to buy and carry separate sets of indoor and outdoor furniture.
During the day, set them up in your slide for reading and lounging. When you arrive at camp, simply carry them outside under the awning to relax by the fire.
Slip rubber floor protectors onto the metal chair rails to protect vinyl floors.
Fold them flat and secure them against the slide wall with a bungee cord while traveling.
Leaving metal rails resting directly against slide rubber seals.
Buying cheap non-locking recliners that slide back unexpectedly.
- Choose chairs with breathable textilene mesh fabric that resists moisture and wipes clean quickly.
- Clip on a side cup tray to hold drinks, phones, and sunglasses.
- Enjoy freeing up valuable storage bay space by using your patio chairs inside.
18. Add a Multi-Tier Wire Utility Rack for Crafting and Pantry Overflow
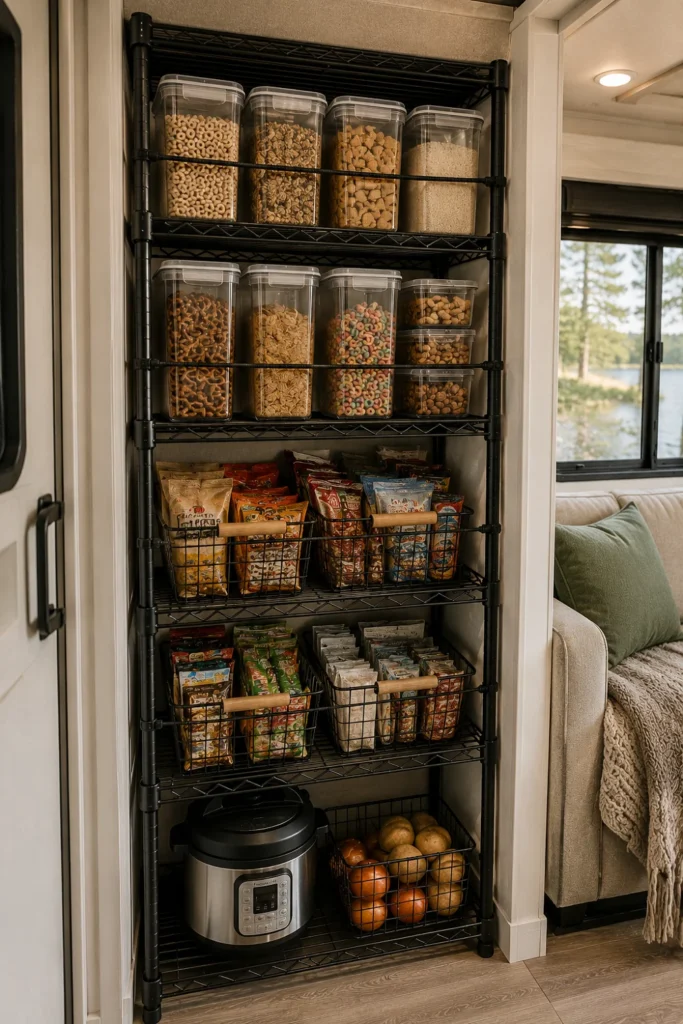
If your RV kitchen is short on pantry storage or you travel with hobby gear, a tall wire shelving unit offers customizable, vertical storage in place of the dinette.
Adjustable wire shelves allow you to fit clear storage tubs, pantry baskets, and small appliances neatly without wasting vertical wall space.
📌 Good To Know
Use heavy-duty tension rods or elastic shock cords across the front of every shelf to keep pantry bins, spice jars, and supply baskets securely in place while navigating winding roads.
- Pick a black powder-coated steel rack for a clean, modern aesthetic.
- Place clear, latching plastic tubs on the lower shelves to store heavy dry pantry goods.
- Anchor the top shelf collar to a wall stud using a nylon safety strap to eliminate tipping.
Removing your factory booth gives you full control over your RV layout. Finding the right fit comes down to how you actually travel, whether you need a dedicated desk for remote work, plush recliners for relaxing, or a slim folding table that opens up your floor plan.
Pick one or two of these rv dinette replacement ideas that match your daily habits, grab your drill, and enjoy your spacious new living area.
Save this list for the next time you are ready to remodel your RV interior!

