
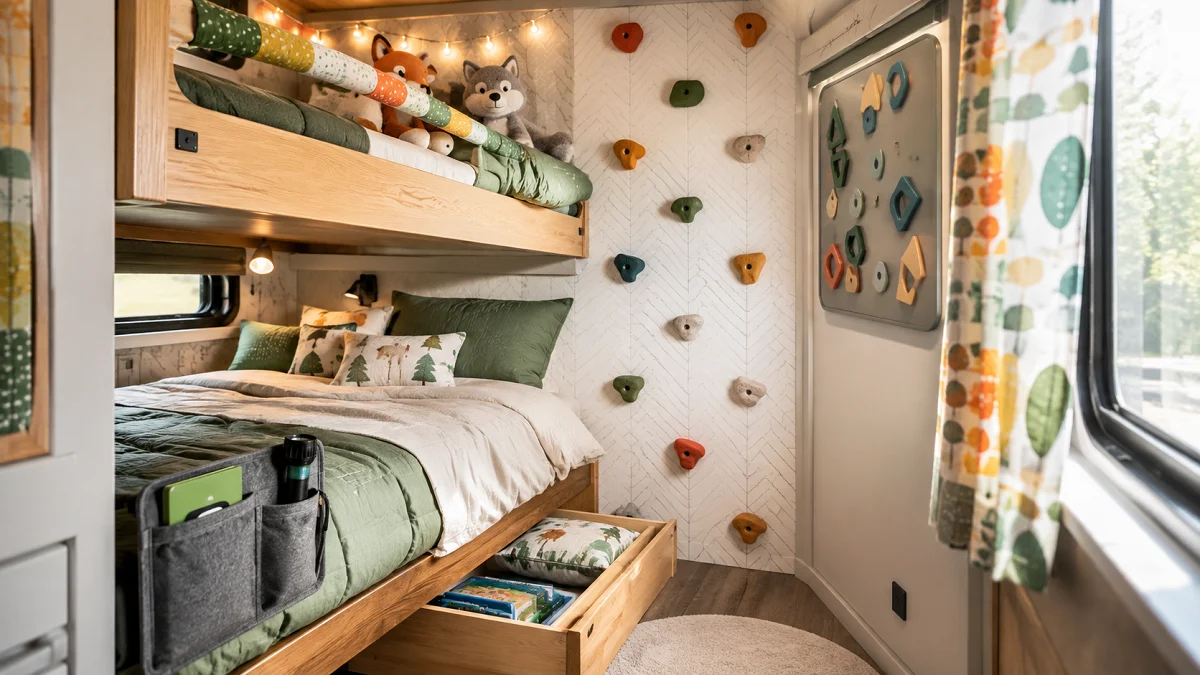
RV bunks often turn into dark, cluttered corners where duffel bags get tossed and toys vanish under thin mattresses. When space is tight, giving kids a functional spot that feels like their own can change the entire tone of a family camping trip.
Most stock camper setups come with flat brown walls, stiff cushions, and awkward vertical ladders that take up half the walking path. You do not need to tear out the frame or add heavy materials to make a difference. Simple changes like better lighting, soft textiles, and smart wall mounts can completely shift the way your family uses the back of the rig.
These practical rv kids room ideas focus on lightweight solutions, easy storage, and cozy touches that hold up to real travel days.
1. Build a Slide-Out Wooden Reading Nook Under the Bottom Bunk
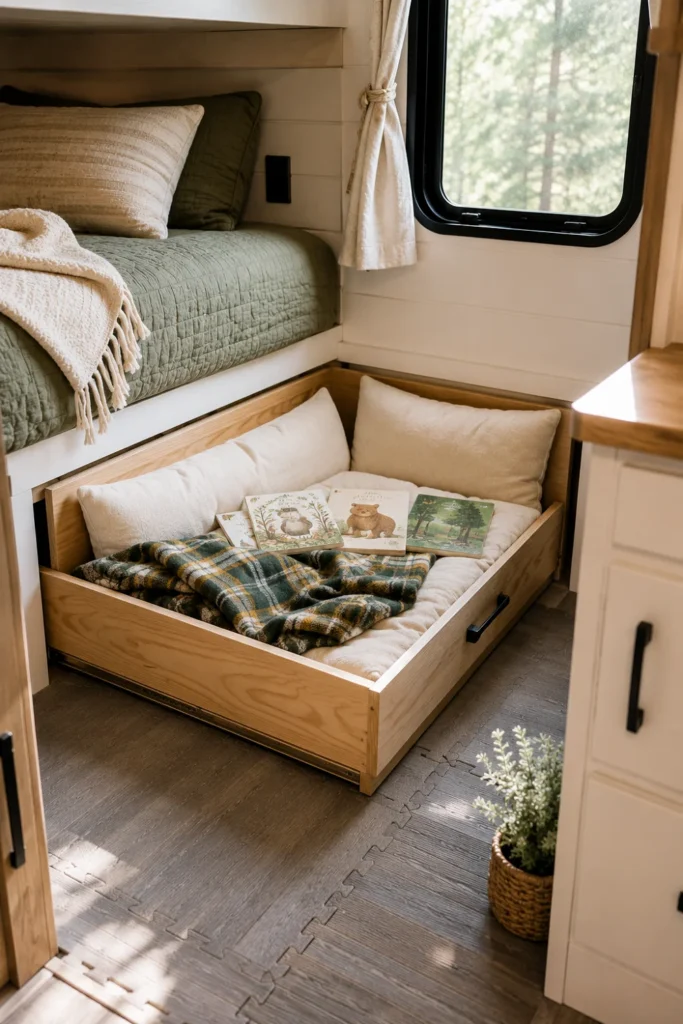
The open cavity beneath a standard lower bunk usually becomes an unorganized drop zone for camping chairs or plastic totes. Adding a low-profile plywood tray on rolling casters turns that empty floor space into a cozy retreat.
Kids can pull the tray out during quiet afternoons for reading or drawing, then tuck it completely away when it is time to move between the bathroom and the dinette.
Duffel bags and stray shoes pile up under the bed frame, making the floor hard to walk across.
A rolling wooden base holding a foam cushion and books that slides smooth and flat under the mattress.
Line the wooden base with a breathable cotton pad and two flat throw pillows for comfort.
2. Replace Heavy Bunk Ladders with Wall-Mounted Rock Climbing Holds
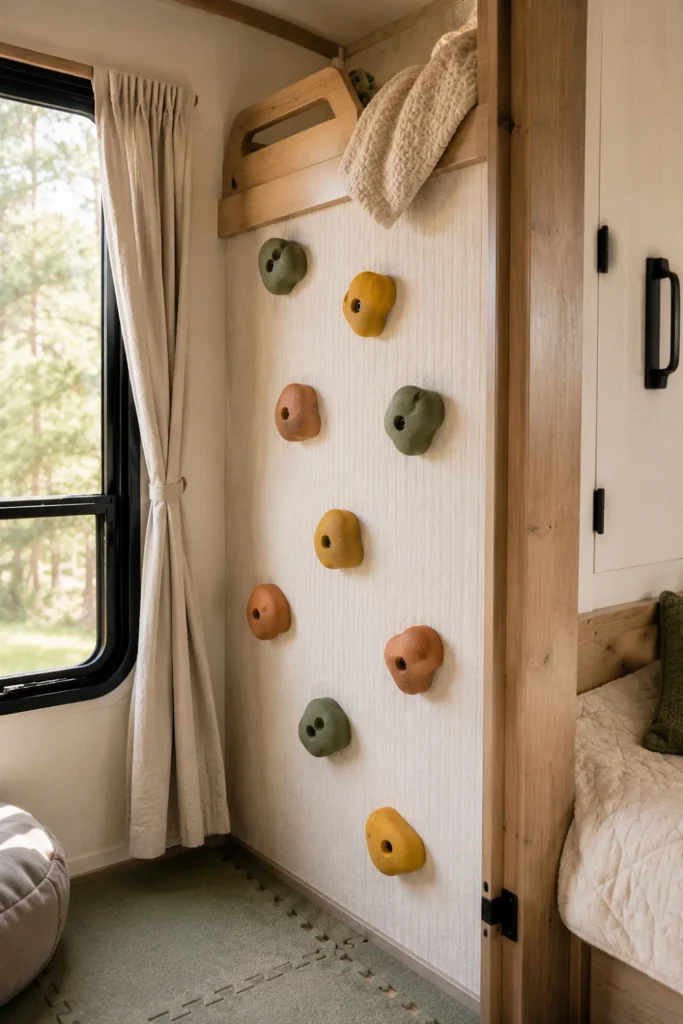
Factory wooden ladders are notoriously bulky and block cabinet doors in narrow bunkhouses. Screwing resin climbing holds directly into the solid corner studs of the bunk frame clears the floor immediately.
Children love the playful setup, and it encourages good balance. Make sure to space the holds roughly eight to ten inches apart so smaller legs can climb without straining.
💡 Quick Tip
Use backing plates with locking nuts behind the wall paneling rather than wood screws to ensure the holds never loosen during bumpy travel days.
Textured grips with rounded edges work best to protect bare feet during midnight climbs.
3. Hang Soft Felt Pocket Organizers Along the Mattress Wall Rails
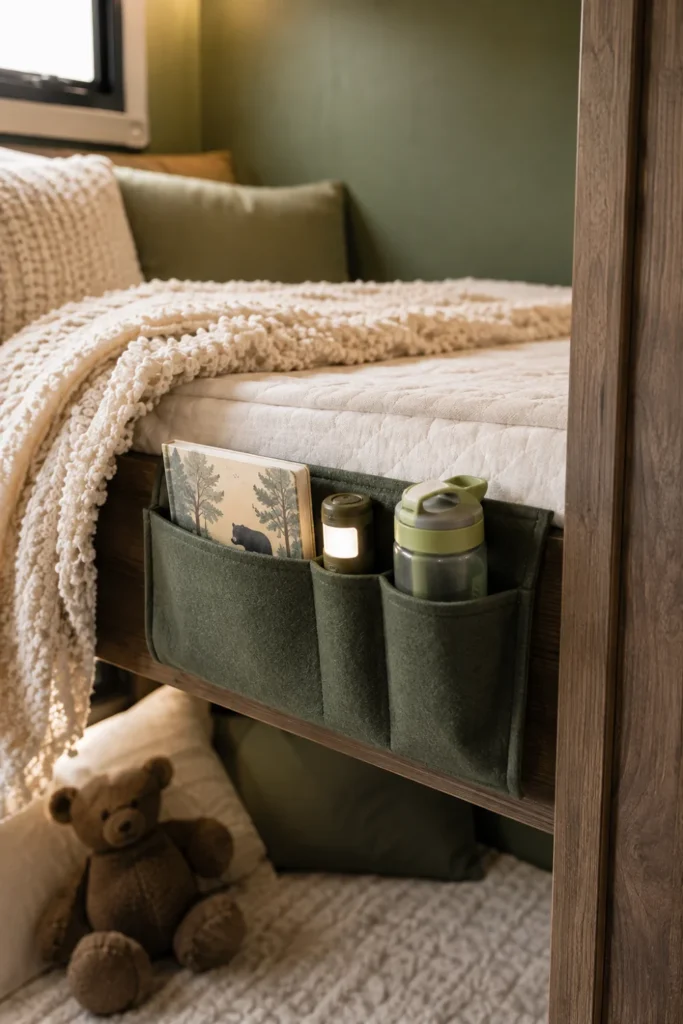
When kids sleep in high bunks, small items like water bottles, glasses, and flashlights easily fall over the edge. Felt bedside caddies slip right between the mattress and the bed frame to keep essentials within arm’s reach.
This stops the constant rustling around at bedtime because everything has a dedicated slot right next to their pillow.
Look for organizers with reinforced stitching so the pockets hold their shape over several seasons.
4. Install Warm Puck Lights with Magnetic Rechargeable Bases
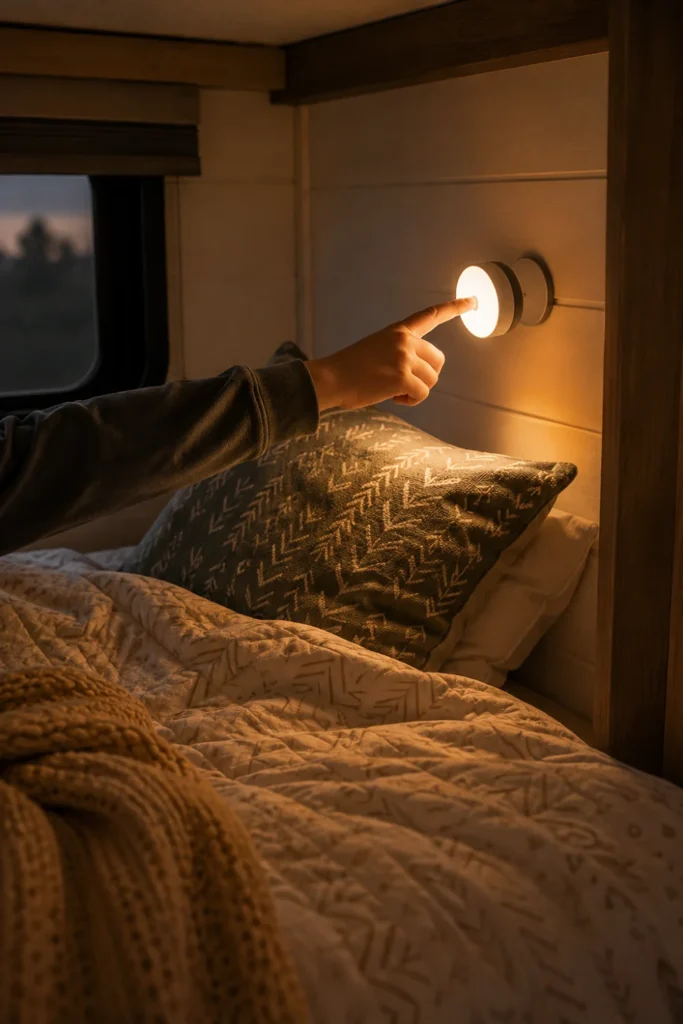
Stock RV dome lights are often harsh, overly bright, and placed in the middle of the ceiling away from the beds. Magnetic puck lights let each child control their own soft light without draining house batteries.
These lights can be detached from their wall plates and used as safe lanterns for late-night bathroom trips.
Stick the adhesive steel mounting disc directly above the head of the bunk.
Snap the magnetic puck light in place and adjust the brightness setting.
Pull the puck off the wall once a week to charge via standard USB-C cord.
Select models with warm white diodes around 2700K to help kids wind down naturally before sleep.
5. Anchor Clip-On Canvas Curtains for Instant Bunk Privacy
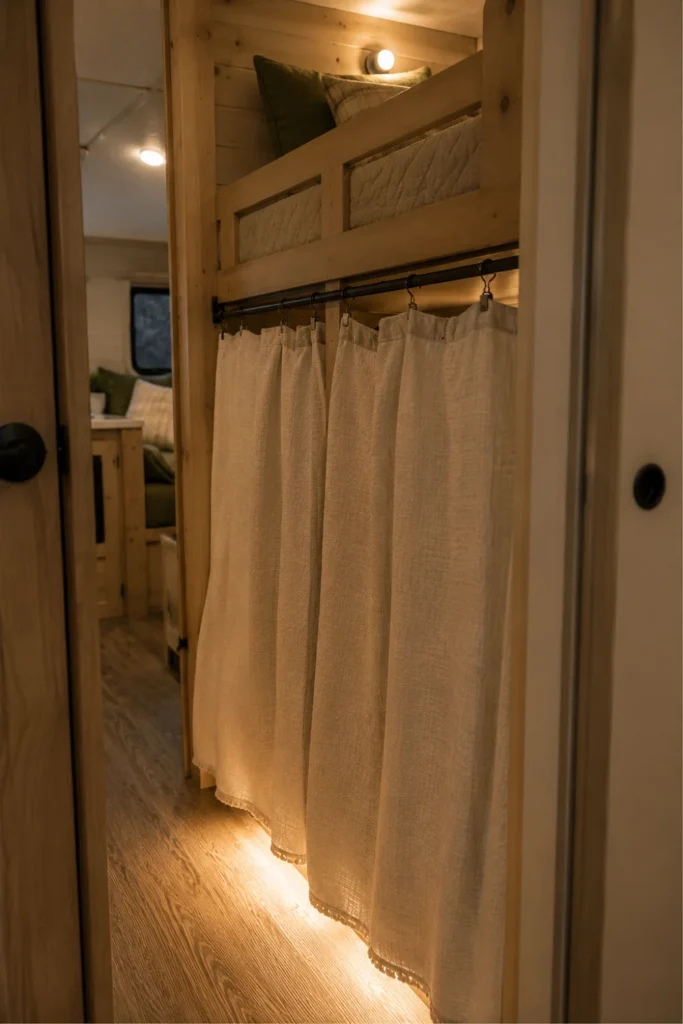
Shared bunkhouses can make it hard for kids with different bedtimes to rest. Hanging simple fabric panels on tension rods creates personal zones where one child can sleep while another stays up reading.
The fabric dampens interior noise and keeps morning light from waking early risers when the campsite gets bright.
Sew a small fabric tieback to the side wall so the curtain stays open during daytime driving.
6. Swap Factory Mattresses for Custom Cut High-Density Foam
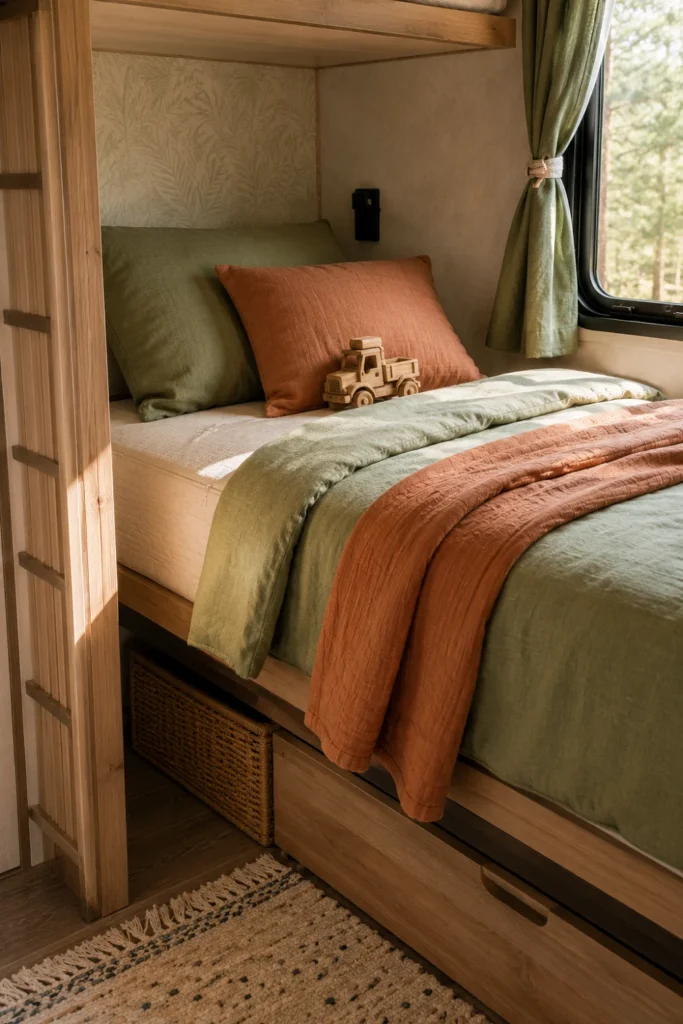
Most camper bunk mattresses are thin, plastic-wrapped pads that trap moisture and break down quickly. Replacing them with custom-cut medium-firm foam wrapped in a zippered cover transforms sleep quality.
Good foam breathes better during hot summer nights and keeps kids well-rested for busy outdoor days.
| Factory Stock Pad | High-Density Foam |
|---|---|
| No airflow, traps sweat and condensation | Breathable open-cell structure |
| Non-removable vinyl or thin poly cover | Removable, machine-washable cotton zip cover |
| Beds sag and bottom out quickly | Even weight support and long durability |
Use an electric carving knife to trim the foam block if your RV has rounded rear corners or angled walls.
7. Set Up a Fold-Down Wall Desk Using Sturdy Drop-Leaf Brackets
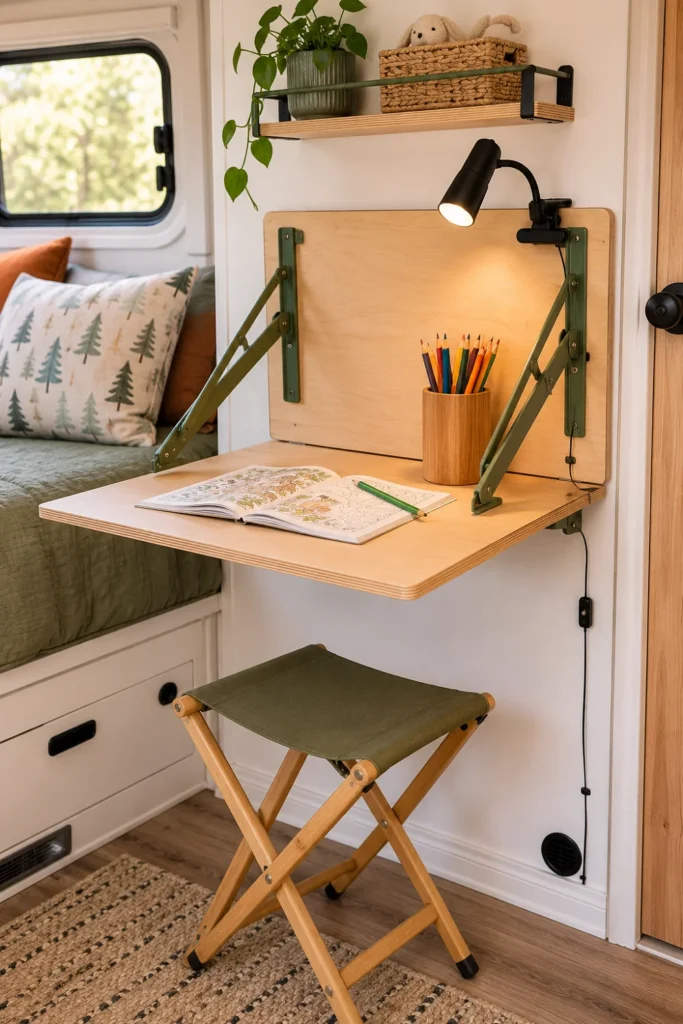
Schoolwork, coloring books, and crafts often clutter the main kitchen dinette when traveling as a family. Installing a lightweight birch wood plank on locking brackets gives kids an independent workstation in their room.
When work is done, releasing the safety catch lets the shelf swing flat against the wall so nobody bumps their knees.
Use positive-locking steel folding brackets.
Round all desk corners with sandpaper.
Heavy particle board tops that pull out studs.
Loose surface items left out on drive days.
A folding wooden stool slides directly underneath the bunk bed when the desk is folded down.
8. Mount Acrylic Book Ledges Directly Into Wall Studs
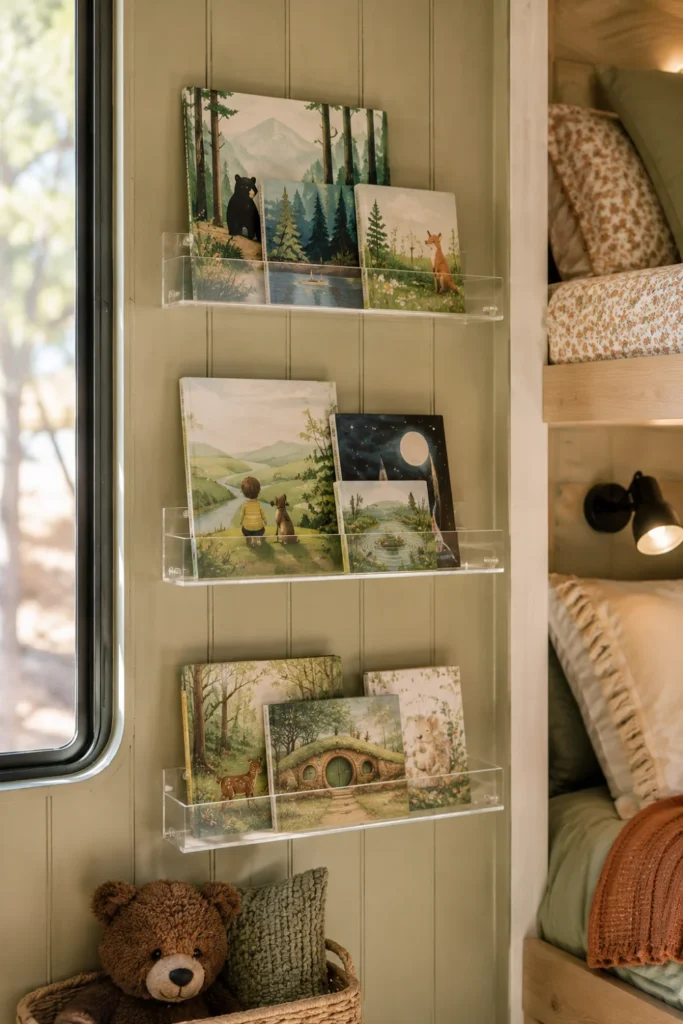
Standard flat bookshelves let picture books slide and tip over the moment the camper takes a corner. Shallow acrylic front-facing ledges hold books securely and display bright cover art as natural room decor.
The clear material keeps the bunk area feeling open while keeping reading materials organized and off the bedding.
What to grab first
Limit each shelf to three or four lightweight paperbacks to keep overall wall weight to a minimum.
9. Brighten Dark Bunk Walls with Neutral Peel-and-Stick Wallpaper
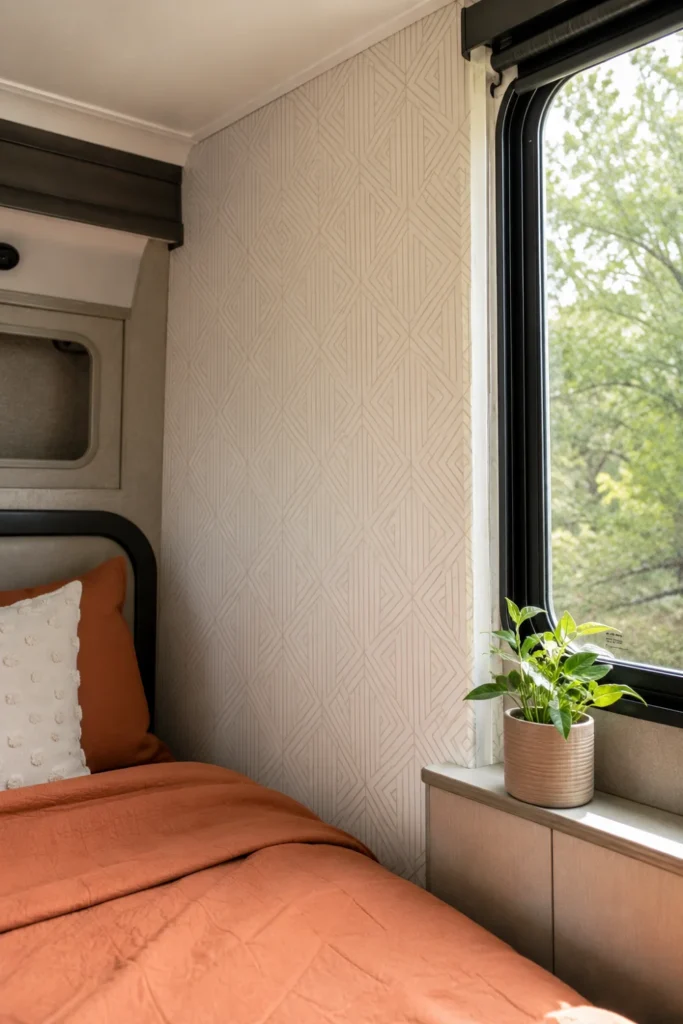
Many RV interiors feature dark woodgrain paneling that absorbs natural light and makes small bunks feel closed in. Applying durable, removable wallpaper in a light print instantly opens up the space.
Since peel-and-stick vinyl is lightweight and easily removed, it adds brightness without leaving residue or causing wall damage.
Wipe RV walls with isopropyl alcohol before applying vinyl so temperature shifts do not cause corners to lift.
Choose light green, warm cream, or subtle geometric prints to brighten the small space.
10. Secure Lightweight Fabric Cubes with Elastic Bungee Straps
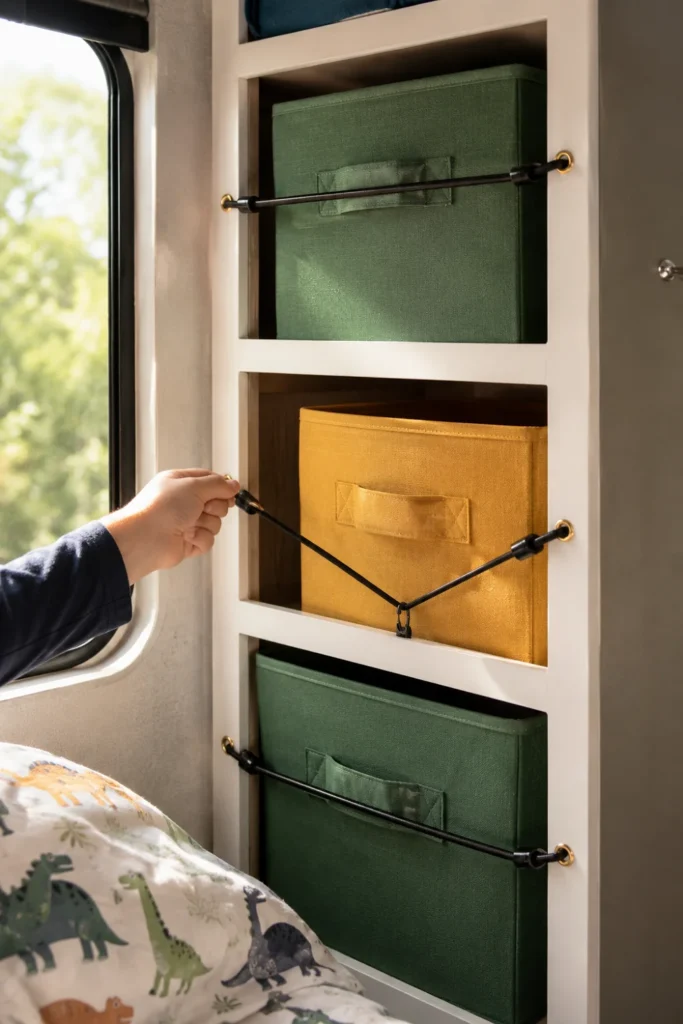
Open cubby shelving in RV bedrooms often empties its contents onto the floor during sudden highway braking. Flexible fabric bins keep small toys contained while heavy-duty bungee cords keep the bins inside their slots.
Kids can pull the entire basket down to play on the rug and slide it back when cleanup time comes.
📌 Good To Know
Screw small brass cup hooks into the shelf face frame so you can snap elastic cords across the opening in two seconds before hitting the road.
Sort bins by activity, using one for art supplies, one for building blocks, and one for card games.
11. Add Removable Window Blackout Shades with Hook-and-Loop Fasteners
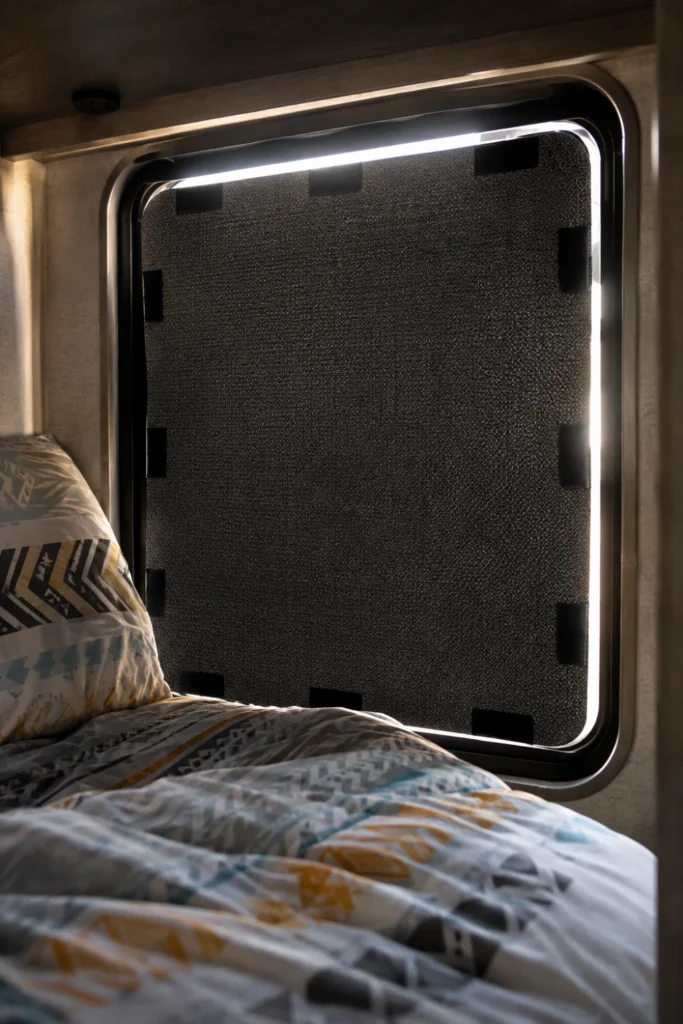
Thin factory camper mini-blinds let early morning sunlight flood right into kids’ eyes at sunrise. Custom-cut thermal blackout fabric secured with adhesive hook-and-loop strips keeps the sleeping space dark.
The extra layer also blocks window heat during hot summer afternoons and keeps out chilly drafts in the fall.
Blinds rattle against the frame while driving and let 5 AM campground floodlights shine through.
A snug blackout panel that blocks light completely and stays silent during transit.
Store the panels flat under the mattress during driving days when you want natural light flowing through the trailer.
12. Create a Magnetic Wall Board for Road Trip Art and Games
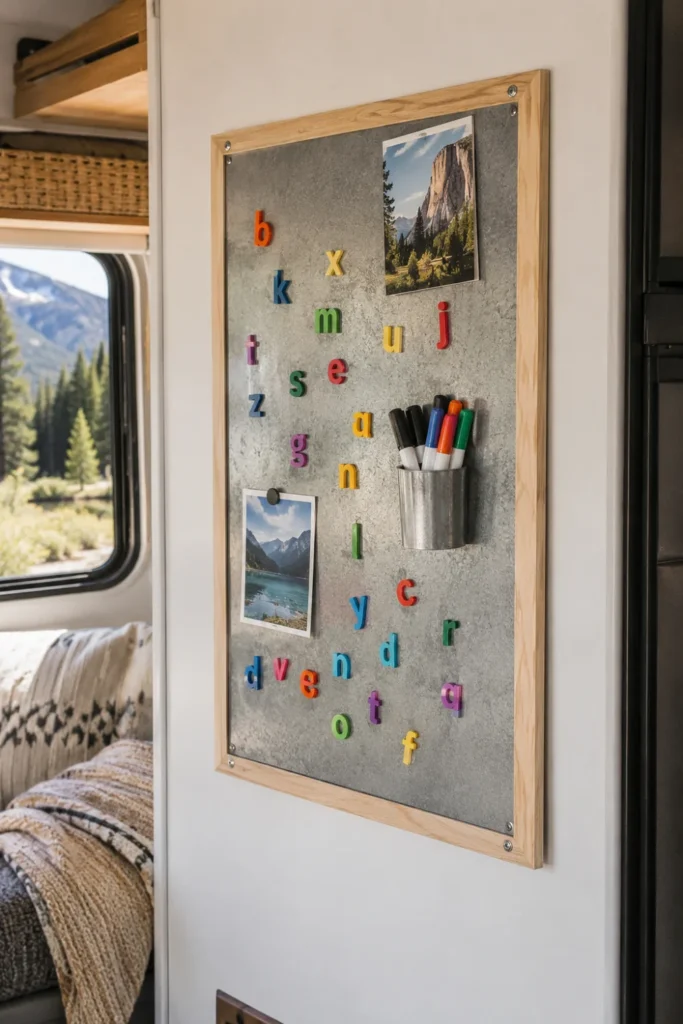
Loose paper and colored pencils can quickly overwhelm a compact camper during rainy days at the campground. A thin galvanized steel sheet mounted securely to a blank wall turns dead space into an active play board.
Kids can use magnetic tangram puzzles, letter magnets, or display postcards collected from national parks along the route.
Cut a thin magnetic sheet or repurpose a framed metal baking pan.
Secure the corners using heavy-duty, flat-head screws driven into structural wall studs.
Add flat magnetic clips for drawings and magnetic cups for dry-erase markers.
Smooth the outer metal edges with clear silicone or frame it in lightweight wood molding for safety.
13. Use Color-Coded Packing Cubes Stashed in Overhead Cabinets
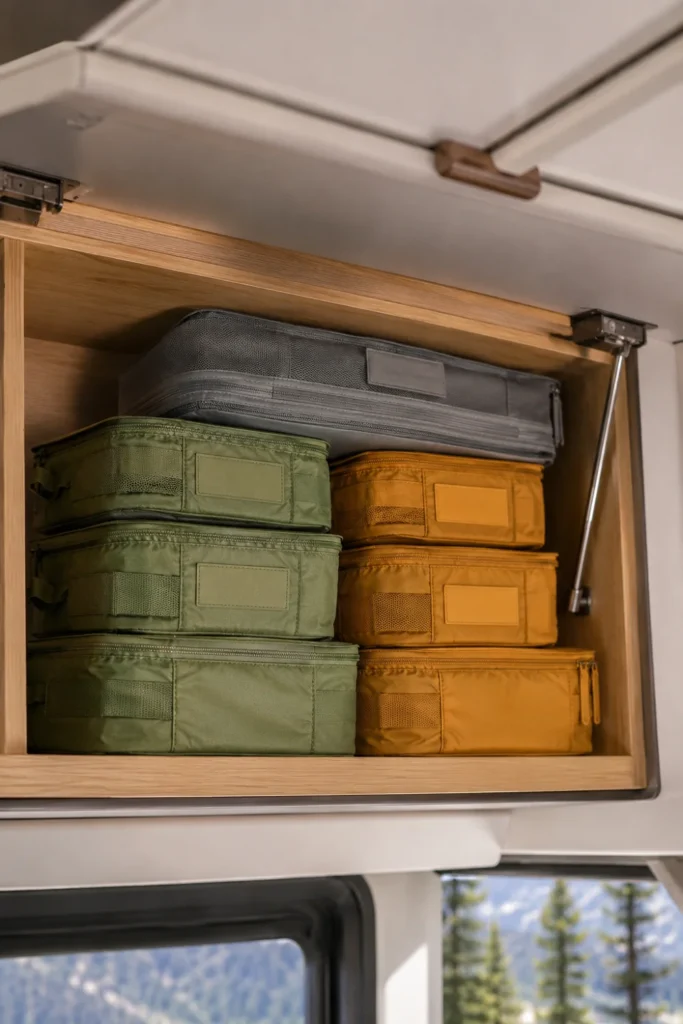
Sharing small overhead cabinets often leads to mixed-up clothes and rummaged piles every morning. Assigning each child a dedicated color for their zippered packing cubes keeps things organized and clear.
When kids need clean clothes, they simply grab their specific cube without pulling out everything else in the cabinet.
This makes packing before a trip straightforward because each child gets a set number of cubes to fill.
14. Line the Bunk Floor Area with Interlocking Foam Play Tiles
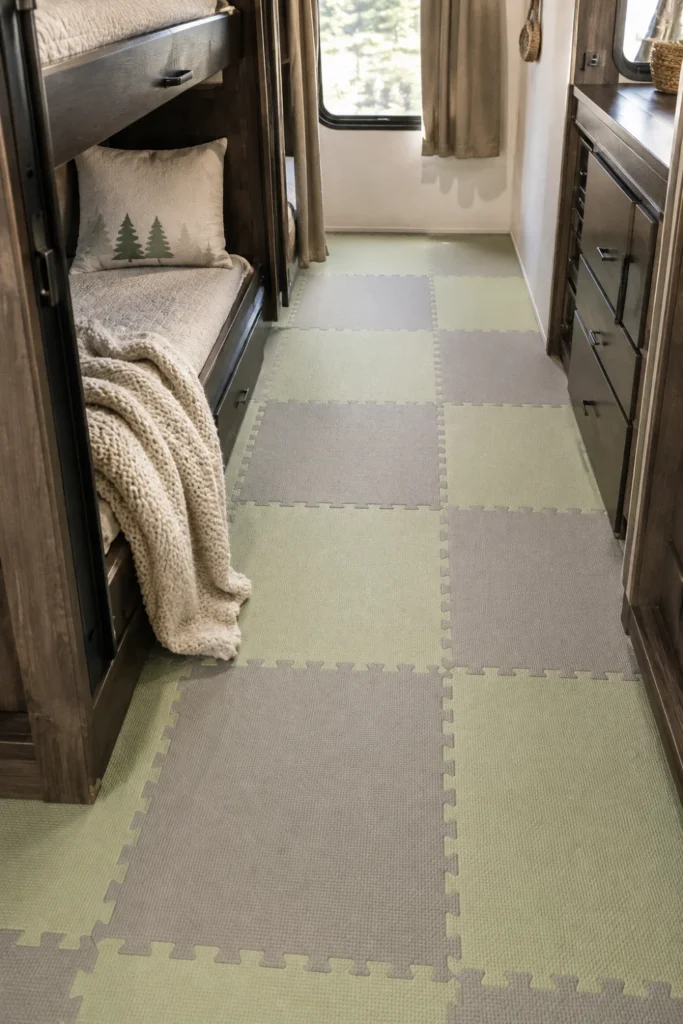
Camper floors get cold in the morning and carry vibration when family members walk past the bunks. Interlocking foam floor tiles provide thermal insulation and a cushioned spot for morning floor play.
They are easy to sweep clean of campsite dirt and protect the underlying vinyl floor from toy scratches.
| Bare RV Vinyl Flooring | EVA Foam Play Tiles |
|---|---|
| Cold under bare feet on chilly mornings | Insulates against cold subfloors |
| Hard surface that echoes shoe noise | Dampens footsteps and dropped toy sounds |
| Prone to gouges from metal toy cars | Cushions drops and wipes clean easily |
Trim the edge tiles with a utility knife so the foam fits tightly against the base cabinets and wall tracks.
15. Hang Soft Overhead Netting to Catch Bulky Stuffed Animals
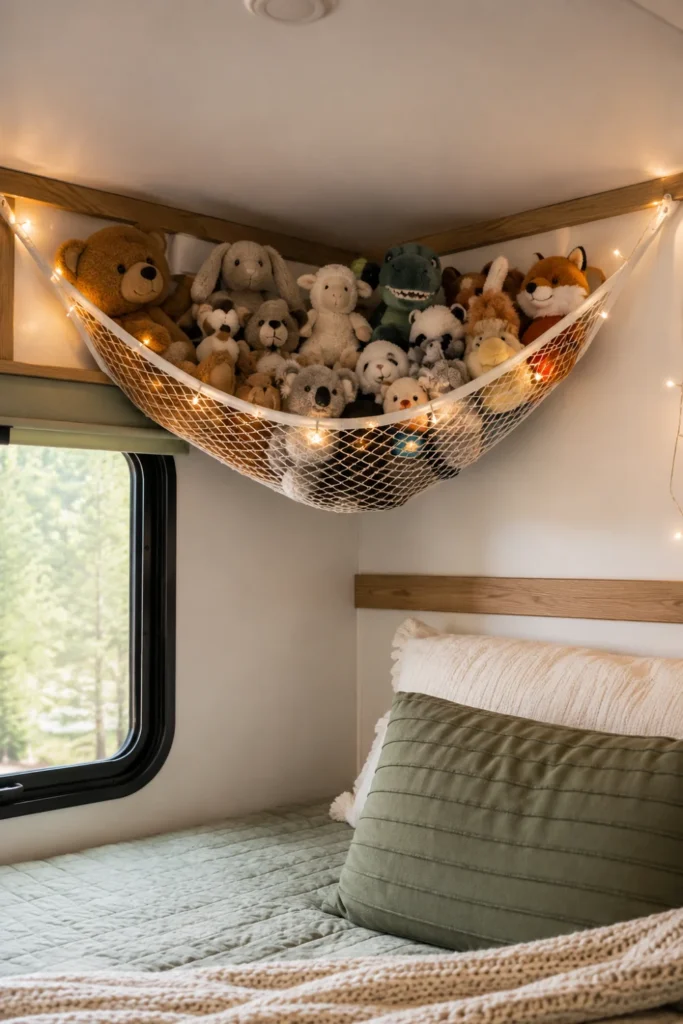
Stuffed animals and extra blankets take up precious mattress surface area in small sleeping bunks. Installing an elastic mesh cargo net across the unused ceiling corner keeps soft items securely stored up high.
The bedding stays clear for sleeping, and kids can still see their favorite toys tucked safely above them.
Anchor the net hooks into ceiling framing seams rather than hollow ceiling paneling to prevent sagging.
Position the net far enough toward the corner so it never interferes with headroom when sitting up in bed.
Creating a comfortable space for kids in a travel trailer does not require complex remodeling or heavy materials. Making small upgrades to lighting, storage, and bed comfort gives children their own relaxing spot while keeping the rest of the camper tidy.
Try testing two or three of these practical rv kids room ideas before your next road trip to see how small organization tweaks keep everyone rested.
Save this list to your RV organization board for the next time you plan a camper refresh.

