
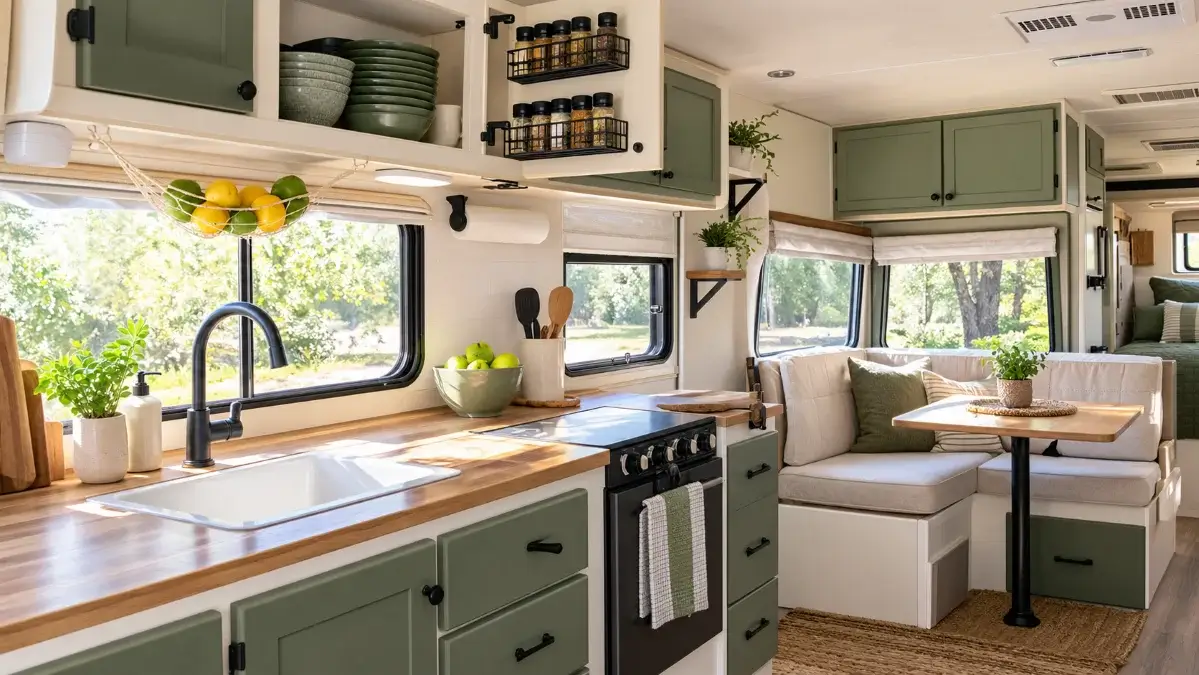
Campers look spacious on dealer lots until you pack for a four-day weekend. Suddenly your galley counters disappear under dry goods, your dinette table becomes an catch-all junk drawer, and opening an overhead locker risks an avalanche of camp dishes.
Living in a small footprint means square footage is fixed, but usable vertical space rarely gets maximized. Most stock RV interiors leave inches of open air above shelves, behind doors, and inside awkward cubbies.
These practical camper storage ideas focus on lightweight setups and smart retention methods that keep your gear secure down gravel washboard roads without tearing into thin luan camper walls.
1. Mount Wire Spice Racks Inside Cabinet Doors
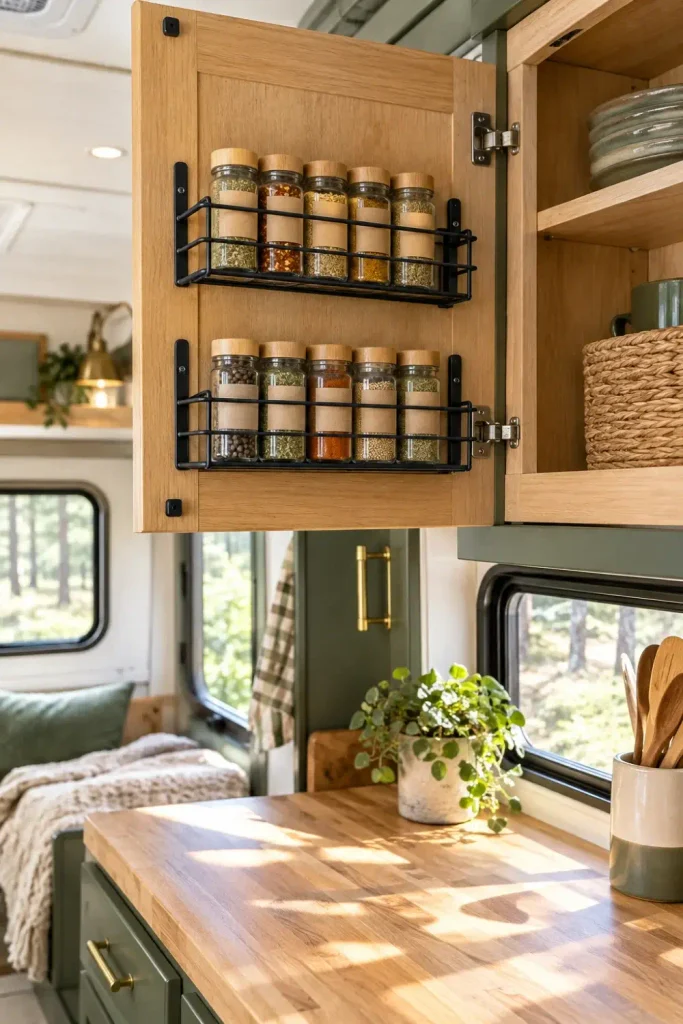
Galley counters in a travel trailer or camper van vanish the second you set down a coffee press and a cutting board. Freeing up that food prep surface starts with taking small jars, hot sauce bottles, and tea boxes off the counter completely.
Screw shallow wire spice baskets directly to the structural wood framing inside upper cabinet doors. Avoid mounting directly through thin hollow door panels without short half-inch truss screws, or use outdoor-rated foam tape to avoid drilling through the face.
- Measure your interior shelf setback first to verify the door closes completely with jars in place.
- Line the bottom wire rails with adhesive felt strips to keep glass bottles from rattling during transit.
- Group high-frequency seasonings together so you can grab salt and oil without digging.
2. Hang Canvas Shoe Organizers on Bed Frame Skirts
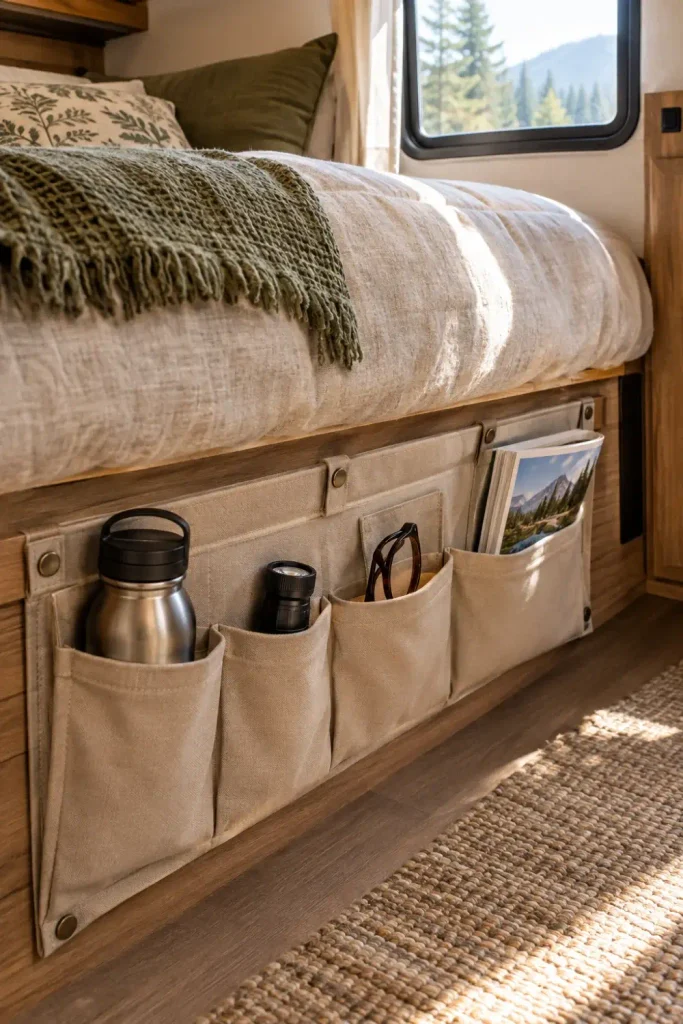
Nightstand surfaces are almost nonexistent around camper beds, which leaves phones, flashlights, glasses, and books scattered across blankets.
Cut a fabric hanging shoe caddy in half and staple or screw the top edge straight into the plywood platform beneath your RV mattress. The pockets hang along the base of the mattress perimeter without taking an inch of walking aisle space.
- Slide heavier gear like flashlights and water bottles into the bottom row to prevent tearing.
- Use the top mesh pouches for lightweight charging cords, lip balm, and reading glasses.
- Add stick-on hook-and-loop pads to the bottom back corners to stop pockets from swaying on travel days.
💡 Road Tip
Always pick canvas or heavy mesh pockets over clear vinyl. Clear vinyl gets brittle and cracks after a single winter storage season in sub-freezing temperatures.
3. Install Heavy-Duty Tension Rods Inside Open Shelves
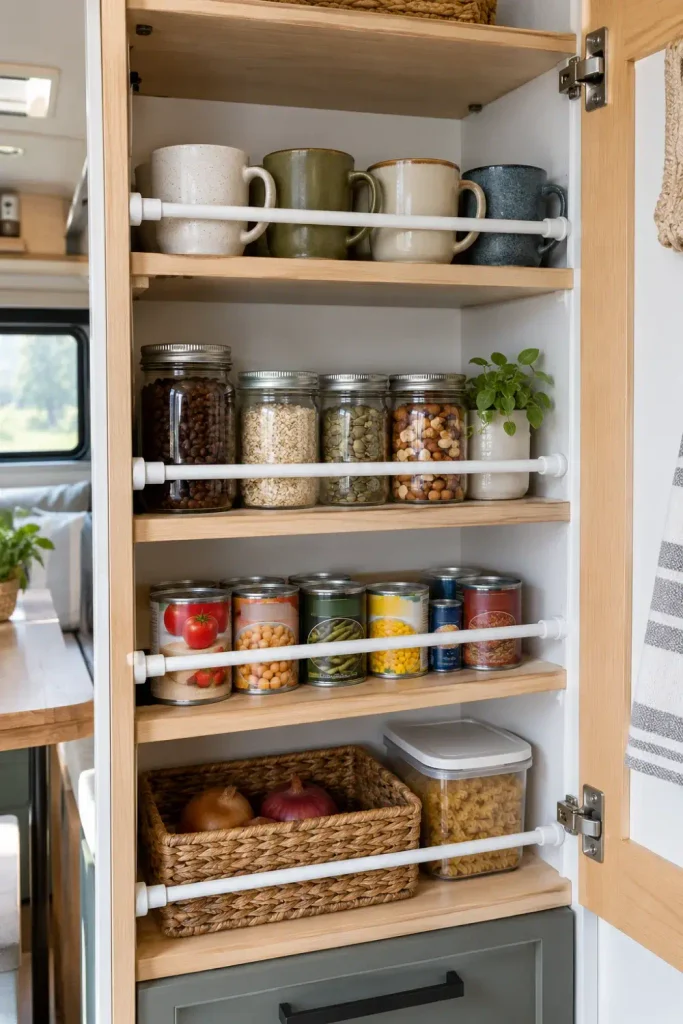
Open cubbies and deep cabinets make packing easy, but they turn into hazard zones the minute you pull into a campsite. Items settle against cabinet doors or work their way loose on steep mountain grades.
Spring-loaded tension rods placed two inches above shelf lips create instant retention bars that keep boxes, canned goods, and storage bins upright.
| Placement Area | Best Rod Tension | What It Secures |
| Pantry Cupboards | Medium Spring | Canned goods, cereal boxes, tea canisters |
| Bathroom Medicine Cabinet | Light Spring | Toothpaste, shampoo bottles, lotions |
| Overhead Galley Lockers | Heavy Spring | Enamel plates, plastic cups, nested bowls |
Dry food containers slide forward and stack against cabinet doors, ready to tumble onto counters the moment you unlatch the door.
Horizontal tension bars act as guard rails, absorbing gear shift and holding everything securely inside their dedicated shelf zones.
4. Swap Standard Plastic Hangers for Slim Velvet Hangers
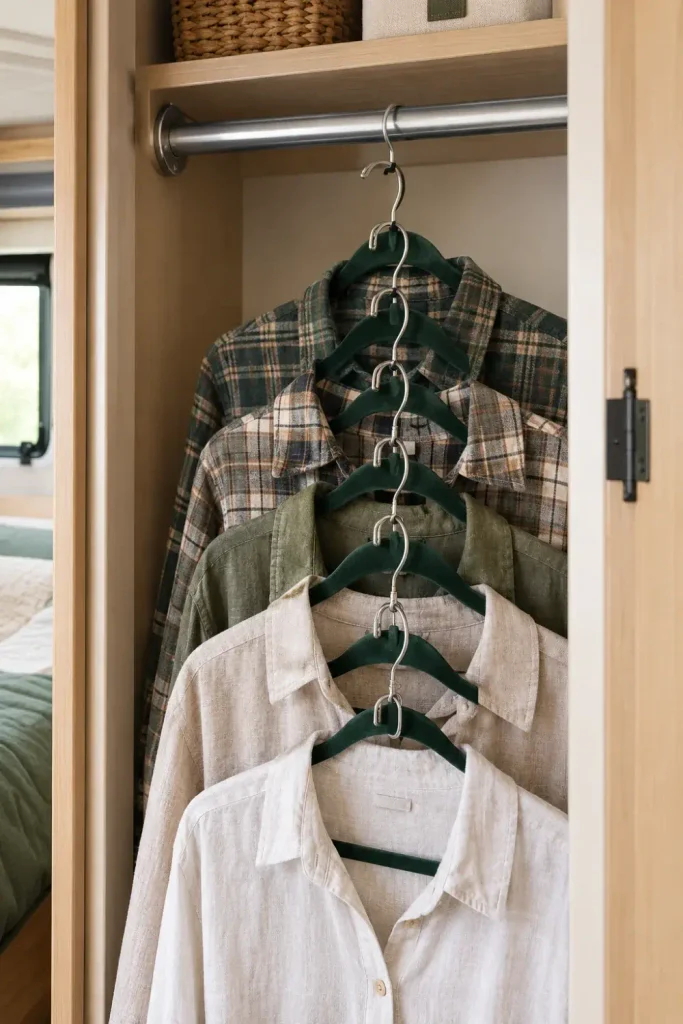
Camper closets are notoriously shallow, often measuring less than eighteen inches from back wall to door latch. Thick tubular plastic hangers eat up horizontal closet rod space quickly and slide around noisily while towing.
Non-slip velvet hangers reduce closet bulk by half. Their textured finish stops jackets and shirts from sliding onto the closet floor when you brake.
- Add metal cascading connector hooks over hanger necks to stack shirts two or three deep vertically.
- Clip pants by the cuffs with low-profile skirt clips to keep waistbands from bunching against the back panel.
- Use rubber rod rings between every five hangers to keep clothing sections from bunching into one corner during transit.
| Standard Plastic Hangers | Slim Cascading Velvet |
|---|---|
| 0.4 inches wide per hanger | 0.18 inches wide per hanger |
| Slick surface allows garments to slip off | Textured flocking grips silk, cotton, and nylon |
| Holds 12 items comfortably in 16-inch closet | Holds 24+ items using vertical tier hooks |
5. Stick Adhesive Wire Bins Under Upper Cabinets
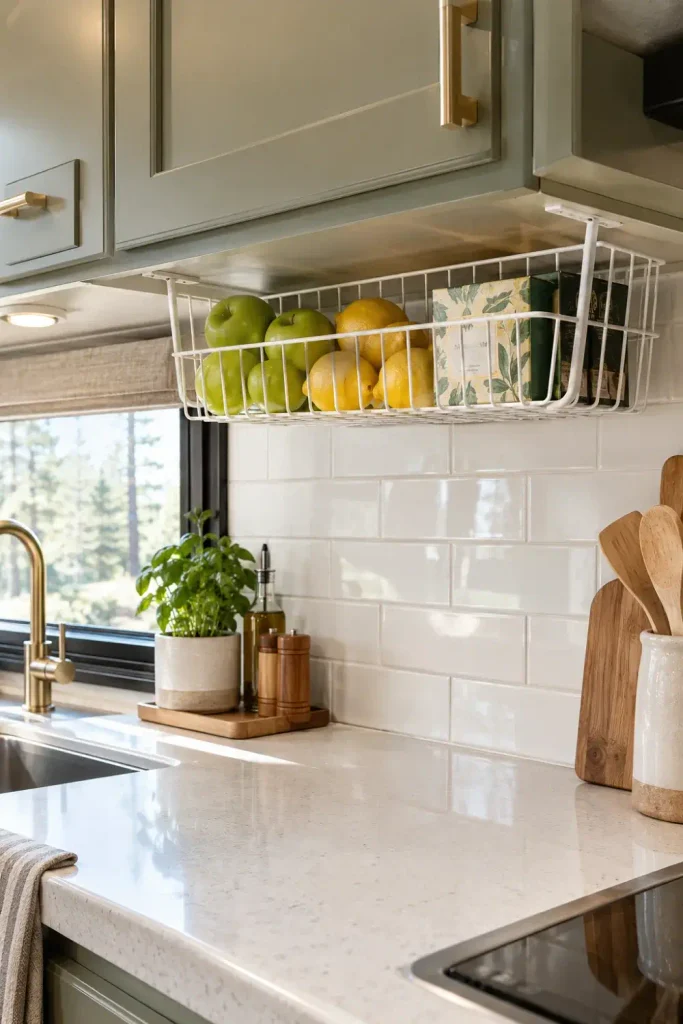
The dead space between the bottom of your overhead cabinets and the countertop often goes completely unused. That four- to six-inch vertical gap offers prime storage real estate for lightweight daily pantry items.
Under-cabinet wire baskets slide onto the lower structural lip or attach with heavy-duty bonding strips. They keep produce, bread loaves, and coffee filters off the food prep zone without eating up headroom.
- Wipe the underside of the cabinet frame with isopropyl alcohol to remove cooking grease before mounting.
- Choose shallow baskets with front lips so contents cannot bounce out when cruising rough highways.
- Store soft items like avocados, onions, and snack bars that damage easily when piled inside deep cabinets.
6. Build Slide-Out Plastic Totes on Wooden Cleats in the Pass-Through Bay
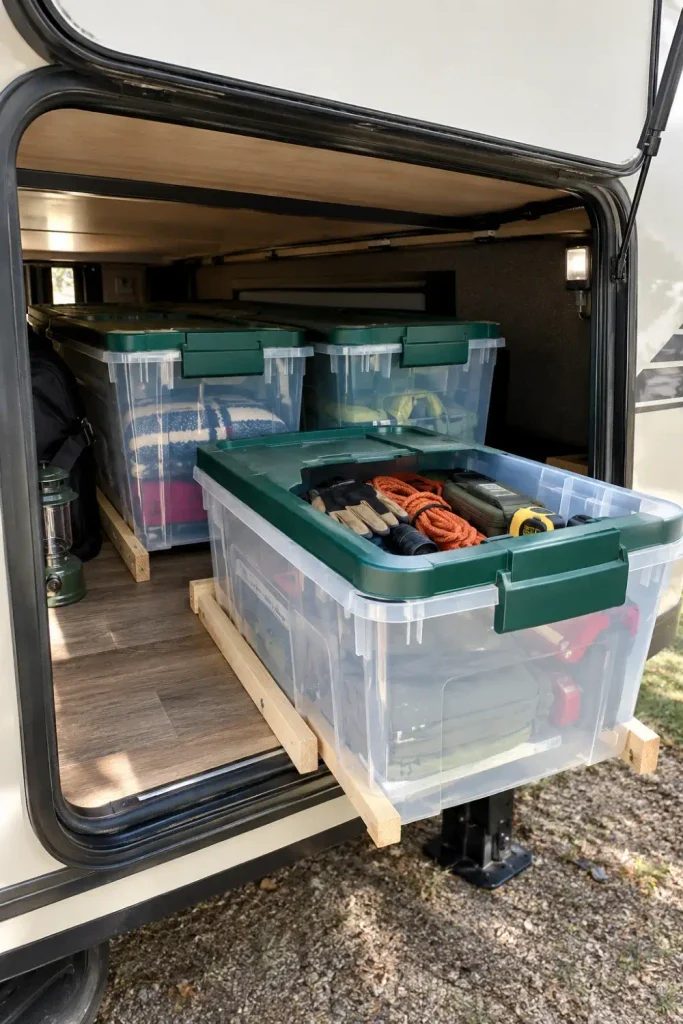
The exterior pass-through compartment underneath your bed is great for gear storage, but reaching tools in the dead center requires crawling into a dark tunnel on your knees.
Installing simple wooden 1×2 pine runners on the compartment subfloor lets heavy storage totes glide forward like giant cabinet drawers.
- Measure bin footprints and leave a half-inch clearance along the sides so plastic totes slide smoothly.
- Fasten pine runners to the plywood floor using short wood screws that will not punch through the underbelly.
- Label both ends of every tote with waterproof chalk markers so you can spot what you need from either side of the camper.
Mark parallel lines across the pass-through floor corresponding to tote base widths.
Secure 1×2 pine cleats with 3/4-inch wood screws to create captive guide rails.
Spray silicone lubricant along the runner channels to reduce plastic friction during slide-out.
7. Add a Wall-Mounted Paper Towel Dispenser with an Integrated Top Shelf
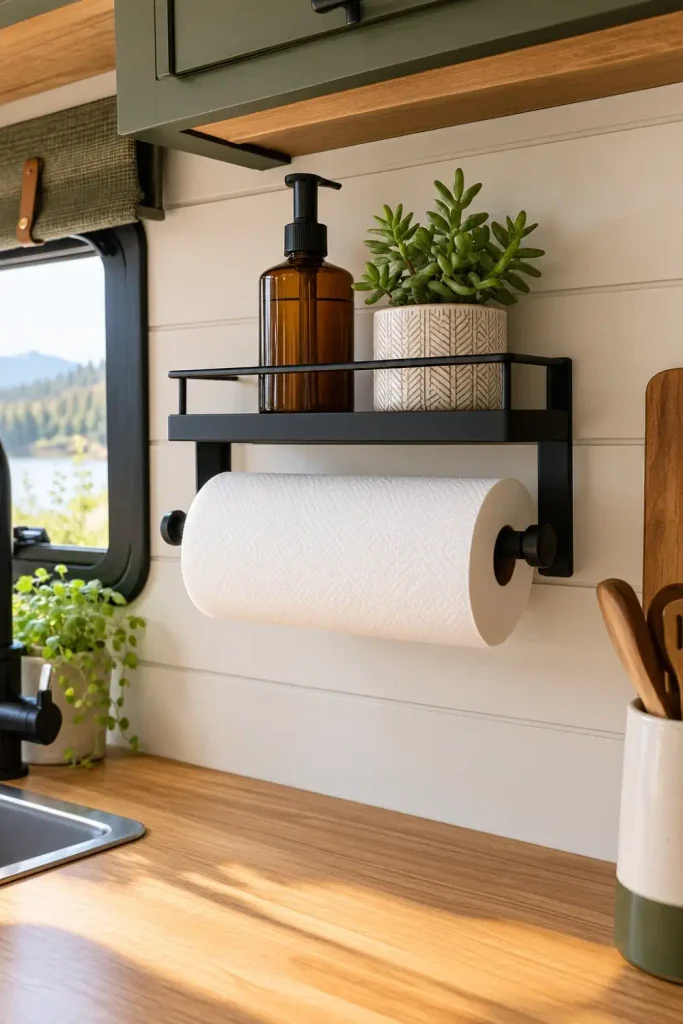
Leaving paper towel rolls sitting loose on the counter means they unroll onto the floor at the first sharp corner, and countertop stands take up valuable cooking prep space.
Pick an aluminum or matte black wire dispenser that features a three-inch fenced shelf built directly on top of the roll spindle. It mounts flush to interior camper walls, turning dead wall space into a dedicated spot for dish soap and hand sanitizer.
- Locate an internal wall stud using a magnetic stud finder before driving mounting hardware.
- Use hollow-wall anchor toggles if you must mount directly to thin decorative luan panels.
- Choose a dispenser model with a tension-arm brake to stop the roll from spinning freely while driving.
Anchor into aluminum or wood frame studs whenever possible.
Use an elastomeric or ratcheting roller to keep the paper roll snug.
Relying on standard double-sided foam tape on vinyl camper wallpaper.
Mounting heavy ceramic soap dispensers on unbraced hollow walls.
8. Fasten Nesting Silicone Bowls and Collapsible Strainers Inside Deep Drawers
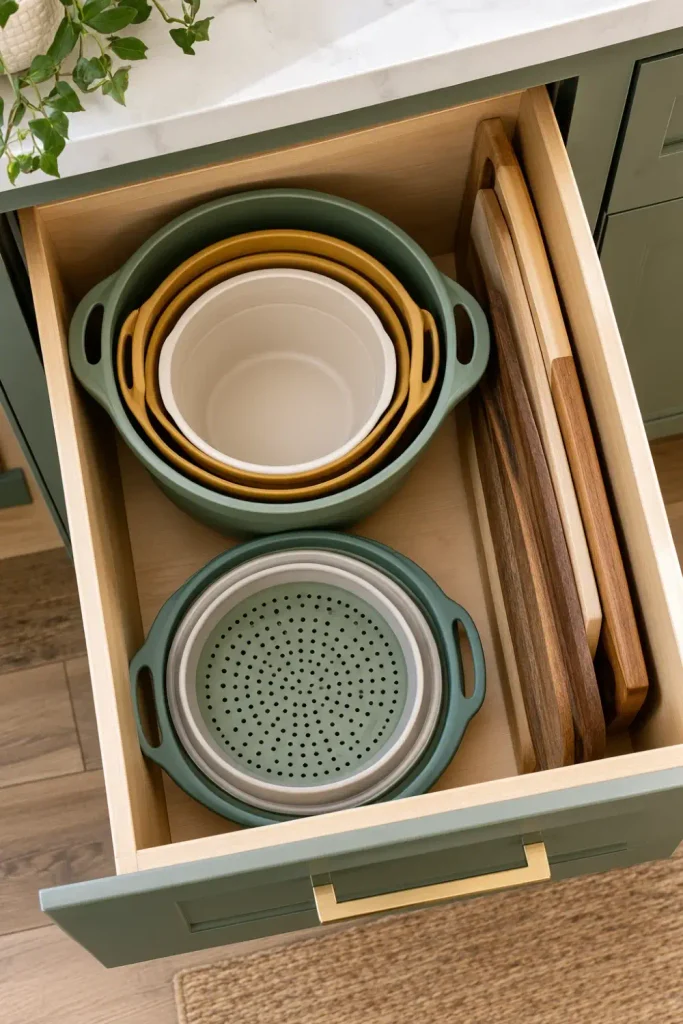
Rigid mixing bowls, salad spinners, and colanders fill entire galley cabinets while holding ninety percent trapped air. Deep camper drawers quickly turn into chaotic catch-alls when cookware cannot nest cleanly.
Modern food-grade collapsible silicone kitchenware folds completely flat down to an inch and a half in height.
- Stack collapsible bowls largest to smallest inside deep pantry pullouts to keep drawer slides balanced.
- Tuck flat folded silicone strainers vertically into file organizers beside cutting boards.
- Use heat-resistant silicone lids instead of bulky domed glass pot covers to eliminate metal clinking noises.
Space-Saving Collapsible Kitchen Essentials
9. Screw Magnetic Knife Strips Behind the Stovetop Splash Wall
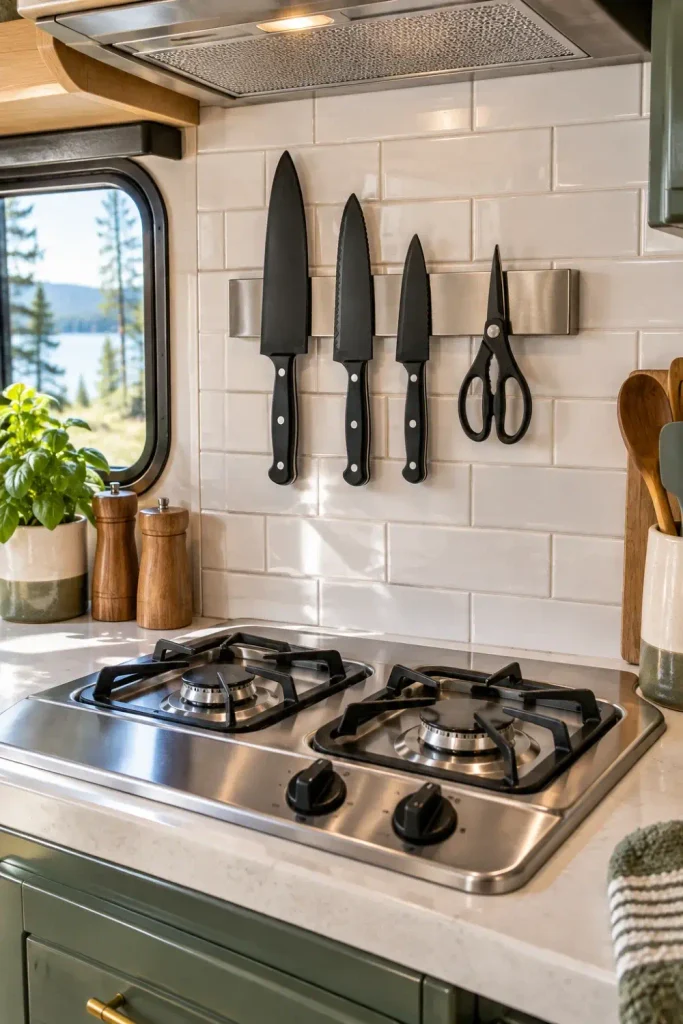
Countertop knife blocks take up valuable kitchen prep space and can turn into loose projectiles during sudden braking stops.
A wall-mounted magnetic stainless steel strip holds chef knives, kitchen shears, and meat thermometers flush against the backsplash. Choose a bar featuring high-strength neodymium magnets rather than cheap ferrite strips.
| Feature | Standard Magnetic Strip | Neodymium RV Bar |
| Grip Strength | Holds 8-12 oz tools | Holds up to 2.5 lbs per tool |
| Rough Road Hold | Knives slide on bumps | Knives remain locked in place |
| Mounting Style | Surface tape or clips | Through-bolt or frame screws |
Always slide hard plastic blade guards over knives before sticking them to the magnetic bar during travel days to protect your hands when reaching into the galley.
10. Hang Woven Macrame Fruit Hammocks Under Cabinets
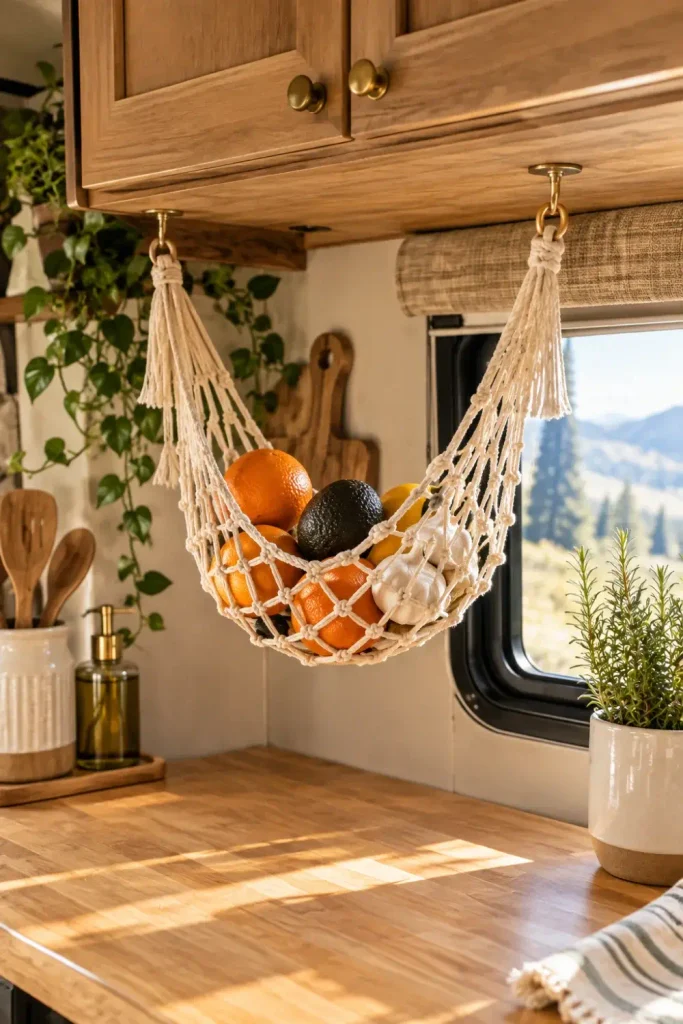
Apples, citrus, and avocados rolled into plastic grocery bags will bruise, rot, and roll around your camper table before you make camp.
A mini woven cotton or macrame fruit hammock suspends underneath an overhead locker, cradle-holding fragile fresh fruit in open air. This keeps food properly ventilated and off your cooking surfaces.
- Pre-drill pilot holes into the solid lower cabinet frame rails to avoid splitting thin plywood trims.
- Position the hanging brass cup hooks at least fourteen inches apart to keep the center net hammock taut.
- Keep small onions, lemons, and stone fruit in the mesh so air circulates freely from all angles.
📌 Good To Know
Keep hammock loads under 5 pounds. Excessive weight bounces rhythmically over freeway expansion joints, which can loosen small screw eyes from low-density cabinetry framing.
11. Tuck Heavy-Duty Adhesive Hooks Inside the Shower Skylight Cavity
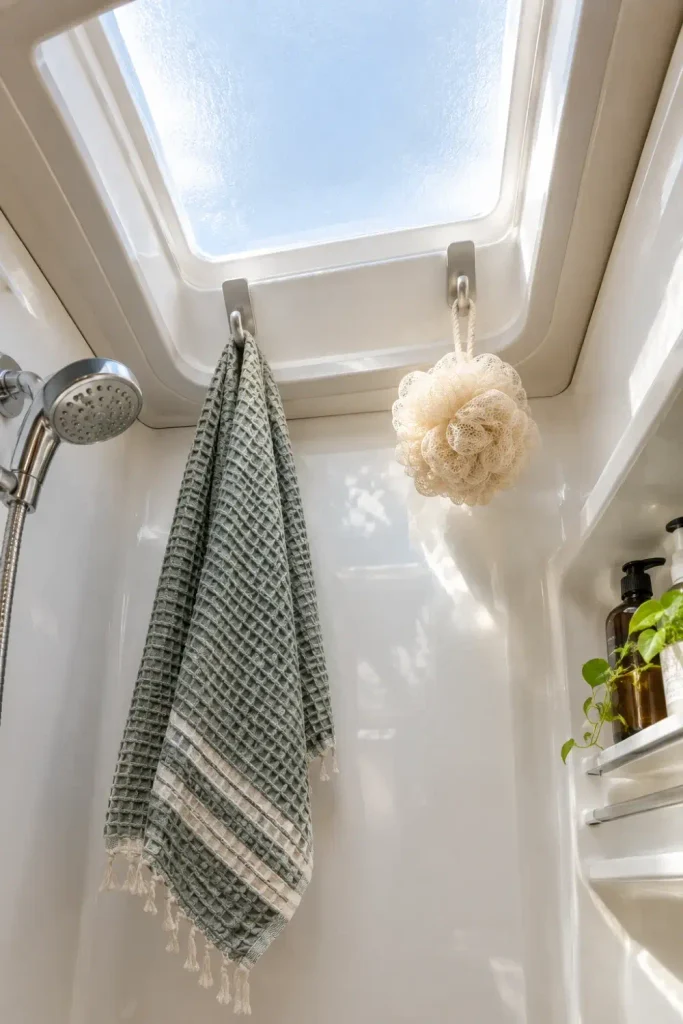
Camper bathrooms are small wet spaces where damp towels and dripping rain jackets take days to dry out. Hook space on bathroom walls is usually limited to one tiny single hook next to the commode.
The recessed interior flange of an RV shower skylight provides several inches of protected overhead plastic framing. Waterproof adhesive utility hooks placed inside this raised cavity let you hang wet towels directly over the shower pan.
- Clean the inner skylight trim using rubbing alcohol and let it dry before pressing the adhesive strip.
- Press the hook firmly for thirty seconds, then wait a full twelve hours before hanging heavy wet items.
- Let your towels and swimwear drip dry directly into the shower drain while driving or hiking.
12. Fit Clear Acrylic Magazine Holders on Cabinet Sidewalls for Foil and Wraps
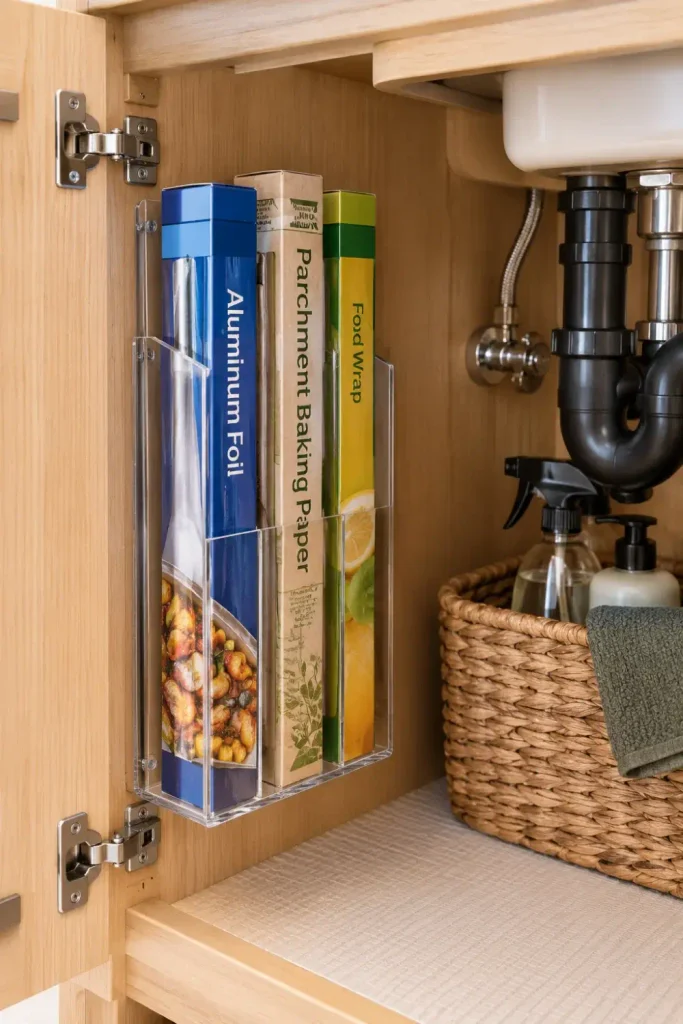
Cardboard boxes for aluminum foil, parchment paper, wax paper, and storage bags are awkwardly long, making them hard to fit into shallow camper kitchen drawers.
Clear acrylic or coated wire magazine file boxes mount vertically to inside cabinet walls or the narrow side of your kitchen island.
- Store boxes vertically so you can grab rolls without unstacking nested baking pans.
- Use heavy-duty removable adhesive strips to avoid putting screw holes in visible outer cabinetry.
- Drop sandwich bags, freezer quart bags, and trash rolls into the front section for easy access.
- ▸Standard roll boxes slide in upright, taking up just 4 inches of shelf width.
- ▸Prevents crushed cardboard packaging caused by rummaging through overcrowded utility drawers.
- ▸Clear sides let you see which roll is running low before you head out to camp.
13. Install an Under-Dinette Drawer Slide Using Dead Kickboard Space
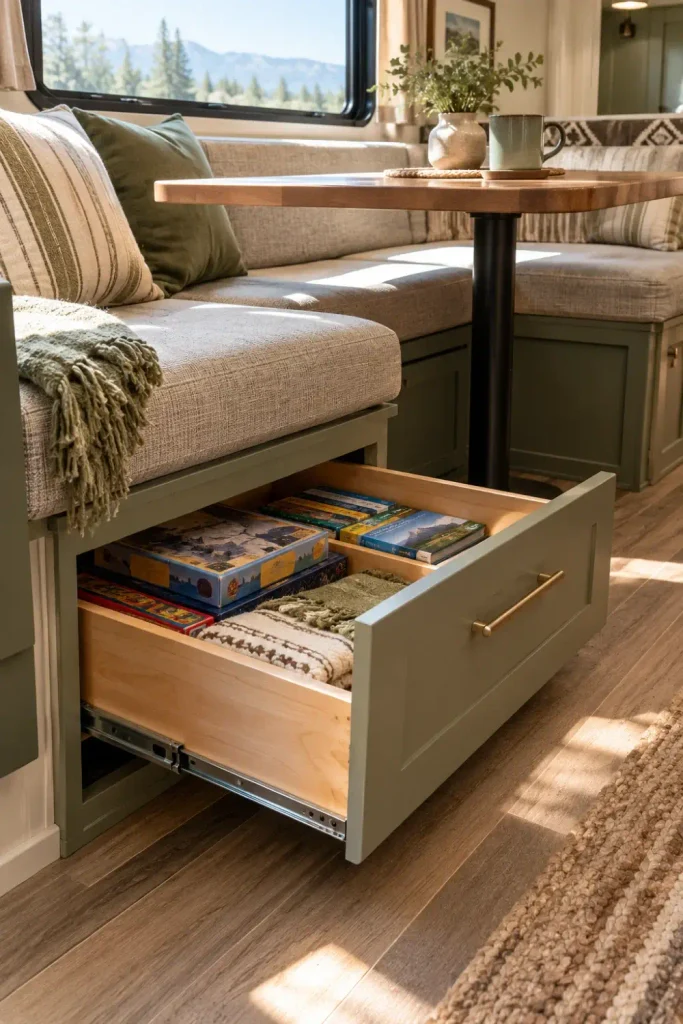
Standard RV dinette bench seating offers huge cavernous spaces underneath, but accessing them means clearing the table, lifting cushions, and wrestling heavy plywood hatch lids.
Cut a drawer opening into the front vertical kickboard of the bench and install full-extension ball-bearing drawer slides. You gain immediate access to dry foods, games, or spare bed linens without disturbing anyone sitting at the dinette.
- Check for factory plumbing, converter wiring, or furnace ducting inside the bench base before cutting.
- Build a simple five-sided drawer box using half-inch lightweight birch plywood.
- Add a push-to-close marine slam latch so the drawer stays locked when cornering on the road.
Requires clearing the tabletop, removing cushions, and lifting unhinged plywood covers just to grab a spare blanket or pot.
Full-extension drawers glide out into the aisle in two seconds flat, leaving dining cushions and tabletop items completely untouched.
14. Strap Elastic Cargo Nets Across Open Bunk End Walls for Soft Gear
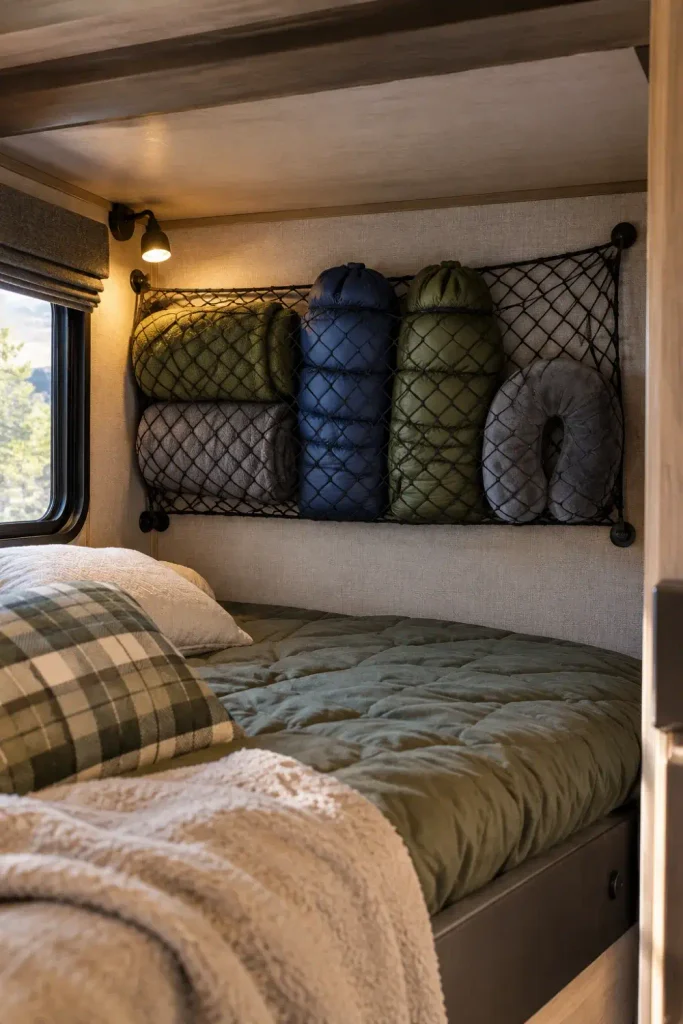
Bunk areas in family campers often turn into jumbled piles of sleeping bags, extra coats, and plush pillows that spill over onto the main cabin floor.
Stretching flexible elastic mesh cargo nets across the end walls creates deep, hammock-like storage cubbies. They keep soft goods contained without the added weight or head-bumping hazards of solid wood cabinetry.
- Mount marine corner eyelets into structural wall framing using short stainless steel pan-head screws.
- Clip net carabiners into place so you can unhook and wash the mesh after muddy camping weekends.
- Store bulky items like fleece jackets, rain coats, and extra bedding up out of the walking aisle.
Bulky Items Best Suited for Wall Cargo Nets
15. Mount Pop-Up Silicone Garbage Cans to the Inside of the Entry Door
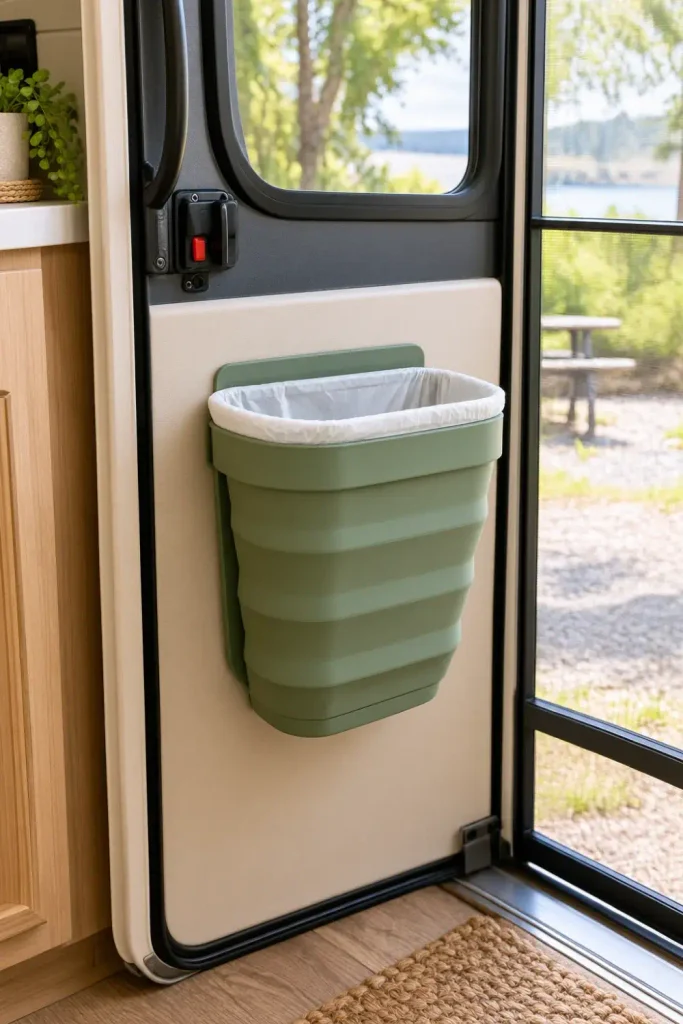
Traditional kitchen waste baskets constantly slide around camper floors or block cabinet drawers when tucked under the sink.
A folding silicone waste bin hangs over a cabinet door or anchors to the interior entry door wall using a screw-mounted bracket. When collapsed, it sticks out less than three inches, and expands outward when prep cooking starts.
| Bin Style | Depth Open | Depth Folded | Best Location |
| Rigid Freestanding Can | 11.5 inches | Not collapsible | Loose in aisle (tips over) |
| Folding Silicone Waste Bin | 7.0 inches | 2.5 inches | Inside entry door / lower galley |
| Cabinet Wire Bag Hanger | 6.0 inches | Not collapsible | Under kitchen sink door |
Check screen door clearance before mounting to the primary door frame.
Use standard grocery plastic bags as free, easily replaceable liners.
Filling the bin with heavy wet food waste that strains door hinges.
Leaving bins extended in high-traffic door pathways while traveling.
16. Add Corner Shower Track Bars to Keep Shampoo Bottles Upright
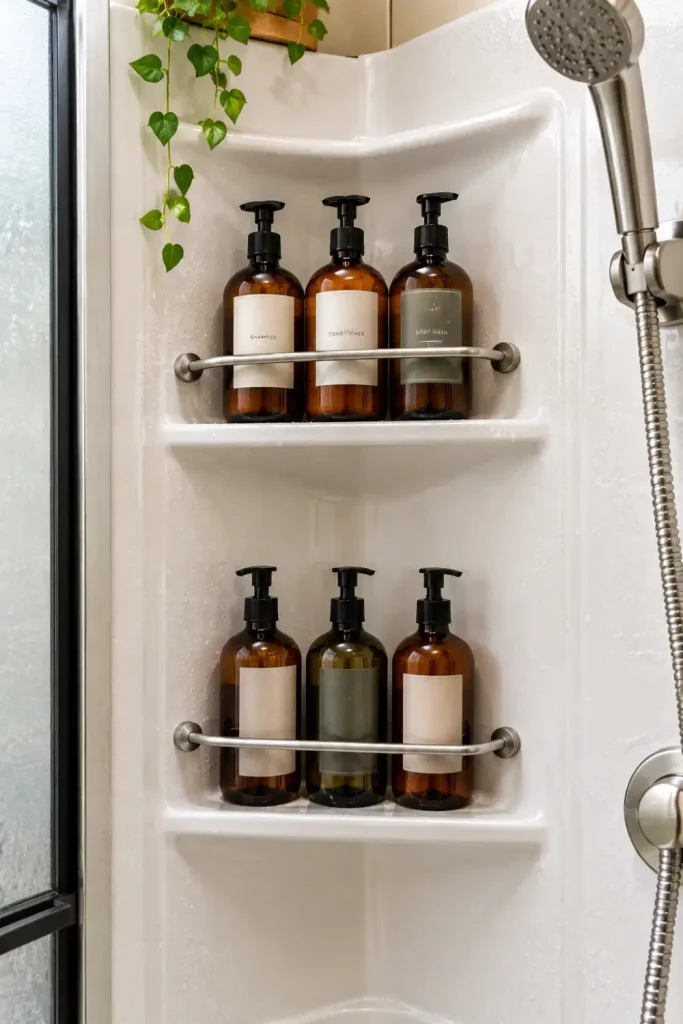
Molded plastic RV shower pans rarely have deep soap shelves, which leaves shampoo bottles and body washes sliding around and tipping over at every turn.
Adjustable stainless steel corner retention rods install between shower corner walls to create secure retaining bars across stock corner ledges.
- Clean the shower surround corners with rubbing alcohol to remove soap film and water deposits.
- Peel the high-strength adhesive mounting pads and secure the corner brackets firmly in place.
- Slip the tension bars into the mounting slots, locking bottles against the wall so they stay put while driving.
Wipe down the corner plastic surround with 70% isopropyl alcohol to strip mineral residues.
Press high-strength acrylic adhesive corner mount plates firmly into place for 60 seconds.
Snap the stainless retention rod across the shelf lip to lock bottles safely against the corner.
17. Slide Flat Under-Bed Storage Containers with Caster Wheels into the Rear Bay
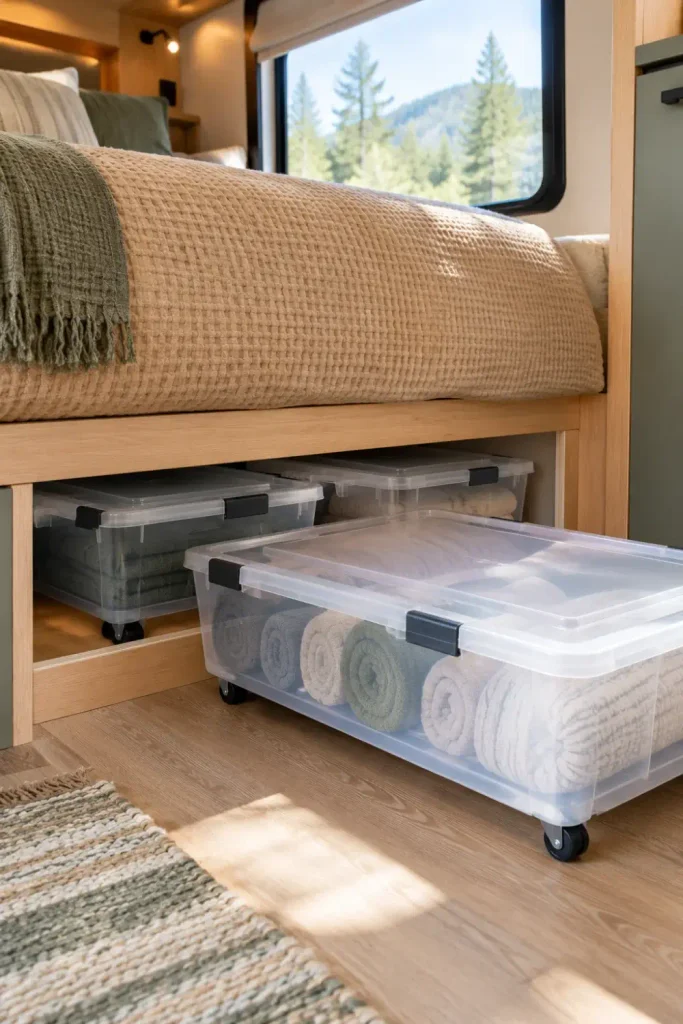
The deep void under an RV walk-around bed provides plenty of storage space, but heavy mattresses make lifting gas struts difficult for quick access.
Shallow polyethylene totes equipped with low-profile caster wheels slide easily across the plywood base. Adding wheel guides lets these bins roll straight out without snagging framing or tangled mattress wires.
- Measure the vertical clearance between the platform base and the bed frame before buying bins.
- Pick containers with locking latch lids and silicone gaskets to keep out road dust from pass-through seams.
- Use these slide-out bins for spare sheets, extra towels, seasonal shoes, and seasonal camp gear.
Getting your travel trailer organized is not about packing less camp gear. It comes down to securing vertical dead space and choosing dual-purpose setups that hold up to bumpy highways. Once every small tool, seasoning bottle, and jacket has a dedicated spot, camping trips become simpler and far more relaxing.
Save this list to your RV organization board on Pinterest so you have these camper storage ideas ready before packing for your next road trip.

